
Related Manuals for DTS Raptor


Summary of Contents for DTS Raptor
- Page 1 Made in Italy D.T.S. Illuminazione s.r.l. Via Fagnano Selve 10/12/14 47843 Misano Adriatico (RN) ITALIA Tel +39 0541 611131 Fax +39 0541 611111 info@dts-lighting.it http://www.dts-lighting.it...
- Page 2 Le informazioni contenute in questo documento sono state attentamente redatte e controllate. Tuttavia non è assunta alcuna responsabilità per eventuali inesattezze. Tutti i diritti sono riservati e questo documento non può essere copiato, fotocopiato, riprodotto per intero o in parte senza previo consenso scritto della D.T.S . D.T.S.
-
Page 3: Table Of Contents
INDEX: 1- SYMBOLS 2- GENERAL WARNING 3- GENERAL WARRANTY CONDITION 4- TECHNICAL FEATURES 5- ACCESSORIES 6- IMPORTANT SAFETY INFORMATION 6.1 Fire prevention 6.2 Prevention of electric shock 6.3 Protection against ultraviolet radiation 6.4 Safety 6.5 Level of protection against the penetration of solid and liquid objects 7- MOUNTING / REPLACING THE LAMP AND LAMP ALIGNMENT 8- VOLTAGE AND FREQUENCY 9- INSTALLATION... -
Page 4: Symbols
1- SYMBOLS Graphic symbols used on this manual: THIS SYMBOL INDICATES A HOT SURFACE THIS SYMBOL INDICATES ELECTRIC SHOCK RISK THIS SYMBOL INDICATES GENERAL RISK THIS SYMBOL MEANS “DO NOT PLACE THE UNIT ON INFLAMMABLE SURFACES” THIS SYMBOL MEANS “RADIATION FROM THIS LAMP CAN CAUSE DAMAGE TO EYES AND SKIN”... -
Page 5: General Warning
2- GENERAL WARNING Read the instruction contained in this user manual carefully, as they give important information regarding safety during installation, use and maintenance. The device is not for domestic use and must be installed by a qualified electrician or experienced person. -
Page 6: Technical Features
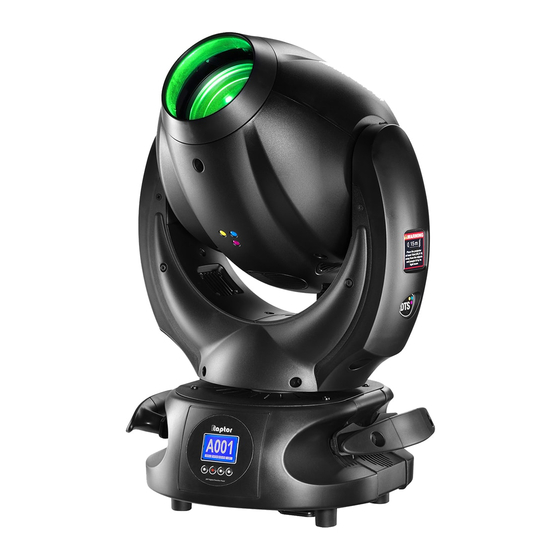
4- TECHNICAL FEATURES Overview RAPTOR is the most compact Beam moving head on the market: just 37 cm x 50 cm. RAPTOR projects the most powerful beam of light (150.000 Lux at 15 m) and the most concentrated one. RAPTOR can perfectly focus its 17 gobos at any distance. - Page 7 Internal operating system updatable via D.T.S. RED BOX interface and hyperterminal program on windows based PC 18 DMX channels Pan & Tilt RAPTOR FPR (03.MB005.EB.LFP) 'FPR': limitless pan rotation, in either directions, never having to reverse motion Tilt 270° (1,2 sec.) RAPTOR (03.MB005.EB.L) Pan 540°...
-
Page 8: Accessories
4- TECHNICAL FEATURES Dimensions Packaging Dimensions (LxWxH) Unit Dimensions (LxWxH) 420 x 440 x 580 mm 368x288x538mm Weight: 18,9 Kg Weight: 15,4 Kg 5- ACCESSORIES As standard * 1 x Osram Sirius HRI 330W (already installed in the projector) (Code 0505S037) * 1 x POWERCON male cable connector (Code 0520P014) * 1 x XLR 5 Pins male cable connector (Code 0508B066) * 1 x XLR 5 Pins female cable connector (Code 0508B065) -
Page 9: Important Safety Information
Unplug the unit prior to performing any function which involves touching the inside of the moving head, including lamp replacement. -The level of technology inherent in the RAPTOR requires the assistance of specialised personnel for all servicing. Please refer to an authorised D.T.S. service centre. - Page 10 7- MOUNTING / REPLACING THE LAMP AND LAMP ALIGNMENT WARNING Turn off the lamp before opening the unit head covers. Never look directly at the lamp when it’s lit. Discharge lamps emits UV rays; radiation from this lamp can cause damage to eyes and skin. Let the projector cool for at least 20 minutes.
- Page 11 1) Loosen the 3 “¼ turn” screws which fix the head covers on both sides (picture 1) . 2) Once loosened the screws, simply lift the covers to access the internal components (picture 2). PICTURE 1 PICTURE 2 3) Unplug the indicated fan connectors from the fans resend card (picture 3); Unplug the two indicated fast-on cable connectors (1 and 2) and using a flathead screwdriver remove the indicated lamp cable (3) from the screw connector (picture 4).
- Page 12 4) Using a phillips screwdriver, loose the 4 screws A, B, C, D and remove the lamp fan assembly (picture 5). PICTURE 5 5) Loose the four screws E, F, G, H from the plate which fix the lamp (picture 6), then loose the two screws on both sides of the lamp rear metal cover (picture 7) and remove the old lamp.
- Page 13 6) Remove the cable connectors from the old lamp and apply them on the new lamp (picture 8). PICTURE 8 7) Put in place the new lamp in the lamp support. Place the lamp connectors on the fan air conveyor side (picture 9). PICTURE 9 8) Lamp sub-assembly can now be re-installed, following backward all the above listed steps.
- Page 14 Lamp Alignment Attention: we recommend to align the lamp in the optical system to avoid overheating of the dichroic filters and other components inside the unit. The lamp alignment is also essential to obtain the maximum luminous performance by the projection. 1) Mount the fixture in an orientation so that it may be squarely projected onto a smooth white surface no less than 20 meters away.
-
Page 15: Voltage And Frequency
Four 1/4 turn Fast Locks connections placed in the base of the unit allow to hang the RAPTOR by using the two omega clamps (provided in the box) in conjunction with fixing clamps for truss (fixing clamps are not included into the unit box). - Page 16 9.1- Safety cable We recommend the use of a safety cable or chain connected to the RAPTOR and to the suspension truss in order to avoid the fixture accidentally falling should the main fixing point fail. Make sure that the iron cable or chain can bear the weight of the entire unit.
- Page 17 Please Note: If two different RAPTOR model (with and without FPR) are controlled at the same time via DMX controller, be shure that channel 6 (PAN FAR) is set to value 0. In this way, the RAPTOR with FPR will react to DMX same as RAPTOR with no FPR function.
- Page 18 (03.MB005.EB.LFP) (03.MB005.EB.L) MAINS AC INPUT 90-260V 50/60 Hz FUSE 5A T 5X20 10.1- Protection The use of a thermal magnetic circuit breaker is recommended for each RAPTOR. A good earth connection is essential for the correct operation of the projector.
- Page 19 11- DMX SIGNAL CONNECTION The unit operates using the digital DMX 512 (1990) signal. Connection between the mixer and the projector or between projectors must be carried out using a two pair screened ø 0.5 mm cable and a XLR 5 or 3 pins connector. Ensure that the conductors do not touch each other.
- Page 20 This procedure require a base knowledge of computer applications and Windows Hyperterminal program. Please refer to an authorised D.T.S. service centre. To update the software version of the RAPTOR you need: D.T.S. RED BOX interface (D.T.S. Code: 03.LA.008). USB-DMX Driver for the D.T.S. RED BOX interface.
-
Page 21: Display Functions
ENTER DISPLAY FUNCTIONS The RAPTOR display panel shows all the available functions . Using these functions, it is possible to change some of the parameters and add some functions. Changing the D.T.S. setting can vary the functions of the unit so that it does not respond to the DMX 512 used to control it. - Page 22 13- DISPLAY FUNCTIONS Software Version: 18.25 WARNING WARNING A001 PLACE THE PROJECTOR AT READ WITH CAREFULL THE LEAST 15mt (49’ 21’’ ft) USER MANUAL BEFORE TO AWAY FROM THE OBJECTS INSTALL AND USE THE AND PEOPLE LIT BY ITS PROJECTOR. LIGHT BEAM.
- Page 23 13- DISPLAY FUNCTIONS DISPLAY Display Display Flip Menu Up-Down ENTER Up-Down ENTER ON THE GROUND (Default) DISPLAY FLIP / STAND BY / CONTRAST FLIP FLIP SUSPENDED Display Flip: ON THE GROUND Reverses display's reading depending on the mounting position MENU ENTER DOWN (On the ground or suspended).
- Page 24 Pan&Tilt 9M R.17 Lamp life time, lamp strikes, card software version and PT R.24 unit life time, 9 motors card MODEL: RAPTOR FPR unit model software version, Pan&Tilt card MENU ENTER DOWN software version and unit model RESERVED...
-
Page 25: Error Messages
DEFAULT Default Default Menu Up-Down ENTER ENTER Up-Down To restore main settings RESTORE MAIN SETTINGS DEFAULT To restore main settings MENU ENTER DOWN DEFAULT RESTORE MAIN SETTINGS 13- DISPLAY FUNCTIONS SURE? PRESS ENTER TO CONFORM PRESS MENU TO CANCEL MENU ENTER DOWN 14- ERROR MESSAGES ERROR ERROR... -
Page 26: Hidden Menu
- Connect the projector to the DMX controller (DMX SIGNAL MUST BE CORRECTLY RECEIVED) - Reset the RAPTOR (reset from the MENU, not from the DMX controller). - While reset is running, press the MENU and ENTER keys at the same time. -
Page 27: Colour Wheel
15.1 Calibration mode CALIBRATION CALIBRATION CALIBRATION MOTORS ALIGNMENT MOTORS ALIGNMENT MOTORS ALIGNMENT COLOUR WHEEL FIXED GOBO FROST ZERO MENU ENTER DOWN MENU ENTER DOWN MENU ENTER DOWN FIXED GOBO WHEEL FROST ZERO COLOUR WHEEL ALIGNMENT ALIGNMENT ALIGNMENT To align Fixed Gobo wheel Frost zero position setting To align Colour wheel CALIBRATION... - Page 28 15.2 Power Setup menu (Access code only for technical personnel) BASE FANS BALLAST FANS LAMP FAN AUX 1 1=13V 12=24V 1=13V 12=24V AT 330W 1=13V 12=24V MENU ENTER DOWN MENU ENTER DOWN MENU ENTER DOWN BASE FANS SPEED BALLAST FANS SPEED LAMP FANS SPEED WHEN OPEN INSERTED LAMP FAN AUX 1...
-
Page 29: Opening The Projector Housing
16- PAN SPEED & TILT SPEED You can set the PAN and TILT motors at high speed on your RAPTOR. Press menu until you see PAN SPEED / TILT SPEED. Press ENTER and select a speed with UP-DOWN (there are 8 speeds). -
Page 30: Periodic Cleaning
Fuse replacement Locate the fuse, which protects the lamp and electronics, in the base of the RAPTOR. Using a multimeter, test the condition of the fuse, replacing it with one of equivalent type (5AT) if necessary. -
Page 31: Dmx Protocol
20- DMX PROTOCOL 18 CHANNELS MODE PAN msb PAN lsb TILT msb TILT lsb SPEED MOVEMENT PAN FAR (Active only on RAPTOR FPR) DIMMER SHUTTER COLOUR COLOUR MODE FIXED GOBO FIXED GOBO SHAKE FROST SMOOTH PRISM PRISM ROTATION FOCUS RESET + LAMP... - Page 32 Vector mode from fast to slow 128-247 Variable time reaction to dmx signal (fast to slow) 248-255 Silent movement DMX CHANNEL Parameter: PAN FAR(Active only on RAPTOR FPR) DMX value Function 000-010 Position mode 540° (standard path) 011-020 Position mode 360° ( 1 turn) 021-030 Position mode 720°...
- Page 33 Parameter: DIMMER DMX CHANNEL DMX value Function 000-007 Black-out 008-255 Proportional dimmer DMX CHANNEL Parameter: SHUTTER DMX value Function 000-019 Black-out 020-039 Open 040-059 Black-out 060-079 Strobe random speed 080-084 Strobe speed 1 (1 flash/sec) 085-089 Strobe speed 2 (2 flash/sec) 090-094 Strobe speed 3 (3 flash/sec) 095-099...
- Page 34 Parameter: COLOUR DMX CHANNEL IF CHANNEL 10 = FULL COLOUR (DMX range value 0-63) DMX value Function 000-013 Colour 1 014-027 Colour 2 028-041 Colour 3 042-055 Colour 4 056-069 Colour 5 070-083 Colour 6 084-097 Colour 7 098-111 Colour 8 112-125 Colour 9 126-139...
- Page 35 IF CHANNEL 10 = PROPORTIONAL COLOUR (DMX range value 128-191) DMX value Function 000-010 No colour 011-255 Proportional colour IF CHANNEL 10 = RAINBOW (DMX range value 192-255) DMX value Function 000-009 No colour 010-127 Right rotation speed from max to min 128-137 Stop 138-255...
-
Page 36: Dmx Value
Parameter: FIXED GOBO SHAKE DMX CHANNEL DMX value Function 000-009 Stop 010-016 Gobo shake R-L speed 1 017-023 Gobo shake R-L speed 2 024-030 Gobo shake R-L speed 3 031-037 Gobo shake R-L speed 4 038-044 Gobo shake R-L speed 5 045-051 Gobo shake R-L speed 6 052-058... - Page 37 Parameter: SMOOTH DMX CHANNEL DMX value Function 000-127 No function 128-255 Smooth inserted DMX CHANNEL Parameter: PRISM DMX value Function 000-127 No function 128-255 Prism inserted Parameter: PRISM ROTATION DMX CHANNEL DMX value Function 000-009 Stop 010-127 Left rotation from fast to slow 128-137 Stop 138-255...
-
Page 38: Fixed Gobo Wheel
21- FIXED GOBO WHEEL... -
Page 39: Colour Wheel
22- COLOUR WHEEL COLOUR 1 COLOUR 2 COLOUR 3 COLOUR 4 COLOUR 5 COLOUR 6 YELLOW 1 GREEN PINK FULL CTO FULL CTB D.T.S. Code: D.T.S. Code: D.T.S. Code: D.T.S. Code: D.T.S. Code: D.T.S. Code: (0507C059.D14) (0507C065.D14) (0507C068.D14) (0507C071.D14) (0507C061.D14) (0507C060.D14) COLOUR 7 COLOUR 8... - Page 40 ISO 9001:2008 standard D.T.S. products are designed and manufactured at the D.T.S. plants in italy *0517I208* 0517I208 D.T.S. Illuminazione s.r.l. – Via Fagnano Selve 10-12-14 47843 Misano Adriatico (RN) Italia Tel.: +39 0541 611131. Fax + 39 0541 611111 info@dts-lighting.it www.dts-lighting.it...
Need help?
Do you have a question about the Raptor and is the answer not in the manual?
Questions and answers