Table of Contents
Advertisement
INSTALLATION INSTRUCTIONS
AIR-COOLED CONDENSING UNITS
(-)ASL-JEC 18 SEER EQUIPPED WITH THE COMFORT CONTROL
SYSTEM™ AND FEATURING DUAL DRIVE COMPRESSORS IN
SELECT MODELS
!
WARNING
!
THESE INSTRUCTIONS ARE INTENDED AS AN AID TO
QUALIFIED, LICENSED SERVICE PERSONNEL FOR
PROPER INSTALLATION, ADJUSTMENT AND OPERATION
OF THIS UNIT. READ THESE INSTRUCTIONS THOROUGHLY
BEFORE ATTEMPTING INSTALLATION OR OPERATION.
FAILURE TO FOLLOW THESE INSTRUCTIONS MAY RESULT
IN IMPROPER INSTALLATION, ADJUSTMENT, SERVICE OR
MAINTENANCE POSSIBLY RESULTING IN FIRE, ELECTRICAL
SHOCK, PROPERTY DAMAGE, PERSONAL INJURY OR DEATH.
[ ] INDICATES METRIC CONVERSIONS
Featuring Industry Standard
R-410A Refrigerant
ISO 9001:2008
SUPERSEDES 92-101691-05-05
2
92-101691-05-06
Advertisement
Table of Contents

Related Manuals for Rheem ASL-JEC 18 Seer


Summary of Contents for Rheem ASL-JEC 18 Seer
-
Page 1: Installation Instructions
INSTALLATION INSTRUCTIONS AIR-COOLED CONDENSING UNITS (-)ASL-JEC 18 SEER EQUIPPED WITH THE COMFORT CONTROL SYSTEM™ AND FEATURING DUAL DRIVE COMPRESSORS IN SELECT MODELS Featuring Industry Standard R-410A Refrigerant WARNING THESE INSTRUCTIONS ARE INTENDED AS AN AID TO QUALIFIED, LICENSED SERVICE PERSONNEL FOR PROPER INSTALLATION, ADJUSTMENT AND OPERATION OF THIS UNIT. -
Page 2: Table Of Contents
TABLE OF CONTENTS 1.0 SAFETY INFORMATION ..........3 Checking Product Received . -
Page 3: Safety Information
1.0 SAFETY INFORMATION WARNING THESE INSTRUCTIONS ARE INTENDED AS AN AID TO QUALIFIED, LICENSED SERVICE PERSONNEL FOR PROPER INSTALLATION, ADJUSTMENT AND OPERATION OF THIS UNIT. READ THESE INSTRUCTIONS THOROUGHLY BEFORE ATTEMPTING INSTALLATION OR OPERATION. FAILURE TO FOL- LOW THESE INSTRUCTIONS MAY RESULT IN IMPROPER INSTALLATION, ADJUSTMENT, SERVICE OR MAINTENANCE POSSIBLY RESULTING IN FIRE, ELECTRICAL SHOCK, PROPERTY DAMAGE, PERSONAL INJURY OR DEATH. - Page 4 CAUTION R-410A systems operate at higher pressures than R-22 systems. Do not use R-22 service equipment or components on R-410A equipment. CAUTION Only use evaporators approved for use on R-410A systems. Use of existing R-22 evaporators can introduce mineral oil to the R-410A refrigerant form- ing two different liquids and decreasing oil return to the compressor.
-
Page 5: General Information
2.0 GENERAL INFORMATION WARNING The (-)ASL-series of condensing units are designed to operate using the Comfort System™ or traditional 24VAC controls. These units are equipped with the THE MANUFACTURER’S WAR- . Your installation must have these components to use Comfort Control RANTY DOES NOT COVER ANY System™... -
Page 6: Dimensions
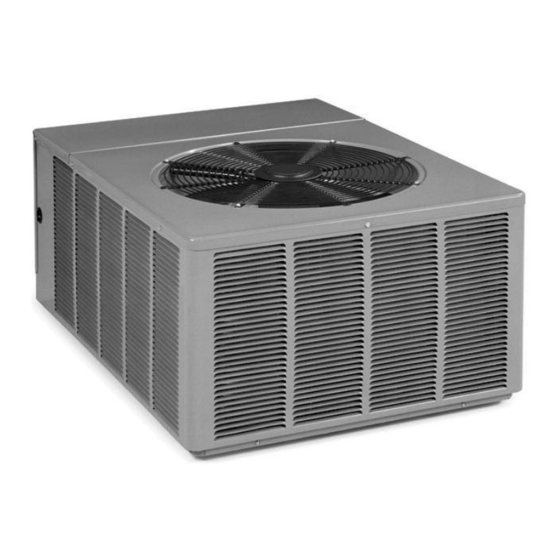
2.3 DIMENSIONS UNIT MODEL NUMBER EXPLANATION FIGURE 1 (-)ASL – 036 J E C DIMENSIONS AND INSTALLATION CLEARANCES EC = EQUIPPED WITH THE AIR DISCHARGE AIR DISCHARGE COMFORT CONTROL SYSTEM™ ALLOW 600 [1524 mm] CLEARANCE ALLOW 60" [1524 mm] CLEARANCE J - 208/230-1-60 (NOMINAL CAPACITY) 024 = 24000 BTU/HR... -
Page 7: Proper Installation
2.5 PROPER INSTALLATION Proper sizing and installation of this equipment is critical to achieve optimal perfor- mance. Use the information in this Installation Instruction Manual and reference the applicable Engineering Specification Sheet when installing this product. IMPORTANT: This product has been designed and manufactured to meet ENER- GY STAR criteria for energy efficiency when matched with appropriate coil compo- ®... -
Page 8: Operational Issues
3.3 Operational Issues • IMPORTANT: Locate the unit in a manner that will not prevent, impair or com- promise the performance of other equipment horizontally installed in proximity to the unit. Maintain all required minimum distances to gas and electric meters, dryer vents, exhaust and inlet openings. -
Page 9: Refrigerant Connections
FIGURE 2 RECOMMENDED ELEVATED INSTALLATION 4.0 REFRIGERANT CONNECTIONS All units are factory charged with Refrigerant 410A. All models are supplied with service valves. Keep tube ends sealed until connection is to be made to prevent system contamination. 4.1 Tools Required For Installing & Servicing R-410A Models Manifold Sets: -Up to 800 PSIG High side -Up to 250 PSIG Low Side... -
Page 10: Specifications Of R-410A
IMPORTANT: The Rheem approved/recommended method is a guide to securing equipment for wind and seismic loads. Other methods might provide the same result, but the Rheem method is the only one endorsed by Rheem for securing equipment where wind or earthquake damage can occur. Additional information is available in the PTS (Product Technical Support) section of the Rheem website Rheemote.net... -
Page 11: Replacement Units
5.0 REPLACEMENT UNITS To prevent failure of a new condensing unit, the existing evaporator tubing system must be correctly sized and cleaned or replaced. Care must be exercised that the expansion device is not plugged. For new and replacement units, a liquid line filter drier should be installed and refrigerant tubing should be properly sized. -
Page 12: Maximum Length Of Lines
TABLE 3 VAPOR LINE CAPACITY MULTIPLIER (-)ASL Unit Vapor Line 3/4” [19.05] I.D. 3/4” [19.05] I.D. 3/4” [19.05] I.D. 3/4” [19.05] I.D. 7/8” [22.23] I.D. Connection Size Sweat Sweat Sweat Sweat Sweat (inches I.D.) [mm] Vapor Line Diameter (inches O.D.) [mm] 5/8”... - Page 13 TABLE 4 (-)ASL LIQUID LINE SIZING LIQUID LINE SIZE - OUTDOOR UNIT ABOVE INDOOR COIL Liquid Line Size R-410A Line Size Outdoor Unit Above Indoor Coil (Cooling Only - Does not apply to Heat Pumps) Line Size System Connection Total Equivalent Length - Feet [m] (Inch O.D.) Capacity Size (Inch...
- Page 14 TABLE 5 (-)ASL SUCTION LINE SIZING SUCTION LINE SIZE - OUTDOOR UNIT ABOVE INDOOR COIL Suction Line Size R-410A Line Size Line Size System Connection (Inch O.D.) Outdoor Unit ABOVE Indoor Coil (Cooling Only - Does not apply to Heat Pumps) Capacity Size (Inch [mm]...
-
Page 15: Tubing Connections
• For best operation, keep tubing run as short as possible with a minimum num- ber of elbows or bends. • Locations where the tubing will be exposed to mechanical damage should be avoided. If it is necessary to use such locations, the copper tubing should be housed to prevent damage. -
Page 16: Dual Drive Compressors
8.0 DUAL DRIVE COMPRESSORS The -039, -048, & -060 condensing units contain two compressors to deliver maxi- mum efficiency and comfort. The Dual Drive Compressors are sized to increase run times at first stage operation (partial capacity). When additional capacity is needed, a two stage thermostat energizes both compressors to deliver full rated capacity. -
Page 17: System™ Control Operation
8.3 Comfort Control System™ Control Operation A Dual Drive unit has two controls instead of a single control. The controls are the same as any residential communicating control except the secondary control dip- switches (SW5) should be in the off position. Therefore, the features such as fault recall and the operation of the test button are the same as any JEC control. -
Page 18: Evacuation Procedure
CAUTION THE COMPRESSOR HAS AN INTERNAL OVERLOAD PROTECTOR. UNDER SOME CONDITIONS, IT CAN TAKE UP TO 2 HOURS FOR THIS OVERLOAD TO RESET. MAKE SURE OVERLOAD HAS HAD TIME TO RESET BEFORE CONDEMNING THE COMPRESSOR. 11.1 Evacuation Procedure Evacuation is the most important part of the entire service procedure. The life and efficiency of the equipment is dependent upon the thoroughness exercised by the serviceman when evacuating air and moisture from the system. - Page 19 Compressor Control (K2) • Sealed single pole compressor relay switch with optical feedback feature (arc detection) Thermostat Connector (E2) • R – 24VAC from the indoor unit 24VAC transformer (40 VA minimum) • C – 24VAC Common from the indoor unit 24VAC transformer •...
-
Page 20: Control Wiring
12.2 Comfort Control System™ Control Wiring An HVAC system equipped with Comfort Control System™ consists of: • Heat pump or condensing unit equipped with Comfort Control • Air handler or furnace equipped with Comfort Control • Comfort Control thermostat The four 18AWG low voltage control wires must be installed from the thermostat to the indoor unit and from indoor unit to the outdoor unit. -
Page 21: Icc Control Operation
13.X Serial Communication ICC Control Operation 12.4 Comfort Control ICC Control Operation I I n n s s t t a a l l l l a a t t i i o o n n V V e e r r i i f f i i c c a a t t i i o o n n Installation Verification •... -
Page 22: Active Compressor Protection Mode
3 3 0 0 S S e e c c o o n n d d M M i i n n i i m m u u m m R R u u n n T T i i m m e e r r •... - Page 23 Active Protection – Code L4 – Locked rotor If the ICC detects the compressor has run less than 15 seconds before the pro- tector tripped for four (4) consecutive starts during the same command for unit operation, the ICC will lockout the compressor to keep it from continuing to oper- ate and flash a “L”...
-
Page 24: Test And Fault Recall Modes
I I M M P P O O R R T T A A N N T T : : This mode of active protection must be manually reset. E E x x i i t t i i n n g g A A c c t t i i v v e e C C o o m m p p r r e e s s s s o o r r P P r r o o t t e e c c t t i i o o n n L L o o c c k k o o u u t t Three are three methods to reset the ICC after an active protection lockout: 1) Cycle the line voltage to the unit 2) Cycle 24VAC to the ICC (remove the R or C connection to the ICC) - Page 25 to continue to operate. If no command for unit operation is present, TEST mode causes • • A maximum of six individual faults can be stored A steady “t” appears on the 7-segment LEDs • A maximum of three consecutive identical faults are stored. The compressor will start The compressor will turn off after 5-seconds.
-
Page 26: Icc Diagnostic Codes
cooling during an active anti-short cycle timer or minimum run timer. • Wait until unit timer has expired or press the FLASHING TEST button to reset timer. 12.7 C - Second Stage Cooling Normal operation COMFORT CONTROL SYSTEM™ CONTROL WIRING Unit has received a command for second 13.X ICC Diagnostic Codes 13.X ICC Diagnostic Codes... - Page 27 (3) minutes each. discharge grill) (3) minutes each. discharge grill) 01 – Long Run Time (Compressor) • Low refrigerant charge 01 – Long Run Time (Compressor) • Low refrigerant charge L4 – Locked Rotor • Bad run capacitor L4 – Locked Rotor •...
- Page 28 FLASHING FLASHING FLASHING 27 – Low Line Voltage or No Line Voltage • Check incoming line voltage to the disconnect 27 – Low Line Voltage or No Line Voltage 27 – Low Line Voltage or No Line Voltage • Check incoming line voltage to the disconnect •...
-
Page 29: Conventional 24Vac Thermostat Control Wiring
12.8 Conventional 24VAC Thermostat Control Wiring The (-)ASL series of heat pumps allow the installer to use conventional 24VAC con- trol wiring and a conventional thermostat for proper unit operation. I I M M P P O O R R T T A A N N T T : : The preferred method of unit installation and operation is by serial communications. -
Page 30: Typical Non-Communicating Thermostat Wiring Diagrams
FIGURE 8 FIGURE 9 TYPICAL 2-STAGE THERMOSTAT: CONDENSING UNIT WITH TYPICAL TWO-STAGE THERMOSTAT: CONDENSING UNIT WITH ELECTRIC HEAT ELECTRIC HEAT USING A HUMIDISTAT FOR DEHUMIDIFICATION*. Typical Two-Stage Thermostat Typical Two-Stage Thermostat Y2 G Y2 G Humidistat (-)HPN Air (-)HPN Air Handler Handler (-)ASL... -
Page 31: Diagnostic Codes In Dual Drive Condensing Units With Conventional Thermostat Wiring
FIGURE 14 WIRING DIAGRAM FOR (-)ASL-039JEC, 048JEC, & 060JEC (DUAL DRIVE) - Page 33 CM 0610...
Need help?
Do you have a question about the ASL-JEC 18 Seer and is the answer not in the manual?
Questions and answers