Table of Contents
Advertisement
Advertisement
Table of Contents

Related Manuals for Specialized TURBO S


Summary of Contents for Specialized TURBO S
- Page 1 OWNER’S MANUAL TURBO S...
-
Page 3: Table Of Contents
26 . HANDOVER DOCUMENTATION . . . . . . . . . . . . . . . . . . . . . . . . . . . . . . . . . . . . . . . . . . . . . . . . . . . . . . . . . 26 SPECIALIZED BICYCLE COMPONENTS Please note all instructions and notices are subject to change and updates without notice. Please visit www.specialized.com for periodic tech updates. 15130 Concord Circle, Morgan Hill, CA 95037 (408) 779-6229 0000030351_OM_EN_R1, 06/13... -
Page 4: Specialized Turbo Instructions
According to EN 15194 2002/24/EC NOTE: The Specialized Turbo (L1e S-Pedelec or Pedelec) is referred to in the Owner’s Manual as a bicycle unless otherwise noted. For specific speed setting information, please refer to section 8. This instruction manual only contains information specific to your Specialized Turbo (L1e S-Pedelec/Pedelec). General information, such as information on the technology used on this bicycle, is located in the general section of this instruction manual. -
Page 5: Quick Start
A lot of heat can be created during the charging process and this has to be able to escape. Otherwise this could lead to a danger of overheating and a possible fire hazard. Specialized recommends charging under supervision or with the user present. -
Page 6: Removing / Installing The Battery
Removing / installing the battery Checking the battery diagnostic STARTUP DIAGNOSTIC MOTOR OK 2 SEC OFF! BATTERY OK LIGHT OK REMOTE OK OFF! ANY LED BLINK x2: • Connection failed • Component can’t be found CLICK! WARNING! Before you take to public roads, please familiarize yourself with the behavior and operation of the L1e S-Pedelec/bicycle in a quiet, safe place. -
Page 7: Specialized Turbo Components
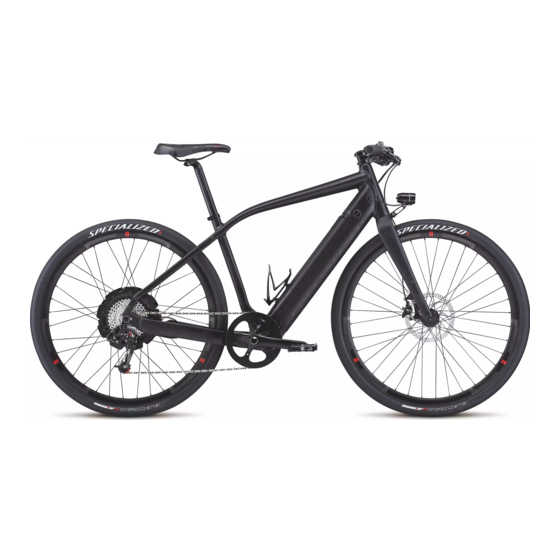
2. SPECIALIZED TURBO COMPONENTS 1. Top tube 22. Motor 2. Down tube 23. Screen / joystick (page 3. Seat tube 24. Handlebar with grip 4. Head tube 25. Shifter 5. Chain stay 26. Bell 6. Seat stay 27. Brake lever 7. -
Page 8: Eg - Declaration Of Conformity
3. EG – DECLARATION OF CONFORMITY The manufacturer: Specialized Bicycle Components Inc. 15130 Concord Circle Morgan Hill, CA 95037, USA Tel: +1 408 779-6229 hereby confirms for the product: Product designation: Specialized Turbo Type designation: Turbo S Year of construction:... -
Page 9: Introduction
Please read this instruction manual carefully and keep it for future reference. Your bicycle was fully assembled and set up before you received it. If this was not the case, please contact your Authorized Specialized Dealer to ensure that this important work is completed. -
Page 10: Before The First Ride
Adjust the seat to a safe and comfortable position for you (please refer to your Specialized Bicycle Owner’s Manual). Allow your Authorized Specialized Dealer to set up the brakes so that the brake levers are always within easy reach. Ensure that you know which lever operates which brake (right/left). -
Page 11: Legal Regulations
WARNING! Before you switch the system on, ensure that the magnetic rubber plug is attached to the frame. The contacts below it are live with electricity when the system is switched on. WARNING! If you are unsure of whether your bicycle is in a sound technical condition, take it to an Authorized Specialized Dealer to be checked instead of riding it. -
Page 12: The Difference Between The L1E S-Pedelec And Pedelec
July, 2012, require the use of a bicycle helmet. L1e S-Pedelecs have to be insured as a low-performance moped. Any changes to the L1e S-Pedelec/Pedelec not approved by Specialized, which could lead to a change in the motor performance and/ or the possible top speed, have the following effects: •... -
Page 13: Intended Use
C. Intended use WARNING! L1e S-Pedelecs/Pedelecs are intended for transporting one person at a time. If you are planning to transport additional people, then the regulations of the StVO apply in Germany. An exception to this is the tandem, for instance. If you would like to transport luggage, this requires that your bicycle is fitted with suitable equipment. -
Page 14: Battery Information System
(fig.5 & 6), and then reinstall it (fig.7). Repeat the process of turning your bicycle on as described in section 12.E. If the bicycle works normally despite a flashing LED, you are still able to use your bicycle with support. However, you should find an Authorized Specialized Dealer in order to find the cause of the flashing LED. -
Page 15: Cleaning
If you want to ship the battery or your bicycle, please consult your Authorized Specialized Dealer first as well as the transport company in order to find out which precautionary measures you have to take. The consultation of an expert for hazardous materials prior to transport is absolutely required. -
Page 16: Charging Process
WARNING! If the red LED flashes during the charging process, a charging error has occurred. If this is the case, please remove the charger from the socket immediately and contact your Authorized Specialized Dealer to identify the fault. In this case, the bicycle, battery and the charger may no longer be used. -
Page 17: Cleaning
14). If you use the optionally available Specialized travel charger, the color of the LED will switch from red (charging process) to green (charging process complete). The charging time of an empty battery is approximately 3.5 hours, and approximately 7 hours with the travel charger. -
Page 18: Screen Setup
C. Screen setup To access the setup function of the computer: Press and hold the joystick to the left while squeezing the rear brake lever. Press the battery power „ button to turn on the system, then continue to hold the joystick to the left and the brake lever closed for 3 seconds. SET UNIT (km/h or mph) SET BACKLIGHT (yes or no) 3 sec... -
Page 19: Screen Modes
D. Screen modes ECO % +/- ADJUST Set ECO level: When the speed setting is in „ ECO mode, the ECO # will be displayed. • If nothing is done for 3 seconds, the ECO 3 sec # disappears. DO NOTHING •... -
Page 20: Motor/Support
On start-up, the system always launches in TURBO mode. The level of motor support in ECO mode can be tailored to your individual needs. Using the screen or with help from your Authorized Specialized Dealer, you can program the ECO mode so that you are supported with between 10 and 70% of the maximum motor performance. If you set up the ECO mode for lower support, this consumes less power and therefore allows a greater range. -
Page 21: Error Codes Displayed
If you receive such an error, please restart the system. If the error message continues to be shown, please contact your Authorized Specialized Dealer for further instructions. Depending on the type of error message, the system may be switched off automatically. It is possible to continue riding with this system switched off without support from the motor, at any time. -
Page 22: Lights
When removing/installing the seatpost, be sure to unplug/plug the two wires that connect the backlight to the electrical system. There is no order or polarity to the two wires. Specialized recommends applying a piece of tape to the wires to stick the wires to the seat tube when the wires are disconnected, to avoid the possibility of the wires falling into the seat tube and out of reach. -
Page 23: Dealing With A Flat Tire / Removing A Wheel
Modern technology is highly efficient but also sensitive. You should service your bicycle on a regular basis. This requires Specialized authorized knowledge and tools. Allow your Authorized Specialized Dealer to do this type of work on your bicycle. You can get more information about your bicycle’s parts as well as cleaning and maintenance in the instruction manual provided by your manufacturer or... -
Page 24: Lubrication
18. LUBRICATION Ask your Authorized Specialized Dealer for suitable lubricants. Not all lubricants are designed for all purposes. Using the wrong lubricants can lead to damage and impact the part’s performance. WARNING! Working on the bicycle requires expert knowledge, experience and Specialized authorized tools. Only allow Authorized Specialized Dealers to work or check key parts on the bicycle. -
Page 25: Replacement Tires
Replacement tires The following tires may be used on your class L1e S-Pedelec: Model Standard Size ETRTO Size Max. Load (kg) Specialized Borough XC Sport 45-622 700x45 Specialized Crossroads Armadillo 38-622 700x38 Specialized Crossroads Armadillo 38-622 700x38 Elite Specialized Crossroads... -
Page 26: Warning Notice
If it is no longer possible to use the vehicle safely, refrain from using your L1e S-Pedelec/bicycle. Please ensure that the L1e S-Pedelec/bicycle cannot be used by any third persons without your consent. Please only ride your L1e S-Pedelec/bicycle again when an Authorized Specialized Dealer has checked your L1e S-Pedelec/bicycle. -
Page 27: Dealer Service Schedule
25. DEALER SERVICE SCHEDULE 1st Inspection: 2nd Inspection: 3rd Inspection: After approx. 200 km After approx. 1000 km After approx. 2000 km Work done: Work done: Work done: ______________________________________________ ______________________________________________ ______________________________________________ ______________________________________________ ______________________________________________ ______________________________________________ ______________________________________________ ______________________________________________ ______________________________________________ ______________________________________________ ______________________________________________ ______________________________________________ ______________________________________________ ______________________________________________ ______________________________________________... -
Page 28: Handover Documentation
26. HANDOVER DOCUMENTATION... - Page 32 SPECIALIZED BICYCLE COMPONENTS 15130 Concord Circle, Morgan Hill, CA 95037 (408) 779-6229...
Need help?
Do you have a question about the TURBO S and is the answer not in the manual?
Questions and answers