Quickie QM-710 Owner's Manual
Quickie sunrise medical
Hide thumbs
Also See for Quickie QM-710:
- Owner's manual (98 pages) ,
- Instructions for use manual (59 pages) ,
- Owner's manual (31 pages)
Table of Contents
Advertisement
Quick Links
Quickie
®
QM-710/715HD/720
CC, BC, SC, MPC / BD, SD, CD, MPD
Supplier: This manual must be given to the rider of
this wheelchair.
Rider:
Before using this wheelchair read this entire manual
and save for future reference.
S E C T I O N
QM-710/715HD/720
S E C T I O N
O w n e r ' s M a n u a l
E N G L I S H
Advertisement
Table of Contents

Related Manuals for Quickie Quickie QM-710


Summary of Contents for Quickie Quickie QM-710
- Page 1 S E C T I O N E N G L I S H QM-710/715HD/720 S E C T I O N Quickie ® QM-710/715HD/720 CC, BC, SC, MPC / BD, SD, CD, MPD Supplier: This manual must be given to the rider of O w n e r ’...
-
Page 2: Introduction
Quickie wheelchair. Sunrise Medical Failure to do so may result in damage and/or injury. Customer Service Department 2842 Business Park Ave... -
Page 3: Table Of Contents
Q M - 7 1 0 / 7 1 5 H D / 7 2 0 II. TABLE OF CONTENTS I. INTRODUCTION............2 Q.POWER LEGREST ACCESSORY........13 II. TABLE OF CONTENTS ..........3 R. LIFT POWER ACCESSORY ..........13 III. YOUR CHAIR AND ITS PARTS........4 S. -
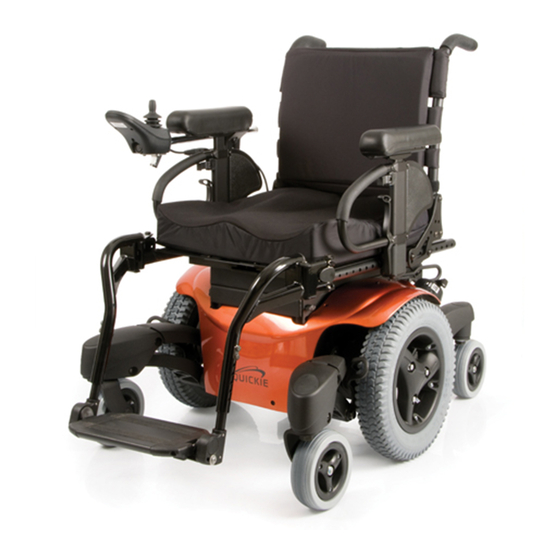
Page 4: Your Chair And Its Parts
14. Transit Tie Down 15. Lift Module (optional) (not shown) Models BC / BD SC (shown) / SD MPC / MPD CC / CD QUICKIE QM-710 Weight (in lbs) Shroud Colors Casters (rear/front) MPD CD Red, Black, Blue, Copper, Silver Standard- 6” solid... -
Page 5: Notice- Read Before Use
Q M - 7 1 0 / 7 1 5 H D / 7 2 0 IV. NOTICE– READ BEFORE USE A. CHOOSE THE RIGHT CHAIR & SAFETY 2. VI — GENERAL WARNINGS Here you will find a safety checklist and a summary of risks OPTIONS you need to be aware of before you ride this chair. -
Page 6: C.sources Of Emi
3. The configuration tested and found to be immune to at least 20 V/m is: Quickie QM-710 power wheelchair with a right- hand mounted RNET remote joystick system, 18" seat width, 18"... -
Page 7: General Warnings
Q M - 7 1 0 / 7 1 5 H D / 7 2 0 VI. GENERAL WARNINGS • Make sure the chair is on level ground before you release WARNING the motor brakes. Heed all warnings in this section. If you fail to do so a 4. -
Page 8: Changes & Adjustments
Q M - 7 1 0 / 7 1 5 H D / 7 2 0 F. CHANGES & ADJUSTMENTS 3. When not in use, keep your chair in a clean, dry place. WARNING PROHIBITED! Extra caution should be used when employing the disc Never use non-Quickie parts to replace Quickie provided parts or switch or the proximity head array as control devices. -
Page 9: Center Of Balance
Q M - 7 1 0 / 7 1 5 H D / 7 2 0 L. CENTER OF BALANCE 4. Never try to pick up an object from the floor by reaching down between your knees. WARNING 5. Never put pressure on the footrests while reaching. The point where this chair will tip forward, back, or to the side 6. -
Page 10: To Reduce The Risk Of A Fall, Tip-Over Or Loss Of Control
Q M - 7 1 0 / 7 1 5 H D / 7 2 0 Beware Of: U.WHEELCHAIR LIFTS 1. Steep slopes. Do Not use this chair on a slope steeper than WARNING 10%. (A 10% slope means: One foot in elevation for every ten feet of slope length). -
Page 11: Warnings: Components And Options
Q M - 7 1 0 / 7 1 5 H D / 7 2 0 VII. WARNINGS: COMPONENTS AND OPTIONS E. FOOTRESTS WARNING WARNING Note: If you use parts or make changes not authorized 1. At the lowest point, footrests should be at least 2 1/2 inch- by Sunrise it may create a safety hazard and will void es (65 mm) off the ground. -
Page 12: Positioning Belts
Q M - 7 1 0 / 7 1 5 H D / 7 2 0 VII. I. POSITIONING BELTS (OPTIONAL) M. POWER SEATING WARNING WARNING Use a positioning belt only to help support your posture. Improper 1. Operation use of such belts may cause severe injury or death. •... -
Page 13: O.cg Tilt Power Accessory
Q M - 7 1 0 / 7 1 5 H D / 7 2 0 VII. O.CG TILT POWER ACCESSORY WARNING The powered CG Tilt accessory for this chair has a maxi- mum user weight capacity of up to 300 lbs (400 lbs for the QM-715HD). -
Page 14: Set-Up, Adjustment And Use
Q M - 7 1 0 / 7 1 5 H D / 7 2 0 VIII. SET-UP, ADJUSTMENT AND USE NOTES TOOLS YOU WILL NEED 1. Work Surface For Set-Up: 1. Basic Tool Kit: Use a flat surface, such as a table, to assemble, adjust and check your To set-up, adjust and maintain your chair you may need the chair. -
Page 15: Battery Removal
Batteries may weigh up to 55 lbs. (25 kg). Care must be taken to avoid injury when lifting. B. FOLDING BACKREST (Fig. 4) Quickie QM-710/715HD/720 wheelchairs are shipped with backrest in folded position. (optional) 1. Upright Positioning a. Lift backrest to upright position so that latch handles (E) lock into place. -
Page 16: C.swing-Away Footrests
Q M - 7 1 0 / 7 1 5 H D / 7 2 0 VIII. C. SWING-AWAY FOOTRESTS (Figs. 5, 6) 1. Installation (Fig. 5) a. Place swing-away pivot pin (B) into the locating hole (C) on top of the hanger mount with the footrest facing outward from frame. -
Page 17: R-Net Joystick
Q M - 7 1 0 / 7 1 5 H D / 7 2 0 VIII. F. R-NET JOYSTICK (Figs. 11, 12, 13, 14) joystick power module Controls: • LED, Monochrome, and Color Display Joystick Omni Input/Display The Omni is a universal specialty controls interface that accepts signals from many different communication types of SIDs and translates them into commands compatible with the PG Drives Technology cable... -
Page 18: Single Post Height-Adjustable Armrests
Q M - 7 1 0 / 7 1 5 H D / 7 2 0 VIII. I. SINGLE POST HEIGHT-ADJUSTABLE ARMRESTS (optional) (Fig. 17) 1. Installation a. Slide the outer armpost into the receiver mounted to the wheel chair frame. b. -
Page 19: Seating System Setup
Q M - 7 1 0 / 7 1 5 H D / 7 2 0 VIII. SEATING SYSTEM SET-UP Front 1st Hole A. ASAP II SEATING ADJUSTMENT Please refer to the ASAP Seating Adjustment Guide for details on how to adjust the seat depth, seat width, armrest height and backrest angle. -
Page 20: Operating Guide
Q M - 7 1 0 / 7 1 5 H D / 7 2 0 IX. OPERATING GUIDE A. PERFORMANCE CONTROL SETTINGS Q-NOTE– Seek advice regarding checking and adjusting settings. 1. It is vital to match control settings to your level of function and ability. 2. -
Page 21: D.thermal Roll-Back
E. FUSES Your Quickie QM-710/715HD/720 has two inline fuses. • In the unlikely event of a short circuit or other fault, all power to your chair will be shut off. • Qualified service personnel are required to repair the fault and replace the battery harnesses. -
Page 22: R-Net Led Joystick
Q M - 7 1 0 / 7 1 5 H D / 7 2 0 G. R-NET LED JOYSTICK On/Off Button The on/off button applies power to the control system electronics, which in turn supply power to the wheelchair’s motors. Do not use the on/off button to stop the wheelchair unless there is an emergency. -
Page 23: H.r-Net Monochrome Lcd Screen
Q M - 7 1 0 / 7 1 5 H D / 7 2 0 H.R-NET MONOCHROME LCD SCREEN Restart When the control system requires a reboot; The status of the control system can be understood by observing for example, after a module re-configuration, the LCD screen. -
Page 24: R-Net Color Lcd Screen
Q M - 7 1 0 / 7 1 5 H D / 7 2 0 I. R-NET COLOR LCD SCREEN This section covers those joystick modules that are fitted with a color LCD screen. The color LCD screen is split into three areas of information. The Top Bar, the Base Bar and the Main Screen Area. - Page 25 Q M - 7 1 0 / 7 1 5 H D / 7 2 0 Inhibit (Fig. 14) If the speed of the wheelchair is being limited; for example, by a tilted seat, then this orange symbol will be displayed. If the wheelchair is being inhibited from driving, then this red sym- bol will be flashing.
-
Page 26: Brake Lever
• A double click of the mode switch will change the operating mode of the system. e.g. standby to drive to actuator etc. For further details refer to the user manual supplied with your module or contact your Sunrise Medical authorized dealer. 118444 Rev. B... -
Page 27: Batteries
Q M - 7 1 0 / 7 1 5 H D / 7 2 0 X. BATTERIES A. INTRODUCTION • Never unplug charger by pulling on the electrical cord. This will damage the cord. 1. Notes– • Never open a charger or attempt to repair it yourself. Return •... -
Page 28: D.charging Batteries
Q M - 7 1 0 / 7 1 5 H D / 7 2 0 D.CHARGING BATTERIES ALWAYS: 1. Use the charger that comes with your wheelchair. Read and WARNING follow all instructions and warnings. To avoid the risk of severe injury or death from electri- 2. -
Page 29: Maintenance
Q M - 7 1 0 / 7 1 5 H D / 7 2 0 XI. MAINTENANCE A. NOTES D.BATTERY MAINTENANCE 1. Proper maintenance will improve performance and extend WARNING the useful life of your chair. 1. To prevent an acid spill, always keep batteries upright 2. -
Page 30: To Repair Or Replace A Tire
Q M - 7 1 0 / 7 1 5 H D / 7 2 0 F. TO REPAIR OR REPLACE A TIRE H.MAINTENANCE CHART You should check the items on this chart at the indicated intervals. If WARNING any of the items are loose, worn, bent or distorted, immediately Residual air pressure in tires can cause severe injury. -
Page 31: Sunrise Limited Warranty
3. This warranty applies in the USA only. Check with your sup- plier to find out if international warranties apply. 4. This warranty is not transferable and only applies to the first consumer purchase of this wheelchair through an authorized Sunrise Medical dealer. 118444 Rev. B... - Page 32 Sunrise Medical • 2842 Business Park Ave. • Fresno, CA 93727 • USA In Canada (800) 263-3390 Customer Ser vice: 800.333.4000 ©2012 Sunrise Medical (US) LLC www.SunriseMedical.com 1.12 118444 Rev. B...