
Subscribe to Our Youtube Channel
Related Manuals for DR SCOUT


Summary of Contents for DR SCOUT
- Page 1 ® SCOUT FIELD and BRUSH MOWER SAFETY & OPERATING INSTRUCTIONS READ AND UNDERSTAND THIS MANUAL AND ALL INSTRUCTIONS BEFORE OPERATING THIS MOWER.
- Page 2 And congratulations on your purchase of a new DR SCOUT FIELD and BRUSH MOWER! We have done our utmost to ensure that your DR SCOUT FIELD and BRUSH MOWER will be one of the most trouble-free and satisfying pieces of equipment you have ever owned. Please let us know of any questions you may have.
-
Page 3: Table Of Contents
Additional Information and Potential Changes.............. 9 CHAPTER 3........................... 11 SETTING UP YOUR DR SCOUT FIELD and BRUSH MOWER........11 DR SCOUT FIELD and BRUSH MOWER Controls and Features ........ 12 Unpacking the Mower ....................13 Adding Oil and Gasoline ....................14 Check the Tire Pressure.................... - Page 4 Schematic - Frame and Drive Assembly ............... 39 Parts List - Brush Deck Assembly ................. 40 Schematic - Brush Deck Assembly................41 Parts List - Differential and Wheel Assembly..............42 Schematic - Differential and Wheel Assembly.............. 43 Warranty......................... 45 ® SCOUT FIELD and BRUSH MOWER...
-
Page 5: Chapter 1
THIS INFORMATION IS IMPORTANT IN THE PROPER USE OF YOUR MACHINE. FAILURE TO FOLLOW THIS INSTRUCTION COULD RESULT IN DAMAGE TO YOUR MACHINE OR PROPERTY. Tip: This is a helpful hint to guide you in getting the most out of your DR SCOUT FIELD and BRUSH MOWER. - Page 6 ® SCOUT FIELD and BRUSH MOWER...
-
Page 7: Chapter 2
Shown below are copies of all the labels that appear on the equipment. Take a moment to study them and make a note of their location on your DR SCOUT FIELD and BRUSH MOWER as you assemble and before you operate the machine. - Page 8 This label shows the proper routing of the Drive Belt. (#164371) This label reminds you about the importance of reading and understanding the Safety and Operating Instructions manual and of paying attention to the safety warnings. (#162651) ® SCOUT FIELD and BRUSH MOWER...
-
Page 9: Protecting Yourself And Those Around You
PROTECT YOUR EYES FROM POSSIBLE THROWN DEBRIS. • WEAR SHOES WITH NON-SLIP TREADS WHEN USING YOUR DR SCOUT FIELD AND BRUSH MOWER. IF YOU HAVE SAFETY SHOES, WE RECOMMEND WEARING THEM. DO NOT USE THE MACHINE WHILE BAREFOOT OR WEARING OPEN SANDALS. - Page 10 DAMAGE. CLEAN AND REPAIR AND/OR REPLACE DAMAGED PARTS. • WHILE USING THE DR SCOUT FIELD AND BRUSH MOWER, DON'T HURRY OR TAKE THINGS FOR GRANTED. WHEN IN DOUBT ABOUT THE EQUIPMENT OR YOUR SURROUNDINGS, STOP THE MACHINE AND TAKE THE TIME TO LOOK THINGS OVER. MAKE SURE THAT YOU HAVE 100% CONTROL OF THE MOWER AT ALL TIMES.
-
Page 11: Slope Operation
BEFORE AND WHILE MOVING BACKWARDS, LOOK BEHIND AND FOR SMALL CHILDREN. • NEVER ALLOW CHILDREN TO OPERATE THE MOWER. • USE EXTRA CARE WHEN APPROACHING BLIND CORNERS, SHRUBS, TREES, OR OTHER OBJECTS THAT MAY OBSCURE YOUR VISION. CALL TOLL FREE 1-800-DR-OWNER... -
Page 12: Safety With Gasoline-Powered Machines
NEVER TAMPER WITH SAFETY DEVICES. CHECK THEIR PROPER OPERATION REGULARLY. • DO NOT CHANGE THE ENGINE GOVERNOR SETTINGS OR MODIFY THE ENGINE SPEED. • TO REDUCE FIRE HAZARD, KEEP THE ENGINE AND MUFFLER FREE OF DEBRIS BUILD-UP. ® SCOUT FIELD and BRUSH MOWER... -
Page 13: A Note To All Users
This also applies to operation on US Forest Lands. All DR SCOUT FIELD and BRUSH MOWERS shipped to California and Washington State are provided with spark arresters. Failure of the owner/operator to maintain this equipment in compliance with state regulations is a misdemeanor under California law and may be in violation of other state and/or federal regulations. - Page 14 ® SCOUT FIELD and BRUSH MOWER...
-
Page 15: Chapter 3
CHAPTER 3 SETTING UP YOUR DR SCOUT FIELD and BRUSH MOWER This chapter outlines a few simple steps you will need to follow to set up your new machine before you use it. It may be helpful to familiarize yourself with the controls and features on your mower by reviewing the picture in the next section before beginning the steps outlined in this chapter. -
Page 16: Dr Scout Field And Brush Mower Controls And Features
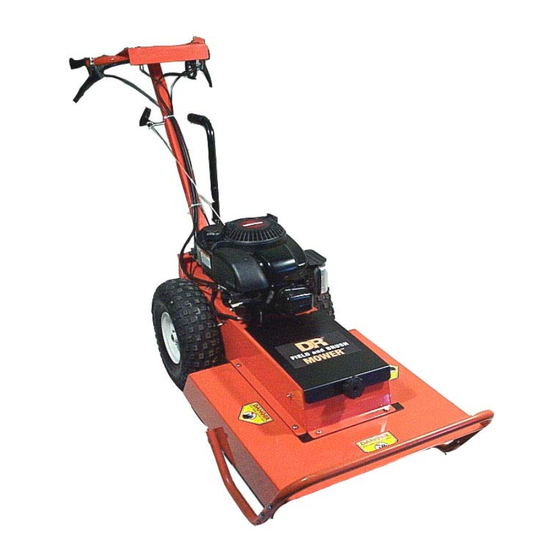
DR SCOUT FIELD and BRUSH MOWER Controls and Features NOTE: The model shown in Figure 1 may look slightly different from your machine. Key Switch Throttle Control Operator Presence Control Lever Blade Clutch Lever Wheel Clutch Lever Shift Lever Recoil Starter Handle Figure 1 ®... -
Page 17: Unpacking The Mower
Unpacking the Mower NOTE: Unpacking the DR SCOUT FIELD and BRUSH MOWER is a two-person job. We recommend you have an extra set of hands available before you begin. Tools and Supplies Needed: • Screwdriver • Metal Shears • Knife •... -
Page 18: Adding Oil And Gasoline
3. Fill the gas tank to within 1/4 inch of the top with fresh, unleaded gas. See the Engine Owner’s Manual for more information. Fuel Fill Oil Fill Check the Tire Pressure Figure 2 There should be 10 psi in each tire. ® SCOUT FIELD and BRUSH MOWER... -
Page 19: Chapter 4
This chapter covers the procedures for starting and stopping your new DR SCOUT FIELD and BRUSH MOWER and discusses basic operation features. You may find it helpful to review the DR SCOUT FIELD and BRUSH MOWER Controls and Features picture (Figure 1) on page 12 before reading this chapter. -
Page 20: Before Starting The Engine
4. Grasp the recoil starter handle and slowly pull until you feel resistance. Let the cord retract a little bit, then pull the cord rapidly to start the engine. One or two pulls usually starts the DR SCOUT FIELD and BRUSH MOWER. -
Page 21: Engaging The Wheel Drive
Engaging the Wheel Drive The DR SCOUT FIELD and BRUSH MOWER has a three-speed forward transmission and single-speed reverse. Forward speeds range from 1.1 mph in first gear to 2.2 mph in third gear. Use the lower gears for mowing in thick, woody vegetation and the higher gears for wide-open areas and lighter vegetation, or as "travel gears."... -
Page 22: Stopping The Engine
4. Turn the Key to the OFF position (Figure 5) and remove it for safety. Figure 5 Obstacle Tips Dealing with obstacles in the terrain is easy with your new DR SCOUT FIELD and BRUSH MOWER. The following section explains how to approach most common obstacles. •... -
Page 23: Slopes
SLOPES, USE EXTREME CAUTION NOT TO TIP THE MACHINE OVER. • NEVER USE THE DR SCOUT FIELD and BRUSH MOWER ON SLOPES GREATER THAN 20 DEGREES (FIGURE 6). DOING SO COULD RESULT IN SERIOUS INJURY OR DAMAGE TO YOUR MACHINE. -
Page 24: Cutting Brush And Saplings
Cutting in Wet and Heavy Growth 1. Be very careful of your footing when mowing in wet conditions. Avoid steep slopes and other slippery areas. 2. Use a lower, slower speed when mowing in wet conditions. ® SCOUT FIELD and BRUSH MOWER... -
Page 25: Chapter 5
Replace Air Filter and Precleaner** Replace Spark Plug ▲ ® * FLUID FILM lubricant or SAE 30 oil. NEVER use penetrating oil. ** The engine on your DR may not have a Precleaner or Oil Filter. CALL TOLL FREE 1-800-DR-OWNER... -
Page 26: Lubrication
Lubrication Your DR SCOUT FIELD and BRUSH MOWER was lubricated at the Factory. The spindle, differential and transmission are lubricated for life and sealed at the factory. The operator needs to periodically lubricate the Wheel Clutch Cable, Blade Clutch Cable, Drive Chain, and provide engine lubrication. -
Page 27: Removing The Engine Oil
2. Replace the oil by following the instructions on page 14. NOTE: If the oil is not to be reused, be sure to use environmentally safe disposal procedures in the disposing of the used oil. CALL TOLL FREE 1-800-DR-OWNER... -
Page 28: Removing And Replacing The Belts
Removing and Replacing the Belts BEFORE PERFORMING ANY MAINTENANCE PROCEDURE, STOP THE ENGINE AND DISCONNECT THE SPARK PLUG WIRE. USE ONLY DR BELTS ON YOUR MACHINE. THEY HAVE BEEN THOROUGHLY TESTED AND PROVEN FOR MANY HOURS OF USE. To Replace the Blade Belt Tools and Supplies Needed: •... - Page 29 To Replace the Drive Belt BEFORE PERFORMING ANY MAINTENANCE PROCEDURE, STOP THE ENGINE AND DISCONNECT THE SPARK PLUG WIRE. USE ONLY DR BELTS ON YOUR MACHINE. THEY HAVE BEEN THOROUGHLY TESTED AND PROVEN FOR MANY HOURS OF USE. Tools Needed: •...
-
Page 30: Removing And Replacing The Blade
3. Remove the blade. 4. Mount the new Blade, washer and Bolt. NOTE: Be sure the blade is seated completely over the small ridge in the spindle hub before tightening the Bolt. Figure 16 ® SCOUT FIELD and BRUSH MOWER... -
Page 31: Adjusting The Wheel Clutch
IF THE CLUTCH IS OVER TIGHTENED, THE MACHINE MAY LURCH FORWARD WHEN SHIFTING INTO GEAR. USE CAUTION WHEN SHIFTING INTO GEAR. TEST ADJUSTMENT USING THE PROCEDURE ON PAGE 16. Clutch Bracket Wheel Clutch Adjuster Figure 17 CALL TOLL FREE 1-800-DR-OWNER... -
Page 32: Removing And Replacing The Drive Chain
5. Add the Master Chain Link (Figure 19) in the reverse order of step 2. 6. Replace the Chain Cover and tighten the Screws. 7. Replace the Shift Lever and tighten the Nut. Drive Chain Routing Figure 20 ® SCOUT FIELD and BRUSH MOWER... -
Page 33: Adjusting The Blade Engagement Cable
Cable (Figure 21). To tighten the cable, loosen the Nut on the front (threaded) side of the Bracket by 1/8" to 1/4", and then tighten the Nut on the back against the Bracket. Check the tension on the Blade Lever and repeat the adjustment as needed. Blade Engagement Cable Adjuster Bracket Figure 21 CALL TOLL FREE 1-800-DR-OWNER... -
Page 34: Replacing The Blade Clutch Springs
Clutch Cam and remove the Clutch Spring from the Cam. 6. Install the new Clutch Spring by reversing the above procedure. 7. Replace the Belt Guard (Figure 11 on page 24). Figure 24 ® SCOUT FIELD and BRUSH MOWER... -
Page 35: Removing The Wheels
3. Remove the Shear Bolt and slide the Wheel off the axle (Figure 25). 4. Replace the Wheel in the reverse order as above. NOTE: Do not over tighten the Shear Bolt Nut when reinstalling the Wheel. Shear Bolt Nut Shear Bolt Figure 25 CALL TOLL FREE 1-800-DR-OWNER... -
Page 36: End Of Season And Storage
If your engine has a fuel filter, replace it. • If your DR SCOUT FIELD and BRUSH MOWER will be idle for more than 30 days, we recommend using a gas stabilizer. This will prevent sediment from gumming up the carburetor. If there is dirt or moisture in the gas or tank, remove it by draining the tank. -
Page 37: Chapter 6
Wipe off the spark plug and reinstall it. ⇒ The recoil may be broken or jammed. Call 1(800) DR-OWNER (376-9637) for assistance. ⇒ Is the spark plug wire connected? The engine won’t... - Page 38 Engine Owner’s Manual for detailed information. ⇒ Clean the cooling fins if they’re dirty. ⇒ If the engine still smokes, call 1(800) DR-OWNER (376-9637) for assistance. ⇒ If you find it difficult to shift into reverse, lightly pull the Clutch Lever as you pull Machine is hard to the Shift Lever into Reverse then quickly release the Clutch Lever;...
- Page 39 Blade and tighten the Bolt. Be sure to turn OFF the engine and remove the engaged. spark plug wire before performing this operation. ⇒ The spindle bearings may be bad. Call 1(800) DR-OWNER (376-9637) for assistance. ⇒ The Blade may not be seated properly on the hub. Loosen the Blade Bolt, reset The blade is not the Blade and tighten the Bolt.
-
Page 40: Chapter 7
NOTE: Part numbers listed are available through Country Home Products, Inc. Ref# Part# Description Safety and Information Labels 165361 Handlebar Assy w/Control Panel 162651 Label, Control Panel, F/B Scout 120301 Screw, 3/8"-16 x 1-1/2", Tri-Lobe 179111 Label, Deck, F/B Scout Deleted 173351... -
Page 41: Schematic - Handlebar Assembly
Schematic - Handlebar Assembly 051012 CALL TOLL FREE 1-800-DR-OWNER... -
Page 42: Parts List - Frame And Drive Assembly
165341 Frame, Main, w/Engine Plate 165131 Bolt, 3/8"-24 x 1-1/4" GR 8 174641 Engine, 7.0 HP, B&S 165431 Guide, Engine Belt, F/B Scout 111591 Bolt, 5/16"-18 x 2-1/2" HCS 119831 Bolt, 1/4"-20 x 3/4" HCS 110761 Nut, Nylon Lock, 5/16"-18 112481 Washer, Lock, 1/4"... -
Page 43: Schematic - Frame And Drive Assembly
Schematic - Frame and Drive Assembly 051012 CALL TOLL FREE 1-800-DR-OWNER... -
Page 44: Parts List - Brush Deck Assembly
Spring, e, .750" OD x .105" wire 110761 Nut, Nylon Lock, 5/16"-18 150501 Spring, e, .438" OD x .045" wire 175521 Bolt, Eye, 10-24 178991 Cable, Blade Engage, F/B Scout 118731 Nut, Nylon Lock, 10-24 165381 Access Panel, F/B Scout 175401 Clutch, PTO, F/B Scout 143661 Knob, Handlebar, 5/16"-18... -
Page 45: Schematic - Brush Deck Assembly
Schematic - Brush Deck Assembly 051012 CALL TOLL FREE 1-800-DR-OWNER... -
Page 46: Parts List - Differential And Wheel Assembly
Bearing, Ball, 3/4" Bore 123211 Bolt, 5/16"-18 x 3/4" HCS 110761 Nut, Nylon Lock, 5/16"-18 175431 Wheel, 14.5" x 7-6 2ply, F/B Scout 111481 Bolt, 1/4"-20 x 1-3/4" HCS 110731 Nut, Nylon Lock, 1/4"-20 180151 Chain, #40, 77 Link w/ML ®... -
Page 47: Schematic - Differential And Wheel Assembly
Schematic - Differential and Wheel Assembly 051012 CALL TOLL FREE 1-800-DR-OWNER... - Page 48 NOTES: ® SCOUT FIELD and BRUSH MOWER...
-
Page 49: Warranty
The DR SCOUT™ FIELD and BRUSH MOWER is warranted for two (2) years against defects in materials or workmanship when put to ordinary and normal consumer use; ninety (90) days for any other use. The engine manufacturer warrants the engine separately. - Page 50 Daily Checklist for the DR SCOUT FIELD and BRUSH MOWER To help maintain your DR SCOUT FIELD and BRUSH MOWER for optimum performance, we recommend you follow this checklist each time you use your machine. [ ] OIL: With the machine on a level surface, check the engine oil level with the dipstick and add more if necessary (only add oil to the level indicated on the dipstick - DO NOT OVERFILL).
Need help?
Do you have a question about the SCOUT and is the answer not in the manual?
Questions and answers