
Subscribe to Our Youtube Channel
Related Manuals for DR DR SCOUT DR SCOUT FIELD and BRUSH MOWER


Summary of Contents for DR DR SCOUT DR SCOUT FIELD and BRUSH MOWER
- Page 1 SCOUT FIELD and BRUSH MOWER Safety & Operating Instructions Please read instructions before operating machine...
- Page 2 Thanks once again! ALES ANAGER COPYRIGHT 2004 Country Home Products, Inc. All rights reserved. OCUMENTATION Written by: Ed Melen of EVM Technical Writing Country Home Products, Inc. Meigs Road P.O. Box 25...
-
Page 3: Table Of Contents
Table of Contents Chapter 1: Introducing the DR Conventions used in this manual... 1 Chapter 2: Safety Considerations...2 Preparing to Use the DR Safety Information Labels... 2 Protecting Yourself ... 4 Operating the Machine Safely ... 4 Safety with Gasoline-Powered Machines ... 5 A Note to All Users ... -
Page 4: Scout
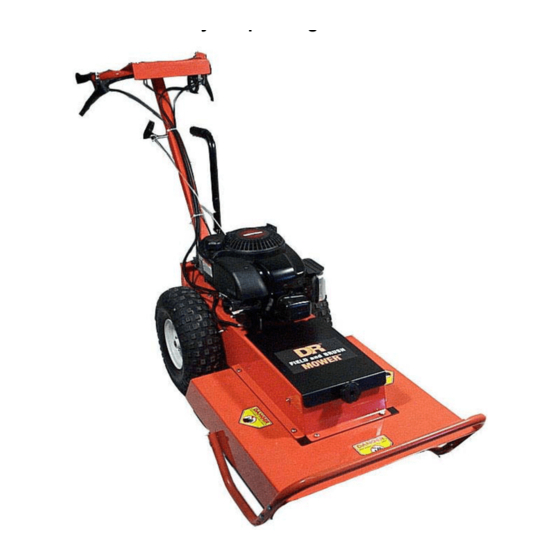
Chapter 1: Introducing the DR BRUSH MOWER Thank you for the purchase of your new DR This manual will help you set up and safely operate your new DR BRUSH MOWER. Careful adherence to the safety and operating instructions in this manual will ensure many years of productive use. -
Page 5: Chapter 2: Safety Considerations
Chapter 2: Safety Considerations Taking the time to read and observe all safety instructions will ensure many years of productive use from your DR avoid injury. Please take a few moments to read the following guidelines for safely operating your new machine. Preparing to Use the DR BRUSH MOWER Read these Safety... - Page 6 To avoid injury, keep your hands and feet away from the spinning blade. (#13649) This label shows the proper routing of the blade belt. (#16437) SCOUT FIELD and BRUSH MOWER Safety & Operating Instructions This label reminds you about the importance of reading and understanding the...
-
Page 7: Protecting Yourself
Protecting Yourself Always wear protective goggles while mowing to protect your eyes from possible thrown objects. Wear shoes with non-slip treads when using your DR MOWER. If you have safety shoes, we recommend wearing them. Do not use the machine while barefoot or wearing open sandals. Wear long pants while mowing. -
Page 8: Safety With Gasoline-Powered Machines
ALWAYS OPERATE THE MOWER FROM BEHIND. Never pass or stand beside or in front of machine when the engine is running. Do not, under any conditions, remove, bend, cut, fit, weld, or otherwise alter standard parts on the DR and guards. Modifications to your machine could cause personal injuries and property damage and will void your warranty. -
Page 9: A Note To All Users
Additional Information and Potential Changes Country Home Products, Inc. reserves the right to discontinue, change, and improve its products at any time without notice or obligation to the purchaser. The descriptions and specifications contained in this manual were in effect at printing. -
Page 10: Throttle Control
Chapter 3: Setting Up Your DR BRUSH MOWER This chapter outlines a few simple steps you will need to follow to set up your new machine before you use it. It may be helpful to familiarize yourself with the controls and features on your mower by reviewing the picture in the next section before beginning the steps outlined in this chapter. -
Page 11: Unpacking The Mower
Unpacking the Mower Tools & Supplies Needed: Screwdriver Knife Gloves Eye protection Metal shears WARNING! Always wear eye protection when cutting the banding. The banding may have a lot of tension on it and may snap, striking you when cut. Always stand to one side when cutting the band. -
Page 12: Adding Oil And Gasoline
Adding Oil and Gasoline WARNING! You must add oil before starting the engine. This machine is shipped without oil. Traces of oil may be in the reservoir from factory testing, but YOU MUST ADD OIL BEFORE STARTING THE ENGINE. Fill the reservoir slowly checking the dipstick frequently to avoid overfilling. -
Page 13: Scout
Chapter 4: Operating Your DR BRUSH MOWER This chapter covers the procedures for starting and stopping your new DR SCOUT FIELD and BRUSH MOWER and discusses basic operation features. Before Starting the Engine 1. Check the oil level every time you use the machine. (See Figure 2 on page 9) 2. -
Page 14: Engaging The Wheel Drive
Engaging the Wheel Drive The DR SCOUT transmission and single-speed reverse. Forward speeds range from 1.1 mph in first gear to 2.2 mph in third gear. Use the lower gears for mowing in thick, woody vegetation and the higher gears for wide-open areas and lighter vegetation, or as "travel gears." Reverse is ideal for maneuvering in tight spots. -
Page 15: Stopping The Engine
Stopping the Engine 1. Stop the blade by releasing the blade clutch lever. (Figure 5) 2. Move the throttle control to the IDLE position. 3. Turn the key to the OFF position and remove it for safety. Obstacle Tips Dealing with obstacles in the terrain is easy with your new DR BRUSH MOWER. -
Page 16: Slopes
Slopes WARNING! When operating over uneven terrain and slopes, use EXTREME CAUTION to ensure solid and firm footing. 1. We do not recommend using the DR SCOUT continuously on slopes greater than 20 degrees. Doing so could deprive the engine of oil and cause it to overheat. -
Page 17: Cutting Brush & Saplings
Cutting Brush & Saplings 1. When cutting woody material, small saplings, etc., allow the machine to ride up and over material slowly. Adjust your forward speed to varying conditions. (Figure 7) 2. After cutting brush, etc., you may want to mow over it again to remove any remaining branches. - Page 18 SCOUT FIELD and BRUSH MOWER Safety & Operating Instructions...
-
Page 19: Scout
Chapter 5: Maintaining the DR BRUSH MOWER Regular maintenance is the way to ensure the best performance and long life of your machine. Please refer to this manual and the engine manufacturer's owner's manual for maintenance procedures. Service intervals listed in the checklist below supercede those listed in the engine manufacturer's owner's manual. -
Page 20: Lubrication
Lubrication Your DR SCOUT The spindle, differential and transmission are lubricated for life and sealed at the factory. The operator needs to provide engine lubrication and lubricate the chain periodically. Tools & Supplies Needed: 9/16" wrench or socket (chain cover) FLUID FILM WARNING! Before performing any maintenance procedure, stop the engine and disconnect the spark plug wire. -
Page 21: Removing The Engine Oil
Removing the Engine Oil WARNING! Before performing any maintenance procedure, stop the engine and disconnect the spark plug wire. Tools & Supplies Recommended: Manual 1. Remove the Oil Filler Cap and position a suitable oil receptacle beside the oil fill tube. 2. -
Page 22: Removing And Replacing The Blade Belt
Removing and Replacing the Blade Belt WARNING! Before performing any maintenance procedure, stop the engine and disconnect the spark plug wire. Important! Use only DR thoroughly tested and proven for many hours of use. Tools & Supplies Needed: 9/16" wrench or socket (spring nut) 1/2"... -
Page 23: Removing And Replacing The Drive Belt
Removing and Replacing the Drive Belt WARNING! Before performing any maintenance procedure, stop the engine and disconnect the spark plug wire. Tools Needed: 7/16" wrench or socket 1/2" wrench or socket Gloves 1. Drain the gas by running the engine until the gas tank is empty or by the use of a siphon. -
Page 24: Removing And Replacing The Blade
Removing and Replacing the Blade WARNING! Before performing any maintenance procedure, stop the engine and disconnect the spark plug wire. Tools Needed: 15/16" wrench or socket Air wrench if available Wear gloves 1 x 4 x 6 to brace the blade 1. -
Page 25: Adjusting The Wheel Clutch
Adjusting the Wheel Clutch WARNING! Before performing any maintenance procedure, stop the engine and disconnect the spark plug wire. Note: When properly adjusted, tension on the wheel clutch lever should increase when the lever is about parallel to (almost touching) the handlebar grip. Tools Needed: (2) 1/2"... -
Page 26: Removing And Replacing The Drive Chain
Removing and Replacing the Drive Chain WARNING! Before performing any maintenance procedure, stop the engine and disconnect the spark plug wire. Tools Needed: 1/2" wrench or socket (chain cover) 9/16" wrench or socket (shift lever) Flat-head screwdriver Pliers 1. Place the gearshift lever in NEUTRAL and remove chain removing the shift lever... -
Page 27: Adjusting The Blade Engagement Cable
Adjusting the Blade Engagement Cable WARNING! Before performing any maintenance procedure, stop the engine and disconnect the spark plug wire. Note: If the blade won't cut, or seems to slip in heavy material, check the blade engagement cable. When properly adjusted, tension on the blade engagement lever should decrease when the lever is about parallel to (almost touching) the handlebar grip. -
Page 28: Replacing The Blade Clutch Springs
Replacing the Blade Clutch Springs WARNING! Before performing any maintenance procedure, stop the engine and disconnect the spark plug wire. Tools Needed: 1/2" open-end wrench 9/16" open-end wrench Gloves Remove the belt guard by unscrewing the knob, pull the guard forward and lift to remove it. -
Page 29: Removing The Wheels
4. Remove the clutch cam retaining nut from the clutch cam pivot bolt and lift the cam off the pivot bolt. (Figure 24) 5. Remove the clutch spring retaining nut from beneath the clutch cam and remove the clutch spring from the cam. 6. -
Page 30: End Of Season & Storage
End of Season & Storage WARNING! Before performing any maintenance procedure, stop the engine and disconnect the spark plug wire. Note: Please refer to the engine manufacturer's owner's manual for engine-specific procedures. Change the oil. If your DR days, we recommend using a gas stabilizer. This will prevent sediment from gumming up the carburetor. -
Page 31: Chapter 6: Troubleshooting And Warranty
Chapter 6: Troubleshooting and Warranty Most problems are easy to fix. Consult the troubleshooting table for common problems and their solutions. If you continue to experience problems, call Country Home Products, Inc. for support. Troubleshooting Table WARNING! Before performing any maintenance procedure, stop the engine and disconnect the spark plug wire. - Page 32 Symptom The engine lacks power or is not running smoothly. (Please refer to the engine manufacturer’s owner’s manual for engine- specific procedures.) Engine smokes. Machine is hard to get into reverse. The belt frays or rolls over the pulley. Possible Cause ⇒...
- Page 33 Symptom Blade vibrates when engaged. The blade is not cutting or is loose. Wheels pulling left or right. SCOUT FIELD and BRUSH MOWER Safety & Operating Instructions Possible Cause ⇒ The blade may not be seated properly on the hub. Loosen the blade nut, reset the blade and tighten the nut.
- Page 34 Notes SCOUT FIELD and BRUSH MOWER Safety & Operating Instructions...
-
Page 35: Year Limited Warranty
Country Home Products, Inc. certifies that the DR which a product of this type is used. Country Home Products, Inc. however, limits the implied warranties of merchantability and fitness in duration to a period of one (1) year in consumer use, ninety (90) days for any other use. -
Page 36: Daily Checklist For The Dr
COUNTRY HOME PRODUCTS, Inc. M E I G S R O A D , P . O . B O X 2 5 , V E R G E N N E S , V E R M O N T 0 5 4 9 1 1-800-DR-OWNER (376-9637) •...
Need help?
Do you have a question about the DR SCOUT DR SCOUT FIELD and BRUSH MOWER and is the answer not in the manual?
Questions and answers