
Related Manuals for Spacelabs 90207


Summary of Contents for Spacelabs 90207
- Page 1 Ambulatory Blood Pressure Monitors 90207/90217 Operations Manual 070-0137-03 Rev. L 070-0137-03 Rev.L...
- Page 2 90207/90217 Operations Manual...
- Page 3 Spacelabs Healthcare as fi eld repairable. Spacelabs Healthcare is committed to providing comprehensive customer support beginning with your initial inquiry through purchase, training, and service for the life of your Spacelabs Healthcare equipment.
- Page 4 90207/90217 Operations Manual...
-
Page 5: Table Of Contents
Operation Overview ABP Monitor Replacing the Batteries Main Battery Replacement Lithium Battery Replacement (90207 only) Initializing the Monitor Connecting Directly to a Local Report Generator Connecting Directly to the PC Interface Connecting to the Base Station via Modem Modem Speed and Compatibility Issues Offi... - Page 6 90207/90217 Operations Manual...
-
Page 7: Operation
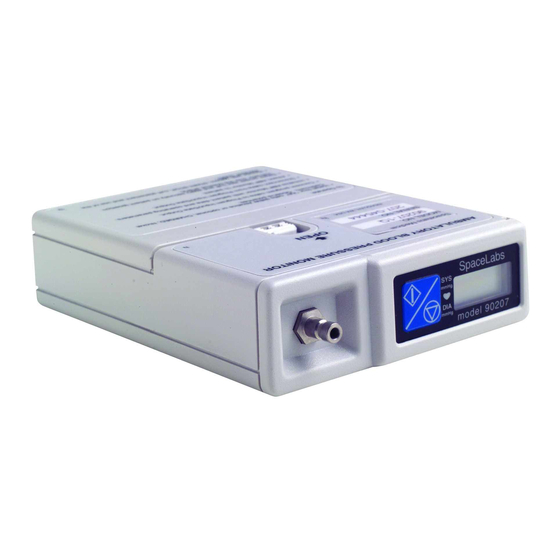
• Beep before and after each reading. Front Panel The 90207 and 90217 monitor front panels include the LCD display, cuff hose connector, and a START/ STOP switch. Rear Panel The rear panels of both monitors contain program input and output communication ports. On the 90207, the power ON/OFF switch is located on the rear panel. -
Page 8: Replacing The Batteries
90217 uses three batteries. These batteries should be replaced or recharged before the start of each patient monitoring session. Use either alkaline or Nicad batteries. The 90207 monitor uses a lithium battery (P/N 146-0008-xx) to back up the monitor memory and should be replaced periodically. The 90217 monitor backup battery should not require replacement. -
Page 9: Initializing The Monitor
Connecting Directly to a Local Report Generator For a direct connection to the 90207 or to the 90217 monitor, place the monitor into the chute on the Report Generator (Model 90239A or equivalent), as displayed in Report Generator . -
Page 10: Connecting To The Base Station Via Modem
9600 2999/9999 90217-Q 9600 any Hayes 0999/9999 Connection Procedure Set the switches on the modem if you are using an older 90207 monitor with a 1200 modem, as follows: Switch Number Setting at Monitor Site down down down... - Page 11 When instructed by the base station operator, power ON the ABP monitor. Note: The modem link must be established within 10 to 20 seconds for the 90207, and within 45 sec- onds for the 90217. If this does not occur, power the monitor OFF and then ON again to retry establishing the link.
-
Page 12: Offi Ce Check Mode
fi ve Offi ce Check mode readings. Reinstating Offi ce Check Mode The Offi ce Check mode may be reinstated in the 90217 and the 90207 monitors (versions 2.14 and later). To reinstate the Offi ce Check mode without initialization of the monitor: Power ON the monitor. -
Page 13: Preparing The Patient And Precautions For Use
Operation Preparing the Patient and Precautions for Use Note: • Blood pressure measurements determined with this device are equivalent to those ob- tained by a trained observer using the cuff/stethoscope auscultation method, within the limits prescribed by the American National Standard, Electronic, or automated sphyg- momanometers. - Page 14 These components include the bladder and the fi rst four inches of tubing extending from the cuff. Note: • Use only Spacelabs Healthcare cuffs with this monitor. Using other manufacturer’s cuffs may result in inaccurate readings, even if the manufacturer’s recommended size is ob- served. •...
-
Page 15: Correlating With Manual Readings
Operation Show the patient how to enter information in the Patient Diary. Make sure the patient knows what to do if the cuff becomes very uncomfortable during a measurement, if it slips out of place, or if event codes are displayed on the monitor screen (refer to Patient Instructions ). Also, ensure that the patient knows how to care for the monitor. -
Page 16: Patient Instructions
Note: The patient should make every effort to keep the monitor dry. However, there is no hazard if the monitor does get wet. If this occurs, power the monitor OFF and return it to Spacelabs Healthcare for service. Data Transfer and Reports After monitoring is complete, connect the monitor to either a PC Direct or Base Station interface to transmit patient data and generate blood pressure reports. -
Page 17: Cleaning The Cuff And Carrying Pouch
Over time, repeated use of a chlorine bleach solution may cause some colors to fade. Tape adhesive can be removed with Spacelabs Healthcare adhesive tape remover pads (P/N 392196-001). Questions and concerns about cleaning issues should be directed to a Spacelabs Healthcare fi eld serv- ice engineer. Cleaning the Cuff and Carrying Pouch Small soiled or stained areas may be cleaned by gentle scrubbing with a sponge or cloth soaked in a mild soap and water solution. -
Page 18: Event Codes
EC03 Patient canceled reading by pressing STOP key. No retry attempt is made following an EC03 code. EC13 The Offi ce Check mode has been reinstated. No retry attempt is made following an EC13 code. EC04 1-12 90207/90217 Operations Manual... - Page 19 EC05 The individual blood pressure result has been corrupted and cannot be recovered. EC15 Equipment malfunction. Return to Spacelabs Medical for service. EC25 Monitor failed to initialize. Please initialize. EC35 90207 At least one of the blood pressures or time readings obtained before the event code is erroneous.
- Page 20 Low battery detected after measurement started. Usually caused by the pump drawing enough current to lower the battery voltage. The report does not print an event code for this condition, which is a low backup battery. Contact Spacelabs Medical for replacement of the bat- tery. 1-14...
-
Page 21: Accuracy
Accuracy Checking Accuracy Accuracy of the monitor pressure readings should be checked annually. Recalibration is necessary only if the monitor is not within the accuracy limits. Required Equipment • A full-size mercury sphygmomanometer or aneroid gauge. Note: Ensure the mercury sphygmomanometer or aneroid gauge is calibrated and indicates “0” with no pressure. -
Page 22: Accuracy Procedure
Note: If the monitor pressure values fall outside the allowed tolerance, call your local Service Representative or Spacelabs Medical for servicing. At the end of the procedure, the monitor displays an event code indicating that no dynamic blood pressure measurements were obtained. -
Page 23: Troubleshooting
There is a 12-month warranty on this product. Field service for the ABP monitor is limited to replacing batteries and accessories. If other repair is required, return the monitor to Spacelabs Healthcare. Contact your Spacelabs Healthcare Customer Service Representative for shipping details. - Page 24 90207/90217 Operations Manual...
-
Page 25: Appendix A - Symbols
Appendix A — Symbols The following list of international and safety symbols describes all symbols used on Spacelabs Health- care products. No one product contains every symbol. HELP Key Keyboard Connection SPECIAL FUNCTIONS Key Mouse Connection RECORD Key START/STOP Key... - Page 26 Return to Prior Menu Clock/Time Setting Key TREND/TIMER Key HELP (Explain Prior Screen) Key Keypad Activate Recorder for Graphics Indoor Use Only START (NIBP) Key Auto Mode (NIBP) Output (Non-terminated) No Output (Terminated) Data Input/Output Input/Output Input Reset 90207/90217 Operations Manual...
- Page 27 Appendix A Symbols Menu Keys Waveform/Parameter Keys Monitor Setup Set Initial Conditions Menu Select Program Options Access Special Function Menu Return Unit to Monitor Mode Serial Port 1 Serial Port 2 External Marker Push Button SDLC Port Connection Electrocardiograph or Defi brilla- Arterial Pulse tor Synchronization Gas Exhaust...
- Page 28 fi eld service engineer (U.S.A.). an authorized representative of the DANGER - High Voltage (International) manufacturer for information con- cerning the decommissioning of your equipment. Refer to manual for further informa- Use only specifi ed battery type. tion 90207/90217 Operations Manual...
- Page 29 Loop Filter Adult NIBP Canadian Standards Associa- ETL Laboratory Approved tion Approved Risk of Explosion if Used in the Operates on Non-Harmonized Presence of Flammable Anesthet- Radio Frequencies in Europe Spacelabs Compatible CE Mark 070-0137-03 Rev.L...
- Page 30 Catalog Number Catalog Number Nellcor Oxisensor II Compat- Date of Manufacture ible UL recognized component in Canada and United States Nell- Novametrix Compatible cor OxiMax Compatible Nellcor OxiMax Compatible Spacelabs TruLink Compatible Masimo SET Compatible Nellcor OxiMax Compatible 90207/90217 Operations Manual...
- Page 31 Appendix A Symbols 1 – 32 Access Codes 1 Through 32 ANT 1 Diversity Antenna System 1 Arr1 Arrhythmia Net 1 ANT 2 Diversity Antenna System 2 ArrNet2 Arrhythmia Net 2 EEG, EMG, or ECG Channel ECG Channels – CH1, CH2, Centimeters of Water CH3, CH4 EMG Channel –...
- Page 32 90207/90217 Operations Manual...
- Page 33 070-0137-03 Rev.L...
- Page 34 4-10 90207/90217 Operations Manual...
Need help?
Do you have a question about the 90207 and is the answer not in the manual?
Questions and answers
My monitor keeps saying error 20