Table of Contents
Advertisement
Advertisement
Chapters
Table of Contents

Related Manuals for Renault TWIZY Z.E.


Summary of Contents for Renault TWIZY Z.E.
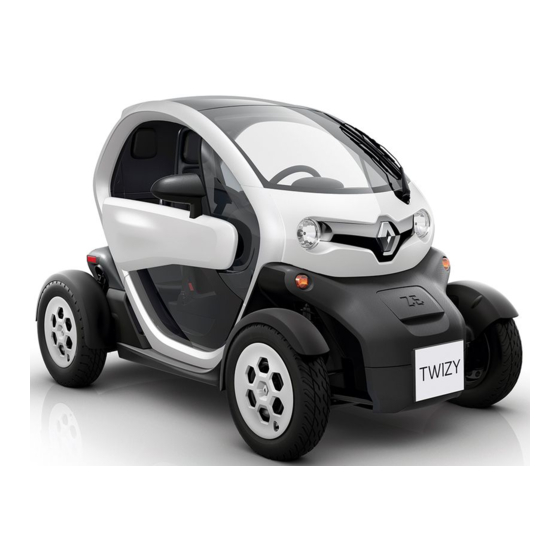
- Page 1 TWIZY Z.E. DRIVER’S HANDBOOK...
- Page 2 This handbook may also contain information about items of equipment to be introduced later in the model year. Throughout the manual, the “approved Dealer” is your RENAULT Dealer. Enjoy driving your new vehicle.
-
Page 4: Table Of Contents
Sections Getting to know your vehicle ....... Driving ..............Your comfort ............Maintenance ............Practical advice ............ Technical specifications ........Alphabetical index .......... -
Page 6: Getting To Know Your Vehicle
Section 1: Getting to know your vehicle Electric vehicle: introduction ............Important recommendations . -
Page 7: Electric Vehicle: Introduction
electric vehicle: introduction (1/4) 1 Charging cord 2 Electric motor 3 Orange electrical power cables 4 Traction battery 5 12 volt battery... - Page 8 electric vehicle: introduction (2/4) Batteries 12 volt battery Electric vehicles have specific features. We therefore recommend that you read The second battery on your vehicle is Your electric vehicle has two types of these instructions describing your elec- a 12V battery: this supplies the energy battery: tric vehicle carefully.
- Page 9 electric vehicle: introduction (3/4) “58 volt” electrical circuit The electrical circuit can be recognised by the orange cables and by the ele- ṑ ments signalled using the symbol. The vehicle drive system in an electric vehicle uses a direct voltage of ap- proximately 58 volts.
- Page 10 electric vehicle: introduction (4/4) Driving Noise For safety reasons, adapt When you lift your foot off the accelera- Electric vehicles are particularly quiet. your driving to driving condi- tor pedal, the motor generates electri- You will not yet necessarily be used to tions and avoid any sudden cal current during deceleration, and this it, and neither will other road users.
-
Page 11: Important Recommendations
importANt recommeNDAtioNS Please read these instructions carefully. Failure to follow these instructions may lead to a risk of fire, burns or elec- tric shock and serious injury. in the event of an accident or impact to the vehicle In the event of an accident or an impact to the underside of the vehicle (e.g.: striking a post, raised kerb or other street furni- ture), this may damage the electrical circuit or the traction battery. -
Page 12: Electric Vehicle: Charging
electric vehicle: charging (1/5) charging schematic diagram 1 Wall socket or, depending on the ve- hicle, charging terminal 2 Charging cord If you have any questions regarding the equipment needed for charging, please ask an authorised dealer. - Page 13 electric vehicle: charging (2/5) important recommendations for charging your vehicle Please read these instructions carefully. Failure to follow these instructions may lead to a risk of fire, burns or elec- tric shock and serious injury. installations on domestic sockets Have a qualified professional check that each socket you intend to use with the charging cord complies with the standards and regulations in force in your country, and especially that they have: –...
- Page 14 electric vehicle: charging (3/5) Wear to the charging cord Avoid charging and parking your ve- hicle in extreme temperatures (hot or protective sleeve. cold). When the outdoor temperature is lower The charging cord must be than approximately -15°C, the traction replaced in the event that battery charging time may be longer.
- Page 15 electric vehicle: charging (4/5) recharging the traction When charging, the following informa- tion is displayed: It is not necessary to wait: battery – until you reach reserve levels in Ignition switched off: – warning light 4. This flashes to indi- order to recharge your vehicle;...
- Page 16 electric vehicle: charging (5/5) precautions to take when removing from the socket – Unplug the cord from the power supply by pulling out the plug. The instrument panel goes out; – reposition the cord 2 correctly in the front storage compartment. Depending on the vehicle, place the end of the plug in its housing or the cord connector facing down;...
-
Page 17: Key
replacement, requirements for additional keys If you lose your key or require an- other, you can obtain one exclu- sively from an authorised dealer. A Coded ignition-starter key, locking/ unlocking storage compartments. Driver’s responsibility Never leave your vehi- cle with the key inside and never leave a child (or a pet) unsupervised, even for a short while. -
Page 18: Opening And Closing The Doors
opeNiNg AND cloSiNg the DoorS Driver’s responsibility For safety reasons: opening from inside or when parking or stopping – Do not press on the door the vehicle outside while it is open when there Never leave an animal, is another occupant of the Lift handle 1 and pull upwards. -
Page 19: Engine Immobiliser System
eNgiNe immoBiliSer this prevents the vehicle being vehicle protection tell-tale light driven by anyone not in possession After the ignition has been switched off, of the vehicle’s coded ignition key. warning light 1 flashes and the vehicle The vehicle is automatically protected is protected. -
Page 20: Front Seat
FroNt SeAt Access to the rear seats Lift strap 2 and slide the driver’s seat forwards. To replace the seat in the driving posi- tion, pull strap 2 towards the rear of the vehicle until you get to the desired po- sition. -
Page 21: Seat Belts
SeAt BeltS (1/3) For safety reasons, always wear your seat belt when travelling in your vehi- cle. You must also comply with the leg- islation of your country. Before starting, first adjust your driv- ing position, then ask all occupants to adjust their seat belts to ensure optimum protection. - Page 22 SeAt BeltS (2/3) Unfastening Press button 6 and the seat belt will be rewound by the inertia reel. Guide the belt into position. locking Adjusting the seat belts Unwind the belt slowly and smoothly Sit with your back firmly against the and ensure that buckle 5 locks into seatback.
- Page 23 SeAt BeltS (3/3) – No modification may be made to the component parts of the originally fitted restraint system: belts, seats and their mountings. For special operations (e.g.: fitting booster seats), please contact an authorised dealer. – Do not use devices which allow any slack in the belts (e.g. clothes pegs, clips, etc.): a seat belt which is worn too loosely may cause injury in the event of an accident.
-
Page 24: Methods Of Restraint In Addition To The Front Seat Belts
methoDS oF reStrAiNt iN ADDitioN to the FroNt SeAt BeltS (1/3) These are made up of: – Have the entire restraint – a side support belt; system checked following an accident. – chest force limiters; – No operation whatsoever – the driver’s airbag. is permitted on any part of the These systems are designed to act in- system (airbags, electronic con-... - Page 25 methoDS oF reStrAiNt iN ADDitioN to the FroNt SeAt BeltS (2/3) Side support belt Airbag Please see the information on “Seat This is fitted in the front seats. belts” in Section 1. An Airbag marking on the steering wheel informs you of the presence of load limiter this equipment.
- Page 26 methoDS oF reStrAiNt iN ADDitioN to the FroNt SeAt BeltS (3/3) All of the warnings below are given so that the air bag is not obstructed in any way when it is inflated and also to prevent the risk of serious in- juries caused by items which may be dislodged when the air bag inflates.
-
Page 27: Additional Methods Of Restraint
ADDitioNAl methoDS oF reStrAiNt All of the warnings below are given so that the air bag is not obstructed in any way when it is inflated and also to prevent the risk of serious injuries caused by items which may be dislodged when the air bag inflates. The air bag is designed to complement the action of the seat belt. -
Page 28: Child Safety: General Information
chilD SAFety: general information (1/2) carrying children Children, and adults, must be correctly seated and strapped in for all journeys. The children being carried in your vehi- cle are your responsibility. A child is not a miniature adult. Children are at risk of specific injuries as their muscles and bones have not yet fin- ished growing. - Page 29 chilD SAFety: general information (2/2) Set a good example by always fas- only a booster seat should be used. tening your seat belt and teaching The level of protection offered by the your child: booster seat depends on its ability to –...
-
Page 30: Attaching A Booster Seat
chilD SAFety: attaching a booster seat Attachment via the seat belt Do not use the booster seat The seat belt must be adjusted to if it risks loosening the seat ensure that it is effective in the event of belt restraining it: the base harsh braking or an impact. -
Page 31: Installing A Booster Seat
chilD SAFety: installing a booster seat (1/3) in the rear seat For child safety, move the front seat as far forward as possible to install a booster seat, then move it back as far as it will go, without allowing it to come into contact with the child. - Page 32 chilD SAFety: installing a booster seat (2/3) ² Seat not suitable for fitting child seats. Seat which only allows a stand- ardised “Universal” booster seat to be installed using a seat belt. Using a child safety system which is not approved for this vehicle will not correctly protect the baby or child.
- Page 33 chilD SAFety: installing a booster seat (3/3) the table below summarises the information already shown on the diagram on the previous page, to ensure the regula- tions in force are respected. type of child seat Weight of the child rear seat carrycot fitted across the vehicle <...
-
Page 34: Driving Position
DriviNg poSitioN the equipment fitted, described below, DepeNDS oN the verSioN AND coUNtry. 7 and 12 door mirrors To adjust the mirrors, press on the mirror. 8 Key ignition switch. 9 Handbrake. 10 Controls for: – forward gear, – neutral, –... -
Page 35: Warning Lights
WArNiNg lightS (1/3) the presence and operation of the warning lights DepeND oN the eQUipmeNt AND coUNtry. å Side light tell-tale light Air bag warning light This comes on when the igni- á main beam headlight tell-tale tion is switched on and goes out after a light few seconds. - Page 36 WArNiNg lightS (2/3) the presence and operation of the warning lights DepeND oN the eQUipmeNt AND coUNtry. Ú Stop light 12 v battery charge warning ® This lights up when the ignition light ® is switched on and goes out as soon as If it comes on together with the the engine is started.
- Page 37 WArNiNg lightS (3/3) the presence and operation of the warning lights DepeND oN the eQUipmeNt AND coUNtry. low traction battery level warning light This comes on when the traction bat- tery charge level has reached the re- serve threshold. Please see the infor- mation on “Displays and indicators”...
-
Page 38: Displays And Indicators
DiSplAyS AND iNDicAtorS (1/2) the presence and operation of the display and indicators DepeNDS oN the level oF eQUipmeNt AND the coUNtry. immobilisation threshold imminent When the battery reaches less than 6% charge, a beep repeats every 20 sec- Ṏ onds and warning light flashes on and off. - Page 39 DiSplAyS AND iNDicAtorS (2/2) Forecast range display features – Sporty driving will strongly affect the forecast range value. Once you return to a calmer driving style, you will need to drive for several miles to return to an estimate that is closer to the real situation;...
-
Page 40: Clock
clocK – repeatedly press button 2 as neces- sary to adjust the hour; – press and hold button 2 to confirm the hours. The minute display flashes; – repeatedly press button 2 as neces- sary to adjust the minutes; – press and hold button 2 to confirm the minutes. -
Page 41: Audible And Visual Signals
AUDiBle AND viSUAl SigNAlS Direction indicators Move stalk 1 parallel to the steering wheel and in the direction you are going to turn it. When driving on the motorway, the steering wheel is not often turned enough to return the stalk automatically to 0. -
Page 42: Horn
horN Electric vehicles are particularly quiet. This system enables you to warn people of your presence – especially pedestrians and cyclists. Activating the system With the engine running, turn centre ṫ ring 1 on the stalk until the symbol faces mark 2. Deactivating the system Turn the centre ring 1 to position 0 again. -
Page 43: Exterior Lighting And Signals
eXterior lightiNg AND SigNAlS main beam headlights á With the dipped headlights lit, pull stalk A towards you. An indicator light on the instrument panel will come To return to the dipped headlights posi- tion, pull stalk A towards you again. Switching off the lights Return the stalk to its original position. -
Page 44: Windscreen Washer, Wiper
ScreeN WASher/Wiper When working on the vehi- cle, ensure that the wind- screen wiper stalk is in po- sition A (off). Risk of injury. Before any action involving the windscreen (washing the vehicle, de-icing, clean- ing the windscreen, etc.) return stalk 1 to position A (park). Risk of injury and/or damage. - Page 45 1.40...
- Page 46 Section 2: Driving (Advice on use relating to fuel economy and the environment) Starting, stopping the engine ............Handbrake .
-
Page 47: Starting, Stopping The Engine
StArting, StOpping the engine “Accessories” position A Stopping the engine No power-consuming device will oper- Bring the key to “Stop” position. Ṑ ate when the ignition is switched off. Warning light goes out. “On” position M The ignition is switched on: Start position D Starting the engine Turn the key to the D position and hold... - Page 48 geAr cOntrOl (1/2) Driving Press switch D, a beep will sound. While driving, press the accelerator pedal to achieve the desired speed. hill start When setting off on a slope, release the handbrake whilst pressing the brake pedal before pressing the accelerator pedal.
-
Page 49: Parking The Vehicle
geAr cOntrOl (2/2) temporary stop At a standstill and with the engine run- ning, when position D or r is engaged, Ṑ a beep will sound and warning light flashes until one of the following condi- tions is met: – brake pedal pressed; –... -
Page 50: Handbrake
hAnDbrAke to apply: Pull lever 1 upwards and make sure the vehicle is immobilised. Warning light 3 will come on on the instrument panel. handbrake Special conditions It is not possible to release the hand- to release: When stationary and de- brake when the 12 volt battery is dis- pending on the slope and/or With the ignition on, pressing on the... -
Page 51: Vehicle Range: Recommendations
Vehicle rAnge: recommendations (1/2) You have a certain amount of control over your vehicle’s range. A number of factors must be monitored for this: – speed and driving style; – type of road; – tyres; – electrical accessories and equip- ment;... -
Page 52: Vehicle Loading
Vehicle rAnge: recommendations (2/2) Use of electrical accessories and equipment In the event of freezing, manually de-ice the windscreen (using a scraper) to reduce usage of the de-icing/demist- ing function and to save energy. Please see the information on “Deicing, demisting the windscreen”... -
Page 53: Environment
enVirOnMent please make your own recycling Your vehicle has been designed with respect for the environment in mind for contribution towards Your vehicle is 85% recyclable and its entire service life: during production, protecting the environment 95% recoverable. use and at the end of its life. too. -
Page 54: Charge Meter
chArge Meter/ecO-cOnSUMptiOn charge meter eco-consumption (Éco ScorE) power recovery B This function shows the driver whether When driving, if you lift your foot off the The charge meter gives the driver a their driving style is suitable for an opti- accelerator pedal, the motor generates real-time view of the vehicle’s remain- mum vehicle range. - Page 55 2.10...
-
Page 56: Your Comfort
Section 3: Your comfort De-icing, demisting the windscreen ..........Passenger compartment storage space and fittings . - Page 57 Windscreen de-icing, demisting to exit this function de-icing or demisting Turn the end of stalk 1. Warning light 2 the windscreen goes out on the instrument panel. Demisting automatically stops approxi- With the engine running, turn the end of mately 10 seconds after it is activated.
- Page 58 Passenger comPartment storage/fittings (1/2) accessories socket 3 Located in the storage compartment 1, this is provided for connecting ac- cessories approved by the Technical Department with a maximum power of 65 watts (voltage of 12V). Left-hand storage right-hand storage compartment 1 compartment 4 To open, lift cover 2.
- Page 59 Passenger comPartment storage/fittings (2/2) storage 8 Located behind the rear seat back A. To unlock the seat back A, insert the ig- nition key in lock 7 and turn it. Unclip the seat back A. Lock 7 enables you to lock and nB: When replacing, make sure you unlock the rear passenger seat lock the seat back in place.
-
Page 60: Maintenance
Section 4: Maintenance Levels ............... . brake fluid . -
Page 61: Levels
LeveLs (1/2) Topping up After any operation on the hydraulic cir- cuit, a specialist must replace the fluid. Only use fluids approved by our Technical Department (and taken from a sealed container). Replacement intervals Refer to the Maintenance Service Booklet for your vehicle. Brake fluid level Level 3 It is normal for the level to drop as... -
Page 62: Windscreen Washer Reservoir
LeveLs (2/2) Use a pointed tool to adjust the height of the windscreen washer jets. Windscreen washer reservoir Topping up Open flap 5. Open cap 4 and fill until you see the liquid. Then close the cap. Liquid Screen wash product (product with an- tifreeze in winter). -
Page 63: Volt Battery
12 voLT BATTeRy (1/3) Replacement As this operation is complex, we advise you to contact an approved Dealer. The battery is a specific type, please ensure it is replaced with the same type. Consult an approved Access The charge status of the 12 volt bat- dealer. - Page 64 12 voLT BATTeRy (2/3) Special procedures may be required to charge some batteries. Contact your ap- proved dealer. Avoid all risk of sparks which may cause an immediate explosion, and charge the battery in a well-venti- lated area. Risk of serious injury. Label A Observe the indications on the battery: –...
- Page 65 12 voLT BATTeRy (3/3) Recharging the 12 volt Quick restart battery You can recharge the 12 volt battery by charging the traction battery for at It is difficult to access the 12 volt bat- least 15 minutes. The vehicle will start tery.
-
Page 66: Bodywork Maintenance
BodyWoRk MAINTeNANCe (1/2) A well-maintained vehicle will last – minor impacts – Scrape off mud or dirt without longer. It is therefore recommended to prewetting. You should take a minimum number of maintain the exterior of the vehicle reg- precautions in order to safeguard your –... - Page 67 BodyWoRk MAINTeNANCe (2/2) you should – Wash your car frequently, with the engine off, with cleaning products – Observe the vehicle stopping dis- recommended by our Technical tances when driving on gravelled Department (never use abrasive surfaces to prevent paint damage. products) and be sure to jet-rinse off: –...
-
Page 68: Interior Trim Maintenance
INTeRIoR TRIM MAINTeNANCe (1/2) Instrument panel glass and seat belts A well-maintained vehicle will last longer. It is therefore recommended to door deflector These must be kept clean. maintain the interior of the vehicle regu- (e.g.: instrument panel, clock, etc.) Use products selected by our Technical larly. - Page 69 INTeRIoR TRIM MAINTeNANCe (2/2) Removal/replacing removable equipment originally fitted in the vehicle If you have to remove detachable equipment to clean the passenger compartment, make sure you reinstall it properly and attach them using the original parts. With the vehicle stationary, ensure that nothing will impede driving (anything obstructing the pedals, etc.).
-
Page 70: Practical Advice
Section 5: Practical advice Tyres (tyre and wheel safety, use in winter) ......... . . Headlights (changing bulbs) . -
Page 71: Tyres (Tyre And Wheel Safety, Use In Winter)
Tyres (1/4) Tyre and wheel safety When the tread has worn down to the wear warning strips, these strips will The tyres are the only contact between become visible: it is then necessary the vehicle and the road, so it is essen- to replace your tyres because the tread tial to keep them in good condition. -
Page 72: Tyre Pressures
Tyres (2/4) Tyre pressures snow or Winter tyres If tyre pressures cannot be checked when the tyres are cold, the normal Respect the tyre pressures, checking We would recommend that these be pressures must be increased by 0.2 to them at least once a month and before fitted to all four wheels to ensure that 0.3 bar (or 3 PsI). - Page 73 Tyres (3/4) Fitting new tyres Due to the special design of this vehi- cle, please bear in mind the tyre speci- fications as indicated: For safety reasons, this op- A = Dimension, type and structure. eration must be carried out B = Brand by a specialist.
- Page 74 Tyres (4/4) Type of tyres Type of “snow” tyres Pressure (bar) 125/80 R13 65M 125/80 R13 65T TS800 Front wheels Conti.eContact ContiWinterContact 145/80 R13 75M 145/80 R13 75T TS800 Rear wheels Conti.eContact ContiWinterContact For safety reasons, the use of tyres other than those recommended by the man- ufacturer is prohibited.
-
Page 75: Headlights (Changing Bulbs)
FroNT heAdlIghTs: changing bulbs (1/2) Front lights – Turn bulb a quarter of a turn 4; Type of bulbs – and/or undo the bulb 5, then turn the 4 side light – Unclip upper bar 2 of the bonnet bulb holder a quarter turn. Bulb type: W5W. - Page 76 FroNT heAdlIghTs: replacing bulbs (2/2) Cleaning the headlights Use a soft cloth. If this does not clean it properly, moisten the cloth with soapy water then rinse off. Finally, carefully dry off with a soft dry cloth. Cleaning products containing alco- hol must not be used under any cir- cumstances.
-
Page 77: Rear Lights: Changing Bulbs
reAr lIghTs: changing bulbs (1/2) refitting To refit, proceed in the reverse order, taking care not to damage the wiring. reversing/side and brake side light and brake light 2 lights Bulb type: P21/5W. From inside the vehicle: reversing indicator light 3 –... -
Page 78: Direction Indicators
reAr lIghTs: changing bulbs (2/2) Number plate lights 5 direction indicators 6 – Unclip light 5 by pressing tab 4; Please see an authorised dealer. – remove the light cover to gain access to the bulb. Bulb type: W5W. The bulbs are under pres- sure and can break when replaced. -
Page 79: Fuses
FUses (1/2) Fuse box Tweezers 1 If any electrical component does not Disconnect the fuse using pliers 1. work, check the condition of the fuses. To remove the fuse from the tweezers, Apply the handbrake and unclip flap A. slide the fuse to the side. Check the fuse in question It is not advisable to use the free fuse and replace it, if neces-... - Page 80 FUses (2/2) Allocation of fuses (the presence of fuses dePeNds oN The eQUIPMeNT leVel oF The VehICle) symbol Allocation symbol Allocation Ṍ Circuit breaker Traction battery Ṟ Inverter Brake lights Left-hand dipped beam headlight STOP Charger Side light, left rear light Á...
-
Page 81: Accessories
ACCessorIes electrical and electronic accessories Before installing this type of accessory, make sure it is compatible with your vehicle. You can get advice from an au- thorised dealer. To install an accessory requiring intervention with the vehicle’s 12 V electrical circuit, please follow these instructions: –... -
Page 82: Wiper Blade
WIPer BlAde Check the condition of the wiper blades. How long they last depends on you: – clean the blades and the wind- screen regularly with soapy water; – do not use them when the wind- screen is dry; – free them from the windscreen when they have not been used for a long time. -
Page 83: Towing
ToWINg: towing point and choice of towing Choice of towing There are two ways to tow the vehicle, depending on the type of immobilisa- tion. In the event of an energy fault In the event of a fully discharged trac- tion battery. - Page 84 ToWINg: in the event of an energy fault Towing in the event of an Before towing, insert the key in the switch to unlock the steering column. energy fault Turn key to position M. In the event of the full discharge of The steering column is unlocked, power the traction battery, the vehicle can be is supplied to the accessory functions:...
- Page 85 ToWINg : breakdown recovery Breakdown recovery Before breakdown recovery, insert the key in the ignition to unlock the steer- Breakdown recovery must be per- ing column. formed on a flat surface under all cir- The regulations in force for breakdown cumstances except where the vehicle recovery must always be observed.
-
Page 86: Operating Faults
oPerATINg FAUlTs (1/3) The following advice will enable you to carry out quick, temporary repairs. For safety reasons you should always contact an approved dealer as soon as possible. FAUlTs PossIBle CAUses WhAT To do Impossible to charge the No electrical current in domes- Check your installation (circuit breaker, programmer, traction battery. - Page 87 oPerATINg FAUlTs (2/3) electrical equipment PossIBle CAUses ACTIoN reQUIred The wipers do not work. Wiper blade stuck. Free the blade before using the wipers. Broken windscreen wiper fuse. Consult an approved dealer. Motor fault. Consult an approved dealer. The wiper does not stop. Faulty electrical controls.
- Page 88 oPerATINg FAUlTs (3/3) electrical equipment PossIBle CAUses ACTIoN reQUIred The headlights Only one: – blown bulb, Replace the bulb. are not working. – disconnected wire or incorrectly- Check and reconnect the wire or the connector. positioned connector, – faulty earth connection. See above.
- Page 89 5.20...
-
Page 90: Technical Specifications
Section 6: Technical specifications Vehicle identification plates ............Engine identification plate . -
Page 91: Vehicle Identification Plates
Vehicle identification plates the information shown on the ve- hicle identification plate should be quoted on all correspondence or orders. Vehicle identification plate A 1 Vehicle type and chassis number. 2 Paint reference. -
Page 92: Engine Identification Plate
engine identification plate/engine specification engine specification please quote the information on the engine plate or label A in all corre- Engine type 1: 3CG spondence or orders. (Location varies depending on engine) 1 Engine type. 2 Engine suffix. 3 Engine number. -
Page 93: Weights
Weights (in kg) the weights shown are for a basic vehicle without options: they will vary depending on the equipment level of your ve- hicle. contact an authorised dealer. Vehicle type Twizy 45 Twizy Unladen weight excluding traction battery Mass in Running order (MRo) gross Vehicle Weight (gVW) Braked trailer Weight prohibited... -
Page 94: Dimensions
diMensions (in metres) 0,313 1,686 0,339 1,193 → 1,237 2,337 1,454* 1,188 → 1,232 1,381 → 1,396 Unladen... -
Page 95: Replacement Parts And Repairs
ReplaceMent paRts and RepaiRs Original parts are based on strict specifications and are subject to highly-specialised tests. Therefore, they are of at least the same level of quality as the parts fitted originally. If you always fit genuine replacement parts to your vehicle, you will ensure that it performs well. Furthermore, repairs carried out within the manufacturer’s Network using original parts are guaranteed according to the conditions set out on the reverse of the repair order. -
Page 96: Service Sheets
seRVice sheets (1/6) Vin: .................. Date: Miles (Km): Invoice number: Comments/miscellaneous type of operation: stamp Service □ ........□ anti-corrosion check: OK □ Not OK* □ *See specific page Date: Miles (Km): Invoice number: Comments/miscellaneous type of operation: stamp Service □... - Page 97 seRVice sheets (2/6) Vin: .................. Date: Miles (Km): Invoice number: Comments/miscellaneous type of operation: stamp Service □ ........□ anti-corrosion check: OK □ Not OK* □ *See specific page Date: Miles (Km): Invoice number: Comments/miscellaneous type of operation: stamp Service □...
- Page 98 seRVice sheets (3/6) Vin: .................. Date: Miles (Km): Invoice number: Comments/miscellaneous type of operation: stamp Service □ ........□ anti-corrosion check: OK □ Not OK* □ *See specific page Date: Miles (Km): Invoice number: Comments/miscellaneous type of operation: stamp Service □...
- Page 99 seRVice sheets (4/6) Vin: .................. Date: Miles (Km): Invoice number: Comments/miscellaneous type of operation: stamp Service □ ........□ anti-corrosion check: OK □ Not OK* □ *See specific page Date: Miles (Km): Invoice number: Comments/miscellaneous type of operation: stamp Service □...
- Page 100 seRVice sheets (5/6) Vin: .................. Date: Miles (Km): Invoice number: Comments/miscellaneous type of operation: stamp Service □ ........□ anti-corrosion check: OK □ Not OK* □ *See specific page Date: Miles (Km): Invoice number: Comments/miscellaneous type of operation: stamp Service □...
- Page 101 seRVice sheets (6/6) Vin: .................. Date: Miles (Km): Invoice number: Comments/miscellaneous type of operation: stamp Service □ ........□ anti-corrosion check: OK □ Not OK* □ *See specific page Date: Miles (Km): Invoice number: Comments/miscellaneous type of operation: stamp Service □...
-
Page 102: Anticorrosion Check
anticoRRosion check (1/6) If the continuation of the warranty is subject to repair, it is indicated below. Vin: ............stamp Corrosion repair operation to be carried out: Date of repair: Repair to be carried out: stamp Date of repair: Repair to be carried out: stamp Date of repair: 6.13... - Page 103 anticoRRosion check (2/6) If the continuation of the warranty is subject to repair, it is indicated below. Vin: ............stamp Corrosion repair operation to be carried out: Date of repair: Repair to be carried out: stamp Date of repair: Repair to be carried out: stamp Date of repair: 6.14...
- Page 104 anticoRRosion check (3/6) If the continuation of the warranty is subject to repair, it is indicated below. Vin: ............stamp Corrosion repair operation to be carried out: Date of repair: Repair to be carried out: stamp Date of repair: Repair to be carried out: stamp Date of repair: 6.15...
- Page 105 anticoRRosion check (4/6) If the continuation of the warranty is subject to repair, it is indicated below. Vin: ............stamp Corrosion repair operation to be carried out: Date of repair: Repair to be carried out: stamp Date of repair: Repair to be carried out: stamp Date of repair: 6.16...
- Page 106 anticoRRosion check (5/6) If the continuation of the warranty is subject to repair, it is indicated below. Vin: ............stamp Corrosion repair operation to be carried out: Date of repair: Repair to be carried out: stamp Date of repair: Repair to be carried out: stamp Date of repair: 6.17...
- Page 107 anticoRRosion check (6/6) If the continuation of the warranty is subject to repair, it is indicated below. Vin: ............stamp Corrosion repair operation to be carried out: Date of repair: Repair to be carried out: stamp Date of repair: Repair to be carried out: stamp Date of repair: 6.18...
-
Page 108: Alphabetical Index
AlphAbeticAl index (1/3) accessories................ 5.12 dashboard................1.29 additional methods of restraint ......1.19 → 1.22 de-icing to the front seat belts ........1.19 → 1.21 windscreen ..............3.2 to the rear seat belts ........1.19 → 1.21 demisting adjusting your driving position ........... 1.16 windscreen ..............3.2 air bag..............1.19 → 1.22 display ..............1.30 → 1.34 anti-corrosion check ..........6.13 → 6.18 doors.................. - Page 109 AlphAbeticAl index (2/3) front lights front ............... 5.6 – 5.7 changing bulbs ............5.6 – 5.7 lights: front seat adjustment ............1.15 brake lights ............5.8 – 5.9 front seats dipped beam headlights ....... 1.38, 5.6 – 5.7 adjustment ............1.15 → 1.18 direction indicator lights ........5.6 – 5.7 with manual controls ............ 1.15 direction indicators ......1.30, 1.36, 5.6 → 5.8 fuses ...............
- Page 110 AlphAbeticAl index (3/3) washing ..............4.7 – 4.8 seat belt pretensioners ..........1.19 → 1.21 weights ................6.4 front seat belt ...........1.19 → 1.21 wheels (safety) ............5.2 → 5.5 seat belts ............1.16 → 1.22, 1.31 windscreen washer ............. 1.39, 4.3 service sheets............6.7 → 6.12 windscreen washer fluid ............4.2 signals and lights ............... 1.38 windscreen washer/wiper ..........1.39 starting .................
- Page 111 à999101613Rò î ò ä RENAULT S.A.S. SOCIÉTÉ PAR ACTIONS SIMPLIFIÉE AU CAPITAL DE 533 941 113 € / 13-15, QUAI LE GALLO 92100 BOULOGNE-BILLANCOURT R.C.S. NANTERRE 780 129 987 — SIRET 780 129 987 03591 / TÉL. : 0810 40 50 60...
Need help?
Do you have a question about the TWIZY Z.E. and is the answer not in the manual?
Questions and answers