Table of Contents
Advertisement
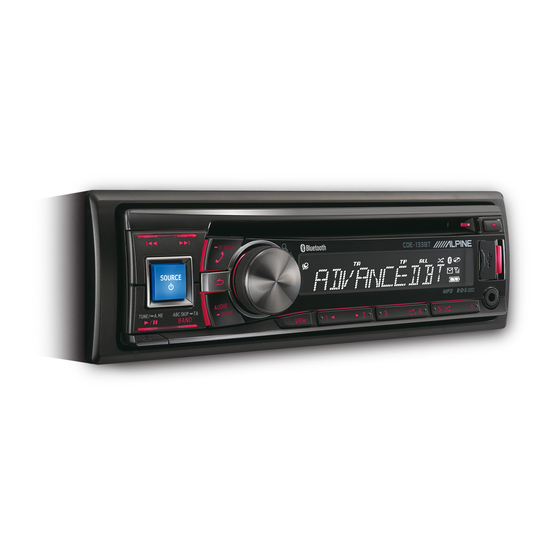
ADVANCED BLUETOOTH CD RECEIVER
ALPINE ELECTRONICS MARKETING, INC.
1-1-8 Nishi Gotanda,
Shinagawa-ku,
Tokyo 141-0031, Japan
Phone 03-5496-8231
ALPINE ELECTRONICS OF AMERICA, INC.
19145 Gramercy Place, Torrance,
California 90501, U.S.A.
Phone 1-800-ALPINE-1 (1-800-257-4631)
ALPINE ELECTRONICS OF CANADA, INC.
777 Supertest Road, Toronto,
Ontario M3J 2M9, Canada
Phone 1-800-ALPINE-1 (1-800-257-4631)
YAMAGATA (Wuxi) Co., Ltd.
Block 28-25, Changjiang Nanlu, WND, jiangsu, China
CDE-133EBT
• OWNER'S MANUAL
Please read before using this equipment.
ALPINE ELECTRONICS OF AUSTRALIA PTY. LTD.
161-165 Princes Highway, Hallam
Victoria 3803, Australia
Phone 03-8787-1200
ALPINE ELECTRONICS GmbH
Wilhelm-Wagenfeld-Str. 1-3, 80807 München, Germany
Phone 089-32 42 640
ALPINE ELECTRONICS OF U.K. LTD.
Alpine House
Fletchamstead Highway, Coventry CV4 9TW, U.K.
Phone 0870-33 33 763
ALPINE ELECTRONICS FRANCE S.A.R.L.
(RCS PONTOISE B 338 101 280)
98, Rue de la Belle Etoile, Z.I. Paris Nord Il,
B.P. 50016, 95945 Roissy Charles de Gaulle
Cedex, France
Phone 01-48638989
R
ALPINE ITALIA S.p.A.
Viale C. Colombo 8, 20090 Trezzano
Sul Naviglio (MI), Italy
Phone 02-484781
ALPINE ELECTRONICS DE ESPAÑA, S.A.
Portal de Gamarra 36, Pabellón, 32
01013 Vitoria (Alava)-APDO 133, Spain
Phone 945-283588
ALPINE ELECTRONICS (BENELUX) GmbH
Leuvensesteenweg 510-B6,
1930 Zaventem, Belgium
Phone 02-725-13 15
Designed by ALPINE Japan
Printed in China (Y)
68-21627Z15-A
EN
Advertisement
Table of Contents

Related Manuals for Alpine CDE-133EBT


Summary of Contents for Alpine CDE-133EBT
- Page 1 ADVANCED BLUETOOTH CD RECEIVER CDE-133EBT • OWNER’S MANUAL Please read before using this equipment. ALPINE ELECTRONICS MARKETING, INC. ALPINE ELECTRONICS OF AUSTRALIA PTY. LTD. ALPINE ITALIA S.p.A. 1-1-8 Nishi Gotanda, 161-165 Princes Highway, Hallam Viale C. Colombo 8, 20090 Trezzano...
-
Page 3: Table Of Contents
Contents ENGLISH Adjusting the Parametric Equalizer Curve Operating Instructions (3BAND EQ).............12 Setting the Bass Control ..........12 WARNING Setting the Mid Control ...........12 Setting the Treble Control........12 WARNING ............3 Setting the Source Volume Level....13 CAUTION ............3 Adjusting the High Pass Filter ......13 PRECAUTIONS .......... - Page 4 ENGLISH Contents iPod/iPhone (optional) Setting the BLUETOOTH sound quality..19 Adjusting the volume (VOL LV ADJ)....19 Connecting an iPod/iPhone........25 Sound Auto setting (AUTO SET)......19 Setting the iPod Control.........25 Setting the caller information display/ Playback ...............25 text message indicator ON/OFF ..... 19 Setting text message indicator ON/OFF Searching for a desired Song .......26 (MSG ALERT) ..............20...
-
Page 5: Operating Instructions
If you have problems, do not attempt to repair the unit yourself. result in re, etc. Return it to your Alpine dealer or the nearest Alpine Service Station for servicing. KEEP SMALL OBJECTS SUCH AS BATTERIES OUT OF THE REACH OF CHILDREN. - Page 6 We insert the disc again. recommend not using these accessories on discs played in Alpine CD players. Centre Hole Centre Hole...
- Page 7 (i.e. revenue-generation) Alpine accepts no responsibility for lost data, etc., even if data, real time broadcasting (terrestrial, satellite, cable and/or any other etc., is lost while using this product.
-
Page 8: Getting Started
Press at the lower left side until the front panel pops Getting Started out. Grasp the left side of the front panel and pull it out. SOURCE/ Rotary encoder ENTER Notes • e front panel may become hot in normal usage (especially the connector terminals on the back of the front panel). -
Page 9: Adjusting Volume
Controllable with Remote Control Press or to tune in the desired station. This unit can be controlled with an optional Alpine remote control. For details, consult your Alpine dealer. Point the optional remote Holding down or will change the frequency control transmitter at the remote-control sensor. -
Page 10: Presetting Stations Automatically
CD/MP3/WMA Presetting Stations Automatically Press BAND repeatedly until the desired radio band is displayed. SOURCE/ Rotary encoder Press and hold TUNEA.ME for at least 2 seconds. /ENTER The frequency on the display continues to change while the automatic memory is in progress. -
Page 11: Repeat Play
Repeat Play Folder/File Name Search (concerning MP3/ WMA) Press The song is played back repeatedly. Folder and le names may be searched and displayed during playback. (o ) Folder Name Search mode *1 Only a track/ le is repeatedly played back. *2 Only les in a folder are repeatedly played back. -
Page 12: About Mp3/Wma
This device also can play back discs in Joliet, Romeo, etc., and other About MP3/WMA standards that conform to ISO9660. However, sometimes the le names, folder names, etc., are not displayed correctly. Formats supported CAUTION This device supports CD-ROM XA, Mixed Mode CD, Enhanced CD Except for private use, duplicating audio data (including MP3/ (CD-Extra) and Multi-Session. -
Page 13: Sound Setting
Sound Setting Audio Setup You can exibly customize the unit to suit your own preference and usage. From the AUDIO SETUP menu, Audio Setting can be modi ed. Rotary encoder /ENTER Use steps 1 to 5 to select one of the setting modes to modify. See the applicable section below for details about the selected setting item. -
Page 14: Adjusting The Parametric Equalizer Curve (3Band Eq)
Setting the Mid Bandwidth (WIDTH (Q)) Adjusting the Parametric Equalizer Curve (3BAND EQ) Turn the Rotary encoder to select the desired Mid bandwidth. You can modify the Equalizer settings to create a response curve more WIDE 0.75 MEDIUM 1.00 MEDIUM 1.25 NARROW 1.50 appealing to your personal taste. -
Page 15: Setting The Source Volume Level
Setting the Source Volume Level Setting the Subwoofer System e output level of each source is individually adjustable. For example, if When the subwoofer is on, you can select either SYS 1 or SYS 2 for the the TUNER level sounds lower than CD, its output can be adjusted desired subwoofer e ect. -
Page 16: Other Functions
Indicator/ MP3/WMA iPod/iPhone/BT Other Functions CD Mode Mode Mode AUDIO Mode Artist Name Artist Name — being displayed being displayed Text (Disc Album Name Album Name SOURCE/ Name ) being being displayed being displayed Rotary encoder displayed ENTER/OPTION ... -
Page 17: Option Menu Setting
*10 While calling, and the Voice Mute is activated, the microphone Option Menu Setting input will mute instantly and “VOICE MUTE” will blink. operation can also be done by pressing . Refer to “Muting the microphone input quickly (Voice Mute)” on page 23. You can quickly adjust the setting items relevant to the current SOURCE *11 If there is a waiting call, select this item to display the caller’s by using Option Menu. -
Page 18: Setup
General Setting SETUP GENERAL is selected on the setup main menu in step 2. Setting the AUX SETUP Mode SOURCE/ Rotary encoder You can input the audio of an external device, (such as a Portable audio ENTER player) to the AUX connector of this unit. ... -
Page 19: Display Setting
Setting contents: • When you search this unit using the BLUETOOTH compatible phone, OFF / ON the unit name is displayed as “Alpine CD Receiver” model name. Notes Before Using BLUETOOTH Function • When the search mode is in Playlists/Artists/Albums/Podcasts/Genres/... -
Page 20: Pairing A Bluetooth Compatible Device With Ssp (Secure Simple Pairing)
Using your BLUETOOTH compatible device, select the FW VERSION FW UPDATE “Alpine CD Receiver” for pairing. e items are not displayed during a phone call. e items are not displayed when “HFP” is set to OFF. Refer Turn the Rotary encoder to change the head unit display to “Setting the BLUETOOTH Connection (BT IN)”... -
Page 21: Setting The Visible Mode
Turn the Rotary encoder to select “CONNECT” to connect Setting the BLUETOOTH sound quality the selected device. The connected device is marked with “ ”. Select “DISCONNECT” You can exibly customize the sound of call to t your own preferences. to disconnect this device. -
Page 22: Setting Text Message Indicator On/Off (Msg Alert)
Setting contents: For information to update your BLUETOOTH rmware, please visit FIRST NAME (Initial setting) / LAST NAME Alpine Asia home page (http://www.alpine-asia.com). Note • “WAITING” will be displayed while the Phone book order is switching. Setting item: FW UPDATE You can quit the “WAITING”... -
Page 23: Answering A Call
• You can use Phone book alphabet search function to search a name or of printing. number from Phone Book. For details, refer to “Phone book alphabet Alpine reserves the right to change or modify any information or search function” on page 22. speci cations without notice or obligation. -
Page 24: Redialing A Number In Outgoing History
Redialing a Number In Outgoing History Turn the Rotary encoder to select the third letter (e.g. C), and then press ENTER. Previously dialled telephone numbers are stored in dialled calls history. The names stored in phone book which begin with “MIC” are You can redial a number by searching from dialled calls history. -
Page 25: Dialing The Preset Number
Dialing the preset number BLUETOOTH Audio Operation Press any one of the preset buttons (1 through 6) that has Audio information of a BLUETOOTH compatible mobile phone, a had a number stored in the phone mode. portable player, etc., is controllable/playable wirelessly from this unit. -
Page 26: Usb Memory (Optional)
Remove USB Memory USB Memory (optional) Carefully, pull out the USB Memory Device from the USB cable or the USB Port. SOURCE/ Close the cover of the USB Port. Notes • Change to a source other than the USB Memory mode, and then remove the USB Memory Device. -
Page 27: Ipod/Iphone (Optional)
iPod nano (4th generation): Ver.1.0.4 iPod/iPhone (optional) iPod classic (120 GB): Ver.2.0.1 iPod touch (1st generation): Ver.3.1.3 iPod nano (3rd generation): Ver.1.1.3 iPod classic (80 GB, 160 GB): Ver.1.1.2 iPod nano (2nd generation): Ver.1.1.3 SOURCE/ iPod with video: Ver.1.3 Rotary encoder ... -
Page 28: Searching For A Desired Song
• “NOAUDIOBOK” will be displayed if there is no Audiobook data in the Searching for a desired Song iPod/iPhone in AUDIOBOOK search mode. • If “iPod name” stored in the iPod/iPhone is selected in the desired Playlist search mode, and ENTER is pressed, you can search for all An iPod/iPhone can contain thousands of songs. -
Page 29: Select Playlist/Artist/Album/Genre/Composer
Select Playlist/Artist/Album/Genre/ Repeat Play Composer Only Repeat One is available for the iPod/iPhone. Playlist/Artist/Album/Genre/Composer can be easily changed. Repeat One: For example, if you listen to a song from a selected album, the album can A single song is repeatedly played back. be changed. -
Page 30: Information
– Remove the disc by following these steps: 1 hour). Press the button again for at least 2 seconds. If the disc still does not eject, consult your Alpine dealer. CD insertion not possible. • A CD is already in the CD player. -
Page 31: Indication For Usb Memory
(refer to “Initial System Start-Up” on page 6) and press again. – Try another USB Memory, if available. If the disc still cannot be ejected, consult your Alpine dealer. Indication for iPod Mode • A copy-protected WMA le was played back. -
Page 32: Speci Cations
GENERAL Speci cations Power Requirement 14.4 V DC (11~16 V allowable) Maximum Power Output 50 W × 4 FM TUNER SECTION Maximum Pre-Output Voltage 2 V/10 k ohms Tuning Range 87.5~108.0 MHz ± Mono Usable Sensitivity 9 dBf (0.8 µV/75 ohms) ±... -
Page 33: Installation And Connections
When connecting MAKE GROUND CONNECTIONS. the CDE-133EBT to the fuse box, make sure the fuse for the intended Bolts or nuts used for the brake or steering systems (or any other circuit of the CDE-133EBT has the appropriate amperage. -
Page 34: Installation
• For the screw marked “ ”, use an appropriate screw for the chosen mounting location. Slide the CDE-133EBT into the dashboard until it clicks. Caution This ensures that the unit is properly locked and will not When you install this unit in your car, do not remove the accidentally come out from the dashboard. -
Page 35: Connections
Connections Microphone (Blue) POWER ANT To power antenna (Blue/White) REMOTE TURN-ON (Pink/Black) AUDIO INTERRUPT IN Not used (Orange) ILLUMINATION To the instrument cluster illumination lead (Red) IGNITION Ignition Key (Yellow) BATTERY (Black) Battery (Grey) Speakers SPEAKER RIGHT FRONT Front Right (Grey/Black) (Violet/Black) SPEAKER... - Page 36 Connect this lead to the remote turn-on lead of your ampli er or • If you add an optional noise suppressor, connect it as far away signal processor. from the unit as possible. Your Alpine dealer carries various Audio Interrupt In Lead (Pink/Black) noise suppressors, contact them for further information.
- Page 37 About the Rules of Bluetooth Electromagnetic Radiation Regulation Thailand This telecommunication equipment conforms to NTC technical requirement.
Need help?
Do you have a question about the CDE-133EBT and is the answer not in the manual?
Questions and answers