Table of Contents
Advertisement
Advertisement
Table of Contents

Subscribe to Our Youtube Channel
Related Manuals for Prima LPR9000


Summary of Contents for Prima LPR9000
- Page 1 LPR9000 OPERATING AND INSTALLATION INSTRUCTIONS OF BUILT-IN OVEN...
- Page 2 Dear Customer, We aim to produce quality products that exceed your expectations. Each product is tested to ensure they are of the highest quality. Your manual is prepared in order to help you to use your appliance with confidence and maximum efficiency. Before you use your new appliance for the first time please read through this manual to understand the features and controls of this product.
- Page 3 CONTENTS 1- Presentation and size of product page 2 page 3 2- Warnings page 6 3- Preparation for installation and use page 10 4- Using the oven page 17 5- Cleaning and Maintenance of your product page 18 6- Service and Transport...
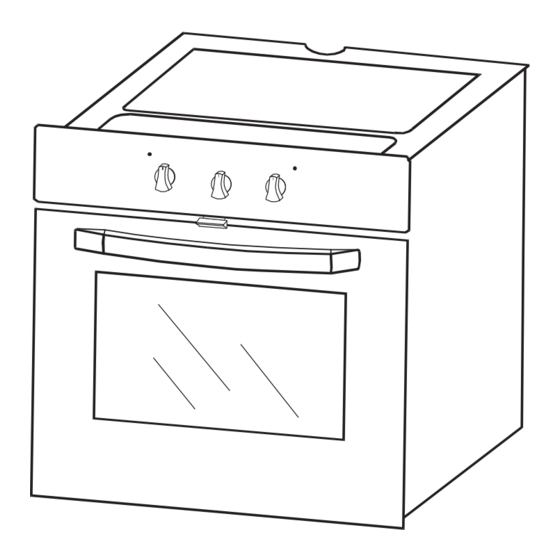
- Page 4 PART 1: PRESENTATION AND SIZE OF PRODUCT LIST OF COMPONENTS : 1- Control panel 8- Wire Grill 2- Handle 9- Racks 3- Oven Door 10- Oven Light 4- Child Lock 11- Turbo Heating Element(behind the plate) 5- Tray 12- Fan (behind the plate) 6- Lower Heating Element (behind the plate) 13- Air Outlet Shutters 7- Upper Heating Element (behind the plate)
- Page 5 PART 2: WARNINGS BEFORE STARTING TO USE THE APPLIANCE, PLEASE TAKE ALL ESSENTIAL SAFETY MEASURES AND THOROUGHLY READ THE USER MANUAL This appliance has been designed for domestic use as built-in furniture. After removing the packaging, make sure to check if there is any damage to the appliance. If there is any damage, never attempt to use the appliance and immediately contact your Authorized Service Agent.
- Page 6 During use the appliance becomes hot. Care should be taken to avoid touching heating elements inside the oven. WARNING: Accessible parts may become hot during use. Young children should be kept away This appliance is not intended for use by persons (including children) with reduced physical, sensory or mental capabilities, or lack of experience and knowledge, unless they have been given supervision or instruction concerning use of the appliance by a person responsible for their safety.
- Page 7 The values indicated on the printed documents found on the product are values obtained in laboratory environment according to relevant standarts. These values may vary according to the usage and environment conditions of product. WARNING: If the surface is cracked, switch off the appliance to avoid the possibility of electric shock.
- Page 8 PART 3: PREPARATION FOR INSTALLATION AND USE Manufactured with best quality parts and materials, this modern, functional and practical oven will meet your needs in all respects. Make sure to read the manual to obtain successful results and not to experience any problems in the future. The information given below contain rules that are necessary for correct positioning and service operations.
- Page 9 3.2. INSTALLATION OF BUILT IN OVEN Cabinet cut-out sizes Min 25mm You can use either cabinet 1 or cabinet 2 cut-out sizes A DETAIL Minimum 40mm(The wooden part can be extended up to cut-out depth) Wooden part Front frame B DETAIL Countertop Built-in hob Distance between...
- Page 10 The dimensions and material of the cabinet in which the oven will be installed must be correct and resistant to increases in temperature. In a correct installation, contact with electrical or insulated parts must be prevented. Insulating parts need to be fitted in a way to ensure that they cannot be removed by using any kind of tool.
- Page 11 3.3. WIRING AND SAFETY OF BUILT IN OVEN The instructions given below must be followed without fail during wiring : The earthing cable must be connected via the screw with the earthing mark. The supply cable connection must be as shown in Figure 2. If there is no earthed outlet conforming to regulations in the installation environment, call the Authorized Service Agent immediately.
- Page 12 PART 4: USING THE OVEN 4.1 CONTROL PANEL Built in Oven Oven Thermostat Knob Oven Function Control Knob Oven Thermostat Light Oven Operation Light Mechanic Timer 4.2. USING THE OVEN PART OF THE APPLIANCE FIGURE 3 Oven Function Control Knob: To select the desired cooking function, turn the knob to the related symbol(Figure 3).
- Page 13 4.3. USING THE OVEN FUNCTION CONTROL BUTTON TABLE 1 The oven light will be turned on. The oven light, the red warning light and the fan will be turned on. Performs the function of defrosting the frozen foods. The oven’s thermostat and warning lights, the fan and the turbo heater will be switched on.
- Page 14 Turbo Fan Function : The turbo fan function evenly disperses the heat in the oven. All foods on all racks will be cooked evenly. Adjust the thermostat knob to the desired degree. Turn the function knob so it will point to the Turbo function symbol.
- Page 15 Grill and Fan Function : Using the grill and fan together ensures complete cooking. For grills, put the food on the grill, and the grill on the highest rack. After placing the oven tray on the rack, you can start the grill operation.
- Page 16 4.4. USING THE MECHANIC TIMER FIGURE 6 Manual Operation : When you bring the Timer button to the position indicating M as shown on the picture, you can continuously run your oven. When the timer button is in 0 position the oven will not operate(Figure 6). FIGURE 7 Operating by adjusting the time : Rotate the timer button clockwise to a certain time range between 0...
- Page 17 4.5. ACCESSORIES USED IN THE OVEN There are many suitable containers for use in your oven and these are readily available at High Street retailers. Refer to the manufacturers guidance included with these products to ensure they are suitable. If small sized containers are used, place this container on the inner grill wire so it will be precisely on the middle of the wire.
- Page 18 Wire grid The wire grid is used to grill or to place different cookware on it. To locate the wire grid correctly in the cavity, put it on any rack and push fully onto the rack. Deep Tray The deep tray is used to cook stews. To locate the tray correctly in the cavity, put it on any rack and push fully onto the rack.
- Page 19 PART 5: CLEANING AND MAINTENANCE OF YOUR OVEN 5.1. CLEANING Before starting to clean your oven, be sure that all control buttons are off and your appliance is cooled off. Unplug the appliance. Do not use cleaning materials containing particles that might scratch the enamelled and painted parts of your oven.
- Page 20 PART 6: SERVICE AND TRANSPORT 6.1. TROUBLESHOOTING If the oven does not operate : The oven may be turned off, there has been a black out. On models fitted with a timer, the time may not be regulated. If the oven does not heat : Check the heat setting on the oven's heater control switch.
- Page 21 The symbol on the product or on its packaging indicates that this product may not be treated as household waste. Instead it shall be handed over to the applicable collection point for the recycling of electrical and electronic equipment. By ensuring this product is disposed of correctly, you will help prevent potential negative consequences for the environment and human health, which could otherwise be caused by inappropriate waste handling of this...
Need help?
Do you have a question about the LPR9000 and is the answer not in the manual?
Questions and answers