
Subscribe to Our Youtube Channel
Related Manuals for Spirit 16117400


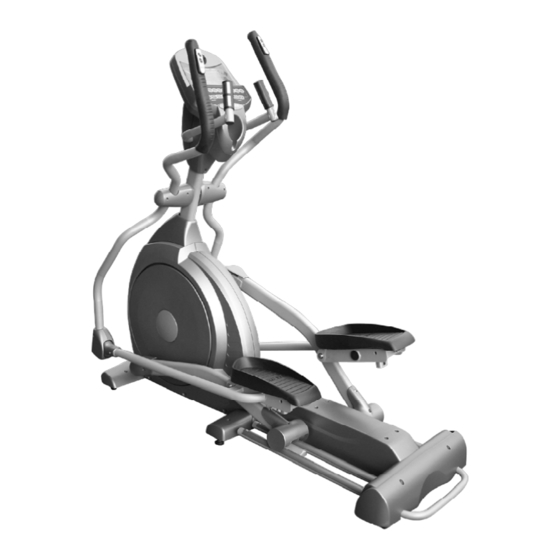
Summary of Contents for Spirit 16117400
- Page 1 OWNER’S MANUAL MODEL NO. 16117400 Assembly Operation Trouble –Shooting Parts Warranty CAUTION: You must read and understand this owner’s manual before operating unit.
-
Page 2: Table Of Contents
Manufacture’s One-Year Limited Warranty TABLE OF CONTENTS WARRANTY COMPUTER INSTRUCTIONS 14-26 SAFETY PRECAUTIONS PARTS LIST & DIAGRAM 27-31 ASSEMBLY INSTRUCTION 3-12 TRAINING GUIDELINE 32-34 TRANSPORTATION & LUBRICATION 13 STRETCHING 35-36 CUSTOMER SERVICE 1-888-707-1180 MAURICE PINCOFFS CANADA©2007... -
Page 3: Safety Precautions
SAFETY PRECAUTIONS Thank you for purchasing our product. Even though we go to great efforts to ensure the quality of each product we produce, occasional errors and /or omissions do occur. In any event should you find this product to have either a defective or a missing part please contact the manufacturer at 1-888- 707-1880 for a replacement. - Page 4 HARDWARE LIST Step 1 #100. 5/16" x 20x 1.5T #96. 3/8" x 19 x 1.5T #104. 3/8" x 23 x 2T Flat Washer (4 pcs) Flat Washer (2pcs) Curved Washer (2pcs) #128. 3/8" x 2T #85 M5x12m/m Phillips #89. 3/8" x 7T Spring Washer (1pc) Head Screw (4 pcs) Nylon Nut (2 pcs)
- Page 5 Step 2 #103.ψ17Wavy Washer (2 pcs) #99. 5/16" x 23 x 1.5T Flat Washer (2 pcs) #107.ψ3.5x12m/m #123. 5/6" x 15 m/m Self Tapping Screw (6 pcs) Hex Head Bolt (2 pcs) Step 3 #100. 5/16" x 20 x 1.5T Flat #91.
- Page 6 Tools #106. 13/14m/m Wrench (1 pc) #109. 12m/m Wrench (1 pcs) #129. 12m/m Wrench ( 2pcs) #124. 13/14m/m Wrench ( 1pc) CUSTOMER SERVICE 1-888-707-1180 MAURICE PINCOFFS CANADA©2007...
-
Page 7: Assembly Instruction
ASSEMBLY INSTRUCTION This manual is designed to help you easily assemble, adjust and use this machine. Please read this manual carefully. For the sake of familiarizing yourself with the parts identified in the instruction, first study the overview drawing. It will take two people to assemble your unit. Ensure all bolts are firmly tightened after each step. - Page 8 STEP 1 44 36 146-1 CUSTOMER SERVICE 1-888-707-1180 MAURICE PINCOFFS CANADA©2007...
- Page 9 STEP 2: Handlebar Assembling 1. Put one of ψ17 Wave Washer (103) and then Handlebars (L) and (R), (10) and (11), at each side of Console Mast shaft and secure with 2pcs of 5/16”x15mm Hex Head Bolts (123) and 2pcs of 5/16”x23x1.5T Flat Washers (99) by using 14mm Wrench (129). Connect Upper Resistance Handle Wire (146) and Upper Incline Handle Wire (146-1) with Lower Resistance Handle Wire (147) and Lower Incline Handle wire (147-1), push the excessive wires into the Console Mast (12) and Plug in the Wire Cap (145) at each...
- Page 10 STEP 3: Connecting Arm Assembling Untie the wire on the Fish-eye Bearing, connect the Handlebar (10) with Connecting Arm (8) and secure with 5/16”x1-1/4” Hex Head Bolt, Fish-eye Sleeve (22) 5/16”x20x1.5T Flat Washer (100) and 5/16”x7T Nyloc Nut (91) by using 13/14 mm Wrench (124) and 14 mm Wrench (129).
- Page 11 STEP 4:Plastic Parts Assembling 1. Match Connecting Arm Covers (L) and (R), (71) and (72), on Left Connecting Arm (8) and secure with 2pcs of M5x15mm Phillips Head Screws (82) and ψ3.5x12mm Self Tapping Screw (107) by using Short Phillips Head Screw Driver (125). Repeat for the other side.
- Page 12 STEP 4 73-2 961012PM1348 73-3 CUSTOMER SERVICE 1-888-707-1180 MAURICE PINCOFFS CANADA©2007...
- Page 13 Adjustment of Footpad Support Plates 1. Holding the footpad, pull the adjustment pin out from the footpad. 2. Raise the footpad to your desired angle. Suggestion Different angles of the footpad are for the users different heights. If the user is tall, we suggest to keep the footpad at a flatter angle. CUSTOMER SERVICE 1-888-707-1180 MAURICE PINCOFFS CANADA©2007...
- Page 14 Transportation elliptical is equipped with two transport wheels which are engaged when rear of the elliptical is lifted. LUBRICATION You must lubricate the rails every three months. Pour 2c.c of the lubricant under the middle of the rail. Note: If your exercise is not smooth or you hear noise lubricate the middle rail with the lubricant.
-
Page 15: Computer Instructions
COMPUTER OPERATION INSTRUCTIONS Data display Dot matrix Message window Program Buttons Power up The Elliptical is supplied with an external power supply. When power is connected to the Elliptical, the console will automatically power up. If there is no input to the console for 20 minutes the console will go to stand-by mode. - Page 16 Console Operation Quick Start This is the quickest way to start a workout. After the console powers up you just press the Start key to begin, this will initiate the Quick Start mode. In Quick Start the Time will count up from zero and the workload may be adjusted manually by pressing the Up or Down buttons.
- Page 17 Entering/Changing Settings When you enter a program, by pressing a program key, then enter key, you have the option of entering your own personal settings. If you want to workout without entering new settings then just press the Start key. This will bypass the programming of data and take you directly to the start of your workout.
- Page 18 3. You are now asked to enter your Weight. You may adjust the Weight number using the Up and Down keys or the numeric key pad, then press enter to continue. 4. Next is Time. You may adjust the Time and press enter to continue. 5.
- Page 19 Cardio The Cardio program is designed to increase your Cardio vascular function. This is, simply said, exercise for your heart and lungs. It will build up your heart muscle and increase blood flow and lung capacity. This is achieved by incorporating a higher level of exertion with slight fluctuations in work. To start the Cardio program follow the instructions below or just press the Cardio button then the Enter button and follow the directions in the message window.
- Page 20 9. During the Strength program you will be able to scroll through the data in the message window by pressing the Enter key. 10. When the program ends you may press Start to begin the same program again or Stop to exit the program or you can save the program you just completed as a custom user program by pressing a User key and following the instructions in the message window.
- Page 21 3. The message window will ask you to enter your Age. You may enter your Age, using the Up and Down keys or the numeric key pad, then press the Enter key to accept the new number and proceed on to the next screen.
- Page 22 PROFILE: Workload profile Manual Mode Strength Program Hill Program Interval Program Fatburn Program HR 1 Cardio Program HR 2 CUSTOMER SERVICE 1-888-707-1180 MAURICE PINCOFFS CANADA©2007...
- Page 23 PROFILE: Ramp CUSTOMER SERVICE 1-888-707-1180 MAURICE PINCOFFS CANADA©2007...
-
Page 24: Heart Rate Programs
Heart Rate programs Before we get started, a word about Heart Rate: The old motto, “no pain, no gain”, is a myth that has been overpowered by the benefits of exercising comfortably. A great deal of this success has been promoted by the use of heart rate monitors. With the proper use of a heart rate monitor, many people find that their usual choice of exercise intensity was either too high or too low and exercise is much more enjoyable by maintaining their heart rate in the desired benefit range. - Page 25 Rate of Perceived Exertion Heart rate is important but listening to your body also has a lot of advantages. There are more variables involved in how hard you should workout than just heart rate. Your stress level, physical health, emotional health, temperature, humidity, the time of day, the last time you ate and what you ate, all contribute to the intensity at which you should workout.
- Page 26 2. Adjust the strap as tightly as possible as long as the strap is not too tight to remain comfortable. 3. Position the transmitter with the Spirit logo centered in the middle of your body facing away from your chest (some people must position the transmitter slightly left of center). Attach the final end of the elastic strap by inserting the round end and, using the locking parts, secure the transmitter and strap around your chest.
- Page 27 Heart Rate Control Program 1 & 2 (HR 1, HR 2) operation Both programs operate the same, the only difference is that HR 1 is set to 60% and HR 2 is set to 80% of maximum heart rate. They both are programmed the same way. (When user play HRC program, the Ramp will no function.
-
Page 28: Parts List & Diagram
KEY NO. PART NO. DESCRIPTION O'TY 1740001 Main Frame 1740002 Incline Rail Assembly 1740003 Idler Wheel Assembly 1740004 Cross Bar 1740005 Pedal Arm Bushing Housing 1740006 Pedal Arm(L) 1740007 Pedal Arm(R) 1740008 Connecting Arm (L) 1740009 Connecting Arm (R) 1740010 Handle Bar (L) 1740011 Handle Bar (R) - Page 29 KEY NO. PART NO. DESCRIPTION O'TY 1740041 Gear Motor 1740042 Sensor W/Cable 1740043 Sensor Rack 1740044 Handpulse W/Cable Assembly 44~1 1740044-1 Handpulse Assembly Top 44~2 1740044-2 Handpulse Assembly Bottom 1740045 Power Cord 1740046 Transportation Wheel 1740047 Sliding Wheel , Urethane 48~1 1740048-1 3/8"...
- Page 30 KEY NO. PART NO. DESCRIPTION O'TY 1740079 5/16" x 1-1/4"_Hex Head Bolt 1740080 5/16" x 19m/m_Hex Head Bolt 1740081 5/16" x1- 3/4"_Button Head Socket Screw 1740082 M5 x 15m/m_Phillips Head Screw 1740083 1/4" x 3/4"_Hex Head Bolt 1740085 M5 x 10m/m_Phillips Head Screw ψ25 _C Ring 1740086 1740087...
- Page 31 KEY NO. PART NO. DESCRIPTION O'TY 17400124 13/14mm_Wrench 17400125 Short Phillips Head Screw Driver 17400126 Phillips Head Screw Driver 17400127 M8 x20_Carriage Bolt 17400128 3/8" x 2T_Split Washer 17400129 12mm_Wrench 17400132 Front Console Cover 17400133 Rear Console Cover ψ17x 23.5 x 1T_Flat Washer 17400134 17400135 Drink Bottle...
- Page 32 CUSTOMER SERVICE 1-888-707-1180 MAURICE PINCOFFS CANADA©2007...
-
Page 33: Training Guideline
TRAINING GUIDELINES Exercise Exercise is one of the most important factors in the overall health of an individual. Listed among its benefits are: Increased capacity for physical work (strength endurance) Increased cardiovascular (heart and arteries/veins) and respiratory efficiency Decreased risk of coronary heart disease Changes in body metabolism, e.g. - Page 34 Specificity Different forms of exercise produce different results. The type of exercise that is carried out is specific both to the muscle groups being used and to the energy source involved. There is little transfer of the effects of exercise, i.e. from strength training to cardiovascular fitness. That is why it is important to have an exercise program tailored to your specific needs.
- Page 35 Don’t push yourself too hard to reach the figures on this table. It can be very uncomfortable if you overdo it. Let it happen naturally as you work through your program. Remember, the target is a guide, not a rule, a little above or below is just fine. Two final comments:(1) don’t be concerned with day to day variations in your pulse rate, being under pressure or not enough sleep can affect it;(2) your pulse rate is a guide, don’t become a slave to it.
-
Page 36: Stretching
STRETCHING Stretching should be included in both your warm up and cool down, and should be performed after 3-5 minutes of low intensity aerobic activity or callisthenic type exercise. Movements should be performed slowly and smoothly, with no bouncing or jerking. Move into the stretch until slight tension, not pain, is felt in the muscle and hold for 20-30 seconds. - Page 37 INNER THIGH STRETCH TOUCHES Sit with the soles of your feet together with Slowly bend forward from your waist, letting your knees pointing outward. your back and shoulders relax as you stretch Pull your feet as close Into your groin as toward your toes.
Need help?
Do you have a question about the 16117400 and is the answer not in the manual?
Questions and answers