
Subscribe to Our Youtube Channel
Related Manuals for Spirit XE395ENT


Summary of Contents for Spirit XE395ENT
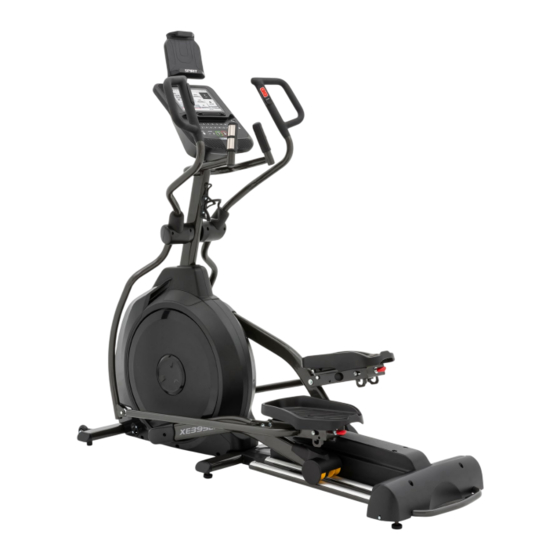
- Page 1 Owner’s Manual Modl No. 16607303950 XE395ENT - Assembly - Operation - Adjustments - Parts - Warranty CAUTION: Read and understand this manual before operating unit Retain For Future Reference...
-
Page 2: Table Of Contents
Important Operation Instructions ............6 Assembly Instructions ................. 7 Setting Up Your Elliptical ..............14 About Your Machine & Using the Spirit+ App ........15 Operation of Your Console ..............16 Programs Intro ..................21 Using A Heart Rate Transmitter ............28 Maintenance &... - Page 3 CONGRATULATIONS ON YOUR NEW ELLIPTICAL Thank you for your purchase of this quality elliptical from Dyaco Canada Inc. Your elliptical was manufactured by one of the leading fitness manufacturers in the world and is backed by one of the most comprehensive warranties available. Through your dealer, Dyaco Canada Inc. will do all we can to make your ownership experience as pleasant as possible for many years to come.
-
Page 4: Important Safety Instructions
Important Safety Instructions When using an electrical appliance, basic precautions should always be followed, including the following: WARNING - Read all instructions before using this appliance. DANGER - To reduce the risk of electric shock disconnect your elliptical from the electrical outlet prior to cleaning and/or service work. - Page 5 • Do not attempt to use your elliptical trainer for any purpose other than for the purpose it is intended. The hand pulse sensors are not medical devices. Their purpose is to provide you with an approximate measurement in relation to your target heart rate. Use of a chest transmitter strap is a much more accurate.
-
Page 6: Important Electrical Instructions
Important Electrical Instructions WARNING! Route the power cord away from any moving part of the unit including the transport wheels. NEVER remove any cover without first disconnecting AC power. If voltage varies by ten percent (10%) or more, the performance of your unit may be affected. Such conditions are not covered under your warranty. -
Page 7: Assembly Instructions
Assembly Instructions Pre-Assembly Using a razor knife (Box Cutter), cut the banding straps that wrap around the carton. Reach under the bottom edge of the carton and pull it away from the cardboard underneath, separating the staples that join the two together. Lift the box over the unit and unpack. Carefully remove all parts from carton and inspect for any damage or missing parts. - Page 8 Customer Service 1-888-707-1880 Dyaco Canada Inc. 2023 Email: customerservice@dyaco.ca...
- Page 9 STEP 1 Gather HARDWARE FOR STEP 1. Slide the INCLINE RAIL ASSEMBLY (2) into the U channel of the MAIN FRAME (1). Be very careful not to damage the wires that exit each part. 2. Connect the INCLINE RAIL ASSEMBLY (2) horizontally to the U channel of the MAIN FRAME (1) with 2 HEX HEAD BOLTS (104), 2 FLAT WASHERS (137), and 2 NYLON NUTS (130).
- Page 10 STEP 2 Gather HARDWARE FOR STEP 2. 1. Slide 2 WAVE WASHERS (196) onto each side of the Swing Arm Axle. Slide the LOWER SWING ARMS (10 LEFT,11 RIGHT) onto the axles and secure with the 2 BOLTS (184) and FLAT WASHERS (141). Do not force the Swing Arms onto the axle.
- Page 11 STEP 3 Gather HARDWARE FOR STEP 3. 1. Slide the RUBBER SLEEVE (162) onto the LEFT (16) and RIGHT (17) Upper Swing Arms. Make sure the wide part is at the bottom. 2. Attach the WIRE (55) from the RIGHT UPPER SWING ARM (17) to the WIRE (57) that exits the CONSOLE MAST TUBE (12).
- Page 12 Customer Service 1-888-707-1880 Dyaco Canada Inc. 2023 Email: customerservice@dyaco.ca...
- Page 13 STEP 4 Gather HARDWARE FOR STEP 4. 1. Fasten the 2 WHEEL COVERS (79 & 80) above the rollers with 4 PHILLIPS HEAD SCREWS (115). Tighten with the PHILLIPS HEAD SCREW DRIVER (157). 2. Plug the power cord into the machine and a grounded wall outlet. Turn the power switch on. Press the start button and elevate the incline to level Attach the COVER (85) to the mid-stabilizer tube with 2 PHILLIPS HEAD SCREWS (115).
-
Page 14: Setting Up Your Elliptical
Setting Up Your Elliptical Notice About Pedals The foot plates on your new elliptical have a pull-pin adjustment. This adjustment allows you to change the angle of the footpad to add variety to your workouts. The foot plates are spring loaded, and when the pull-pin is pulled, the foot plate can drop suddenly. -
Page 15: About Your Machine & Using The Spirit+ App
Downloading the Spirit+ app will help unlock more features- such as tracking workouts and sharing data via Google Fit and Apple Fitness. Simply search for “Spirit+” in the app store on your smartphone or tablet, or scan the QR code as below. -
Page 16: Operation Of Your Console
Operation of Your Console GETTING FAMILIAR WITH THE CONTROL PANEL Touchscreen Adjustable Fan Headphone Audio Jack USB Charging Direct Resistance Level & Incline Buttons Child Lock Powering On When the power cord is connected to the equipment, the console will automatically power up. Quick Start This is the quickest way to start a workout. - Page 17 FEATURES Basic Information The Stop button has several functions. Pressing the Stop key once during a program will pause the program for 5 minutes. If you need to get a drink, answer the phone or any of the many things that could interrupt your workout, this is a great feature.
- Page 18 Pulse Grip Feature The Pulse (Heart Rate) console window will display your current heart rate in beats per minute during the workout. You must use both stainless steel sensors on the front cross bar or the heart rate transmitter chest strap to display your pulse. Pulse value displays anytime the upper display is receiving a Pulse signal.
- Page 19 To link a SPIRIT+ account, scan the QR code on the console screen to download the mobile app first. Once the app is installed and the registration is complete, press “Link” on the bottom of the console screen, then open the QR code scanning camera in your SPIRIT+ app, and scan the QR code once again to link your local profile with the SPIRIT+ account.
- Page 20 TOUCHSCREEN OPERATION Media Tap on the right tab of the bottom panel to access the Media section. Choose from a variety of pre-installed third party Apps, or use the Mirroring function to cast the content from your smartphone directly to the console screen. For detailed instructions, press the ? icon. Once the content is on, use the floating panel for navigation and operating full screen mode.
-
Page 21: Programs Intro
PROGRAMS INTRO Workout Programs To access all available categories of programs, press “All Programs” on the Home screen. Once inside, switch between categories using the tabs on the top of the screen: Preset, Targets, Fitness Tests, Custom and Favorites. Tap on any of the program cards to open a Program Setup page, where you can learn more about the program, set properties of your workout, or keep browsing by pressing on the arrow... - Page 22 Program Level Hill Incline Level Fatburn Incline Level Cardio Incline Level Strength Incline Level HIIT Incline Fusion This program takes you through high and low intensity periods followed by strength exercises using free weights. The number of intervals, work and recovery time can all be customized for this program.
- Page 23 Heart rate, Time, Distance and Calories are “target” programs, that end when the target set before start is reached. Heart Rate program uses resistance to control your heart rate. The resistance level gradually increases until you reach your target heart rate, then adjusts automatically to keep you within 5 bpm of your goal.
- Page 24 Templates Templates are preset programs with a preserved set of parameters. Programs can be saved as templates upon completion, or you can create one from scratch in the Templates tab: tap on the “New Template” button, choose your base program, then save it with adjusted properties. A maximum of 12 template programs can be stored.
- Page 25 10 records can be stored locally on the console, but you can access your full workout history if you link your profile to the SPIRIT+ mobile app. Tap on the record preview to see the full summary. Each user can only see his or her workouts.
- Page 26 HEART RATE EXERTION Before we get started, a word about Heart Rate: The old motto, “no pain, no gain”, is a myth that has been overpowered by the benefits of exercising comfortably. A great deal of this success has been promoted by the use of heart rate monitors. With the proper use of a heart rate monitor, many people find that their usual choice of exercise intensity was either too high or too low and exercise is much more enjoyable by maintaining their heart rate in the desired benefit range.
- Page 27 HEART RATE - PERCEIVED EXERTION Heart rate is important but listening to your body also has a lot of advantages. There are more variables involved in how hard you should workout than just heart rate. Your stress level, physical health, emotional health, temperature, humidity, the time of day, the last time you ate and what you ate, all contribute to the intensity at which you should workout.
-
Page 28: Using A Heart Rate Transmitter
USING HEART RATE TRANSMITTER (OPTIONAL) How to wear your wireless chest strap transmitter: Attach the transmitter to the elastic strap using the locking parts. Adjust the strap as tightly as possible as long as the strap is not too tight to remain comfortable. Position the transmitter with the logo centered in the middle of your body facing away from your chest (some people must position the transmitter slightly left of center). -
Page 29: Maintenance & Care
Maintenance & Care 1. Wipe down all areas in the sweat path with a damp cloth after each workout. 2. If a squeak, thump, clicking or rough feeling develops the main cause is most likely one of two reasons: The hardware was not sufficiently tightened during assembly. All bolts that were installed during assembly need to be tightened as much as possible. -
Page 30: Exploded View Diagram
Exploded View Diagram Customer Service 1-888-707-1880 Dyaco Canada Inc. 2023 Email: customerservice@dyaco.ca... -
Page 31: Parts List
Parts List KEY NO. DESCRIPTION Q'TY Main Frame Inclinable Rail Assembly Cross Bar Bushing Housing, Pedal Arm Pedal Arm (L) Pedal Arm (R) Connecting Arm (L) Connecting Arm (R) Lower Handle Bar (L) Lower Handle Bar (R) Console Mast Idler Bracket Crank Axle Seat Handle Bar (L) Swing Arm (R) - Page 32 KEY NO. DESCRIPTION Q'TY Console Assembly 43-01 Console Top Cover 43-02 Console Bottom Cover 43-03 Deflector Fan Grill 43-04 Wind Duct (L) 43-05 Wind Duct (R) 43-06 Speaker Grill Anchor 43-07 Fan Grill Anchor 43-13 Console Display Board 43-14 Interface Board 43-15 Main Key Board 43-16...
- Page 33 KEY NO. DESCRIPTION Q'TY Upright Bushing Pedal (L) Pedel (R) Console Mast Cover(L) 72-01 Console Mast Cover(R) Chain Cover (L) Chain Cover (R) Round Disk Round Disk Cover Pedal Arm Cover (L) Pedal Arm Cover (R) Slide Wheel Cover (L) Slide Wheel Cover (R) Front Handle Bar Cover (L) Rear Handle Bar Cover (L)
- Page 34 KEY NO. DESCRIPTION Q'TY M5 × 15mm_Phillips Head Screw M5 × 10mm_Phillips Head Screw M5 × 10mm_Phillips Head Screw 5 × 19mm_Tapping Screw 3.5 × 12mm_Sheet Metal Screw 3.5 × 16mm_Sheet Metal Screw 5 × 16mm_Tapping Screw M6 × 10mm_Phillips Head Screw 3 ×...
- Page 35 KEY NO. DESCRIPTION Q'TY Ø8 × 23 × 1.5T_Curved Washer Switch Wire Cap Swing Arm Bushing Pedal Foam (L) Pedal Foam (R) Ø19 × Ø14 × Ø10 × (5+4)_Bushing Ø5 × Ø15 × 1.5T_Flat Washer M5 × 15mm_Flat Head Socket Screw Ø10_C Ring 3/8"...
- Page 36 KEY NO. DESCRIPTION Q'TY 200-16 M5 × 12mm_Phillips Head Screw 200-17 5/16" × 15mm_Hex Head Bolt Ø38 × Ø8.5 × 4T_Flat Washer Ø5/16" × Ø23 × 3T_Flat Washer 250mm_Connecting Wire (White) 250mm_Connecting Wire (Black) 300mm_Connecting Wire (White) 300mm_Connecting Wire (Black) 80mm_Connecting Wire (White) 80mm_Connecting Wire (Black) Filter...
-
Page 37: Manufacturer's Limited Warranty
MANUFACTURER’S LIMITED WARRANTY Dyaco Canada Inc. warrants all its elliptical parts for a period of time listed below, from the date of retail sale, as determined by a sales receipt. Dyaco Canada Inc.’s responsibilities include providing new or remanufactured parts at Dyaco Canada Inc.’s option and technical support to our independent dealers and servicing organizations. - Page 38 Please visit us online for information about our other brands and products manufactured and distributed by Dyaco Canada Inc. spiritfitness.ca solefitness.ca xterrafitness.ca dyaco.ca/products/everlast.html dyaco.ca/UFC/UFC-home.html spiritfitness.ca/johnnyg.html trainorsports.ca For more information, please contact Dyaco Canada Inc. T: 1-888-707-1880 ⏐ 5955 Don Murie St., Niagara Falls, Ontario L2G 0A9 ⏐ sales@dyaco.ca Customer Service 1-888-707-1880 Dyaco Canada Inc.
Need help?
Do you have a question about the XE395ENT and is the answer not in the manual?
Questions and answers