Sign In
Upload
Download
Table of Contents
Contents
Add to my manuals
Delete from my manuals
Share
URL of this page:
HTML Link:
Bookmark this page
Add
Manual will be automatically added to "My Manuals"
Print this page
×
Bookmark added
×
Added to my manuals
Manuals
Brands
Motorola Manuals
Cordless Telephone
C1201
User manual
Motorola C1201 User Manual
C12 series
Hide thumbs
1
2
3
Table Of Contents
4
5
6
7
8
9
10
11
12
13
14
15
16
17
18
19
20
21
22
23
24
25
26
27
28
29
30
31
32
33
34
35
36
37
38
39
40
41
42
43
44
page
of
44
Go
/
44
Contents
Table of Contents
Bookmarks
Table of Contents
Need Help
Table of Contents
1 Getting Started
Connecting the Base
Connecting the Handset and Charger
Handset Overview
2 Getting to Know Your Phone
Handset Lcd Display
Overview of the Base
Base Overview
Navigating the Menus
Menu Map
3 Using the Phone
Switch the Handset on / off
Calls
Make a Call
Preparatory Dialling
End a Call
Receive a Call
Adjust the Earpiece Volume
Mute
Intercom
Make an Internal Call
Receive an Internal Call
Transfer a Call
3-Way Conference Call
Hands-Free Speakerphone
Make a Hands-Free Call
Answer a Call Hands-Free
Switch to Hands-Free During a Call
Redial
View or Dial an Entry
Copy a Redial List Number to the Phonebook
Delete an Entry
Delete the Entire Redial List
Lock / Unlock the Keypad
Paging / Find Handset
4 Phonebook
Store a Name and Number
View or Dial an Entry
Edit a Name and Number
Delete an Entry
5 Handset Settings
Handset Ringer Volume
Handset Ringer Melody
Auto Answer
Handset Name
Language
Key Beep
Battery Low Warning Beep
Out of Range Warning Beep
Keypad Lock Using the Menu
6 Base Settings
Base Ringer Volume
Base Ringer Melody
Change Base PIN Code
Dial Mode
Recall Mode
Restore Default Settings
Emergency Default
Eco Mode
Default Settings
7 Clock & Alarm
Set the Date
Set the Time
Set Alarm
Switch off Alarm Ring
8 Caller ID and the Calls List
Caller ID
Calls List
View the Calls List
Dial a Number in the Calls List
Copy a Calls List Number to the Phonebook
Delete an Entry
Delete the Entire Calls List
9 Using Additional Handsets
Registering an Additional Handset
Register a Different Make of Handset to Your C12 Base
Select a Base
De-Register a Handset
10 Help
Handset Does Not Ring
11 General Information
Installation Guidelines
Battery Safety Instructions
Save These Instructions
Product Disposal Instructions
Consumer Products and Accessories Warranty
Technical Information
Connecting to a Switchboard
Advertisement
Quick Links
1
Connecting the Base
2
Handset Overview
3
Handset Lcd Display
Download this manual
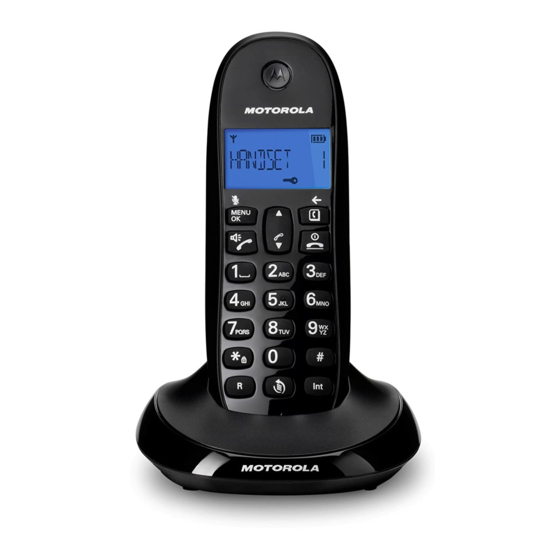
Digital Cordless Telephone
Motorola C12
For C1201, C1202, C1203 and C1204
.
Warning: Charge the handset for 24 hours before use
Table of
Contents
Previous
Page
Next
Page
1
2
3
4
5
Advertisement
Table of Contents
Need help?
Do you have a question about the C1201 and is the answer not in the manual?
Ask a question
Questions and answers
Related Manuals for Motorola C1201
Cordless Telephone Motorola C1001LB+ Manual
(2 pages)
Cordless Telephone Motorola C1202 User Manual
C12 series (44 pages)
Cordless Telephone Motorola C155 Motomanual
Gsm wireless phone (120 pages)
Cordless Telephone Motorola C155 Service Manual
Dual band wireless telephone (40 pages)
Cordless Telephone Motorola C168i Manual
(78 pages)
Cordless Telephone Motorola C1D User Manual
Digital cordless telephone (44 pages)
Cordless Telephone Motorola C1001LA User Manual
(42 pages)
Cordless Telephone Motorola C1 Manual
Digital cordless telephone with digital answering machine (52 pages)
Cordless Telephone Motorola C1001CB+ Quick Start Manual
(52 pages)
Cordless Telephone Motorola C1CB+ Manual
(44 pages)
Cordless Telephone Motorola C1CB Manual
(44 pages)
Cordless Telephone Motorola C1001CB Manual
(44 pages)
Cordless Telephone Motorola C1002CB Manual
(44 pages)
Cordless Telephone Motorola C1003CB Manual
(44 pages)
Cordless Telephone Motorola Motorola O201 User Manual
(52 pages)
Cordless Telephone Motorola CD301 User Manual
(48 pages)
This manual is also suitable for:
C1202
C1203
C1204
C1001
C1002
C1003
...
Show all
C1004
C12
Table of Contents
Print
Rename the bookmark
Delete bookmark?
Delete from my manuals?
Login
Sign In
OR
Sign in with Facebook
Sign in with Google
Upload manual
Upload from disk
Upload from URL


Need help?
Do you have a question about the C1201 and is the answer not in the manual?
Questions and answers