
Related Manuals for Avtech AVH306


Summary of Contents for Avtech AVH306
- Page 1 Multilingual Version English 中文 日本語 alarm shop Français Español Deutsch Italiano...
-
Page 2: User Manual
NETWORK VIDEO RECORDER SERIES User Manual alarm shop Please read instructions thoroughly before operation and retain it for future reference. Online manual download: www.surveillance-download.com/user/h306.swf h306_system_1.3... -
Page 3: Trademark Acknowledgements
IMPORTANT SAFEGUARD All lead-free products offered by the company comply with the requirements of the European law on the Restriction of Hazardous Substances (RoHS) directive, which means our manufacture processes and products are strictly “lead-free” and without the hazardous substances cited in the directive. The crossed-out wheeled bin mark symbolizes that within the European Union the product must be collected separately at the product end-of-life. - Page 4 MPEG4 Licensing THIS PRODUCT IS LICENSED UNDER THE MPEG4 VISUAL PATENT PORTFOLIO LICENSE FOR THE PERSONAL AND NON-COMMERCIAL USE OF A CONSUMER FOR (i) ENCODING VIDEO IN COMPLIANCE WITH THE MPEG4 VISUAL STANDARD (“MPEG-4 VIDEO”) AND/OR (ii) DECODING MPEG4 VIDEO THAT WAS ENCODED BY A CONSUMER ENGAGED IN A PERSONAL AND NON-COMMERCIAL ACTIVITY AND/OR WAS OBTAINED FROM A VIDEO PROVIDER LICENSED BY MPEG LA TO PROVIDE MPEG4 VIDEO.
-
Page 5: Table Of Contents
TABLE OF CONTENTS 1. HARDWARE OVERVIEW ........................1 1.1 Front Panel..............................1 1.2 Rear Panel ..............................1 2. CONNECTION............................ 2 2.1 Hard disk installation ..........................2 2.2 Camera IP Configurations by LAN ......................3 2.2.1 AUTO Mode..............................3 2.2.2 Static / DHCP Mode ............................5 3. - Page 6 6.4.7 RECORD................................29 6.4.8 NOTIFY ................................30 6.5 SCHEDULE SETTING ..........................32 6.5.1 RECORD................................32 6.5.2 EVENT ................................32 APPENDIX 1 MOBILE SURVEILLANCE VIA EAGLEEYES ..............33 A1.1 Prerequisites ............................33 A1.2 Where to download ..........................33 APPENDIX 2 COMPATIBLE USB FLASH DRIVE LIST ................ 34 APPENDIX 3 COMPATIBLE HARD DISK LIST ..................
-
Page 7: Hardware Overview
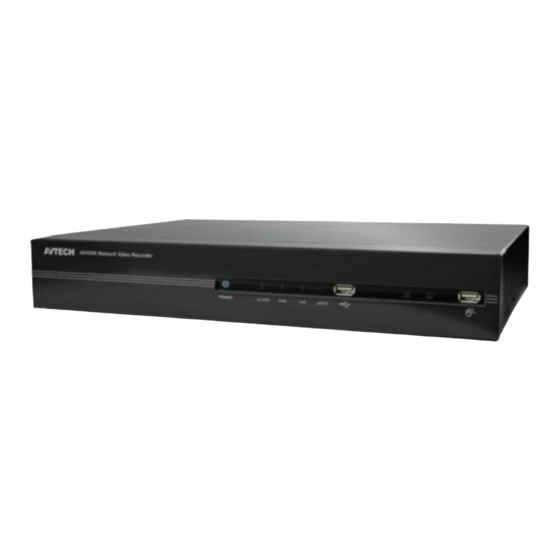
HARDWARE OVERVIEW 1. HARDWARE OVERVIEW 1.1 Front Panel POWER AL AR M L AN REC O RD 1) LED indicators The NVR is power-supplied. An alarm event occurs. The NVR is connected to Internet. The NVR is connected to LAN. RECORD Recording is on. -
Page 8: Connection
CONNECTION 2. CONNECTION 2.1 Hard disk installation Step1: Remove the top cover. Step2: Find the hark disk bracket in the NVR, and place the compatible hark disk in the bracket. Step3: With the PCB side facing up, connect the hard disk to the power connector and data connector. Step4: Fasten the hark disk with the supplied screws, two for each side. -
Page 9: Camera Ip Configurations By Lan
CONNECTION 2.2 Camera IP Configurations by LAN 2.2.1 AUTO Mode The connection mode of the LAN port is “AUTO” by default. This mode is suitable when the LAN port of the NVR is connected to a hub. Note: SETTING Path: ADVANCED CONFIG) ... - Page 10 CONNECTION The NVR will automatically configure the IP address of a camera connected by LAN if: The connected IP camera is our brand’s IP camera. The default IP configuration method of the camera is “DHCP”. The camera is powered on before the NVR is powered on. If the NVR doesn’t configure the IP address of your camera automatically as described above, your IP camera might NOT be: ...
-
Page 11: Static / Dhcp Mode
CONNECTION 2.2.2 Static / DHCP Mode Note: SETTING Path: ADVANCED CONFIG) NETWORK LAN MODE. When the LAN port of the NVR is connected to a router (not a hub), you can: Choose “Static” when you know the network segment of your router. For example, the IP address of your router of 192.168.0.1, and the network segment of your router will be 192.168.0.xx (xx is ranged from 2 ~ 254). -
Page 12: User Interface
USER INTERFACE 3. USER INTERFACE 3.1 Local alarm shop 3.1.1 NVR Status Key lock Key unlock Channel lock Channel unlock USB flash drive / device connected No USB device connected Timer record on Timer record off Overwrite on Overwrite off Sequence mode on Sequence mode off PTZ mode on... -
Page 13: Quick Operation
USER INTERFACE 3.1.3 Quick Operation For details, please refer to “5. QUICK OPERATION” at page 14. Click to show the power off panel to either halt or reboot the system. Click to show the channel switch panel and select the channel you want. Switch to the channel you want first, and click to enter the zoom-in mode. -
Page 14: Remote
USER INTERFACE 3.2 Remote alarm shop... -
Page 15: Frequently-Used Functions
FREQUENTLY-USED FUNCTIONS 4. FREQUENTLY-USED FUNCTIONS 4.1 Key Lock / Unlock To lock or unlock NVR local operation, click (unlock) or (lock) on the NVR status bar to change the status to (lock) or (unlock). To unlock NVR local operation, you’ll be prompted to enter the user level and password to access. Note: The default user level and password are both “admin”. -
Page 16: Ip Device Search
FREQUENTLY-USED FUNCTIONS 4.3 IP Device Search Note: This function is available only for “SUPERVISOR”. To know more details, please refer to “4.4 User Level Creation” at page 11. Click (IP Search) to start searching IP camera(s) connected in the same network segment as the NVR (i.e. 10.1.1.xx by default). -
Page 17: User Level Creation
FREQUENTLY-USED FUNCTIONS 4.4 User Level Creation Note: This function is available only for “SUPERVISOR”. To create different user account for different access privilege, click (SYSTEM), and select “ACCOUNT” to enter “USER LIST”. ADVANCED CONFIG ACCOUNT USER LIST TOOLS USER NAME LEVEL SYSTEM INFO admin... -
Page 18: Event Search
FREQUENTLY-USED FUNCTIONS Function User Level SUPERVISOR POWER NORMAL GUEST Playback control Fast Forward Fast Rewind Play / Pause Stop Slow Playback Previous / Next Hour Quick Search 4.5 Event Search Note: This function is not available for “NORMAL”... -
Page 19: Video Backup
FREQUENTLY-USED FUNCTIONS 4.6 Video Backup Note: This function is available for “SUPERVISOR”. For details, please refer to “4.4 User Level Creation” at page 11. Note: Before using the USB flash drive, please use your PC to format the USB flash drive to FAT32 format first. -
Page 20: Quick Operation
QUICK OPERATION 5. QUICK OPERATION 5.1 Power Switch Note: This function is available only for “SUPERVISOR”. To know more details, please refer to “4.4 User Level Creation” at page 11. To power off or reboot the NVR, you may: Turn the power switch ( ) directly on the NVR rear panel (refer to “1.2 Rear Panel”... -
Page 21: Ptz Control
QUICK OPERATION 5.4 PTZ Control Note: This function is available only for “SUPERVISOR” and “POWER USER”. To know more details, please refer to “4.4 User Level Creation” at page 11. Click on the quick menu bar to display the panel as follows: Click to enter the camera main menu. - Page 22 QUICK OPERATION To fix the camera IP address, or allow the NVR to assign an IP address to your IP camera, select “SETUP”, and select “STATIC IP “ or DHCP” for “NETWORK TYPE”. Click “APPLY” and “EXIT” to save your changes. SETUP NETWORK TYPE DHCP...
-
Page 23: Main Menu
MAIN MENU 6. MAIN MENU Note: This menu is available only for “SUPERVISOR”. To know more details, please refer to “4.4 User Level Creation” at page 11. 6.1 QUICK START 6.1.1 GENERAL QUICK START GENERAL CHANNEL TITLE TIME SETUP EVENT STATUS BENCHMARK DATE DISPLAY MOUSE SENSITIVITY... -
Page 24: Time Setup
MAIN MENU EVENT QUICK START MANUAL EVENT TIMER CHANNEL IMAGE SIZE QUALITY I.P.S. EVENT 720 X 480 MOTION 1280 x 1024 MOTION / ALARM 1280 x 1024 MOTION / ALARM 1280 x 1024 MOTION 720 X 480 MOTION / ALARM 720 X 480 MOTION EXIT... -
Page 25: Benchmark
MAIN MENU 6.1.3 BENCHMARK “BENCHMARK” is where you can see CPU loading and performance when certain functions are enabled and how the number of online users affects the performance of the device. QUICK START GENERAL LIVE PARAMETER SETUP SETUP TIME SETUP MANUAL RECORD SETUP SETUP BENCHMARK... -
Page 26: Tools
MAIN MENU 6.2.2 TOOLS SYSTEM ACCOUNT LANGUAGE ENGLISH TOOLS UPGRADE SUBMIT SYSTEM INFO BACKUP CONFIG SUBMIT BACKUP DATA (USB) RESTORE CONFIG SUBMIT BACKUP LOG (USB) EXIT 1) LANGUAGE Select the language of the OSD. 2) UPGRADE Save the upgrade files obtained from your installer or distributor in a compatible USB flash drive, and insert it into the USB port at the front panel. -
Page 27: Backup Data (Usb)
MAIN MENU 3) RESET DEFAULT Click “SUBMIT” to reset all settings as default, and select “YES” to confirm or “NO” to cancel. The NVR will reboot after reset. 6.2.4 BACKUP DATA (USB) This function is used to copy recorded video data from the NVR hard disk to a USB flash drive. Insert a compatible USB flash drive to the USB port at the front panel, and you’re able to start video backup. -
Page 28: Backup Log (Usb)
MAIN MENU 6.2.5 BACKUP LOG (USB) This function is used to copy the event log list from the NVR to a USB flash drive. Insert a compatible USB flash drive to the USB port at the front panel. Note: Before using the USB flash drive, please use your PC to format the USB flash drive to FAT32 format first. -
Page 29: Event Information
MAIN MENU 6.3 EVENT INFORMATION 6.3.1 QUICK SEARCH EVENT INFORMATION QUICK SEARCH HARD DISK ALL HDD EVENT SEARCH CHANNEL 01 02 03 04 HDD INFO 05 06 EVENT LOG 2009 15 : 20 EXIT SUBMIT Step1: Select the hard disk and channel including the video data you want to search. -
Page 30: Hdd Info
MAIN MENU 5) SEARCH Click “START” to start search and play the video data immediately. 6.3.3 HDD INFO You can check the information of the connected hard disk(s) in the NVR. EVENT INFORMATION QUICK SEARCH NUMBER MODEL SIZE FREE FORMAT TIME SERIAL NUMBER F.W. -
Page 31: Camera
MAIN MENU Then, click “SETUP” to enter the access information of the camera: CONFIG-CH1 USER NAME admin PASSWORD ********** CACHE TIME (MSEC) MODEL AVTECH GET TYPE IP CAMERA PROFILE PROFILE-3 TYPE H264 IMAGE SIZE 720 X 480 QUALITY I.P.S. AUDIO EXIT Step1: Enter the user name and password to access the IP camera. -
Page 32: Detection
MAIN MENU 4) REC AUDIO Select if you want to enable audio recording for the selected channel (ON / OFF). Note: This function is available only when your connected device supports audio recording. 5) CHANNEL TITLE Click “EDIT” to input the channel title (up to six characters). The default title is the channel number. 6) PORT FORWARD / PORT FORWARD ENABLE These two functions are used when you only want to see a single channel of this NVR remotely. -
Page 33: Alert
MAIN MENU 6.4.4 ALERT ADVANCED CONFIG CONNECTION EXT. ALERT CAMERA INT. BUZZER DETECTION KEY BUZZER ALERT VLOSS BUZZER NETWORK MOTION BUZZER DISPLAY ALARM BUZZER RECORD HDD BUZZER NOTIFY ALARM DURATION (SEC) HDD NEARLY FULL (GB) EXIT 1) EXT. ALERT Select to enable or disable the sound when any external alarm is triggered (ON / OFF). 2) INT. -
Page 34: Network
MAIN MENU 6.4.5 NETWORK There are two RJ45 ports on the NVR rear panel: WAN and LAN. WAN is used to connect this NVR to Internet for remote access from anywhere as long as Internet access is available. LAN is used to connect to IP cameras locally. ... -
Page 35: Display
MAIN MENU 6.4.6 DISPLAY ADVANCED CONFIG CONNECTION FULL SCREEN DURATION CAMERA DISPLAY COVERT DETECTION HDD DISPLAY MODE SIZE ALERT BRIGHTNESS NETWORK CONTRAST DISPLAY SATURATION RECORD NOTIFY EXIT 1) FULL SCREEN DURATION Select the full screen dwell duration time in second (03 / 05 / 10 / 15). 2) DISPLAY COVERT Select “ON”... -
Page 36: Notify
MAIN MENU 4) PRE-ALARM RECORD Select to enable or disable the pre-alarm function (ON / OFF). When pre-alarm and event recording functions are both activated, the NVR will record 8MB data before an alarm / motion event is triggered. 5) OVERWRITE Select “ON”... - Page 37 MAIN MENU VIDEO MAIL Enable this function in “E-MAIL ALERT”, and add the E-mail address(es) to which you want to send notifications in “RECEIVER”. You’ll get an E-mail telling you the occurrence of motion events attached with a html file. ADVANCED CONFIG CONNECTION MESSAGE MAIL VIDEO MAIL...
-
Page 38: Schedule Setting
MAIN MENU 6.5 SCHEDULE SETTING 6.5.1 RECORD Select “ON” to enable record timer, and select the day and time for this function. SCHEDULE SETTING RECORD RECORD TIMER EVENT EXIT X axis: 0 ~ 24 hours. Each time bar is 30 minutes. Y axis: Monday ~ Sunday. -
Page 39: Appendix 1 Mobile Surveillance Via Eagleeyes
APPENDIX 1 MOBILE SURVEILLANCE VIA EAGLEEYES APPENDIX 1 MOBILE SURVEILLANCE VIA EAGLEEYES EagleEyes is a mobile phone program used with our surveillance system for remote surveillance. It has several advantages: It’s free (Except EagleEyes Plus for iPhone, EagleEyes Plus+ for Android, and EagleEyesHD Plus for iPad). ... -
Page 40: Appendix 2 Compatible Usb Flash Drive List
APPENDIX 2 COMPATIBLE USB FLASH DRIVE LIST APPENDIX 2 COMPATIBLE USB FLASH DRIVE LIST Please upgrade the firmware of the NVR to the latest version to ensure the accuracy of the following table. If the USB flash drive is not supported by the NVR, you will see on the screen. -
Page 41: Appendix 3 Compatible Hard Disk List
APPENDIX 3 COMPATIBLE HARD DISK LIST APPENDIX 3 COMPATIBLE HARD DISK LIST Please upgrade the firmware of the device to the latest version to ensure the accuracy of the following table. MANUFACTURER MODEL CAPACITY ROTATION Seagate ST3320613AS 320GB 7200 rpm ST33500320AS 500GB 7200 rpm... -
Page 42: Appendix 4 Battery Replacement
APPENDIX 4 BATTERY REPLACEMENT APPENDIX 4 BATTERY REPLACEMENT The time reset after power failure, for example, caused by a power outage, will cause the disorder of the recorded data, and users may have problems in searching the event clip they want. To keep the device time from resetting, a non-chargeable lithium battery, CR2032, is installed in the device. -
Page 43: Appendix 5 Specifications
APPENDIX 5 SPECIFICATIONS APPENDIX 5 SPECIFICATIONS Hardware One LAN port Video Input Up to 6 Channels with a 6-port hub Video Output Full HD Output Video Output Resolution 1920 x 1080 Audio Output HDD Storage** Up to two 3TB HDDs Two on the front panel: one for video backup to USB flash drive, and USB Ports...
Need help?
Do you have a question about the AVH306 and is the answer not in the manual?
Questions and answers