
Related Manuals for ADT RC8025B-ADT


Summary of Contents for ADT RC8025B-ADT
- Page 1 ADT Pulse Interactive Solutions ® RC8025B-ADT Wireless Day/Night Camera Installation Guide...
-
Page 2: Table Of Contents
WA ADTLLL881DO, 11824 N Creek Pkwy #105, Bothell, WA 98011; WI 1210943; WV 049758. MS 15019511 ©2014 ADT LLC dba ADT Security Services. All rights reserved. ADT, the ADT logo, 800 ADT.ASAP and the product/service names listed in this document are marks and/or registered marks. -
Page 3: Introduction
802.11n Wireless LAN. RC8025B-ADT Features • Standalone Design: The wireless camera is a standalone device that requires a power source and a wireless connection to the ADT Pulse gateway. • Triple Video Support: The wireless camera supports H.264 Baseline, MPEG-4 SP and MJPEG video compression. -
Page 4: Package Contents
RC8025B-ADT Wireless Day/Night Camera Installation Guide Package Contents 1. RC8025B-ADT Wireless Day/Night Camera 2. Power Adapter 3. Ethernet Cable 4. Stand 5. Installation Guide ADT Pulse Interactive Solutions ®... -
Page 5: Physical Details - Rc8025B-Adt
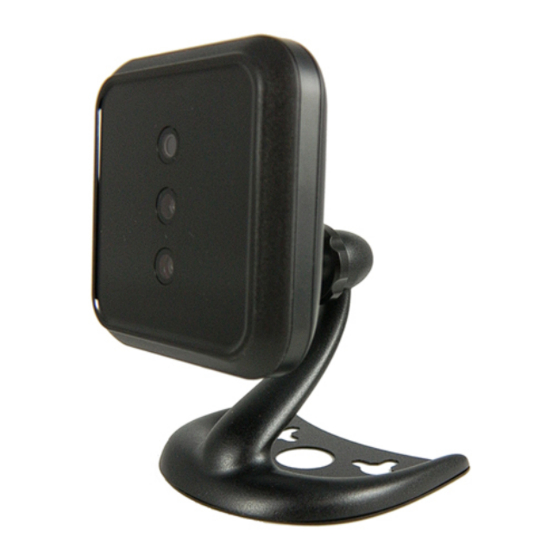
RC8025B-ADT Wireless Day/Night Camera Installation Guide Physical Details – RC8025B-ADT Front Panel Figure 1: Front Panel 1. Infrared LEDs Six infrared light emitting diodes behind the front (behind panel) panel help you see clearly at night or in a dark environment. -
Page 6: Rear Panel
RC8025B-ADT Wireless Day/Night Camera Installation Guide Rear Panel Figure 2: Rear Panel 1. Power Port This port is used to provide 12V to the wireless camera from the supplied power adapter. IMPORTANT DO NOT USE ANY POWER ADAPTER OTHER THAN THE ONE SPECIFIED FOR THIS CAMERA. -
Page 7: Reset
RC8025B-ADT Wireless Day/Night Camera Installation Guide 3. Reset/WPS Reset Button When pressed and held for ten (10) seconds, the communication configuration of the wireless camera is reset to the default manufacturer settings. Wi-Fi Protected Setup (WPS) WPS PBC Mode 1. Turn on the wireless camera without connecting the Ethernet cable. -
Page 8: Installation
RC8025B-ADT Wireless Day/Night Camera Installation Guide Installation The following instructions provide details of configuring and installing the RC8025B-ADT Wireless Day/Night Camera to your ADT Pulse network. Configuring and Installing the RC8025B-ADT Initial setup is performed only one time to configure the camera’s wireless settings to the ADT Pulse Gateway. -
Page 9: Adding The Rc8025B-Adt To The Adt Pulse Wireless System
During start up, the Power LED displays for approximately 10 to 15 seconds. When installation is complete, the Power LED and the Network LED remain ON. NOTE: Adding the RC8025B-ADT to the ADT Pulse Wireless System 1. Open your web browser. In the address bar, type: https://Portal.ADTPulse.com. - Page 10 RC8025B-ADT Wireless Day/Night Camera Installation Guide 4. In the Manage Devices Assistant, click Cameras. 5. Click the picture of the RC8025 or select it from the drop-down list, and then click the Continue button. 6. Assign the wireless camera a unique name (this is usually based on the location of the wireless camera) in the space provided, and then type the wireless camera’s MAC ID or Server Name.
- Page 11 RC8025B-ADT Wireless Day/Night Camera Installation Guide 7. Click the Continue button. 8. Connect the wireless camera to the Device Port of the gateway using a standard LAN cable. 9. Connect the supplied 12V power adapter to power up the wireless camera.
- Page 12 13. Install the wireless camera in the final location. 14. Re-apply power. If the camera does not connect, use of the ADT Wi-Fi extender, part # WN2RPADT-1ADNAS is recommended to improve connectivity. For more information, refer to Physical Details – on pages 3 through 5.
-
Page 13: Wall Mounting Instructions
RC8025B-ADT Wireless Day/Night Camera Installation Guide Wall Mounting Instructions Ensure that the wireless camera is properly configured and added to the network before mounting the camera. NOTE: 1. Identify the location for mounting the wireless camera. 2. Install and drive two M4 self-taping screws (not included in the package) 2/3 of the way into the wall. - Page 14 RC8025B-ADT Wireless Day/Night Camera Installation Guide 6. Connect the power cable into the back of the camera and plug the adapter end into a power outlet. Use only the power adapter provided. Using a different one may lead to hardware damage.
-
Page 15: Ceiling Mounting Instructions
RC8025B-ADT Wireless Day/Night Camera Installation Guide Ceiling Mounting Instructions 1. Mount the Wireless Camera. Use a screwdriver to tighten the screw of the stand base. b. Attach the wireless camera to the swivel connector by turning it clockwise. 2. Complete the installation. -
Page 16: Video Motion Detection
RC8025B-ADT Wireless Day/Night Camera Installation Guide Video Motion Detection The motion event will be captured when a significant image changes within the Window of Interest. The Window of Interest is defined below. Video motion detection is susceptible to light reflection, shade or tree/leaves movement, etc. -
Page 17: Enabling Motion Detection Via The Adt Security System
RC8025B-ADT Wireless Day/Night Camera Installation Guide Enabling Motion Detection via the ADT Security System 1. Click the Automations tab, and then click the Add Automation button. 2. Select a trigger for this automation from the Trigger drop-down list. 3. Select Motion from the Event drop-down list. - Page 18 RC8025B-ADT Wireless Day/Night Camera Installation Guide 8. Click OK. 9. Click Save. ADT Pulse Interactive Solutions ®...
-
Page 19: Appendix A: Specifications
RC8025B-ADT Wireless Day/Night Camera Installation Guide Appendix A: Specifications Model RC8025B-ADT Wireless Day/Night Camera Dimensions 3.11” x 3.11” x 1.14” H x W x D 79 mm x 79 mm x 29 mm Weight 0.22 lb (100 g) Operating Temperature 32°F to 113°F (0°C to 45°C) -
Page 20: Appendix B: Regulatory Approvals
This transmitter must not be co-located or operating in conjunction with any other antenna or transmitter. CE Approvals The RC8025B-ADT Wireless Day/Night Camera meets the guidelines of the European Union and complies with the 99/5/EEC and RTTE 99/5EG directives, including the following standards: •...
Need help?
Do you have a question about the RC8025B-ADT and is the answer not in the manual?
Questions and answers