Advertisement
Advertisement
Table of Contents

Related Manuals for Telstra EASYCALL 3


Summary of Contents for Telstra EASYCALL 3
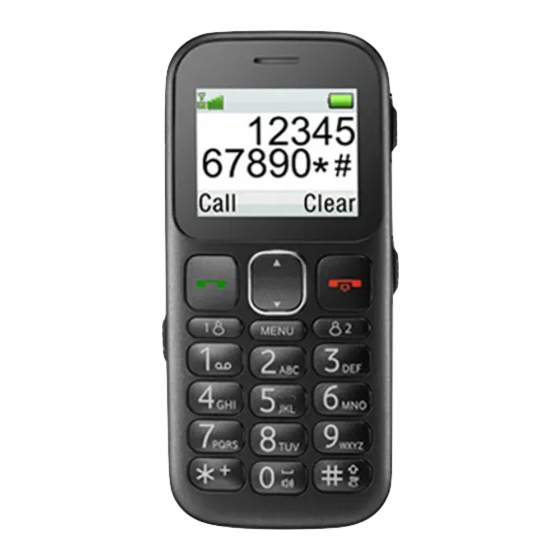
- Page 1 GETTING TO KNOW YOUR TELSTRA EASYCALL ®...
- Page 2 You can also download the full user guide online from zte.com.au By the way, your Telstra EasyCall ® handset is Blue Tick approved which means it’s recommended for rural and...
- Page 3 WHAT’S INSIDE Let’s get started Getting connected The basics Making calls Messaging Typing Managing your contacts Alert switch Extra features Extra bits you should know...
-
Page 4: Let's Get Started
LET’S GET STARTED YOUR PACKAGE CONTAINS THE FOLLOWING: • Telstra EasyCall 3 handset and battery ® • Telstra Pre-Paid Next G SIM card ® • AC charger • Headset • Telstra Pre-Paid Welcome Guide • This Getting Started Guide • Manufacturer’s warranty card... - Page 5 YOUR TELSTRA EASYCALL ® Call Key End Call Key EasyCall Key 1 ® Easycall Key 2 ® Press and hold during a call for Hold down speakerphone to switch to Silent Mode...
- Page 6 Alert Switch Torch On/Off Volume Keys Lock/ Radio Unlock On/Off Keys Handy Hint For more information on status bar icons you can refer to the full user guide online at zte.com.au...
-
Page 7: Getting Connected
GETTING CONNECTED 1. INSERT SIM CARD • Slide the back cover down to open. • Insert the SIM card with the gold chip facing down and the slanted edge on the bottom as shown. -
Page 8: Insert The Battery
2. INSERT THE BATTERY Ensure the gold tabs on the battery are aligned with the gold pins in the battery compartment. Gently push down on the battery until it clicks into place. - Page 9 TELSTRA EASYCALL ® Press and hold the red power key for two seconds to switch the mobile phone on and off. 4. ACTIVATE YOUR SIM CARD Refer to the Telstra Pre-Paid Welcome Guide for further details on activating your SIM card.
- Page 10 BASICS KEYLOCK ON THE KEYPAD Refer to page 5 to locate the Keylock switch. Slide the Keylock switch down to lock the keypad or up to unlock. If you get an incoming call you can press the Green key to answer or the Red key to reject the call even when the keys are locked.
-
Page 11: Charging Your Phone
CHARGING YOUR PHONE Your phone will sound an alert tone when the battery is low and display a low battery message on screen. To charge your phone insert the AC charger supplied carefully with the plug and socket aligned correctly as shown below. You can also use the desktop charger supplied in the box. - Page 12 PERSONALISE YOUR RINGTONE, MESSAGE ALERT AND MORE • Press Menu Key, use the arrow keys to scroll through the menu and use the Green Call key to select Settings • Then select Audio profiles - Personalise - Tone Setup. • Select which item you would like to personalise.
-
Page 13: Volume Control
VOLUME CONTROL You can adjust the ringtone, keytone, earphone volume and in call volume. • Press Menu Key, use the arrow keys to scroll through the menu and use the Green Call Key to select Settings. • Then select Audio profiles - Personalise - Volume. -
Page 14: Making Calls
MAKING CALLS To make a voice call, enter the number on the keypad and press OK or the Green Call key to dial. Calling a number from Contacts • Select Menu and press Green Call Key to select Phone Book. •... - Page 15 USING THE EASYCALL BUTTONS Use the EasyCall buttons as a shortcut to dial your favourite contacts. Follow the below steps to assign a contact. • Press Menu Key, use the arrow keys to scroll through the menu and use the Green Call Key to select Settings.
- Page 16 MESSAGING Sending a text message • Press Menu Key, use arrow keys to scroll through menu and Use Green Call Key to select Messages. • Select Write message, then begin typing your message. • When finished typing, Press Green Call Key to select Options.
- Page 17 • Use the arrow keys to scroll through contacts. You can also type in a name or letter to jump to a contact. Then press Green Call Key to select contact. • Press the Green Call Key to send message.
- Page 18 Viewing a received text message When you receive a text message an envelope icon will be displayed in the status bar at the top of your display. • To view messages press the Menu Key, then use arrow keys to scroll to Messages.
- Page 19 TYPING The letters of the alphabet are arranged on keys 2-9. The letter entered depends on how many times you press the key. For example to type the name John, you press the 5 key once for J, then press the 6 key three times for the letter O, press the 4 key twice for H and then the 6 key twice for N.
- Page 20 TYPING MODES Press the hash key to view different typing modes. Use the arrow keys to scroll through and press the Green Call Key to select a mode. Text Mode Function eZiEng Predictive Lowercase Sentence case Uppercase Numbers USING PREDICTIVE TEXT (eZiEng) Predictive text uses a built in dictionary to match possible words.
- Page 21 For example to type the name John press the 5 key once, 6 key, 4 key and then the 6 key. A list of suggestions will appear below. The first suggestion ‘John’ will be highlighted in blue. Press the Green Call Key to select.
-
Page 22: Managing Your Contacts
MANAGING YOUR CONTACTS When you switch on your handset it reads the contacts from your current SIM card. You can copy these contacts to your Phone by following the instructions on the next page. When you add a new contact you can choose to save it to your Phone or SIM card. - Page 23 OPENING YOUR CONTACT LIST AND ADDING A NEW CONTACT • Select Menu, then select Phone Book. • Select Add New Contact and choose to Save to the SIM card or Phone. • Press the Green Call Key to Edit Name and up to two numbers.
-
Page 24: Alert Switch
ALERT SWITCH The Alert Switch on the back of the handset can be programmed to sound an alert tone and call and/or send a text message (SMS) simultaneously. This is particularly useful in emergency situations. ENABLE/DISABLE • Select Menu, then scroll down and select Settings. -
Page 25: Switch Setup
SWITCH SETUP To preset contacts when Switch is activated: • Select Menu, then scroll down and select Settings. • Scroll down to Switch Setup and press Green Call Key for OK. • Select Switch Number and press OK. - Page 26 • You can enter a number that you would like to contact in emergency situations. The number entered in Position 1 will be contacted via Voice Call when the switch is activated. The numbers entered from position 2-5 will receive a preset text message.
- Page 27 TO ACTIVATE/DEACTIVATE ALERT TONE: • Select Menu, then scroll down and select Settings. • Scroll down to Switch Setup and press Green Call Key for OK. • Select Volume and press OK. • You can select from Off, Low Medium or Loud.
- Page 28 TO PRESET A TEXT MESSAGE: • Select Menu, then scroll down and select Settings. • Scroll down to Switch Setup and press Green Call Key for OK. • Select Switch SMS and press OK. • Enter message. For example you can enter: “Please help, urgent assistance needed.
-
Page 29: Extra Features
EXTRA FEATURES TORCH The Torch works when the phone is On or Off. Slide the switch on the side of the handset to switch the torch On or Off. See page 5 for Torch switch location. - Page 30 FM RADIO Slide the FM Key switch to turn the radio On. See page 5 for FM Radio switch location. FM Radio Setup You can preset channels to your preferred station. • Select Option - Channel List - Option - Edit to enter a new channel directly.
-
Page 31: Extra Bits You Should Know
ACCESS THE FULL USER GUIDE For additional information the full mobile phone user guide is available for download online at zte.com.au The spectrum device is a trade mark of Telstra Corporation Limited. ™ and are trade marks and registered trade ®...
Need help?
Do you have a question about the EASYCALL 3 and is the answer not in the manual?
Questions and answers