Table of Contents
Advertisement
TELSTRA T86 - User Manual
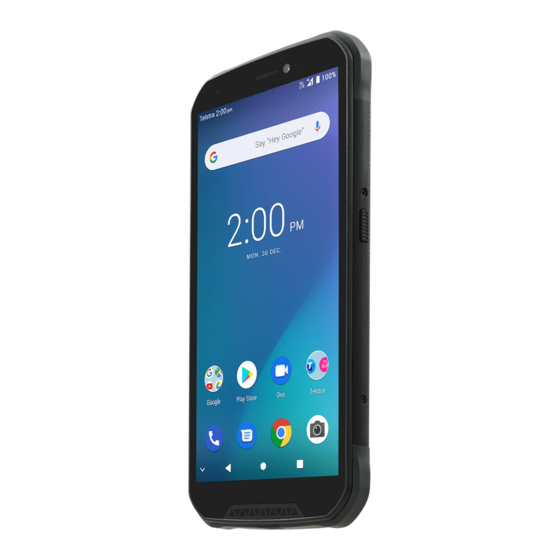
OVERVIEW
INSERT YOUR SIM CARD.
INSTALL A MICRO SD CARD
PHONE CALLS
CONTACTS
MESSAGES
CONNECT TO THE INTERNET
USING THE BROWSER
BLUETOOTH
CAMERA
ZTE Australia provides dedicated support with a local call centre and social
media outreach. Search 'ZTE Australia' on Facebook and Twitter to keep in
touch.
The worst case SAR value for this device is published on ztemobiles.com.au
VOICE RECORDER
GOOGLE APPLICATIONS
UPDATING YOUR DEVICE
EXTERNAL ANTENNA PORT
HEADPHONE AND USB
CHARGING PORT
TECHNICAL SPECIFICATIONS
QUICK REFERENCE SECTION
WARRANTY INFORMATION
SAFETY
© ZTE 2019 Ver 1.0 Sept 2019
Advertisement
Table of Contents

Related Manuals for Telstra T86


Summary of Contents for Telstra T86
- Page 1 TELSTRA T86 - User Manual VOICE RECORDER OVERVIEW GOOGLE APPLICATIONS INSERT YOUR SIM CARD. UPDATING YOUR DEVICE INSTALL A MICRO SD CARD EXTERNAL ANTENNA PORT PHONE CALLS HEADPHONE AND USB CONTACTS CHARGING PORT MESSAGES TECHNICAL SPECIFICATIONS CONNECT TO THE INTERNET...
- Page 2 OVERVIEW...
-
Page 3: Getting Started
GETTING STARTED INSERT YOUR SIM CARD. Open the SIM cover on the top right side of the device. There is a finger notch at the bottom of the SIM cover, use a finger nail to gently lift up the SIM cover towards the top of the handset. - Page 4 INSTALL A MICRO SD CARD A microSD card can be installed or removed while the phone is turned on. You need to unmount the microSD card before removing it. The device supports microSD(HC) cards up to 128GB. Insert into the SIM tray as shown above. Battery Warnings Do not disassemble the device.
- Page 5 On first use please charge the battery for 3-4 hours. It is better to keep your battery topped up than to let it fully discharge. TIPS TO MAXIMISE BATTERY LIFE After 2-3 charge / discharge cycles the battery life will improve. From then on use top up charging to recharge frequently and always charge promptly when flat.
- Page 6 GOOGLE ACTIVATION WIZARD: CREATE OR LOG IN TO A GOOGLE ACCOUNT We recommend you log in or create a Google account to enable access to Google services. Follow the activation wizard to create or log in to an existing Google account.
- Page 7 WAKE UP FROM SLEEP MODE Press the Power key to activate the display. Slide the screen Up to unlock. Slide the icons on the bottom panel for quick access to the Phone or Camera. SWITCH YOUR HANDSET TO SLEEP MODE Press the Power key to activate sleep mode.
- Page 8 Keys Function Hold down to power on your phone. Press to wake up or Power Key activate sleep mode. Hold down for Restart, Power off, Flight mode, Silent, or Vibrate options. Press to go to the previous screen and exit applications. Back Press to return to the Home Screen from any screen.
-
Page 9: The Home Screen
THE HOME SCREEN Slide the Home Screen left or right to view additional pages. Long press on the screen to change your wallpaper or add widgets. Slide Down from the top of the screen to see the Quick Settings panel. Slide Up from the bottom of the screen to see the All Apps view. - Page 10 ADD OR REMOVE ICONS & WIDGETS Slide your finger up from the bottom of the screen to go to Apps. Long press an icon to add it to the desktop. Hold the icon to move it and release to place it on the home screen. ...
-
Page 11: Phone Status Icons
PHONE STATUS ICONS Signal strength* Flight mode Data in use* No SIM card No Signal Emergency Calls only Wifi on, not connected Connected to a Wi-Fi network Wi-Fi Hotspot is on Bluetooth is on Battery is low Battery is full Alarm is set Battery is charging Speaker mode is on... - Page 12 The Notifications Panel at the top of the Home Screen shows useful device and status information. Drag your finger down from the top of the display to open the Notifications Panel. NOTIFICATION ICONS New Email New instant message New SMS/MMS Upcoming calendar event New voicemail Song is playing...
- Page 13 ACCESS THE QUICK SETTINGS PANEL Swipe down from the top of the home screen to access the Quick Settings panel. Touch each icon to switch that feature on or off, long press Wi-Fi or Bluetooth to access more features. THE QUICK SETTINGS PANEL: Pull down from the top of the screen twice to access the quick settings panel or pull down once using two...
-
Page 14: Uninstall Applications
APPLICATIONS Flick the screen up from the bottom to view the All Apps list. You can install additional applications by going to Play Store. INSTALL APPLICATIONS FROM GOOGLE PLAY STORE Tap Play Store from the Home Screen to download and install applications. - Page 15 MULTI-TASKING AND THE TASKS KEY Run multiple applications simultaneously: Press the Home key from any application to return to the home screen then launch another app. The original application will be suspended until you return to it. Press the Tasks key to view recent apps, double tap on the tasks key to toggle between the two most recent apps.
- Page 16 SETTINGS Swipe down twice from the top of the screen then press the Settings icon. (You can also swipe down once with two fingers) SETTINGS MENU Network & Internet Check Wi-Fi and mobile networks. Connected devices Connect to Bluetooth devices, enable NFC Apps &...
-
Page 17: Settings Menu
SETTINGS MENU Storage Check available memory. Mount or unmount the SD card. Security & location Set screen lock, fingerprint, face unlock, location settings, Find My Device (Need Google account) Accounts Control sync for your account and add other accounts Accessibility Text to speech, font sizes, magnification, captions and other features. -
Page 18: Phone Calls
PHONE CALLS Press the Phone icon to launch the Phone application. This will open in the same state it was last used, this can be the Dial Pad view or the Favorites / Recents / Contacts view. Press the Dial pad icon to bring up the dial pad or press Back to move from the Dial Pad to the alternate view. - Page 19 FUNCTIONS DURING A CALL: During a call when you move the handset away from your ear the screen lights up. Use the buttons for the features described: Add call – place the current call on hold and dial another party. Hold –...
-
Page 20: Make A Call From Contacts
MAKE A CALL FROM CONTACTS Touch the Phone icon to open the Dialler. Contacts are shown on the third tab from the Favorites / Recents / Contacts view. If you are not on this view press the Back button. ... -
Page 21: Mute A Call
MAKE A CALL FROM A TEXT MESSAGE Unlock the phone and press for messages. Tap the thread that contains the phone number to call. Tap the number then tap to call Press End to end the call. TURN THE SPEAKER ON/OFF (HANDSFREE) Tap Speaker during a call. -
Page 22: Make An International Call
Call the second number. While you are connected to the second number, tap Merge To add the third party, tap Add call. Dial the number, and when connected, tap Merge MAKE AN INTERNATIONAL CALL Press the Call Key on the home screen to open the dialer. - Page 23 CALLER ID, CALL FORWARDING (DIVERT), BLOCK NUMBERS DIALLER > OPTIONS > SETTINGS > CALL SETTINGS Press the Phone icon. If the dial pad is open press the back button. Press the three dots in the top Search bar for Options > Settings: Display Options- Sort by name, first name / last name options Sounds and vibration –...
- Page 24 CONTACTS Add contacts to your phone and synchronise them with your Google account. Existing SIM or Google contacts are shown by default. You can view your Contacts through the Phone Dialler or choose from the Apps area Touch Apps > to access your contact list.
- Page 25 Adding a New Contact Slide up from the bottom of the screen and press Contacts Touch to add a new contact, or Add new Contact if using the Phone interface. Select where to save the new Contact, Google account or Phone ...
- Page 26 Select individual contacts, or use Options > Select All. Press the Import icon at the top Select an account to save the contacts Import Contacts From the microSD Card Open Contacts >Menu > Settings > Import ...
- Page 27 Export Contacts to the microSD Card Open Contacts >Menu > Settings > Export Select Export to Storage Tap to select individual contacts, or use the box in the top right to Select All and then to Export Share Contacts ...
- Page 28 Remove a Contact From Favourites Open Contacts Touch a favourite contact and then touch Searching for a Contact Open Contacts Touch at the top of the screen. Enter the contact name, all matching Contacts will be displayed. Edit Contact Details ...
- Page 29 Touch Default ringtone Select a ringtone and touch OK Add a picture to a Contact Open Contacts Select the contact the touch the pen icon to edit Touch the Camera icon in the top picture area. ...
- Page 30 MESSAGES SMS AND MMS MESSAGES From the Home screen tap the messages icon to access SMS and MMS messages. Unread messages will show a notification at the top of the screen. Open new messages from the Notifications Panel or the Messaging Screen.
- Page 31 Tap in the Type message field enter your message. Tap the arrow to Send. SEND AN MMS MESSAGE (MULTI MEDIA) If the Messages app opens into an existing thread press the Back key to return to the main menu. ...
-
Page 32: Forwarding A Message
USING GROUP MESSAGES When you add multiple Contacts to an SMS it is converted into a Group MMS. All recipients can reply individually, or reply to all. FORWARDING A MESSAGE Long press an individual message to highlight it, then press three dots for Options >... - Page 33 DELETE A MESSAGE (THREAD) From the Message app overview press and hold on the thread then choose the delete icon. Tap OK. To delete an individual message (not a thread) tap and hold the message then press Delete MESSAGE SETTINGS Tap Messages >...
-
Page 34: Using E-Mail
USING EMAIL Create an Email account to receive Emails on your phone. Tap Apps > Gmail to set up your email account Enter your Email address and Password Follow the prompts. You may need to refer to your email service provider to complete the settings. -
Page 35: Email Settings
Enter the subject and the content of your Email. Tap the arrow to Send. REPLY, REPLY TO ALL, FORWARD AN EMAIL Tap Apps > Email to see your Inbox. Select the email Scroll to the bottom to Reply, Reply all or Forward the email. ... -
Page 36: Connect To A Computer
CONNECT TO A COMPUTER Transfer audio, video and picture files between your handset and your computer. Connect your handset using the USB data lead supplied. Pull down the notifications window, touch Android System USB to check the USB connection settings: Select File Transfer then open Explorer on the PC and browse the handset. -
Page 37: Connect To The Internet
CONNECT TO THE INTERNET You can access the internet through the mobile network or via Wi-Fi. When logged on to a Wi-Fi connection all data will be sent via THE Wi-Fi network. To disable mobile network data slide down the Quick Settings Panel from the top of the handset screen then tap the network signal bar icon to switch Data on or off. - Page 38 CONNECT TO A WI-FI NETWORK Go to Settings > Network & Internet > Wi-Fi The available Wi-Fi network names and security settings (open or secured) are displayed. Tap a network to connect. An open network will automatically connect, ...
- Page 39 SET UP A WI-FI HOTSPOT A Wi-Fi hotspot shares your network internet connection with other devices nearby. For example, if you are travelling you can connect your laptop wirelessly to your handset to use the internet. Options > System settings > more > Tethering & portable hotspot > Set up Wi-Fi hotspot.
-
Page 40: Using The Browser
USING THE BROWSER Use the Google Search bar on the Home Screen or the Chrome app. Tap the Google Search box on the Home Screen. Enter your search request using the keypad. Press the arrow when done. ... - Page 41 BLUETOOTH Bluetooth enabled devices can exchange information within a distance of about 10 meters without any physical connection. The Bluetooth devices must be paired to share information. TURNING BLUETOOTH ON OR OFF Switch Bluetooth on or off from the quick settings panel or ...
-
Page 42: Pair With Another Bluetooth Device
PAIR WITH ANOTHER BLUETOOTH DEVICE Both devices must have Bluetooth turned on. Settings > Connected devices > Bluetooth. Tap the device to pair with and enter your PIN if required. The same PIN should be used on both devices. - Page 43 CAMERA...
- Page 44 APPS > CAMERA, OR USE THE SHORTCUT ON THE HOMESCREEN Line up your shot and tap the shutter icon to take the picture. Tap the thumbnail in the bottom corner to review the picture. Tap the Settings button for camera settings APPS >...
- Page 45 Press Options to view your all channels list where you can long press on the channel to rename or delete it. MUSIC You need to have audio files stored on your phone or memory card. Use downloads, Bluetooth or PC Connectivity to copy files to your phone or memory card.
-
Page 46: Voice Recorder
VOICE RECORDER Use Voice Recorder to record voice memos that you can also set as a ringtone. Tap Home > Apps > Voice Recorder. GOOGLE APPLICATIONS SIGN IN OR CREATE YOUR GOOGLE ACCOUNT Sign in to your Google Account to synchronise Gmail, Calendar, and Contacts between your phone and the web. - Page 47 SECURITY SET A SCREEN UNLOCK PATTERN, PIN, OR PASSWORD Protect your phone from unauthorised use by creating a personal pattern, PIN or password. Use a pattern, PIN or password you can easily remember. Tap Home > Options > System settings > Security > Screen lock ...
-
Page 48: Change Sim Pin
UNLOCK THE SCREEN WITH A PATTERN Press Power Key. Draw your pattern to unlock the screen. If you make a mistake you can try again up to five times. If you forget the unlock pattern then after five attempts you can enter your Google account details to unlock your device. -
Page 49: Updating Your Device
UPDATING YOUR DEVICE Your phone can download and install Software updates. Settings > System > System update The software update service checks an online server to see if any updates are available for your phone. If an update is available you can choose to download and install the update. - Page 50 EXTERNAL ANTENNA PORT Your phone provides an external RF antenna port for connecting to suitable patch leads and antennas. Only used approved ZTE patch leads as other generic leads can damage your device. The RF port can be damaged by rough use, excessive force, bending or twisting on the connector so always take care to insert and remove the connector correctly and gently.
-
Page 51: Technical Specifications
TECHNICAL SPECIFICATIONS Size and Weight 157.8 x 77.2 x 11.6mm 185g with battery Networks 4G LTE Band 1,3,7,8,28. 300M Down / 50M Up 3G UMTS 850, 2100 MHz. HSPA+ 42Mbps data 2G 900, 1800 MHz. Display 5.65” Full HD+ (2160 x 1080) Capacitive touch. Camera 16MP + 5MP Rear with flash, 8MP Front CPU &... -
Page 52: Quick Reference Section
Connectivity Bluetooth 4.2 Wi-fi 802.11b/g/n 3.5mm jack Nano SIM (4FF), NFC, USB C. External RF External RF antenna port QUICK REFERENCE SECTION PLEASE CHECK THE MANUAL THOROUGHLY BEFORE CONTACTING YOUR SERVICE PROVIDER. Symptom Solution How do I check the Settings > System > About phone > Build software version? number How do I reset to... - Page 53 Symptom Solution Settings > Network & Internet> Mobile How do I manually Network > Advanced > Automatically select select a carrier? network How do I copy Contacts > Options > Settings > Contacts to or from Import/Export > Follow the directions on my SIM card? screen Settings >...
- Page 54 Symptom Solution How do I check Call Calls > Options > Settings > Call Settings > Call forwarding etc forwarding, Call waiting. Calls > Options > Settings > Call Settings > How do I block my Additional settings > Caller ID outgoing number? Settings >...
- Page 55 Symptom Solution The handset turns An alarm or calendar event switches the on by itself. handset on automatically. Hold the power key to check the phone is not No incoming ring in silent mode. or alarm tone Check the ringtone and ring volume settings. The handset The handset is charging in the off state.
- Page 56 ERROR MESSAGES Message Solution Check a valid SIM card is inserted. No SIM Card See the Getting Started section You have set a SIM PIN. Please enter your SIM Enter PIN code PIN code. Contact your Service Provider to get the PUK Enter PUK code code Contact your Service Provider to obtain the...
-
Page 57: Warranty Information
WARRANTY INFORMATION The warranty does not apply to defects or errors caused by: (a) Normal wear and tear, mishandling, physical damage, improper installation. (b) Water, exposure to solvents or any other liquid damage while the port covers are open. (c) Any unauthorised disassembly, repair or modification. (d) Power surges, lightning, fire, flood or other natural events. -
Page 58: General Statement On Rf Energy
SAFETY GENERAL STATEMENT ON RF ENERGY The phone is a low-power radio transmitter and receiver. When switched on it intermittently transmits radio frequency (RF) energy (radio waves). The transmit power level is optimised for best performance and automatically reduces when there is good quality reception. Maximum power is only used at the edge of network coverage so under most circumstances the power output is very low. -
Page 59: Product Safety Information
PRODUCT SAFETY INFORMATION Please read all instructions This device may produce before use bright or flashing lights Do not use while driving Do not dispose of in fire Avoid contact with Do not use while re-fuelling magnetic media Small parts may be a choking Avoid Extreme hazard Temperatures... - Page 60 Obey warning signs in hospitals Do not attempt to and medical facilities disassemble Do not rely on this device Switch off when flying for emergency communications Switch off in explosive environments microSD™ is a trademark of SD Card Association...
Need help?
Do you have a question about the T86 and is the answer not in the manual?
Questions and answers