Table of Contents
Advertisement
Advertisement
Table of Contents

Related Manuals for Telstra Easycall 3


Summary of Contents for Telstra Easycall 3
- Page 1 TELSTRA EASYCALL® 3 3G MOBILE PHONE USER GUIDE...
- Page 2 This guide will help you get to know your mobile phone and all the fancy things it can do. So you get the most out of your new Telstra Easycall 3, set aside some time to explore and play around with all its features.
-
Page 3: Table Of Contents
Contents A QUICK LOOK AT YOUR DEVICE ................5 INSERT THE SIM CARD..................6 INSERT THE BATTERY ..................7 CHARGING THE BATTERY ..................8 BATTERY LEVEL INDICATOR ................9 SWITCH YOUR PHONE ON ................... 9 GET TO KNOW YOUR PHONE ................10 MAIN DISPLAY .................... - Page 4 3.13 CALL SETTINGS ....................24 3.14 SETTINGS > NETWORK SETTINGS ............... 25 3.15 SETTINGS > SECURITY CODE ................26 3.16 SETTINGS > VOICE BROADCAST ................. 26 3.17 ORGANISER > ALARMS / REMINDERS ..............27 3.18 ORGANISER > CALENDAR ................. 28 3.19 ORGANISER >...
-
Page 5: Quick Look At Your Device
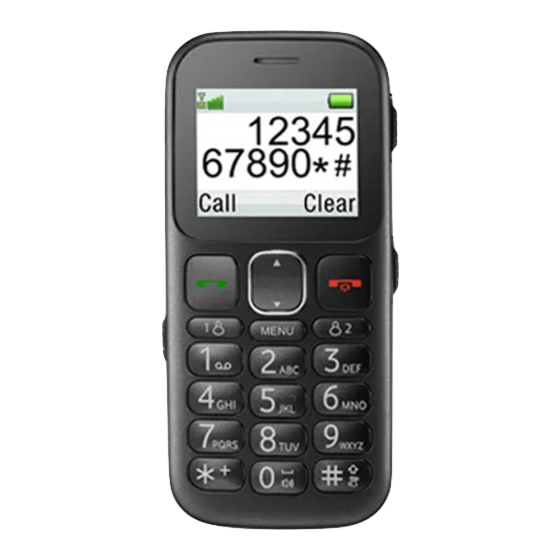
A QUICK LOOK AT YOUR DEVICE... -
Page 6: Insert The Sim Card
INSERT THE SIM CARD Remove the battery cover by pressing down on the back cover and sliding the cover down. Insert the SIM card with the metal contacts facing down and the notch on the bottom left corner as shown:... -
Page 7: Insert The Battery
INSERT THE BATTERY 1. Insert the battery carefully with the contacts located against the gold springs - the battery will only fit one way. 2. Replace the battery cover. Make sure that the cover closes completely. -
Page 8: Charging The Battery
CHARGING THE BATTERY The phone can be charged in the On or Off state. Make sure that the battery is inserted before charging. The charger lead is keyed and will only fit one way. Insert the lead carefully observing the correct alignment of the plug and socket. -
Page 9: Battery Level Indicator
BATTERY LEVEL INDICATOR Charging Charged The phone will give an audible alert when battery is low and display a low battery message on screen. Please recharge the battery promptly to maintain service. SWITCH YOUR PHONE ON Press and hold the red key for 2 seconds to switch the phone on. -
Page 10: Get To Know Your Phone
GET TO KNOW YOUR PHONE MAIN DISPLAY Information Bar Network Provider Time & Day Date DISPLAY ICONS Battery level Keypad locked Network signal level Headset inserted New SMS message Alarm enabled SMS memory is full Silent Mode enabled Missed call CTM Mode enabled (TTY) Call Forwarding active Roaming... -
Page 11: Key Functions
KEY FUNCTIONS Function Description • Press to make a call. Press to answer a call. Call key • From the idle screen, press to access call history. (Green Key) • Press to confirm the function you choose. • Long press to power on or off. End key •... - Page 12 Function Description • Press to input ‘#’. • Switch SMS text input mode – (Predictive) • Hold down to engage / disengage Silent mode. • From the idle screen press to enter ‘*’, ‘+’, ‘W’, or ‘P’ • Use + for the international dialling prefix. •...
-
Page 13: Menu Map
MENU MAP... - Page 14 MENU MAP CONTINUED…...
-
Page 15: Step By Step Guide
STEP BY STEP GUIDE EMERGENCY SWITCH SETTING The Emergency Switch on the back of the handset can be programmed to make a call and/or send an SMS to friends or relatives simultaneously. • Press Down > Down > Down > Down > OK to enter the Settings Menu •... -
Page 16: Make And Receive A Call
MAKE AND RECEIVE A CALL • Enter the phone number using the number keys and press the Green key to dial. If you enter a wrong digit use the Red Key to delete. Long press the Red key to clear all the characters and return to the idle screen. -
Page 17: Add A Contact To Your Phone Book
ADD A CONTACT TO YOUR PHONE BOOK Menu > Phone Book > Add New Contact > To Phone, To SIM > Name > Edit Type in the name using the keypad letter keys, (eg press the key once for the first letter, twice for the second letter etc.), press Done when finished. Press the # key to change text input modes (eZiEng, abc, ABC, 123) if required. -
Page 18: Messages
MESSAGES • The envelope icon indicates a new message. • Press the Green key to view the message. Press the Red key to exit. • The phone can be set to read out the SMS messages. If you wish to switch this feature on go to Menu >... -
Page 19: Text Input Methods
TEXT INPUT METHODS 1. When editing text press the # key to change between eZiEng, abc, Abc, ABC, or 123. 2. Enter Letters: In abc modes press the letter keys until the correct letter appears. 3. Enter Words: In eZiEng mode, input each letter with a single key press. The word updates as you enter more letters. -
Page 20: Phone Book
PHONE BOOK You can save names and numbers to the phone memory and the SIM card. Press the Menu key or the Down arrow key then OK to select Phone Book. • Select Phone Book > Quick Search to view the phone book. Input the first letters of the name, the phone will list the corresponding records. -
Page 21: Program Your Easycall Keys
PROGRAM YOUR EASYCALL KEYS The EasyCall keys let you quickly call your favourite contacts with one button touch. The first step is to assign the Contact to the EasyCall key. • Press and hold (ie long-press) the EasyCall key to add a contact. •... -
Page 22: Call History
3.10 CALL HISTORY • From the idle screen press the Green key to check your call history or go to Menu > Call History to view the full breakdown of calls. 3.11 AUDIO SETTINGS Before you set a personalised Rintone or SMS tone you need to disable Voice Broadcast. -
Page 23: Phone Settings
Volume 1. Ring Tone 3. Earphone 2. Key Tone Alert Type Ring Only Vibrate Then Ring Vibrate Only Light only Vibrate and Ring (Default) 3.12 PHONE SETTINGS • Select Settings > Phone Setup > Set Time to set time (24hrs only) and date. -
Page 24: Call Settings
• Select Settings > Phone Setup > 5.LCD Backlight to set the backlight timeout. • Select Settings > Phone Setup > 6.Brightness. • Select Settings > Phone Setup > 7.TTY setting – For TTY (Teletype) equipment used in Australia requires this setting should be Off. •... -
Page 25: Settings > Network Settings
• Select Settings > Call Setup > Call Barring to bar your handset from making outgoing calls in various circumstances. This feature requires the Barring password which is available from your service provider. • Select Settings > Call Setup > 4.Send My Number. By default your number is displayed to the other party. -
Page 26: Settings > Security Code
3.15 SETTINGS > SECURITY CODE Select Settings > Security Code to Activate or Change PIN codes. The Handset Code is shown on power up and protects the handset from wrong use. The default handset code is 0000. The PIN code is stored on the SIM card and protects the SIM (account) from misuse. -
Page 27: Organiser > Alarms / Reminders
3.17 ORGANISER > ALARMS / REMINDERS Select Menu > Organiser > Alarms/Reminders Alarm Name Required Fields Alarm Type Birthdays Set the Name, Time and Date Annual Important Dates Set the Name, Time and Date Annual Medication Set the Name, Time Daily Getting Up Set the Name, Time... -
Page 28: Organiser > Calendar
3.18 ORGANISER > CALENDAR • Go to Organiser > Calendar to view the calendar. 3.19 ORGANISER > CALCULATOR • Go to Organiser > Select Calculator. Press Up/Down keys to highlight the required functions +, -, *, /, = and press the Green key for Equals. •... -
Page 29: Fm Radio Switch
3.22 FM RADIO SWITCH • Slide the FM key switch up to turn the radio on. • Press the Up / Down arrow keys to search for available channels • Use the side volume keys to adjust the volume. • Select Option > Channel List > Option > Edit to enter a new channel directly. -
Page 30: Technical Specifications
• For Warranty Service directions please see http://www.zte.com.au • All calls for PIN number enquiries, Network problems, Next G Services, BigPond account information, Web Access, Account and Billing Information, (U)SIM card registration and general enquiries should be directed to Telstra. -
Page 31: Warranty Information
3.25 WARRANTY INFORMATION The warranty does not apply to defects or errors in the product caused (a) Reasonable abrasion. (b) Misuse including mishandling, physical damage, improper installation, unauthorized disassembly of the product. (c) Water, exposure to solvents or any other liquid damage. (d) Any unauthorized repair or modification. -
Page 32: Warnings And Safety Notices
WARNINGS AND SAFETY NOTICES GENERAL PRECAUTIONS • The antenna is located in the top portion of the handset, behind the display. When you are using the handset try to avoid shielding the antenna area with your hand. Hold the handset between your thumb and fingers towards the base of the handset. -
Page 33: Precautions While Driving
metal filings which can stick to the speaker area. • Using the phone near electrical appliances such as TV, telephone, radio and personal computer may cause interference. • Do not drop or throw your handset. Rough handling can cause physical damage. -
Page 34: Precautions For Medical Devices And Facilities
PRECAUTIONS FOR MEDICAL DEVICES AND FACILITIES • If you use a pacemaker please keep the phone at least twenty centimetres from the pacemaker when the phone is switched on. Do not carry the phone in your breast pocket. Use the ear opposite the pacemaker to minimize the potential for interference. -
Page 35: Battery Safety
BATTERY SAFETY • Do not short-circuit the battery terminals. Do not carry the battery in your pocket in case of accidental short circuits. • Do not store battery in hot areas or dispose of the battery in a fire. • Do not disassemble, pierce or modify the battery in any way. -
Page 36: Rf Safety (Sar)
RF SAFETY (SAR) SAR tests have been completed as per the Radiocommunications Standard 2003 (Human Exposure). The limit defined by this standard is 2.0W/Kg. The highest value SAR recorded for the device is 1.54 W/Kg. EMERGENCY CALLS Emergency calls to 000 or 112 can be made in all handset conditions as long as there is any available network coverage.
Need help?
Do you have a question about the Easycall 3 and is the answer not in the manual?
Questions and answers