Table of Contents
Advertisement
Quick Links
TELSTRA EASY DISCOVERY
4
TM
3G MOBILE PHONE
USER MANUAL
Copyright © 2013. All rights reserved.
No part of this publication may be excerpted, reproduced, translated or utilized in any form or by any means,
electronic or mechanical, including photocopying and microfilm, without the prior written permission of ZTE
Corporation.
The manual is published by ZTE Corporation. We reserve the right to make modifications on print errors or
update specifications without prior notice.
Version 1.1 August 2013
1
Advertisement
Table of Contents

Related Manuals for Telstra EASY DISCOVERY 4


Summary of Contents for Telstra EASY DISCOVERY 4
- Page 1 TELSTRA EASY DISCOVERY 3G MOBILE PHONE USER MANUAL Copyright © 2013. All rights reserved. No part of this publication may be excerpted, reproduced, translated or utilized in any form or by any means, electronic or mechanical, including photocopying and microfilm, without the prior written permission of ZTE Corporation.
- Page 2 This guide will help you get to know your mobile phone and all the fancy things it can do. So you get the most out of your new Telstra Easy Discovery 4, set aside some time to explore and play around with all its features.
-
Page 3: What's Inside
WHAT’S INSIDE Getting to know your mobile phone Getting Started Contacts Messages and Emails Extra Features Troubleshooting, Technical and Warranty Extra bits you should know... -
Page 4: Getting To Know Your Mobile Phone
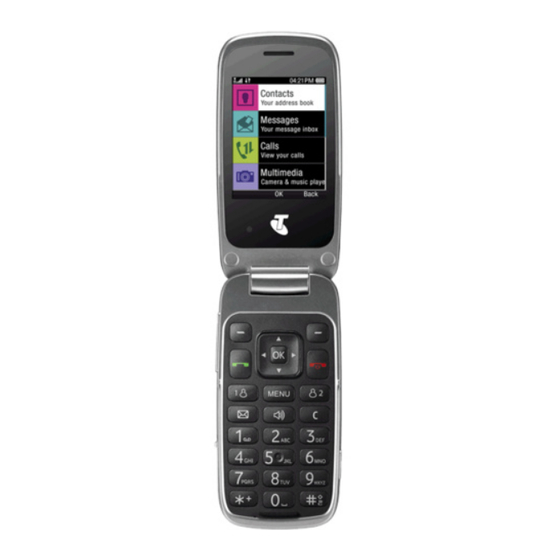
GETTING TO KNOW YOUR MOBILE PHONE Earpiece Main Display Arrow Keys, OK Key Use the Arrow Keys to navigate & access shortcuts. Front camera OK to confirm. Left & Right Soft Keys Performs the function shown on the display Power / End Key Hold down to power On or Off. - Page 5 GETTING TO KNOW YOUR MOBILE PHONE Camera External Volume Keys antenna port Torch & flash Torch switch (open Camera clamshell button operate) Thumb catch to open the battery cover Headphones, charging and USB port...
-
Page 6: Information Bar Icons
INFORMATION BAR ICONS 3G Signal Strength Battery Level Indicator EDGE Signal Strength Alarm is set GSM Signal Strength Data available Missed Call Data active New SMS Message Vibrate enabled Message Memory is Full Silent mode New MMS Message Silent with vibrate New Wap Push Message Flight Mode New E-mail... - Page 7 MENU QUICK REFERENCE GUIDE...
- Page 8 MENU QUICK REFERENCE GUIDE CONTINUED...
-
Page 9: Getting Started
GETTING STARTED 1. OPEN THE BACK COVER AND INSERT SIM CARD Open the back cover using the thumb catch at the base of the handset Insert the SIM card with the gold chip facing down and the slanted edge on the top left as shown. -
Page 10: Insert The Battery
The device supports microSD and microSDHC cards up to 32GB. IF YOUR HANDSET DISPLAYS: Enter Handset unlock code The default code is 0000 Enter (U)SIM PIN Code Enter the PIN supplied with your SIM card No (U)SIM detected Check the SIM is inserted correctly. Enter PUK code Contact your Service Provider 2. -
Page 11: Switch The Phone On Or Off
3. SWITCH THE PHONE ON OR OFF To switch the phone ON press and hold the red key until the screen lights To switch the phone OFF press and hold the red key until the shutdown screen appears or until the screen switches off. Enter SIM PIN code –... -
Page 12: Connect The Charger
CONNECT THE CHARGER The plug and socket are shaped so they will only fit together one way. • Do NOT use excessive force which may damage the USB port. • The phone can also be charged by connecting it to a computer using the USB lead supplied. - Page 13 NOTES ABOUT CHARGING • Only use the AC charger and USB lead supplied. • Insert the charger lead carefully • Be careful to avoid tripping over or pulling on the lead whilst it is plugged into the device. Sudden force can damage the socket. •...
-
Page 14: How To Navigate The Menu
HOW TO NAVIGATE THE MENU The main menu is a list of items to access features on the phone. From the home screen press OK to access the main menu. Use the arrow keys to move up and down the menu list and press OK to select. Handy Hint Use the right soft key to select the bottom right hand of the screen and use the left soft key to select the bottom left hand of the screen. -
Page 15: Shortcut Keys
SHORTCUT KEYS From the home screen press the arrow keys to launch the default shortcuts: My Place Messages Alarm Contacts Handy Hint Change default shortcuts: Menu > Settings > Handset > Shortcut keys EASY CALL KEYS Press and hold the Easy Call keys to program the Easy Call keys HOW TO SET THE TIME AND DATE The time and date is set automatically from the network. -
Page 16: How To Change The Ringtone
VOICE BROADCAST - IMPORTANT Voice Broadcast reads out the Name, Contact number and SMS Message contents by default. It overrides all Ringtone and SMS notification settings. Press the volume keys to mute the broadcast, or switch the function off. To customise the incoming Ringtone and SMS tone you MUST switch off Voice Broadcast for the respective settings. -
Page 17: Enable Vibrate Mode
ENABLE VIBRATE MODE • Select Menu > Settings > Audio > Ringtone type • Scroll up and down to select the required mode for Ring and Vibrate • Press centre key for OK HOW TO MAKE A VOICE CALL • Enter the number on the keypad or select the downward facing arrow key to access shortcut to contacts. -
Page 18: Audio Profiles
AUDIO PROFILES Audio profiles can be used to quickly set the handset into General mode, Silent mode, Meeting mode or Outdoor mode. • Select Menu > Settings > Audio > Audio profile • General is normal ringtone, no vibrate • Silent has no ringtone and no vibrate •... - Page 19 CALL FEATURE SUMMARY Check the table below to quickly find the Call Feature you require: FUNCTION DESCRIPTION MENU SELECTION Automatic call Enable automatic call Menu > Settings > Call > answer (flip) answer when opening the Answer Call flip. Automatic Voice Broadcast announces Menu >Settings >...
- Page 20 FUNCTION DESCRIPTION MENU SELECTION Last number Press the Green Call Key for Call Key , Call Key redial Call History. Press to redial. Missed Calls Hear an alert tone at your Menu > Settings > reminder specified interval to remind Handset >...
- Page 21 CONTACTS There are some numbers that you may want to call again and again so it makes sense to add these to your Contacts. You can then access these numbers quickly and easily and add special features such as Speed Dialling, a dedicated Ringtone and a Photo.
- Page 22 FUNCTION DESCRIPTION MENU SELECTION Back up or Copy Saving Contacts to your SIM Menu > Contacts > Contacts to your card creates a back up and you Options > Advanced > SIM card can copy these to another device SIM card management > Copy Contacts to SIM Copy Contacts Insert the SIM card.
- Page 23 FUNCTION DESCRIPTION MENU SELECTION Set a unique Add an existing image & Menu > Contacts > Ringtone or ringtone to a Contact. The Select the Contact image to a Contact must be stored in the (stored on the Contact handset memory (see Copy handset) >...
- Page 24 Contact is stored in the Fax field numbers Contact is stored on the Contact is stored in the Home field Phone Contact is stored on the SIM Default Telstra Contacts, eg Sensis Contact is stored in the Mobile Contact has an Email address field...
-
Page 25: Messages And Emails
MESSAGES AND EMAILS HOW TO SEND A TEXT MESSAGE (SMS) • Press the left arrow key to access shortcut for Messages (or select Menu > Messages) • Press OK for Write message • Enter the phone number directly or press OK to select Contacts •... - Page 26 HOW TO TYPE USING THE KEYPAD • The letters of the alphabet are arranged on the keys from 2-9. Whenever you are in a text entry mode, to enter a name, send a message or write a note, the handset changes to letter mode. •...
- Page 27 Handy Hint To change between normal typing mode and predictive text press the # key and select Abc for normal mode or eZiEng for predictive text. Use the Arrow Keys to scroll up or down and OK to select. The selected text mode will be displayed in the top right hand corner.
-
Page 28: How To Use Predictive Text
HOW TO USE PREDICTIVE TEXT Predictive text allows words to be entered more efficiently using a single key press for each letter, as opposed to multiple key presses in Abc text mode. • Predictive text uses a built-in dictionary to match possible words. •... -
Page 29: How To Send A Multimedia Message (Mms)
SPECIAL CHARACTERS € \ │ Each time one of these symbols is used 2 standard SMS characters [ ] { } are transmitted. … This symbol is not part of the standard SMS character set. Each time entire one of these symbols is used the message is converted to Unicode. -
Page 30: How To Receive A Multimedia Message (Mms)
HOW TO RECEIVE A MULTIMEDIA MESSAGE (MMS) Menu > Messages > Inbox • When receiving an MMS you get a standard message alert. Press OK to View. • Press Retrieve to download the message attachment. • When the attachment has downloaded press the Left Soft Key for Options. •... -
Page 31: Sending An Email
SENDING AN EMAIL Menu > Messages > Email > Write email • Enter the sender address e.g. user@domain.com • Press the down arrow to access the copy field • Press the down arrow to access the subject field • Press the down arrow to enter the text field •... -
Page 32: Extra Features
EXTRA FEATURES FUNCTION DESCRIPTION MENU SELECTION Right arrow key or Alarms Set and edit alarms Menu > Tools > Alarm > Edit Set the handset to Auto power On Menu > Settings > Handset > Auto switch on or off at / Off power ON/OFF certain times. - Page 33 FUNCTION DESCRIPTION MENU SELECTION Menu > Calls. Shortcut: Press the Call Logs View your calls history Call Key Menu > Multimedia > Camera or press and hold the side camera Camera Use the camera key, use the arrow keys to toggle to video mode.
- Page 34 FUNCTION DESCRIPTION MENU SELECTION Menu > Multimedia> Games & Games & Access the games and Apps applications area Apps Displayed during start Menu > Settings > Screen > Greeting Greeting Global Positioning Menu > Tools > GPS. System, use for location Check Help for more details finding ‘P’...
- Page 35 FUNCTION DESCRIPTION MENU SELECTION Lock Code. Switch on the handset Menu > Settings > Security > The default is code to protect the Activate security codes > Handset 0000 handset. code Quickly engage Silent Meeting Mode mode Long Press the # Key Change the incoming Menu >...
- Page 36 Select the required message News messaging from the available menu. The Pocket News service provided by update is sent to your handset Telstra by SMS Group handset Menu > Settings > Audio > Audio Profiles behaviours for ringing, profile vibrate etc.
- Page 37 FUNCTION DESCRIPTION MENU SELECTION Use hands-free or loud During a call (or call set-up) Speakerphone speaker mode press the speaker key Activate the stopwatch Stopwatch timer Menu > Tools > Stopwatch Compatible with Menu > Settings > Handset > T-Mode Tele-coils or T-mode for T-mode hearing aids...
- Page 38 FUNCTION DESCRIPTION MENU SELECTION Announces your Voice Menu > Settings > Audio > Voice incoming Call, SMS and Broadcast Broadcast Messages Menu > Settings > Audio > Vibrate Mode Switch on vibrate mode Ringing type Menu > Multimedia > Video Camera or press and hold the Video Camera Use the video camera...
-
Page 39: Advanced Features
ADVANCED FEATURES HOW TO USE GPS Menu > Tools > GPS. Go to GPS Settings to enable this feature, then My Location. • GPS requires signals from 3 satellites and can take several minutes to acquire. • Reception is reduced in city areas. You need a clear view of the whole sky. •... - Page 40 WHAT IS JOIN ME PC AND MAC CONNECTION SUITE? Join Me is used to connect your phone to a computer. Once installed use Join Me to manage contacts, messages and calendar functions. It can also connect to the internet and transfer music / picture files. Please insert the DVD before connecting your phone, then Browse to the Join Me folder.
-
Page 41: Troubleshooting, Technical And Warranty Information
TROUBLESHOOTING, TECHNICAL AND WARRANTY INFORMATION TROUBLESHOOTING AND FAQS Please check the manual thoroughly before contacting your service provider. SYMPTOM RESOLUTION Check the ring tone and ring volume settings under No incoming ring Profiles or alarm tone Check the handset is not muted (Long press the # key) (No) key tones when Check the key tone settings in the current profile. - Page 42 SYMPTOM RESOLUTION MMS messages Your subscription does not include data services. cannot be sent or Check with your service provider. received How do I change to Press the # key to toggle between different text Predictive Text? modes. How do I enable the Go to Menu >...
- Page 43 SYMPTOM RESOLUTION Examine the charging port and make sure it is not damaged. I cannot charge the Remove the battery, clean the contacts and check it phone is inserted correctly. The battery may be worn out. Tip: Charge the phone using the supplied USB cable. Menu >...
-
Page 44: Error Messages
I cant get my Join Me This can only be done from the list view. Change to calendar to sync list view and then try again. Web pages are not Change Smart fit mode in Menu > Tools > Browser > displayed clearly Browser settings >... -
Page 45: Technical Specifications
TECHNICAL SPECIFICATIONS Network 3G UMTS 850, 2100 MHz with HSDPA 3.6Mbps data. Compatibility 2G GSM 850, 900, 1800, 1900 MHz L×W×H : Approx 107.1 x 51.5 x 18.4mm. 112.8 g including Dimensions battery MP4 video, MP3 audio, 3MPixel front and 0.3MPixel rear camera, USB, JAVA, 2.4”... -
Page 46: Support Information
SUPPORT INFORMATION • For Warranty Service directions please consult your Service Provider or your Retailer. • All calls for PIN number enquiries, Network problems, Web Access, Account and Billing Information, (U)SIM card registration and other general enquiries should be directed to your Service Provider. WARRANTY INFORMATION The warranty does not apply to defects or errors in the product caused by: (a) Normal wear and tear... -
Page 47: Safety And General Information
SAFETY AND GENERAL INFORMATION The handset contains delicate electronic circuitry, magnets and battery systems. You should treat it with care and pay attention to the following points: • Handle the handset with care. Do not drop or throw the handset. •... - Page 48 • Do not use damaged batteries. • Do not disassemble or modify the battery. • Stop using the battery if abnormal heat, odour, discolouration, deformation, or abnormal condition is detected during use, charge, or storage. • Do not put the battery in your mouth. •...
- Page 49 • Remember to make backup copies of all important data on the handset. • Take care when the phone is in your pocket. Sitting down may damage the handset. • It is normal for the handset to become warm while the battery is being charged. •...
-
Page 50: Extra Bits You Should Know
EXTRA BITS YOU SHOULD KNOW PC SOFTWARE REQUIREMENTS Join Me PC Software included supports Microsoft Windows 8 (not RT) Windows 7, Vista, XP with Service Pack 2 & 3. A limited version of Join Me is supplied that supports MAC OS 10.4 to 10.8 ZTE cannot guarantee that third party hardware or software is compatible with this product. -
Page 51: Radio Frequency Energy
RADIO FREQUENCY ENERGY The handset is a low-power radio transmitter and receiver. When switched on it intermittently transmits radio frequency (RF) energy (radio waves). The transmit power level is optimized for best performance and automatically reduces when there is good quality reception. Maximum power is only used at the edge of network coverage so under most circumstances the power output is very low.
Need help?
Do you have a question about the EASY DISCOVERY 4 and is the answer not in the manual?
Questions and answers