Table of Contents
Advertisement
Quick Links
Advertisement
Table of Contents

Related Manuals for FLIR MD-Series


Summary of Contents for FLIR MD-Series
- Page 1 MD-Series 432-0010-00-12 Installation Guide Revision 100 Apr 2013...
- Page 2 © FLIR Systems, Inc., 2013. All rights reserved worldwide. No parts of this manual, in whole or in part, may be copied, photocopied, translated, or transmitted to any electronic medium or machine readable form without the prior written permission of FLIR Systems, Inc.
-
Page 3: Table Of Contents
......................... 34 MD-Series Specifications..................35 External Standards....................36 Acronyms........................37 Feature Comparison of MD-Series Models............... 38 Troubleshooting Tips....................39 On Screen Messages ........................41 Restoring the Factory Network Settings ..................42 432-0010-00-12 Rev 100 — MD-Series Installation Guide... - Page 4 This page is intentionally blank. 432-0010-00-12 Rev 100 — MD-Series Installation Guide...
-
Page 5: Chapter 1 Installing Md-Series Systems
Installing MD-Series CHAPTER 1 Systems This manual describes the installation of the MD-Series camera. If you need help or have additional questions, please call to speak with our support experts; see the phone numbers on the back cover of this manual. -
Page 6: Additional References
Installing MD-Series Systems Additional References The MD-Series camera comes with a complete documentation set on a CD (FLIR Doc. # 432-0010-50) that includes this manual as well as others. All documents are in PDF format and can be viewed with Adobe Acrobat Reader: •... -
Page 7: System Overview
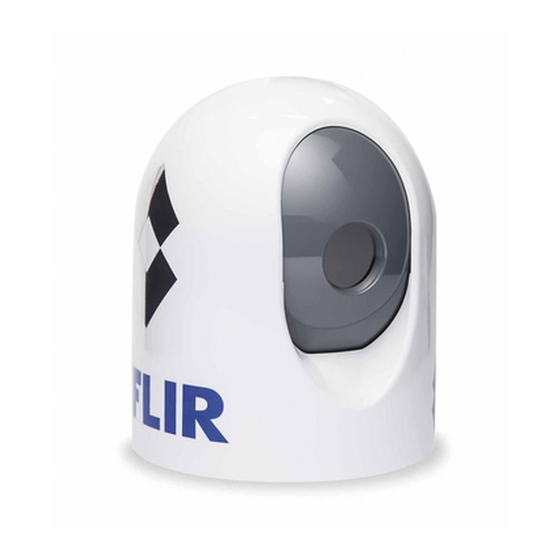
Do not pull on the cables with excessive force. System Overview MD-Series is a maritime thermal imaging system for use on most types of vessels. The system has a single thermal imaging camera and is available in two models: •... -
Page 8: Md-Series Dome Assembly
Installing MD-Series Systems The MD-Series consists of a fixed dome assembly, also known as the camera unit. The camera supplies an analog video output through a standard F-type connection and receives power from its Power over Ethernet (PoE) interface. The MD-Series dome camera is an IP network device. In some installations,... -
Page 9: Installation Overview
If the MD-Series system is installed on a network with other FLIR cameras (such as M-Series or Voyager III) that are operated with the Maritime JCU, the existing JCU can be used to control the MD-Series as well. Installing a JCU is described in “Installing Optional Components” on page 26. - Page 10 • 5 foot Ethernet cable • Clamshell ferrite (Part Number 4134175) Contact FLIR (phone numbers listed on the back cover of this manual) for more information regarding available accessories including JCUs, PoE equipment, video distribution amplifiers, cables, connections, and mounting hardware.
-
Page 11: Installation Planning
Installation Options There are several options for installing and using the MD-Series camera that affect the complexity of the installation and the steps required. • One set of options relates to the position of the cable connections: inside or outside the camera dome. -
Page 12: Location Considerations
Installing MD-Series Systems Ball-Up and Ball-Down Installation In most installations, the MD-Series camera unit is mounted upright (ball up) on top of a mounting surface, with the base below the camera. Optionally, the unit can be hung upside down or ball down and configured to invert and revert the video output by selecting Enable Ball-Down Installation under System Settings of the camera on-screen menu system. -
Page 13: Camera Settings
A dedicated stud located on the bottom of the MD-Series near the cable egress points provides chassis ground for a high conductivity path to vessel ground (maximum 0.25 Ohm). The installer must provide the grounding strap and ring terminal for the connection. -
Page 14: Physical Installation
Physical Installation When shipped from the factory, the MD-Series camera has two cables that extend through the base. • The teal cable is to be connected to the supplied 25-foot Ethernet cable using the supplied RJ45 waterproof coupler. -
Page 15: Remove The Camera Unit Dome
Mounting the Camera from the Bottom Using the mounting template supplied with the camera (and part of the MD-Series ICD) as a guide, mark the location of the holes for mounting the camera. Also mark the location for the cable port holes. - Page 16 2 capture nuts on base Place the camera on the mounting surface so the threaded studs extend through the drilled holes. Secure the camera body to the mounting surface with the supplied nuts and washers. 432-0010-00-12 Rev 100 — MD-Series Installation Guide...
- Page 17 The exact fasteners to use will vary depending on the mounting surface. Maximum major diameter is 6.5 mm. Maximum head diameter is 13 mm. Drill holes using the 4 pilot locations in the top of the base 432-0010-00-12 Rev 100 — MD-Series Installation Guide...
-
Page 18: Route Camera Cables
Using the mounting template supplied with the camera (and part of the MD-Series ICD) as a guide, mark the location of the holes for mounting the camera. The base itself can also be used as a guide. - Page 19 Insert the end of the cable into the end receptor in the coupler. This picture shows the sequence of pieces on the cable. Bring the capture nut up to the coupler and tighten it. Then connect the 25-foot Ethernet cable to the other end of RJ45 coupler: 432-0010-00-12 Rev 100 — MD-Series Installation Guide...
- Page 20 Important: Be sure to apply thread locker to the F-type connectors. Attach the 25-foot coaxial cable to the other end of the connector after applying thread locker so that it looks like the picture below. 432-0010-00-12 Rev 100 — MD-Series Installation Guide...
- Page 21 Pull the rubber gland and clamping claw out of the threaded counter bore. Pull both cables completely up through the base. Remove the three pieces of the two nut assemblies (capture nut, cable gland, and clamping claw) and set them aside. 432-0010-00-12 Rev 100 — MD-Series Installation Guide...
- Page 22 (These are the three pieces that were set aside in step 4 on page 19.) Do not fasten this nut yet. 432-0010-00-12 Rev 100 — MD-Series Installation Guide...
- Page 23 25-foot video cable through the gland and bring it around the other side to meet the camera cable, joining them with the supplied female-to-female connector. Seal the connection and then secure the cable to the camera with zip ties. 432-0010-00-12 Rev 100 — MD-Series Installation Guide...
- Page 24 Tie the video cable to the base of the camera by threading a zip tie through the two holes in the bracket and around the cable. Pull on the zip tie, securing it tightly. 432-0010-00-12 Rev 100 — MD-Series Installation Guide...
-
Page 25: Complete Electrical Connections
Complete Electrical Connections A watertight coupler/enclosure should be used on each electrical connection. Power to the MD-Series camera is supplied using the PoE injector included with the camera purchase and the supplied Ethernet cable. The injector is not a sealed device and should be installed in a protected location. -
Page 26: Adjust Camera Position
Data In port. Connecting Power The camera does not have an on/off switch. Generally the MD-Series camera is connected to a circuit breaker and the circuit breaker is used to apply or remove power to the camera. The MD-Series Operator’s Manual has detailed information about powering and operating the camera. - Page 27 Using a 10-mm wrench, slightly loosen the self-locking bolt in the center of the bracket. Loosen this bolt to adjust camera pan Turn the bracket to the desired pan position. 432-0010-00-12 Rev 100 — MD-Series Installation Guide...
-
Page 28: Replace The Dome Cover
JCU and wireless control. Figure 1 on page 27 shows a possible system configuration using: • A video amplifier (PN 4108996) supplied by FLIR that supports output to four video devices • PoE injectors (PN 4113746) supplied by FLIR for DC/DC Power over Ethernet •... -
Page 29: Connecting Optional Components
Video cables of various lengths with F-type male connectors at one end and BNC connectors at the other end are available from FLIR. The video cable used should be rated as RG59/U or better to ensure an adequate quality video signal. -
Page 30: Installing A Joystick Control Unit (Jcu)
If an optional JCU is used for controlling camera settings, mount it in a convenient area that is close to the monitor being used to display the MD-Series video output. Make sure there is sufficient clearance for the cable under the JCU (refer to the MD-Series ICD for dimensions). - Page 31 PDF file, ensure it is printed to the correct scale by checking the dimensions prior to cutting any holes. Using the JCU template supplied as a guide in MD-Series ICD, mark the location of the rectangular opening that will allow the JCU to be recessed in the vessel’s control console.
- Page 32 Installing MD-Series Systems allowing for proper compression of the JCU mounting gasket to form a watertight seal. 432-0010-00-12 Rev 100 — MD-Series Installation Guide...
-
Page 33: Chapter 2 Md-Series Reference
• A table comparing features of various MD-Series models MD-Series Maintenance The MD-Series components are designed for years of rugged, trouble-free use. Cleaning the Camera Optics Great care should be used with the camera's optics. They are delicate and can be damaged by improper cleaning. -
Page 34: Cleaning The Camera Body
If you have a problem with the thermal camera, do not attempt to repair it. The MD-Series camera is a sealed unit and, apart from removing the dome, cannot be opened or serviced in the field. Consult the installation dealer or FLIR Systems Inc. -
Page 35: Md-Series Specifications
Standard (automatic at unit power-up) Water Ingress IPX 6 Shock 15 g vertical, 9 g transverse Vibration IEC 60945; MIL-STD-810E Lightening Protection Standard Salt Mist IEC 60945 Wind 100 knot (115.2 mph) IEC 60945 432-0010-00-12 Rev 100 — MD-Series Installation Guide... -
Page 36: External Standards
MD-Series Reference External Standards Table 2.2 lists other sources of information and standards definitions that may be useful during the installation of the MD-Series camera. External References Table 2.2 Standard Description ANSI/SCTE 01 2006 “F” http://www.scte.org Port, Female, Outdoor IEC 60169-24... -
Page 37: Acronyms
Infrared or thermal Joystick Control Unit Multifunction display NMEA National Marine Electronics Association NTSC National Television System Committee Phase Alternating Line Power over Ethernet SCTE Society of Cable Telecommunications Engineers Volts, Direct Current 432-0010-00-12 Rev 100 — MD-Series Installation Guide... -
Page 38: Feature Comparison Of Md-Series Models
MD-Series Reference Feature Comparison of MD-Series Models Table 2.4 lists the two MD-Series models and supported features. Each model is available in four variations, identified by a unique part number: • <9 hz thermal frame refresh rate (FPS), NTSC video format •... -
Page 39: Troubleshooting Tips
If maintenance on the wiring connection is required, have an authorized service representative make the appropriate repairs. If the camera still does not produce an image, contact the FLIR dealer or reseller who provided the camera, or contact FLIR directly (contact information is provided on the back cover of this manual). - Page 40 (such as the sky) could cause the camera to use a wider temperature range than appropriate. You should keep the ocean, and not the sky or the boat, as the predominant object in the image. Refer to the MD-Series Operator’s Manual for information about how to make adjustments to the image.
-
Page 41: On Screen Messages
Indicates the camera has lost connection with a previously available network. Normally, when the camera is on a network, the IP address of the camera displays. If the network connection is interrupted, this message displays instead. 432-0010-00-12 Rev 100 — MD-Series Installation Guide... -
Page 42: Restoring The Factory Network Settings
Transmit + Transmit - Receive + Unused Unused Receive Unused Unused The RJ45 loopback termination ties pin 1 to pin 3, and pin 2 to pin 6. The other pins are not connected. 432-0010-00-12 Rev 100 — MD-Series Installation Guide... - Page 43 NOTES...
- Page 44 PH:+ 1 888 747 3547 (Technical Support) FX: + 1 805 685 2711 sales@flir.com EUROPE CS Eurasian Headquarters FLIR Systems CVS BV Charles Petitweg 21 4847 NW Teteringen - Breda Netherlands PH: + 31 (0) 765 79 41 94 FX: + 31 (0) 765 79 41 99 flir@flir.com...
Need help?
Do you have a question about the MD-Series and is the answer not in the manual?
Questions and answers