Table of Contents
Advertisement
Quick Links
Download this manual
See also:
Service Manual
MD/CD RECEIVER
MD/CD-RECEIVER
RECEPTEUR MD/CD
MD/CD-RECEIVER
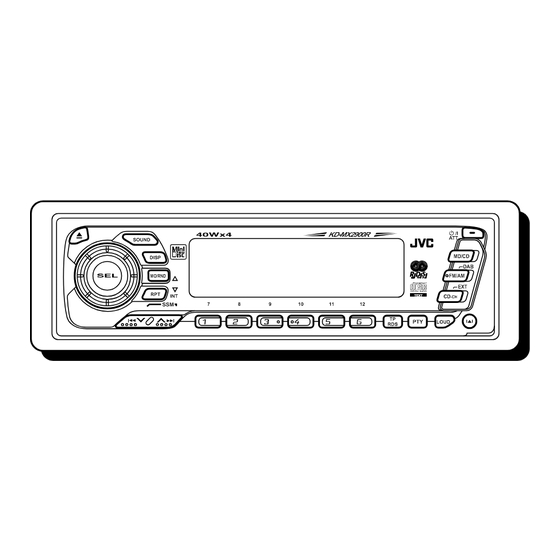
KD-MX2900R
For installation and connections, refer to the separate manual.
Für den Einbau und die Anschlüsse siehe das eigenständige Handbuch.
Pour l'installation et les raccordements, se référer au manuel séparé.
Bijzonderheden over de installatie en aansluiting van het apparaat vindt u in de desbetreffende
handleiding.
INSTRUCTIONS
BEDIENUNGSANLEITUNG
MANUEL D'INSTRUCTIONS
GEBRUIKSAANWIJZING
KD-MX2900R
SOUND
DISP
MO/RND
RPT
INT
SSM
7
8
9
10
11
/I
ATT
MD/CD
DAB
FM/AM
COMPACT
EXT
DIGITAL AUDIO
TEXT
CD
-CH
12
TP
PTY
LOUD
RDS
LVT0251-001A
[E]
Advertisement
Table of Contents

Subscribe to Our Youtube Channel
Related Manuals for JVC KD-MX2900R


Summary of Contents for JVC KD-MX2900R
- Page 1 MD/CD RECEIVER MD/CD-RECEIVER RECEPTEUR MD/CD MD/CD-RECEIVER KD-MX2900R For installation and connections, refer to the separate manual. Für den Einbau und die Anschlüsse siehe das eigenständige Handbuch. Pour l’installation et les raccordements, se référer au manuel séparé. Bijzonderheden over de installatie en aansluiting van het apparaat vindt u in de desbetreffende handleiding.
-
Page 2: How To Reset Your Unit
3. CAUTION: Do not open the top cover. There are no user-serviceable parts inside. Leave all servicing to qualified service personnel. 4. CAUTION: This CD player uses invisible laser radiation and is equipped with safety switches to prevent radiation emission when unloading CDs. It is dangerous to defeat the safety switches. -
Page 3: Table Of Contents
Thank you for purchasing a JVC product. Please read all instructions carefully before operation, to ensure your complete understanding and to obtain the best possible performance from the unit. CONTENTS How to reset your unit ... 2 BASIC OPERATIONS ... 5 RADIO BASIC OPERATIONS ... - Page 4 SOUND ADJUSTMENTS ... 28 Selecting preset sound control modes ... 28 Tuning on/off the loudness function ... 28 Adjusting the sound ... 29 Storing your own sound adjustments ... 30 OTHER MAIN FUNCTIONS ... 31 Setting the clock ... 31 Changing the general settings (PSM) ...
-
Page 5: Basic Operations
Select the source. To operate the tuner, see pages 6 – 18. To operate the CD player, see pages 19 – 23. To operate the MD player, see pages 24 – 27. To operate the CD changer, see pages 45 – 47. -
Page 6: Radio Basic Operations
RADIO BASIC OPERATIONS Listening to the radio FM/AM (FM1) (FM2) (FM3) To search stations of higher frequencies. To search stations of lower frequencies. To stop searching before a station is received, press the same button you have pressed for searching. To tune in a particular frequency without searching: 1 Press FM/AM repeatedly to select the band (FM or AM). -
Page 7: Storing Stations In Memory
Storing stations in memory You can use one of the following two methods to store broadcasting stations in memory. • Automatic preset of FM stations: SSM (Strong-station Sequential Memory) • Manual preset of both FM and AM stations FM station automatic preset: SSM You can preset 6 local FM stations in each FM band (FM1, FM2 and FM3). -
Page 8: Manual Preset
Manual preset You can preset up to 6 stations in each band (FM1, FM2, FM3 and AM) manually. EXAMPLE: Storing an FM station of 88.3 MHz into the preset number 1 of the FM1 band FM/AM Repeat the above procedure to store other stations into other preset numbers. -
Page 9: Tuning Into A Preset Station
Tuning into a preset station You can easily tune into a preset station. Remember that you must store stations first. If you have not stored them yet, see pages 7 and 8. DISP FM/AM To change the display information while receiving an FM RDS station Press DISP. -
Page 10: Rds Operations
RDS OPERATIONS What you can do with RDS EON RDS (Radio Data System) allows FM stations to send an additional signal along with their regular programme signals. For example, the stations send their station names, as well as information about what type of program they broadcast, such as sports or music, etc. Another advantage of RDS function is called “EON (Enhanced Other Networks).”... - Page 11 Mode 1 The AF indicator lights up but the REG indicator does not. Network-Tracking is activated with Regionalization set to “off.” Switches to another station within the same network when the receiving signals from the current station become weak. Note: In this mode, the programme may differ from the one currently received.
-
Page 12: Using Standby Reception
Using Standby Reception Standby Reception allows the unit to switch temporarily to your favorite programme (PTY: Programme Type) and Traffic Announcement (TA) from the current source (another FM station, MD, CD, and other connected components). Note: Standby Reception will not work if you are listening to an AM station. TA Standby Reception •... -
Page 13: Selecting Your Favorite Programme For Pty Standby Reception
Selecting Your Favorite Programme for PTY Standby Reception You can select your favorite programme for PTY Standby Reception to store in memory. When shipped from the factory, “NEWS” is stored as the programme type for PTY Standby Reception. 1, 4 Searching Your Favorite Programme You can search one of your 6 favorite programme types stored in memory. - Page 14 To store your favorite programme types 1, 5 Press and hold the number button for more than 2 seconds to store the PTY code selected into the preset number you want. PTY preset number appears, and selected code name and “MEMORY” alternate on the display.
-
Page 15: To Search Your Favorite Programme Type
To search your favorite programme type • If there is a station broadcasting a programme of the same PTY code you selected, that station is tuned in. • If there is no station broadcasting a programme of the same PTY code you selected, the station will not change. -
Page 16: Other Convenient Rds Functions And Adjustments
Other convenient RDS functions and adjustments Automatic selection of the station when using the number buttons Usually when you press the number button, the preset station is tuned in. However, when the preset station is an RDS station, something different will happen. If the signals from that preset station are not sufficient for good reception, this unit, using the AF data, tunes in another frequency broadcasting the same programme as the original preset station is broadcasting. -
Page 17: Setting The Ta Volume Level
Setting the TA volume level You can preset the volume level for TA Standby Reception. When a traffic programme is received, the volume level automatically changes to the preset level. • See also “Changing the general settings (PSM)” on page 32. 1. - Page 18 PTY codes Indications on the display N E W S A F F A I R S I N F O S P O R T E D U C A T E D R A M A C U L T U R E S C I E N C E V A R I E D P O P M...
-
Page 19: Cd Operations
Playing a CD Total track number of the inserted disc Lights up Note: When a CD is inserted up side down, “PLEASE EJECT” appears on the display. When you open the control panel by pressing 0, the CD automatically ejects. Note on One-Touch Operation: When a CD is already in the loading slot, pressing MD/CD turns on the unit and starts playback automatically. -
Page 20: Playing A Cd Text
Playing a CD Text In a CD Text, some information about the disc (its disc title, performer and track title) is recorded. You can show these disc information on the display. Select text display mode while playing a CD Text. DISP Each time you press the button, the display changes as follows: Notes:... -
Page 21: Locating A Track Or A Particular Portion On A Cd
Locating a track or a particular portion on a CD To fast-forward or reverse the track Press and hold Press and hold 4 To go to the next tracks or the previous tracks Press the next track. Each time you press the button consecutively, the beginning of the next tracks is located and played back. -
Page 22: Selecting Cd Playback Modes
Selecting CD playback modes To play back tracks at random (Random Play) You can play back all tracks on the CD at random. Each time you press MO/RND (Mono/Random) while playing a CD, CD MO/RND random play mode turns on and off alternately. When the random mode is turned on, the RND indicator lights up on the display and a track randomly selected starts playing. -
Page 23: Prohibiting Cd Ejection
To play back only intros (Intro Scan) Each time you press RPT/INT (Repeat/Intro) while playing a CD, CD intro scan mode turns on and off alternately. When the intro scan mode is turned on, “INTRO” appears on the display for 5 seconds and a track number flashes. -
Page 24: Md Operations
MD OPERATIONS Playing an MD Label side Insert an MD in the same way as indicated on the MD Lights up Note on One-Touch Operation: When an MD is already in the loading slot, pressing MD/CD turns on the unit and starts playback automatically. -
Page 25: Locating A Track Or A Particular Portion On An Md
Locating a track or a particular portion on an MD To fast-forward or reverse the track Press and hold Press and hold 4 To go to the next tracks or the previous tracks Press of the next track. Each time you press the button consecutively, the beginning of the next tracks is located and played back. -
Page 26: Selecting Md Playback Modes
Selecting MD playback modes To play back tracks at random (Random Play) You can play back all tracks on the MD at random. Each time you press MO/RND (Mono/Random) while playing an MD, MD MO/RND random play mode turns on and off alternately. When the random mode is turned on, the RND indicator lights up on the display and a track randomly selected starts playing. -
Page 27: Prohibiting Md Ejection
To play back only intros (Intro Scan) Each time you press RPT/INT (Repeat/Intro) while playing a MD, MD intro scan mode turns on and off alternately. When the intro scan mode is turned on, “INTRO” appears on the display for 5 seconds and a track number flashes. -
Page 28: Sound Adjustments
SOUND ADJUSTMENTS Selecting preset sound control modes You can select a preset sound adjustment suitable to the music genre. SOUND Indication SCM OFF (Flat sound) SCM BEAT Rock or disco music SCM SOFT Quiet background music SCM POP Light music Notes: •... -
Page 29: Adjusting The Sound
Adjusting the sound You can adjust the sound characteristics to your preference. Indication BASS Adjust the bass. TREBLE Adjust the treble. FADER* Adjust the front and rear speaker balance. BALANCE Adjust the left and right speaker balance. VOLUME Adjust the volume. Note: * If you are using a two-speaker system, set the fader level to “00.”... -
Page 30: Storing Your Own Sound Adjustments
Storing your own sound adjustments You can adjust the sound control modes (SCM BEAT, SCM SOFT, SCM POP: see page 28) to your preference and store your own adjustments in memory. SOUND LOUD SOUND Repeat the same procedure to store other settings. To reset to the factory settings Repeat the same procedure and reassign the preset values listed in the table on page 28. -
Page 31: Other Main Functions
OTHER MAIN FUNCTIONS Setting the clock 1, 6 3, 5 To check the current clock time while the unit is turned off, press DISP. The power turns on, the clock time is shown for 5 seconds, then the power turns off. •... -
Page 32: Changing The General Settings (Psm)
Changing the general settings (PSM) You can change the items listed on the next page by using the PSM (Preferred Setting Mode) control. Basic Procedure 1, 4 Press and hold SEL (Select) for more than 2 seconds so that one of the PSM items appears on the display. - Page 33 Select. CLOCK HOUR Hour adjustment CLOCK MINUTE Minute adjustment CLOCK24H/12H 24/12-hour time display AUTO ADJUST Automatic setting of the clock CLOCK MODE Clock display TUNER DISPLAY Display mode PTY STANDBY PTY standby PTY SEARCH PTY search TA VOLUME Traffic announcement volume P-SEARCH Programme search...
-
Page 34: Selecting 24-Hour Or 12-Hour Clock
Selecting 24-hour or 12-hour clock You can change the clock built in this unit either to 24 hour system or 12 hour system. 1. Press and hold SEL (Select) for more than 2 seconds so that one of the PSM items appears on the display. -
Page 35: Selecting The Dimmer Mode
Selecting the dimmer mode When you turn on the car head lights, the display automatically dims (Auto Dimmer). When shipped from the factory, Auto Dimmer mode is activated. • DIMMER AUTO: Activates Auto Dimmer • DIMMER OFF: Cancels Auto Dimmer •... - Page 36 When this function is turned on (the CRUISE indicator lights up on the display), the proper volume level is automatically selected among the 3 possible levels according to the driving speed, and the selected level is shown on the display. If Audio Cruise does not function correctly You may need to store the idling speed into memory to make Audio Cruise function correctly.
-
Page 37: Selecting The Telephone Muting
Selecting the telephone muting This mode is used when a cellular phone system is connected. Depending on the phone system used, select either “MUTING 1” or “MUTING 2”, whichever mutes the sounds from this unit. When shipped from the factory, this mode is deactivated. •... -
Page 38: Selecting The Scroll Mode
Selecting the scroll mode You can select the scroll mode for the name display and disc information if they consist of more than 12 characters. When shipped from the factory, Auto Scroll mode is set to “SCROLL ONCE.” • SCROLL ONCE: Scrolls only once. -
Page 39: Assigning Names To The Sources
Assigning names to the sources You can assign names to CDs and the external component connected to the LINE IN plugs. After assigning a name, it will appear on the display when you select the source. Sources CD* and CD changer* External component 2, 7 Select a source you want to assign a name to. - Page 40 DISP Repeat steps 3 to 5 until you finish inputting the name. To erase the input characters Insert spaces using the same procedure described above. Notes: • When you assign a name to the 41st disc, “NAME FULL” appears on the display. (In this case, delete unwanted names before assignment.) •...
-
Page 41: Available Characters
Available characters Capital letters Small letters Numbers and symbols ” – Space Space & ’ < Space >... -
Page 42: Detaching The Control Panel
Detaching the control panel You can detach the control panel when leaving the car. When detaching or attaching the control panel, be careful not to damage the connectors on the back of the control panel and on the panel holder. How to detach the control panel Before detaching the control panel, be sure... -
Page 43: Remote Operations
REMOTE OPERATIONS (With an optionally purchased remote controller) We recommend that you use remote controller RM-RK31 with your unit. The followings are the instructions for using RM-RK31. Before using the remote controller: • Aim the remote controller directly at the remote sensor on the main unit. -
Page 44: Using The Remote Controller
Using the remote controller 1 Functions the same as the 2 • Functions as the BAND button while listening to the radio (or the DAB tuner). Each time you press the button, the band changes. • Functions as the DISC + button while listening to the CD changer. -
Page 45: Cd Changer Operations
CD CHANGER OPERATIONS We recommend that you use one of the CH-X series (ex.: CH-X1200) with your unit. If you have another type of CD automatic changer, consult your JVC IN-CAR ENTERTAINMENT dealer for connections. • For example, if your CD automatic changer is one of the KD-MK series, you need a cord (KS-U15K) for connecting it to this unit. - Page 46 Press and hold 1 (7) – 6 (12) for more than 1 second. Ex. When disc number 3 is selected To show the CD Text information This is possible only when connecting a JVC CD automatic changer equipped with CD Text reading capability. See ”Playing a CD Text” on page 20.
-
Page 47: Selecting Cd Playback Modes
Selecting CD playback modes To play back tracks at random (Random Play) Each time you press MO/RND (Mono/Random) while playing a CD, CD MO/RND random play mode changes as follows: Mode RND Indicator RANDOM1 Lights RANDOM2 Flashes To play back tracks repeatedly (Repeat Play) Each time you press RPT/INT (Repeat/Intro) for more than 1 second while playing a CD, CD repeat play mode changes as follows: Mode... -
Page 48: Dab Tuner Operations
DAB TUNER OPERATIONS We recommend that you use DAB tuner KT-DB1500 with your unit. If you have another DAB tuner, consult your JVC IN-CAR ENTERTAINMENT dealer. • Refer also to the Instructions supplied with your DAB tuner. What is DAB system? DAB is one of the digital radio broadcasting systems available today. - Page 49 To search ensembles of higher frequencies To search ensembles of lower frequencies MO/RND To stop searching before an ensemble is received, press the same button you have pressed for searching. To change the display information while tuning into an ensemble Normally service name is shown on the upper part of the display.
-
Page 50: Storing Dab Services In Memory
Storing DAB services in memory You can preset up to 6 DAB services in each DAB band (DAB1, DAB2 and DAB3) manually. FM/AM FM/AM Select the DAB tuner. Each time you press and hold the button, the DAB tuner and the FM/AM tuner are alternately selected. - Page 51 MO/RND Press and hold the number button (in this example, 1) for more than 2 seconds. Repeat the above procedure to store other DAB services into other preset numbers. Notes: • A previously preset DAB service is erased when a new DAB service is stored in the same preset number.
-
Page 52: Tuning Into A Preset Dab Service
Tuning into a preset DAB service You can easily tune into a preset DAB service. Remember that you must store services first. If you have not stored them yet, see pages 50 and 51. FM/AM FM/AM Select the DAB tuner. Each time you press and hold the button, the DAB tuner and the FM/AM tuner are alternately selected. -
Page 53: External Component Operations
EXTERNAL COMPONENT OPERATIONS Note on One-Touch Operation: When you press CD-CH/EXT, the power automatically comes on. You do not have to press to turn on the power. Turn on the connected device and start playing the source. To turn up the volume To turn down the volume... -
Page 54: Maintenance
– Discs are dirty or scratched. – Moisture condensation occurs on the lens inside the unit. – The pickup lens inside the CD player is dirty. • Use only “finalized” CD-Rs. • CD-RWs (Rewritable) cannot be played back on this receiver. -
Page 55: Taking Care Of Mds
Taking care of MDs Since the disc is accommodated inside a cartridge, it can be handled easily without caring about dust and dirt. However, to maintain the high audio quality for an extended period, use care in the following points. Disc storage Do not place the MD in following places: •... -
Page 56: Troubleshooting
TROUBLESHOOTING What appears to be trouble is not always serious. Check the following points before calling a service center. Symptoms • CD cannot be played back. • CD or MD sound is sometimes interrupted. • Sound cannot be heard from the speakers. -
Page 57: Specifications
Sensitivity: 20 µV Selectivity: 35 dB [LW Tuner] Sensitivity: 50 µV SPECIFICATIONS CD PLAYER SECTION Type: Compact disc player Signal Detection System: Non-contact optical pickup (semiconductor laser) Number of channels: 2 channels (stereo) Frequency Response: 5 Hz to 20,000 Hz... - Page 58 Having TROUBLE with operation? Please reset your unit Refer to page of How to reset your unit Haben Sie PROBLEME mit dem Betrieb? Bitte setzen Sie Ihr Gerät zurück Siehe Seite Zurücksetzen des Geräts Vous avez des PROBLÈMES de fonctionnement? Réinitialisez votre appareil Référez-vous à...
Need help?
Do you have a question about the KD-MX2900R and is the answer not in the manual?
Questions and answers