Table of Contents
Advertisement
Available languages
Available languages
Quick Links
Advertisement
Chapters
Table of Contents
Troubleshooting

Related Manuals for Garmin eTrex 10


Summary of Contents for Garmin eTrex 10
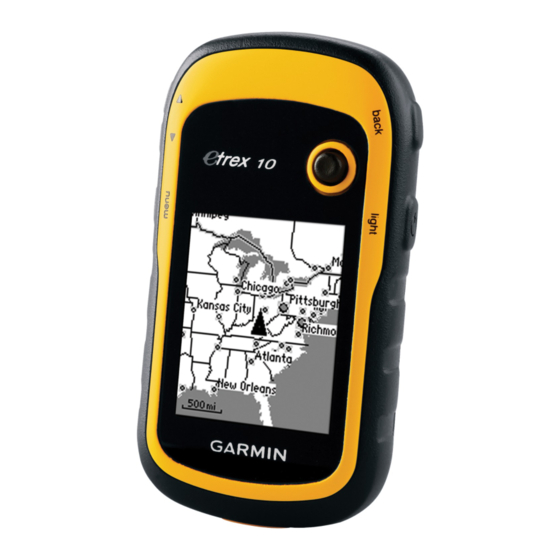
- Page 1 eTrex ® owner’s manual for use with models 10, 20, 30...
- Page 2 All rights reserved. Under the copyright laws, this manual may not be copied, in whole or in part, without the written consent of Garmin. Garmin reserves the right to change or improve its products and to make changes in the content of this manual without obligation to notify any person or organization of such changes or improvements.
-
Page 3: Table Of Contents
Table of Contents Table of Contents Trip Computer ......18 Geocaches ......19 Getting Started ....3 Downloading Geocaches .... 19 Device Overview ......3 Filtering the Geocache List ..19 Using the eTrex Keys ....4 Navigating to a Geocache ..20 Battery Information ..... - Page 4 Table of Contents System Settings ......28 Caring for the Device ....40 Display Settings ......28 Data Management ..... 41 Setting the Device Tones ... 29 Appendix ......44 Map Settings ......29 Optional Accessories ....44 Tracks Settings ......30 Data Field Options .....
-
Page 5: Getting Started
Getting Started Getting Started Device Overview WARNING See the Important Safety and ➋ ➊ Product Information guide in the product box for product warnings ➌ ➍ and other important information. ➎ When using your device the first time, you should complete these tasks to set up the device and get to know the basic features. -
Page 6: Using The Etrex Keys
Getting Started Using the eTrex Keys ➏ • Move the Thumb Stick up, ➐ down, left, and right to highlight menu selections or to move ➑ around the map. • Press the center of the Thumb ➒ Stick to select the highlighted item. -
Page 7: Battery Information
Getting Started 1. Turn the D-ring counter- Battery Information clockwise, and pull up to remove WARNING the cover. The temperature rating for the 2. Insert the batteries, observing device (-4°F to 158°F, or -20 to polarity. 70°C) may exceed the usable range of some batteries. -
Page 8: Turning The Device On Or Off
Getting Started Turning the Device On or Registering Your Device • Go to http://my.garmin.com. Hold . • Keep the original sales receipt, or a photocopy, in a safe place. Satellite Signals After the device is turned on, it begins acquiring satellite signals. -
Page 9: Waypoints, Routes, And Tracks
Waypoints, Routes, and Tracks Waypoints, Routes, Finding a Waypoint 1. Select Where To? > and Tracks Waypoints. 2. Select a waypoint. Waypoints Editing a Waypoint Waypoints are locations you record Before you can edit a waypoint, you and store in the device. must create a waypoint. -
Page 10: Using Sight 'N Go
Waypoints, Routes, and Tracks Increasing the Accuracy of a Using Sight ‘N Go Waypoint Location Sight ‘N Go is available on the Waypoint averaging allows you to eTrex 30. increase the accuracy of a waypoint You can point the device at an location by collecting multiple object in the distance, lock in the samples of the waypoint location. -
Page 11: Where To? Menu
Finding a Location Near or marine services. For more Another Location information, go to http://buy. 1. Select Where To? > menu > garmin.com or contact your Garmin Search Near. dealer. 2. Select an option. 3. If necessary, select a location. -
Page 12: Routes
Waypoints, Routes, and Tracks Finding an Address Creating a Route 1. Select Route Planner > You can use optional City Navigator maps to search for addresses. Create Route > Select First Point. 1. Select Where To? > 2. Select a category. Addresses. - Page 13 Waypoints, Routes, and Tracks Editing a Route Viewing a Route on the Map 1. Select Route Planner. 1. Select Route Planner. 2. Select a route. 2. Select a route. 3. Select Edit Route. 3. Select View Map. 4. Select a point. Deleting a Route 1.
-
Page 14: Tracks
Waypoints, Routes, and Tracks • To record tracks at a Tracks specified distance, select A track is a recording of your path. Distance. The track log contains information about points along the recorded • To record tracks at a specified time, select Time. path, including time, location, and elevation for each point. - Page 15 Waypoints, Routes, and Tracks Saving the Current Track Viewing the Elevation Plot of a Track The track being recorded is called the current track. 1. Select Track Manager. 2. Select a track. 1. Select Track Manager > Current Track. 3. Select Elevation Plot. 2.
-
Page 16: Navigation
Navigation Navigation Stopping Navigation Select Where To? > Stop You can navigate a route, a track, Navigation. to a waypoint, to a geocache, or to any saved location in the device. You can use the map (page 14) or represents your location on the compass (page 15) to navigate to map. -
Page 17: Compass
Navigation • Select a location on the map, Compass and the bar at the top of the The eTrex 30 has a 3-axis, screen shows information electronic compass. about the selected location. You can use a bearing pointer or a Navigating a Driving Route course pointer to navigate to your Driving route navigation is only... - Page 18 Navigation About the Course Pointer You should calibrate the compass after moving long distances, The course pointer is most useful experiencing temperature changes, if you are navigating on water or or changing the batteries. where there are no major obstacles in your path.
-
Page 19: Elevation Plot
Navigation elevation plot, see page 32. The scale refers to the distance ➍ between dots on the course Select Elevation Plot. deviation indicator. Changing the Plot Type Navigating with the Course You can change the elevation plot Pointer to display pressure and elevation Before you can navigate with the over course pointer, you must change... -
Page 20: Trip Computer
Navigation Calibrating the Barometric Resetting the Trip Data Altimeter For accurate information, reset the You can manually calibrate the trip information before beginning barometric altimeter if you know a trip. the correct elevation or the correct Select Trip Computer > menu barometric pressure. -
Page 21: Geocaches
Geocaches Geocaches Filtering the Geocache List A geocache is like a hidden You can filter your geocache list treasure. Geocaching is when you based on certain factors, such as hunt for hidden treasures using the level of difficulty. GPS coordinates posted online by those hiding the geocache. -
Page 22: Navigating To A Geocache
Geocaches 1. Select Setup > Geocaches > Navigating to a Geocache Filter Setup > Create Filter. 1. Select Geocaches. 2. Select items to filter. 2. Select a geocache. 3. Select an option: 3. Select Go. • To apply the filter to the 4. -
Page 23: Chirp
2. Begin navigating to a geocache available on the eTrex 30. (page 20). A chirp is a small Garmin accessory When you are within 33 feet that you can program and leave (10 m) of the geocache that in a geocache. -
Page 24: Applications
Before you can share data area, the device sounds a tone wirelessly, you must be within 10 (eTrex 20/30). feet (3 m) of a compatible Garmin device. 1. Select Share Wirelessly. 2. Select Send or Receive. 3. Follow the on-screen instructions. -
Page 25: Calculating The Size Of An Area
Applications Calculating the Size of an Viewing the Calendar and Area Almanacs 1. Select Area Calculation > You can view device activity, such Start. as when a waypoint was saved, almanac information for the sun 2. Walk around the perimeter of and moon, and the best times for the area you want to calculate. -
Page 26: Setting An Alarm
Applications Setting an Alarm Satellite Page If you are not currently using the The satellite page shows your device, you can set the device to current location, GPS accuracy, turn on at a specific time. satellite locations, and signal strength. 1. - Page 27 Applications Simulating a Location Before you can simulate a location, you must turn off GPS (page 24). 1. Select Satellite > menu > Use With GPS Off. 2. Select menu > Set Location On Map. 3. Select a location. 4. Select Use. owner’s manual for use with models 10, 20, 30...
-
Page 28: Customizing Your Device
Customizing Your Device Customizing Your Enabling the Map Data Fields 1. Select Map > menu > Setup Device Map > Data Fields. 2. Select a number and style of Customizing the Main data fields. Menu Changing the Data Fields Select menu > Change Item Before you can change the map Order to change the item order data fields, you must enable them... -
Page 29: Profiles
Customizing Your Device Customizing Dashboards you change settings such as data 1. Open the page for which fields or units of measurement, the you want to customize the changes are saved automatically as dashboard. part of the profile. 2. Select an option: Selecting a Profile •... -
Page 30: System Settings
38. Overlay Service), or Demo Mode (GPS off). For information • Colors (eTrex 20/30)—sets about WAAS, go to http://www. the colors that display in Night garmin.com/aboutGPS/waas. and Day mode. owner’s manual for use with models 10, 20, 30... -
Page 31: Setting The Device Tones
Customizing Your Device ◦ Mode—sets a light Setting the Device Tones background (Day), a dark You can customize tones for background (Night), or messages, keys, turn warnings, and automatically switches alarms. between the two based on 1. Select Setup > Tones. the sunrise time and the sunset time for your current 2. -
Page 32: Tracks Settings
Customizing Your Device • Guidance Text—allows you to more slowly. select when to show guidance ◦ Shaded Relief—shows text on the map. detail relief on the map • Data Fields—selects the (if available) or turns off number and size of the data shading. -
Page 33: Changing The Units Of Measure
Customizing Your Device frequently creates a more- Time Settings detailed track, but fills the track Select Setup > Time. log faster. • Time Format—allows you to • Auto Archive—selects an select a 12-hour or a 24-hour automatic archive method to display time. -
Page 34: Heading Settings
Customizing Your Device • Map Datum—sets the destination. coordinate system on which the ◦ Course (CDI)—the course map is structured. deviation indicator displays • Map Spheroid—shows the your relationship to a course coordinate system the device is line leading to a destination. using. -
Page 35: Geocaching Settings
Customizing Your Device • Barometer Mode • Plot Type ◦ Variable Elevation—allows ◦ Elevation/Time—records the barometer to measure elevation changes over a changes in elevation while period of time. you are moving. ◦ Elevation/Distance— ◦ Fixed Elevation—assumes records elevation changes the device is stationary at a over a distance. -
Page 36: Routing Settings
™ calculates on-road routes chirp accessory. See the chirp that require minimal time to Owner’s Manual at drive. http://www.garmin.com. ◦ On Road For Distance (requires routable maps)— Routing Settings calculates on-road routes The device calculates routes that are shorter in distance. -
Page 37: Marine Map Settings
Customizing Your Device • Lock On Road—locks the Marine Map Settings position icon, which represents This function is available on the your position on the map, onto eTrex 20 and eTrex 30. the nearest road. Select Setup > Marine. • Off Road Transitions— available only for some •... -
Page 38: Fitness
Customizing Your Device navigation aids on the map. Fitness • Marine Alarm Setup For more information on optional fitness accessories, see page 44. ◦ Anchor Drag Alarm—alarm sounds when you exceed a specified drift distance while Resetting Data anchored. You can reset trip data, delete all waypoints, clear the current track, ◦... -
Page 39: Changing The
Customizing Your Device Restoring Specific Page Changing the Page Settings Sequence You can restore the settings for the Before you can change the order of map, compass, and trip computer. the page sequence, you must add pages to the sequence (page 37). 1. -
Page 40: Device Information
3. Move the Thumb Stick up and down to adjust the contrast Viewing Device level (eTrex 10 only). Information Adjusting the Backlight You can view the unit ID, software Timeout version, and license agreement. -
Page 41: Specifications
Device Information Specifications CAUTION Contact your local waste disposal Water Rugged plastic, department to properly recycle the resistance waterproof to IEC batteries. 60529 IPX7 Battery type 2 AA batteries, NOTICE (alkaline, NiMH, lithium, or precharged NiMH) Alkaline batteries lose a significant amount of their capacity as Battery Life Up to 25 hours temperature decreases. -
Page 42: Caring For The Device
Device Information Long-Term Storage 2. Wipe the screen with the cloth. When you do not plan to use the 3. Thoroughly dry the screen. device for several months, remove Water Immersion the batteries. Stored data is not lost when batteries are removed. NOTICE The device is waterproof to IEC Standard 60529 IPX7. -
Page 43: Data Management
Also, some maps are Me, or NT. It is also not compatible available preloaded on memory with Mac OS 10.3 and earlier. ® cards. Go to http://buy.garmin.com for more information. File Types The device supports these file 1. Turn the D-ring counter- types. - Page 44 Device Information 4. Place the microSD card in the ➋ ➊ device with the gold contacts facing down. ➋ 5. Close the card holder. 3. Plug the small end of the USB 6. Slide the card holder toward the cable into the mini-USB port. top of the device to lock it.
-
Page 45: Deleting Files
Device Information 4. Open the “Garmin” or memory 3. Select the files. card drive/volume. 4. Press the Delete key on your 5. Select Edit > Paste. keyboard. TIP: You must put geocache files Disconnecting the USB Cable in the Garmin\GPX folder. -
Page 46: Appendix
Using Optional Fitness Accessories or from your Garmin dealer. 1. Bring the device within range Optional Maps (10 ft. or 3 m) of the ANT+ You can purchase additional maps, accessory. -
Page 47: Data Field Options
(33 ft. or 10 Data Description m) away from other ANT+ accessories. Field • Bring the Garmin device within Accuracy of The margin of range (10 ft. or 3 m) of the error for your exact ANT+ accessory. - Page 48 Appendix Data Description Data Description Field Field Ascent - The maximum ascent Descent - The maximum Maximum rate in feet or meters Maximum descent rate in feet or per minute. meters per minute. Ascent - Total The total elevation Descent - Total The total elevation distance ascended.
- Page 49 Appendix Data Description Data Description Field Field ETA at Next The estimated time of Location Displays the current day you will reach the (lat/lon) position in the default next waypoint on the position format route. regardless of the selected settings. Glide Ratio The ratio of horizontal distance traveled to...
- Page 50 Appendix Data Description Data Description Field Field Speed The current rate of Time of Day The current time of speed at which you day based on your are moving since last time settings (format, reset. time zone, and daylight saving time). Speed - The maximum speed Maximum...
- Page 51 Appendix Data Description Data Description Field Field Trip Time - The time spent not Vert. Speed to The measurement Stopped moving since the last Dest. of your rate of reset. ascent or descent to a predetermined Trip Time - A running tally of altitude.
-
Page 52: Troubleshooting
Appendix Troubleshooting Problem Solution The device does not 1. Remove the batteries. respond. How do I 2. Reinstall the batteries. reset the device? NOTE: This does not erase any of your data or settings. Select Setup > Reset > Reset All Settings. I want to reset all the customized settings back to the factory... - Page 53 Windows may have trouble assigning drive my list of drives. letters to your Garmin drives. See the Help file for your operating system to learn how to assign drive letters. I need replacement Go to http://buy.garmin.com, or contact your Garmin parts or accessories.
- Page 55 eTrex ® คู ่ ม ื อ การใช้ ง านสำ า หรั บ รุ ่ น 10, 20, 30...
- Page 56 ใดทราบถึ ง การเปลี ่ ย นแปลงหรื อ การแก้ ไ ขปรั บ ปรุ ง ดั ง กล่ า ว สำ า หรั บ อั พ เดทล่ า สุ ด และ ข้ อ มู ล เพิ ่ ม เติ ม เกี ่ ย วกั บ การใช้ ง านผลิ ต ภั ณ ฑ์ น ี ้ กรุ ณ าไปที ่ เ ว็ บ www.garmin.com Garmin , เครื...
- Page 57 สารบั ญ สารบั ญ Trip Computer ......71 Geocaches ......72 เริ ่ ม ต้ น การใช้ ง าน ....57 การดาวน์ โ หลด Geocaches ... 72 ภาพรวมอุ ป กรณ์ ......57 การกรองรายการ Geocache... 73 การใช้ ป ุ ่ ม ของ eTrex ..... 58 การนำ...
- Page 58 สารบั ญ การตั ้ ง ค่ า ระบบ ......81 การดู แ ลรั ก ษาอุ ป กรณ์ ....92 การตั ้ ง ค่ า การแสดงผล....81 การจั ด การข้ อ มู ล ......93 การตั ้ ง ค่ า โทนเสี ย งของอุ ป กรณ์ ..82 ภาคผนวก...
-
Page 59: เริ ่ ม ต้ น การใช้ ง าน
เริ ่ ม ต้ น การใช้ ง าน เริ ่ ม ต้ น การใช้ ง าน ภาพรวมอุ ป กรณ์ คำ า เตื อ น ดู ค ู ่ ม ื อ ความปลอดภั ย ที ่ ส ำ า คั ญ และ ➋... -
Page 60: การใช้ ป ุ ่ ม ของ Etrex
เริ ่ ม ต้ น การใช้ ง าน การใช้ ป ุ ่ ม ของ eTrex ➏ • เลื ่ อ น Thumb Stick ขึ ้ น ลง ซ้ า ย ➐ และขวา เพื ่ อ เน้ น การเลื อ กเมนู หรื อ เคลื... -
Page 61: ข้ อ มู ล แบตเตอร
เริ ่ ม ต้ น การใช้ ง าน ข้ อ มู ล แบตเตอรี ่ 2. ใส่ แ บตเตอรี ่ โ ดยให้ ส ั ง เกตขั ้ ว คำ า เตื อ น ระดั บ อุ ณ หภู ม ิ ส ำ า หรั บ อุ ป กรณ์ (-4°F ถึ... -
Page 62: การเปิ ด หรื อ ปิ ด อุ ป กรณ
สำ า หรั บ ข้ อ มู ล เพิ ่ ม เติ ม เกี ่ ย วกั บ GPS ไม่ ม ี ก ารเปลี ่ ย นแปลง ให้ เ ลื อ ก กรุ ณ าไปที ่ http://www.garmin.com/ เสร็ จ aboutGPS •... - Page 63 Waypoints เส้ น ทาง และ Tracks การหา waypoint การเพิ ่ ม ความแม่ น ยำ า ของตำ า แหน่ ง 1. เลื อ ก ค้ น หาตำ า แหน่ ง > waypoint Waypoints การเฉลี ่ ย Waypoint ช่ ว ยคุ ณ ในการเพิ ่ ม ความแม่...
-
Page 64: การใช้ Sight 'N Go
เติ ม ไปที ่ http://buy.garmin.com หรื อ เสร็ จ > จั ด เก็ บ ติ ด ต่ อ ตั ว แทนจำ า หน่ า ย Garmin ของคุ ณ คู ่ ม ื อ การใช้ ง านสำ า หรั บ รุ ่ น 10, 20, 30... -
Page 65: เส้ น ทาง
Waypoints เส้ น ทาง และ Tracks การค้ น หาตำ า แหน่ ง โดยใช้ ช ื ่ อ การค้ น หาที ่ อ ยู ่ ขึ ้ น อยู ่ ก ั บ แผนที ่ ท ี ่ ถ ู ก ติ ด ตั ้ ง บนอุ ป กรณ์ คุ... - Page 66 Waypoints เส้ น ทาง และ Tracks การสร้ า งเส้ น ทาง การแก้ ไ ขเส้ น ทาง 1. เลื อ ก วางแผนเส้ น ทาง > สร้ า ง 1. เลื อ ก วางแผนเส้ น ทาง เส้ น ทาง > เลื อ กจุ ด เรี ม ต้ น 2.
-
Page 67: Tracks
Waypoints เส้ น ทาง และ Tracks Tracks การดู เ ส้ น ทางบนแผนที ่ 1. เลื อ ก วางแผนเส้ น ทาง Tracks คื อ การบั น ทึ ก เส้ น ทางที ่ ค ุ ณ เดิ น 2. เลื อ กหนึ ่ ง เส้ น ทาง ทางผ่... - Page 68 Waypoints เส้ น ทาง และ Tracks • เลื อ ก ระยะทาง เพื ่ อ บั น ทึ ก การบั น ทึ ก Track ปั จ จุ บ ั น tracks ตามระยะทางที ่ ถ ู ก ระบุ Track ที ่ ถ ู ก บั น ทึ ก ไว้ เรี ย กว่ า track ปั...
-
Page 69: การนำ า ทาง
การนำ า ทาง การนำ า ทาง การดู ผ ั ง ความสู ง ของหนึ ่ ง track 1. เลื อ ก จั ด การ Track คุ ณ สามารถนำ า ทางบนหนึ ่ ง เส้ น ทาง, 2. เลื อ กหนึ ่ ง track หนึ... -
Page 70: แผนท
การนำ า ทาง การหยุ ด การนำ า ทาง • เลื อ กหนึ ่ ง ตำ า แหน่ ง บนแผนที ่ เลื อ ก ค้ น หาตำ า แหน่ ง > หยุ ด และแถบที ่ ด ้ า นบนของจอจะ นำ า ทาง แสดงข้... -
Page 71: เข็ ม ทิ ศ
การนำ า ทาง เข็ ม ทิ ศ คุ ณ ควรปรั บ ตั ้ ง เข็ ม ทิ ศ หลั ง จากที ่ เคลื ่ อ นที ่ เ ป็ น ระยะทางไกล รู ้ ส ึ ก ถึ ง การ eTrex 30 มี เ ข็ ม ทิ ศ อิ เ ล็ ก ทรอนิ ก ส์ แ บบ เปลี... -
Page 72: การวาดผั ง ความสู ง
การนำ า ทาง ของคุ ณ การนำ า ทางด้ ว ยลู ก ศรชี ้ เ ส้ น ทาง ก่ อ นที ่ ค ุ ณ จะสามารถนำ า ทางด้ ว ยลู ก ศรชี ้ เส้ น ทางได้ คุ ณ ต้ อ งเปลี ่ ย นการตั ้ ง ค่ า ลู ก ➍... -
Page 73: Trip Computer
การนำ า ทาง การเปลี ่ ย นประเภทของผั ง การปรั บ ตั ้ ง เครื ่ อ งวั ด ความสู ง จาก ความดั น บรรยากาศ คุ ณ สามารถเปลี ่ ย นประเภทของการวาด ผั ง ความสู ง ให้ แ สดงแรงกดบนพื ้ น ผิ ว กั บ คุ... -
Page 74: Geocaches
Geocaches Geocaches การตั ้ ง ค่ า ข้ อ มู ล การเดิ น ทางใหม่ เพื ่ อ ให้ ไ ด้ ข ้ อ มู ล ที ่ แ ม่ น ยำ า ให้ ต ั ้ ง ค่ า Geocache เป็ น เสมื อ นขุ ม ทรั พ ย์ ท ี ่ ซ ่ อ น ข้... -
Page 75: การกรองรายการ Geocache
Geocaches การกรองรายการ 1. เลื อ ก ตั ้ ง ค่ า > Geocaches > ตั ้ ง ค่ า Filter > สร้ า ง Filter Geocache 2. เลื อ กรายการเพื ่ อ กรอง คุ ณ สามารถกรองรายการ geocache ได้ ต ามปั จ จั ย ที ่ ก ำ า หนด เช่ น ระดั บ ของ 3. -
Page 76: การนำ า ทางไปยั ง Geocache
Chirp เป็ น อุ ป กรณ์ เ สริ ม ขนาดเล็ ก ของ หลั ง จากที ่ ค ุ ณ พยายามค้ น หา geocache Garmin ที ่ ค ุ ณ สามารถตั ้ ง โปรแกรมและ คุ ณ สามารถบั น ทึ ก ผลการค้ น หาไว้ ไ ด้... -
Page 77: โปรแกรมประยุ ก ต
ได้ คุ ณ ต้ อ งอยู ่ ใ นระยะ 10 ฟุ ต (3 ม.) ยั ง ขั ้ น ต่ อ ไปของ geocache ของอุ ป กรณ์ Garmin ที ่ ใ ช้ ร ่ ว มกั น ได้ 1. เลื อ ก แชร์ แ บบไร้ ส าย... -
Page 78: การตั ้ ง ค่ า การเตื อ นใกล้ เ คี ย ง
โปรแกรมประยุ ก ต์ การตั ้ ง ค่ า การเตื อ นใกล้ เ คี ย ง การคำ า นวณขนาดของพื ้ น ที ่ 1. เลื อ ก คำ า นวณพื ้ น ที ่ > เริ ่ ม ต้ น การเตื อ นใกล้ เ คี ย งจะเตื อ นให้ ค ุ ณ ทราบ เมื... -
Page 79: การดู ป ฏิ ท ิ น และ Almanacs
โปรแกรมประยุ ก ต์ การดู ป ฏิ ท ิ น และ Almanacs การตั ้ ง เสี ย งปลุ ก คุ ณ สามารถดู ก ิ จ กรรมของอุ ป กรณ์ ไ ด้ หากคุ ณ ไม่ ไ ด้ ใ ช้ อ ุ ป กรณ์ ใ นขณะนี ้ คุ ณ เช่... -
Page 80: การเปิ ด นาฬิ ก าจั บ เวลา
โปรแกรมประยุ ก ต์ การเปิ ด นาฬิ ก าจั บ เวลา การปิ ด GPS เลื อ ก ดาวเที ย ม > menu > ใช้ เลื อ ก นาฬิ ก าจั บ เวลา พร้ อ มปิ ด GPS หน้ า ดาวเที ย ม การจำ... -
Page 81: การตั ้ ง ค่ า อุ ป กรณ
การตั ้ ง ค่ า อุ ป กรณ์ ของคุ ณ การตั ้ ง ค่ า อุ ป กรณ์ การเปิ ด ใช้ ก ารทำ า งานของ Data Fields ของแผนที ่ ของคุ ณ 1. เลื อ ก แผนที ่ > menu > ตั ้ ง ค่ า แผนที... -
Page 82: Profiles
การตั ้ ง ค่ า อุ ป กรณ์ ของคุ ณ การปรั บ Dashboards หน่ ว ยการวั ด การเปลี ่ ย นแปลงจะถู ก 1. เปิ ด หน้ า ที ่ ค ุ ณ ต้ อ งการปรั บ บั น ทึ ก เป็ น ส่ ว นหนึ ่ ง ของ profile โดย dashboard อั... -
Page 83: การตั ้ ง ค่ า ระบบ
สำ า หรั บ ข้ อ มู ล เกี ่ ย วกั บ WAAS (Wide แสดงบนหน้ า จอในโหมดกลางคื น Area Augmentation System) และกลางวั น ไปที ่ http://www.garmin.com/ ◦ โหมด—ตั ้ ง พื ้ น หลั ง แบบสว่ า ง aboutGPS/waas.html (กลางวั น ) และพื ้ น หลั ง แบบ... -
Page 84: การตั ้ ง ค่ า โทนเสี ย งของอุ ป กรณ
การตั ้ ง ค่ า อุ ป กรณ์ ของคุ ณ การตั ้ ง ค่ า แผนที ่ มื ด (กลางคื น ) หรื อ สั บ เปลี ่ ย น ระหว่ า งทั ้ ง สองระบบโดย เลื อ ก ตั ้ ง ค่ า > แผนที ่ อั... -
Page 85: การตั ้ ง ค่ า Tracks
การตั ้ ง ค่ า อุ ป กรณ์ ของคุ ณ • ข้ อ มู ล แผนที ่ — คุ ณ สามารถเปิ ด ระดั บ การซู ม ที ่ เ หมาะสมโดย อั ต โนมั ต ิ เพื ่ อ การใช้ แ ผนที ่ อ ย่ า ง หรื... -
Page 86: การเปลี ่ ย นหน่ ว ยวั ด
การตั ้ ง ค่ า อุ ป กรณ์ ของคุ ณ การตั ้ ง ค่ า เวลา ค่ า ของผู ้ ใ ช้ • สี (eTrex 20/30)—เปลี ่ ย นสี ข อง เลื อ ก ตั ้ ง ค่ า > เวลา เส้... -
Page 87: การตั ้ ง ทิ ศ ทางที ่ ม ุ ่ ง หน้ า ไป
การตั ้ ง ค่ า อุ ป กรณ์ ของคุ ณ • เข็ ม ทิ ศ —สลั บ จากเข็ ม ทิ ศ ตามโครงสร้ า งของแผนที ่ อิ เ ล็ ก ทรอนิ ก ส์ เ ป็ น เข็ ม ทิ ศ GPS เมื ่ อ •... -
Page 88: การตั ้ ง ค่ า Geocaching
โปรแกรมอุ ป กรณ์ เ สริ ม chirp ดู คู ่ ม ื อ เวลาหนึ ่ ง การใช้ ง าน chirp ที ่ http://www. garmin.com ◦ ความกดอากาศล้ อ มรอบ— คู ่ ม ื อ การใช้ ง านสำ า หรั บ รุ ่ น 10, 20, 30... -
Page 89: การตั ้ ง ค่ า การนำ า ทาง
การตั ้ ง ค่ า อุ ป กรณ์ ของคุ ณ การตั ้ ง ค่ า การนำ า ทาง • คำ า นวณเส้ น ทางเพื ่ อ — ให้ ค ุ ณ เลื อ กวิ ธ ี ก ารคมนาคมเพื ่ อ ให้ เ หมาะ อุ... -
Page 90: การตั ้ ง ค่ า แผนที ่ ท างทะเล
การตั ้ ง ค่ า อุ ป กรณ์ ของคุ ณ การตั ้ ง ค่ า แผนที ่ ท างทะเล ทางทางทะเลบนแผนที ่ • ตั ้ ง ค่ า Marine Alarm ฟั ง ก์ ช ั ่ น นี ้ ม ี อ ยู ่ บ น eTrex 20 และ eTrex ◦... -
Page 91: ฟิ ต เนส
การตั ้ ง ค่ า อุ ป กรณ์ ของคุ ณ ฟิ ต เนส การเรี ย กคื น หน้ า ที ่ ต ั ้ ง ไว้ โ ดยเฉพาะ คุ ณ สามารถเรี ย กคื น การตั ้ ง ค่ า ของแผนที ่ สำ... -
Page 92: การเปลี ่ ย นลำ า ดั บ หน้ า
ข้ อ มู ล อุ ป กรณ ข้ อ มู ล อุ ป กรณ์ การเปลี ่ ย นลำ า ดั บ หน้ า ก่ อ นที ่ จ ะสามารถเปลี ่ ย นลำ า ดั บ หน้ า ได้ คุ ณ ต้ อ งทำ า การเพิ ่ ม หน้ า เข้ า ตามลำ า ดั บ การปรั... -
Page 93: การอั พ เดทซอฟต์ แ วร
แบตเตอรี ่ ข นาด AA 2 คอมพิ ว เตอร์ (หน้ า 94) ก้ อ น (alkaline, NiMH, lithium, หรื อ NiMH ที ่ 1. ไปที ่ http://www.garmin.com/ ชาร์ จ ไว้ ล ่ ว งหน้ า ) products/webupdater อายุ ก ารใช้ ง าน... -
Page 94: การดู แ ลรั ก ษาอุ ป กรณ
ข้ อ มู ล อุ ป กรณ การเก็ บ รั ก ษาระยะยาว ข้ อ ควรระวั ง หากคุ ณ ไม่ ม ี แ ผนที ่ จ ะใช้ อ ุ ป กรณ์ เ ป็ น ติ ด ต่ อ แผนกกำ า จั ด ของเสี ย ในท้ อ งถิ ่ น เวลานานหลายเดื... -
Page 95: การจั ด การข้ อ มู ล
งานหรื อ ชาร์ จ ไฟ • ไฟล์ GPI ที ่ เ ป็ น POI พิ เ ศษ (custom POI) สร้ า งจาก Garmin อุ ณ หภู ม ิ ท ี ่ ส ู ง หรื อ ต่ ำ า เกิ น ไป... - Page 96 ล่ ว งหน้ า บนการ์ ด หน่ ว ยความจำ า สำ า หรั บ อุ ป กรณ์ เ พื ่ อ ล็ อ ค ข้ อ มู ล เพิ ่ ม เติ ม ไปที ่ http://buy.garmin. 7. ใส่ แ บตเตอรี ่ ก ลั บ (หน้ า 59) 8.
- Page 97 ข้ อ มู ล อุ ป กรณ 4. เปิ ด “Garmin” หรื อ ไดรฟ์ ก าร์ ด ➊ หน่ ว ยความจำ า /volume ➋ 5. เลื อ ก Edit > Paste เคล็ ด ลั บ : คุ ณ ต้ อ งนำ า ไฟล์ geocache 3.
-
Page 98: ภาคผนวก
และชิ ้ น ส่ ว นอะไหล่ มี ใ ห้ เ ลื อ กที ่ http:// system tray ของคุ ณ buy.garmin.com หรื อ ที ่ ต ั ว แทน • สำ า หรั บ Mac คอมพิ ว เตอร์ ให้ จำ า หน่ า ย Garmin ของคุ ณ... - Page 99 เสริ ม ถู ก กระตุ ้ น และมี ก ารทำ า งาน อย่ า งถู ก ต้ อ ง • เมื ่ อ จั บ คู ่ แ ล้ ว อุ ป กรณ์ Garmin ของ คุ ณ จะรั บ ข้ อ มู ล จากอุ ป กรณ์ เ สริ ม ของ...
-
Page 100: ตั ว เลื อ ก Data Field
ภาคผนวก อุ ป กรณ์ เ สริ ม อื ่ น ๆ ได้ Data Field คำ า อธิ บ าย เครื ่ อ งวั ด ความกดอากาศปั จ จุ บ ั น ที ่ ตั ว เลื อ ก Data Field บรรยากาศ ถู... - Page 101 ภาคผนวก Data Field คำ า อธิ บ าย Data Field คำ า อธิ บ าย ระยะทางไปถึ ง ระยะทางไปยั ง จุ ด หมาย อั ต ราการ อั ต ราของระยะทางใน จุ ด หมาย ปลายทางสุ ด ท้ า ยของ เคลื ่ อ นที ่ แนวนอนที...
- Page 102 ภาคผนวก Data Field คำ า อธิ บ าย Data Field คำ า อธิ บ าย ตำ า แหน่ ง (ที ่ ถ ู ก แสดงตำ า แหน่ ง ปั จ จุ บ ั น ความเร็ ว ความเร็ ว เฉลี ่ ย ของ เลื...
- Page 103 ภาคผนวก Data Field คำ า อธิ บ าย Data Field คำ า อธิ บ าย เวลาถึ ง จุ ด ต่ อ ไป เวลาโดยประมาณที ่ เลี ้ ย ว มุ ม ที ่ แ ตกต่ า ง (เป็ น ต้ อ งการจนกระทั ่ ง ไป องศา) ระหว่...
-
Page 104: การแก้ ไ ขปั ญ หา
ภาคผนวก การแก้ ไ ขปั ญ หา ปั ญ หา วิ ธ ี แ ก้ ไ ข อุ ป กรณ์ ไ ม่ ม ี ก ารตอบ 1. ถอดแบตเตอรี ่ อ อก สนอง ฉั น จะตั ้ ง ค่ า ใหม่ ใ ห้ 2. - Page 105 รายการไดรฟ์ ข องฉั น กั บ ไดรฟ์ Garmin ของคุ ณ ดู ไ ฟล์ Help สำ า หรั บ ระบบปฏิ บ ั ต ิ ก าร ของคุ ณ เพื ่ อ เรี ย นรู ้ ว ิ ธ ี ก ารกำ า หนดตั ว อั ก ษรไดรฟ์...
- Page 107 eTrex ® petunjuk teknis penggunaan untuk model 10, 20, 30...
- Page 108 © 2012 Garmin Ltd. atau anak perusahaannya Semua hak dilindungi undang-undang. Berdasarkan undang-undang hak cipta, petunjuk teknis ini tidak boleh disalin, seluruhnya atau sebagian, tanpa izin tertulis dari Garmin. Garmin berhak mengubah atau menyempurnakan produknya dan membuat perubahan pada isi petunjuk teknis ini tanpa kewajiban memberi tahu siapapun atau organisasi manapun tentang perubahan atau penyempurnaan tersebut.
- Page 109 Daftar Isi Daftar Isi Komputer Perjalanan ....127 Cache Geografis....127 Untuk Memulai ....109 Mengunduh Cache Geografis ..127 Device Overview ......109 Menyaring Daftar Cache Menggunakan Tombol eTrex ..111 Geografis .........128 Informasi Baterai ......111 Menavigasi ke Cache Geografis ..129 Mengaktifkan atau Menonaktifkan Data Percobaan ......129 Perangkat ........113 chirp™...
-
Page 110: Daftar Isi
Daftar Isi Profil ........136 Tentang Baterai ......151 Pengaturan Sistem ....137 Memelihara Perangkat ....152 Pengaturan Layar .....137 Manajemen Data ......153 Pengaturan Nada Perangkat ..139 Lampiran ......156 Pengaturan Peta .......139 Aksesori Tambahan ....156 Pengaturan Jejak ......140 Pilihan Kolom Data ....158 Mengubah Satuan Ukuran ..141 Troubleshooting .......164 Pengaturan Waktu ....141 Pengaturan Format Posisi ..141... -
Page 111: Untuk Memulai
Untuk Memulai Untuk Memulai 4. Daftarkan perangkat (halaman 113). 5. Membuat waypoint (halaman PERINGATAN 114). Lihat panduan Informasi Penting Tentang Keselamatan dan Produk 6. Membuat rute (halaman 117). dalam kemasan produk untuk 7. Merekam jejak (halaman 119). mengetahui peringatan dan 8. -
Page 112: Device Overview
Untuk Memulai Device Overview ➏ ➐ ➋ ➑ ➊ ➌ ➒ ➍ ➎ Port mini-USB (di bawah tutup ➏ pelindung) Penutup baterai ➐ Tombol zoom ➊ Ring pengunci penutup baterai ➑ Tombol kembali ➋ Bagian pemasangan ➒ Thumb Stick™ ➌ Tombol menu ➍... -
Page 113: Menggunakan Tombol Etrex
Untuk Memulai Menggunakan Tombol Informasi Baterai eTrex PERINGATAN • Gerakkan Thumb Stick ke atas, Suhu perangkat (-4°F sampai ke bawah, dan ke kanan untuk 158°F, atau -20 sampai 70°C) menyorot pilihan menu atau mungkin melebihi kisaran bergerak di sekitar peta. operasional beberapa baterai. - Page 114 Untuk Memulai 5. Pilih Setup (Konfigurasi) > 1. Putar D-ring berlawanan dengan System (Sistem) > Battery arah jarum jam, dan lepaskan Type (Jenis Baterai). atau buka penutupnya. 6. Pilih Alkaline (Alkalin), 2. Pasang baterai sesuai polaritasnya. Lithium, atau NiMH Isi Ulang. 3.
-
Page 115: Mengaktifkan Atau Menonaktifkan Perangkat
Untuk Memulai Mengaktifkan atau Mendaftarkan Perangkat Menonaktifkan • Kunjungi http://my.garmin.com. Perangkat • Simpan tanda terima penjualan Tahan . asli atau fotokopinya di tempat yang aman. Sinyal Satelit Setelah perangkat diaktifkan, maka akan segera mendapat sinyal satelit. Perangkat ini memerlukan pandangan yang jelas ke arah langit untuk mendapatkan sinyal satelit. -
Page 116: Waypoint, Rute, Dan Jalur
Waypoint, Rute, dan Jalur Waypoint, Rute, dan Mencari Waypoint Jalur 1. Pilih Where To? (Mau Kemana?) > Waypoint 2. Pilih waypoint. Waypoint Mengedit Waypoint Waypoint adalah lokasi yang Anda Sebelum dapat mengedit waypoint, rekam dan tersimpan di perangkat. Anda harus membuat waypoint Membuat Waypoint terlebih dulu. -
Page 117: Menggunakan Sight 'N Go
Waypoint, Rute, dan Jalur Menggunakan Sight ‘N Meningkatkan Akurasi Lokasi Waypoint Perata-rataan waypoint Sight ‘N Go tersedia pada tipe memungkinkan Anda untuk eTrex 30. meningkatkan akurasi lokasi waypoint dengan mengumpulkan Anda dapat mengarahkan banyak sampel lokasi waypoint. perangkat ke suatu objek di kejauhan, lalu menavigasi ke objek 1. -
Page 118: Menu Mau Kemana
4. Masukkan semua atau sebagian nama, dan pilih Done (Selesai). restoran atau layanan marina. Untuk informasi, kunjungi http://buy. Mencari Lokasi Didekat garmin.com, atau hubungi dealer Lokasi Lain Garmin Anda. 1. Pilih Where To? (Mau Kemana?). > menu > Search Near (Telusuri Yang Dekat). -
Page 119: Rute
Waypoint, Rute, dan Jalur Mencari Alamat Membuat Rute Anda dapat menggunakan peta 1. Pilih Route Planner (Perencana Rute) > Create Navigator Kota tambahan untuk Route (Buat Rute) > Pilih First mencari alamat. Point (Pilih Titik Pertama). 1. Pilih Where To? (Mau Kemana?). - Page 120 Waypoint, Rute, dan Jalur 5. Pilih Done (Selesai). • Untuk menghapus titik dari rute, pilih Remove Mengedit Rute (Hapus). 1. Pilih Route Planner 6. Pilih back (kembali) untuk (Perencana Rute) menyimpan rute. 2. Pilih rute. Melihat Rute pada Peta 3. Pilih Edit Route (Edit Rute). 1.
-
Page 121: Jejak
Waypoint, Rute, dan Jalur Jejak Melihat Rute Aktif 1. Ketika menavigasi rute, pilih Jejak adalah rekaman jejak Active Route (Rute Aktif). perjalanan Anda. 2. Pilih titik pada rute untuk melihat Data jejak berisi informasi tentang rincian tambahan. titik-titik jejak yang direkam, Membalik Rute termasuk waktu, lokasi, dan 1. - Page 122 Waypoint, Rute, dan Jalur 4. Tentukan pilihan: CATATAN: Interval Most Often • Untuk merekam jejak pada (Paling Sering) memberikan waktu yang berbeda untuk gambaran jejak paling rinci memberi gambaran jejakr tetapi menggunakan lebih secara optimal, pilih Auto banyak memori perangkat. (Otomatis).
- Page 123 Waypoint, Rute, dan Jalur Melihat Informasi Jejak Mengarsipkan Jejak Tersimpan 1. Pilih Track Manager (Pengelola Jalur). Anda dapat mengarsipkan jejak tersimpan untuk menghemat ruang 2. Pilih jalur. memori. 3. Pilih View Map (Lihat Peta). 1. Pilih Track Manager (Pengelola Awal dan akhir jalur ditandai Jejak).
-
Page 124: Navigasi
Navigasi Navigasi Halaman peta akan ditampilkan dengan jalur ditandai garis Anda bisa menavigasi rute, jejak, warna magenta. ke titik waypoint, ke geocache, atau 5. Navigasi menggunakan lokasi yang tersimpan di dalam peta(halaman 122) atau perangkat. kompas(halaman 124). Anda bisa menggunakan peta Menghentikan Navigasi (halaman 122) atau kompas Pilih Where To? (Mau... - Page 125 Navigasi kolom data, lihat halaman halaman memuat peta City Navigator. Jika 135. Anda berencana menggunakan aksesori yang terpasang di mobil Menelusuri Peta bersama perangkat ini, Anda juga 1. Pilih Map (Peta). harus membeli dan memasang dudukannya di kendaraan Anda. 2. Pilih satu pilihan atau lebih: •...
- Page 126 Navigasi Menavigasi dengan Penunjuk menggunakan profil otomotif, Arah kompas akan menampilkan arah GPS, bukan arah magnetik. Bila menavigasi ke suatu tujuan, arah jarum akan menunjuk ke Mengkalibrasi Kompas tujuan Anda, di manapun posisi Anda. PEMBERITAHUAN Kalibrasikan kompas elektronik di 1. Mulai menavigasi ke tujuan luar ruangan.
-
Page 127: Plot Ketinggian
Navigasi Menavigasi dengan Penunjuk ➍ Jalan ➋ Sebelum bisa menavigasi dengan penunjuk jalan, Anda harus ➊ ➌ mengubah pengaturan jarum ke Course (CDI) (Jalan) (halaman 142). 1. Mulai menavigasi ke tujuan ➊ Penunjuk jalan menunjukkan (halaman 122). hubungan Anda dengan garis jalan 2. - Page 128 Navigasi Pilih Elevation Plot (Plot Mengatur Ulang Plot Ketinggian). Ketinggian Pilih Elevation Plot (Plot Mengubah Jenis Plot Ketinggian) > menu > Reset Anda dapat mengubah plot (Atur Ulang) > Clear Current ketinggian untuk menampilkan Track (Hapus Jejak Aktif) > tekanan dan ketinggian Yes (Ya).
-
Page 129: Komputer Perjalanan
Cache Geografis Cache Geografis Komputer Perjalanan Komputer perjalanan menampilkan Sebuah cache geografis itu kecepatan saat ini, kecepatan bagaikan harta karun yang rata-rata, kecepatan maksimum, terpendam. pengukur jarak perjalanan, dan Pencarian cache geografis statistik bermanfaat lainnya. adalah ketika Anda berburu harta Untuk menyesuaikan komputer karun terpendam menggunakan perjalanan, lihat halaman 135. -
Page 130: Menyaring Daftar Cache Geografis
Cache Geografis • Untuk menyimpan 5. Ikuti petunjuk pada layar untuk penyaringan, pilih back mencari dan mengunduh cache geografis ke perangkat. (kembali). Membuat dan Menyimpan Menyaring Daftar Cache Penyaringan Cache Geografis Geografis Anda bisa membuat dan Anda bisa menyaring daftar cache menyimpan penyaringan yang geografis berdasarkan faktor-faktor disesuaikan untuk cache geografis... -
Page 131: Menavigasi Ke Cache Geografis
Cache Geografis Menavigasi ke Cache • Untuk menerapkan penyaringan pada daftar Geografis cache geografis, pilih Search 1. Pilih Geocaches (Cache (Mencari). Geografis). • Untuk menyimpan 2. Pilih cache geografis. penyaringan, pilih back (kembali). 3. Pilih Go (Mulai). Setelah disimpan, 4. Navigasi menggunakan peta penyaringan akan diberi (halaman 122) atau kompas nama secara otomatis. -
Page 132: Chirp
Find Next Closest chirp tersedia pada tipe eTrex 30. (Cari Yang Terdekat Berikutnya). Chirp adalah sebuah aksesori Garmin kecil yang bisa Anda • Untuk mengakhiri pendataan, program dan tinggalkan di pilih Done (Selesai). dalam sebuah cache geografis. • Untuk memasukkan... -
Page 133: Aplikasi
33 kaki (10 m) dari cache secara nirkabel, Anda harus berada geografis yang berisi sebuah pada jarak 10 kaki (3 m) dari chirp, rincian mengenai chirp perangkat Garmin yang kompatibel. akan muncul. 1. Pilih Share Wirelessly (Berbagi 3. Bila ada, pilih Go (Mulai) Secara Nirkabel). -
Page 134: Mengatur Alarm Dekatnya
Aplikasi Menghitung Luas Area 3. Ikuti petunjuk yang muncul di layar. 1. Pilih Area Calculation (Kalkulasi Area) > Start Mengatur Alarm (Mulai). Dekatnya 2. Berjalanlah di sekeliling area Alarm dekatnya akan yang akan dihitung. memperingatkan Anda ketika 3. Pilih Calculate (Hitung) setelah berada dalam jarak tertentu dari selesai. -
Page 135: Melihat Kalender Dan Almanak
Aplikasi • • Pilih menu > Degrees • Untuk melihat prediksi (Derajat) untuk menghitung waktu terbaik berburu dan derajat. memancing, pilih, Hunt and Fish (Berburu dan Melihat Kalender dan Memancing). Almanak 2. Bila perlu, pilih ▲ atau ▼ untuk melihat bulan yang berbeda. Anda dapat melihat aktivitas perangkat, seperti kapan waypoint 3. -
Page 136: Membuka Stopwatch
Aplikasi Jika perangkat tidak aktif pada 3. Bila perlu, pilih Multicolor (Multi warna) untuk memberi waktu alarm, perangkat akan aktif dan membunyikan alarm. warna tertentu pada satelit yang ditampilkan dan baris kekuatan Membuka Stopwatch sinyal satelit itu (eTrex 20/30). Pilih Stopwatch Menonaktifkan GPS Pilih Satellite (Satelit) >... -
Page 137: Cmenyesuaikan Perangkat
CMenyesuaikan Perangkat CMenyesuaikan Mengaktifkan Kolom Data Peta Perangkat 1. Pilih Map (Peta) > menu > Setup Map (Konfigurasi Peta) Menyesuaikan Menu > Data Fields (Kolom-kolom Utama Data). Pilih menu > Change Item 2. Pilih angka dan gaya kolom Order (Ubah Urutan Item) data. -
Page 138: Profil
CMenyesuaikan Perangkat Menyesuaikan Dasbor Bila Anda menggunakan profil dan mengubah pengaturan, seperti 1. Buka halaman yang dasbornya kolom data atau unit pengukuran, ingin Anda sesuaikan. perubahan tersebut akan disimpan 2. Tentukan pilihan: secara otomatis sebagai bagian • Dari peta, pilih menu > dari profil yang digunakan. -
Page 139: Pengaturan Sistem
4. Pilih Create New Profile (Buat Geostationary Navigation Overlay Profil) > OK. Service), atau Demo Mode (Mode Demo). Untuk informasi tentang Mengedit Nama Profil WAAS, kunjungi www.garmin.com/ 1. Pilih Setup (Konfigurasi) > aboutGPS/waas.html. Profiles (Profil). Language (Bahasa)—mengatur 2. Pilih profil. - Page 140 CMenyesuaikan Perangkat pengaturan lampu latar, lihat mengatur warna latar yang halaman 40. digunakan pada mode malam • Colors (Warna) (eTrex hari. 20/30)—mengatur warna yang ◦ Night Highlight Color (Warna Sorot Malam Hari)— mengatur ditampilkan pada mode Malam dan Siang. warna sorotan yang dipilih pada mode malam hari.
-
Page 141: Pengaturan Nada Perangkat
CMenyesuaikan Perangkat Pengaturan Nada ◦ Automotive Mode (Mode Otomotif)—menampilkan Perangkat perspektif mobil dengan arah Anda dapat menyesuaikan nada perjalanan di bagian atas. untuk pesan, tombol, peringatan • Guidance Text (Teks belokan, dan alarm. Panduan)—Anda dapat memilih 1. Pilih Setup (Konfigurasi) > untuk menampilkan teks Tones (Nada). -
Page 142: Id Pengaturan Jejak
CMenyesuaikan Perangkat manual. membeli peta tambahan, lihat ◦ Zoom Levels (Tingkat Zoom)— halaman 116. memilih tingkat zoom untuk Pengaturan Jejak item-item peta. Pilih Setup (Konfigurasi) > Tracks ◦ Text Size (Ukuran Teks)— (Jejak). memilih ukuran teks untuk item- • Log Jejak—aktifkan atau non item peta. -
Page 143: Mengubah Satuan Ukuran
CMenyesuaikan Perangkat Pengaturan Waktu • Auto Archive (Arsip Otomatis)—memilih metode Pilih Setup (Konfigurasi) > Time arsip otomatis untuk menata (Waktu). jejak. Jejak disimpan dan • Time Format (Format dihapus secara otomatis Waktu)—Anda dapat memilih berdasarkan pengaturan tampilan waktu 12 jam atau 24 pengguna. -
Page 144: Pengaturan Heading (Arah)
CMenyesuaikan Perangkat Pilih Setup (Konfigurasi) > menampilkan jenis panduan Position Format (Format Posisi). arah pada kompas: • North Reference (Acuan • Position Format (Format Utara)—mengatur acuan utara Posisi)—mengatur format posisi kompas. untuk menampilkan data lokasi • Go To line/Pointer (Garis/ tertentu. -
Page 145: Pengaturan Altimeter
CMenyesuaikan Perangkat • Mode Barometer kompas. • Kalibrasi Kompas—halaman ◦ Variable Elevation (Ketinggian 124. Bervariasi)—membuat barometer bisa mengukur perubahan ketika Pengaturan Altimeter Anda bergerak. ◦ Fixed Elevation (Ketinggian Fungsi ini tersedia pada tipe eTrex Tetap)—mengasumsikan perangkat dalam keadaan diam Pilih Setup (Konfigurasi) > pada ketinggian tetap. -
Page 146: Pengaturan Cache Geografis
CMenyesuaikan Perangkat Pengaturan Cache dinonaktifkan. Geografis • Jenis Lokasi Pilih Setup (Konfigurasi) > ◦ Elevation/Time (Ketinggian/ Geocaches (Cache Geografis). Waktu)—merekam perubahan ketinggian selama jangka waktu • Geocache list (Daftar Cache tertentu. Geografis)—Anda dapat ◦ Elevation/Distance (Ketinggian/ menampilkan daftar cache Jarak)—merekam perubahan geografis menurut nama atau ketinggian pada jarak tertentu. -
Page 147: Pengaturan Perutean
Lihat chirp Owner’s Manual di http://www. jalan yang memerlukan waktu garmin.com. berkendara minimal. ◦ On Road For Distance Pengaturan Perutean (Di Jalan Menurut Jarak) Perangkat ini menghitung rute yang (memerlukan peta yang mendukung perutean)—... -
Page 148: Pengaturan Peta Laut
CMenyesuaikan Perangkat Pengaturan Peta Laut titik berikutnya secara otomatis. ◦ Manual (Manual)— Fungsi ini tersedia pada tipe eTrex memungkinkan Anda memilih 20 dan eTrex 30. titik berikutnya pada rute. Pilih Setup (Konfigurasi) > Marine ◦ Distance (Jarak)—merutekan (Laut). ke titik berikutnya pada rute bila •... -
Page 149: Fitnes
CMenyesuaikan Perangkat Mengkonfigurasi Alarm untuk penggunaan optimal saat Navigasi Laut memancing. 1. Pilih Setup (Konfigurasi) > • Appearance Marine (Laut) > Marine Alarm (Penampilan)—memungkinkan Setup (Konfigurasi Alarm Anda mengatur kemunculan alat Laut). bantu laut di peta. • Konfigurasi Alarm Laut 2. - Page 150 CMenyesuaikan Perangkat Mengembalikan Semua ke 1. Pilih Setup (Konfigurasi) > Pengaturan Standar Reset (Atur Ulang) Anda dapat mengatur ulang semua 2. Pilih item yang akan diatur nilai konfigurasi ke pengaturan ulang. semula. Mengembalikan Pengaturan Pilih Setup (Konfigurasi) > ke Standar Pabrik Reset (Atur Ulang) >...
-
Page 151: Mengubah Urutan Halaman
CMenyesuaikan Perangkat Mengubah Urutan Menghapus Halaman 1. Pilih Setup (Konfigurasi) Halaman > Page Sequence (Urutan Sebelum mengubah urutan Halaman). halaman, Anda harus menambah 2. Pilih halaman. halaman ke dalam urutan (halaman 3. Pilih Remove (Hapus). 149). 1. Pilih Setup (Konfigurasi) >... -
Page 152: Informasi Perangkat
3. Gerakkan Thumb Stick ke atas dan ke bawah untuk 1. Kunjungi http://www.garmin. menyesuaikan tingkat kontras com/products/webupdater. (eTrex 10 saja). 2. Ikuti petunjuk yang muncul di layar. CATATAN: Memperbarui perangkat lunak tidak akan menghapus data petunjuk teknis penggunaan untuk model 10, 20, 30... -
Page 153: Melihat Informasi Perangkat
Informasi Perangkat Tentang Baterai atau pengaturan Anda. Melihat Informasi PERINGATAN Suhu perangkat (halaman Perangkat 151) mungkin melebihi kisaran Anda dapat melihat ID unit, versi operasional beberapa baterai. perangkat lunak, dan perjanjian Baterai alkalin dapat rusak pada lisensi. suhu tinggi. Jangan menggunakan Pilih Setup (Konfigurasi) >... -
Page 154: Memelihara Perangkat
Informasi Perangkat Memelihara Perangkat kondisi di bawah titik beku. Memaksimalkan Masa Pakai PEMBERITAHUAN Baterai Hindari pembersih dan cairan kimia yang dapat merusak komponen Anda dapat melakukan berbagai plastik. hal untuk meningkatkan masa pakai baterai. Membersihkan Perangkat • Nonaktikan lampu latar 1. -
Page 155: Manajemen Data
HomePort™ Kunjungi http:// www.garmin.com. Suhu Ekstrim • File GPI POI kustom dari PEMBERITAHUAN Garmin POI Loader. Jangan simpan perangkat di • File-file cache geografis GPX tempat yang terkena suhu ekstrim dalam jangka waktu lama karena dapat menyebabkan kerusakan permanen. - Page 156 5. Tutup penahan kartu. sudah diisikan sebelumnya pada 6. Geser penahan kartu ke atas kartu memori. Kunjungi http://buy. perangkat untuk menguncinya. garmin.com untuk keterangan lebih 7. Pasang kembali baterai lanjut. (halaman 111). 1. Putar D-ring berlawanan dengan 8. Pasang kembali penutup...
- Page 157 2. Pilih file. 2. Lepaskan tutup pelindung ➊ 3. Pilih Edit > Copy (Salin). ➋ dari port mini-USB 4. Buka “Garmin” atau drive/ ➊ perangkat penyimpanan kartu memori. ➋ 5. Pilih Edit > Paste (Tempel). TIPS: Anda harus meletakkan file- 3.
-
Page 158: Lampiran
Peta Tambahan Melepaskan Sambungan Kabel USB Anda dapat membeli peta tambahan, seperti gambar satelit 1. Lakukan salah satu tindakan BirdsEye, peta kustom Garmin, berikut: Inland Lakes, TOPO, BlueChart g2, • Untuk komputer Windows, dan peta City Navigator. klik ikon pelepas pada panel sistem. - Page 159 Tambahan • Sebelum menyambungkan 1. Perangkat harus berada dalam aksesori ANT+ dengan jangkauan aksesori ANT+ (3 m) perangkat Garmin, beri jarak (33 (10 kaki atau 3 m). kaki atau 10 m) dari aksesori 2. Pilih Setup (Konfigurasi) > ANT+ lainnya.
-
Page 160: Pilihan Kolom Data
Lampiran kali diaktifkan. Proses ini Kolom Keterangan berlangsung secara otomatis Data saat Anda mengaktifkan Ambient Tekanan di sekitar perangkat Garmin dan hanya Pressure yang belum memerlukan waktu beberapa (Tekanan di dikalibrasi. detik bila aksesori diaktifkan dan Sekitar) berfungsi dengan baik. - Page 161 Lampiran Kolom Keterangan Kolom Keterangan Data Data Bearing (Arah) Arah dari lokasi Anda Distance to Jarak ke tujuan akhir saat itu ke tujuan. Destination Anda. (Jarak ke Cadence Perputaran poros Destinasi) (Siklus) roda atau langkah per (diperlukan menit. Distance to Sisa jarak ke aksesori Next...
- Page 162 Lampiran Kolom Keterangan Kolom Keterangan Data Data ETA at Perkiraan waktu tiba Heading Arah perjalanan. Destination di tujuan akhir. (Arah) (ETA di Heart Rate Kecepatan jantung Destinasi) dalam detak per menit (Detak Jantung) (bpm). ETA at Next Perkiraan waktu tiba (diperlukan di waypoint berikutnya (ETA di...
- Page 163 Lampiran Kolom Keterangan Kolom Keterangan Data Data Off Course Jarak penyimpangan Speed - Kecepatan rata-rata (Keluar Rute) ke kiri atau kanan dari Overall Avg. sejak pengaturan jalur awal perjalanan. (Kecepatan ulang terakhir. - Keseluruhan Pointer Kolom data tanda Rata-Rata) (Penunjuk) panah yang menunjuk ke arah waypoint atau Sunrise...
- Page 164 Lampiran Kolom Keterangan Kolom Keterangan Data Data Time to Next Perkiraan waktu yang Trip Time – Pengukur jarak diperlukan untuk Total perjalanan yang (Waktu ke mencapai waypoint ditempuh sejak Berikutnya) (Waktu berikutnya pada rute. pengaturan ulang Perjalanan - terakhir. Total) To Course (Ke Arah yang harus Anda Rute)
- Page 165 Lampiran Kolom Keterangan Data Vertical Speed Kecepatan (Kecepatan keberhasilan atau Vertikal) ketidakberhasilan mencapai ketinggian seiring waktu. Waypoint at Titik terakhir pada rute Dest. ke tujuan Anda. (Titik Acuan di Destinasi) Waypoint at Titik berikutnya pada Next rute. (Titik Acuan di Berikutnya) petunjuk teknis penggunaan untuk model 10, 20, 30...
-
Page 166: Troubleshooting
Lampiran Troubleshooting Masalah Solusi 1. Keluarkan baterai. Perangkat tidak 2. Pasang kembali baterai. merespon. Bagaimana cara mengatur ulang : Langkah ini tidak akan menghapus data atau CATATAN perangkat? pengaturan Anda. (Konfigurasi) > Saya ingin mengatur Pilih (Atur Ulang) > Setup Reset Reset All ulang semua... - Page 167 Jika terdapat beberapa drive jaringan di komputer, drive baru yang dapat Windows mungkin mengalami masalah dalam dilepas dalam daftar menetapkan huruf drive untuk drive Garmin Anda. Lihat file Help untuk sistem operasi Anda agar dapat drive. mempelajari cara menetapkan huruf drive.
- Page 168 © 2012 Garmin Ltd. or its subsidiaries Garmin International, Inc. 1200 East 151 Street, Olathe, Kansas 66062, USA Garmin (Europe) Ltd. Liberty House, Hounsdown Business Park, Southampton, Hampshire, SO40 9LR UK Garmin Corporation No. 68, Zhangshu 2 Road, Xizhi Dist., New Taipei City, 221, Taiwan (R.O.C.) www.garmin.com...
Need help?
Do you have a question about the eTrex 10 and is the answer not in the manual?
Questions and answers