Advertisement
Quick Links
Basic Receiver Operation
Like all electronic devices, GPS receivers come in many
makes and models. While each may be slightly different in
their design, the basic function of a GPS receiver remains
the same and thus they all have similar features.
All receivers, whether a dedicated unit or integrated into a
personal mobile device, contain an antenna. The antenna is
usually in the top of each device and must have a clear
view of the sky to work correctly. Because of this, the first
step in using a GPS receiver is to go outside to a clear area
before turning it on.
Once the receiver has started up, it will begin searching for
satellites. When four or more satellites have been detected,
the receiver will provide you with a position. This process
often takes between one and two minutes to complete, but
can sometimes be quicker.
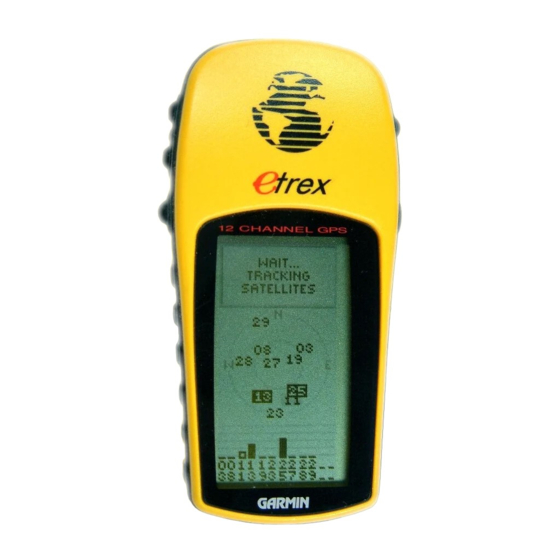
Satellite Visibility
All GPS receivers contain some form of satellite visibility
display. Some receivers provide a signal strength indicator
for each satellite being tracked, while some mobile apps
will combine this into one 'signal' bar. This feature is useful
for determining whether your view of the sky is clear enough, or whether you need to move to a
different area. An estimation of the receiver's accuracy can often be found on the same page, often
being quite poor when the receiver first starts up and improving as more satellites are tracked.
Tracks and Waypoints
Tracks and Waypoints provide a way of recording where you've been and navigating to specific
locations of interest. The 'track' feature on most GPS receivers acts like a digital trail of breadcrumbs,
recording where the GPS has moved over time. Some receivers create tracks automatically, while
others require you to manually record and save tracks. The track feature is particularly useful if you
want to map a continuous feature such as a foreshore, property boundary or road, as you can import
the track into various mapping programs as a continuous line. Tracks can also be useful if you want to
retrace your previous steps with a GPS receiver, as you can see your current location relative to the
previous track as you move along.
Waypoints on the other hand are used for marking individual points or features of interest, allowing
you to save and return (i.e. navigate) to their location at a later stage. This feature is useful for
recording the location of individual items (such as a home, school or shop), rather than continuous
features (it's better to use tracks for these). Waypoints can be exported later on to show specific
features on maps. Similarly, waypoints can be made on a computer and transferred onto a GPS
receiver as well, allowing you to find your way to places you've never even visited before!
Produced by the University of Tasmania in conjunction with Geoscience Australia as part of the AuScope GPS in Schools Project – 2014.
GPS in Schools – Basic Receiver Operation
FAST FACTS
1. While there are different
makes and models of GPS
receiver, their basic function
is the same.
2. The antenna must have a
clear view of the sky.
3. Four satellites are required to
get a position; this can take
one to two minutes.
4. 'Waypoints' can be used to
mark individual points of
interest, while 'tracks' can be
used to map continuous
boundaries or paths.
5. Each type of GPS receiver
stores information in a
slightly different format, and
may need to be converted
before it can be used for other
things (e.g. making maps).
1
Advertisement

Related Manuals for Garmin etrex


Summary of Contents for Garmin etrex
- Page 1 GPS in Schools – Basic Receiver Operation Basic Receiver Operation FAST FACTS Like all electronic devices, GPS receivers come in many 1. While there are different makes and models. While each may be slightly different in makes and models of GPS their design, the basic function of a GPS receiver remains receiver, their basic function the same and thus they all have similar features.
-
Page 2: Further Information
For more detailed information, refer to the user manual of your specific GPS receiver or check out the following resources: GPS Receiver Tutorials • A step-by-step guide to using a Garmin eTrex GPS Receiver (see additional handout). • Quick start guide for the ‘MotionX-GPS’ app for iOS devices (see http://goo.gl/7euDCV). •... - Page 3 GPS in Schools – Worksheet 2 Australian Curriculum Content Descriptors: ACSIS124, ACHGS048, ACHGS050, ACHGS052, ACSIS146, ACHGK053, ACHGS058, ACHGS060 Worksheet 2 – Part 1 (GPS Practical) Instructions: Refer to your GPS receiver’s user manual and the ‘Basic Receiver Operation’ guide to complete the following exercise.
- Page 4 GPS in Schools – Worksheet 2 7. Split into groups of three or more people and find the waypoint function on your GPS receiver. Get one member of your group to go off and secretly mark a waypoint at a significant feature (e.g.
- Page 5 GPS in Schools – Worksheet 2 Measuring the distance covered after running for 5 minutes Measuring the perimeter of a basketball court Measuring the distance travelled down a highway in a car Setting out a 100m running track ...
- Page 6 GPS in Schools – Worksheet 2 16. Congratulations, you’ve just made your first interactive map! You can click on each of the waypoints to bring up a detailed description of each feature. Be sure to save your edited waypoints by selecting each one in the navigation pane and choosing ‘File ...
- Page 7 The Garmin eTrex H has five (5) main windows or PAGES (see below). Using the PAGE button (top right hand side of the GPS) allows you to scroll through those pages.
- Page 8 GPS in Schools – Garmin eTrex User’s Guide For a GPS receiver to work, it must receive at least four (4) satellites. There are two (2) ways of viewing if the GPS receiver has acquired enough satellites. They are Normal Skyview and Advanced Skyview:...
- Page 9 GPS in Schools – Garmin eTrex User’s Guide You will normally use two of the five pages: the main SATELLITE page and the MENU page. The SATELLITE page is the first page that appears after the unit has been switched on, the MENU page is the page we use most of the time.
- Page 10 GPS! Step 7: Checking the reference or Datum for the GPS. The eTrex H allows you to specify a reference grid for your data points. This is called a Datum. The default Datum can be set/checked by the following process: •...
- Page 11 GPS in Schools – Garmin eTrex User’s Guide • Press ENTER. • You should then see the UNITS page. Settings The GPS should reflect the above settings. If a setting is to be changed, scroll over the incorrect setting, press ENTER, scroll to the correct setting, and press ENTER.
- Page 12 Please note that the DELETE ALL option tab will be ‘greyed-out’ (not useable) if there are NO waypoints stored in the GPS memory. The eTrex H automatically stores information behind the scenes every time it is turned on and has satellite reception. This includes details like: •...
- Page 13 GPS in Schools – Garmin eTrex User’s Guide In addition, the eTrex H will store a ‘breadcrumb’ or TRACK LOG. This feature allows the user to back-track their journey (particularly handy if the user becomes disorientated in the bush). The procedure to clear the TRACK LOG is: Press the PAGE button until the MENU screen is displayed, scroll to TRACKS, then press ENTER.
- Page 14 NOTE – Read this page carefully before proceeding. You may need to install a cable driver before you install EasyGPS! If you are intending to connect to a GARMIN GPS receiver that uses the above connector, you will most likely strike complications as these GARMIN leads generally come fitted with a Serial connector on the computer end of the cable (see below).
- Page 15 GPS in Schools – EasyGPS Setup Guide Adding GPS Receivers Produced by the University of Tasmania in conjunction with Geoscience Australia as part of the AuScope GPS in Schools Project – 2014.
- Page 16 GPS in Schools – EasyGPS Setup Guide Setting up the GPS Settings Set to USB for USB cable/adaptor options OR select communications port from the drop down menu. If you have multiple listings for communications ports, Select the port that has the wording against it Prolific USB-to- Serial CommPort.
- Page 17 GPS in Schools – EasyGPS Setup Guide Set the Units of Measure Produced by the University of Tasmania in conjunction with Geoscience Australia as part of the AuScope GPS in Schools Project – 2014.
- Page 18 GPS in Schools – Inserting Placemarks in Google Earth Inserting Placemarks in Google Earth Open Google™ Earth. Right Click on My Places / Add / Folder. Give the folder a suitable name. Produced by the University of Tasmania in conjunction with Geoscience Australia as part of the AuScope GPS in Schools Project – 2014.
- Page 19 GPS in Schools – Inserting Placemarks in Google Earth Click on Add Placemarks. • Ensure that you select Center in View. • Position the ‘Pin’ by left clicking + holding whilst moving the mouse over the aerial photo. • Click on Add Placemarks for each point to be added. Add information about each point of interest under the Description tab.
- Page 20 GPS in Schools – Inserting Placemarks in Google Earth Ensure that all Placemarks are in the folder you created. If not, drag and drop the Placemarks into the folder. Right Click on the folder and choose Save Place As. Produced by the University of Tasmania in conjunction with Geoscience Australia as part of the AuScope GPS in Schools Project – 2014.
- Page 21 GPS in Schools – Inserting Placemarks in Google Earth Produced by the University of Tasmania in conjunction with Geoscience Australia as part of the AuScope GPS in Schools Project – 2014.
- Page 22 GPS in Schools – Structuring Folders and Files in Google Earth Structuring Folders and Files in Google Earth Open Google™ Earth. Right Click on My Places / Add / Folder. Give the folder a suitable name and click OK. Produced by the University of Tasmania in conjunction with Geoscience Australia as part of the AuScope GPS in Schools Project – 2014.
- Page 23 GPS in Schools – Structuring Folders and Files in Google Earth Add a series of sub-folders by right clicking on the newly created folder and choosing Add Folder Enter the folder name OK. When wanting to add a Placemark, Polyline or Polygon, select the relevant sub-folder by left clicking it, then proceed to place / draw in the feature.
- Page 24 GPS in Schools – Structuring Folders and Files in Google Earth Name the file appropriately and Save as type: KMZ. Produced by the University of Tasmania in conjunction with Geoscience Australia as part of the AuScope GPS in Schools Project – 2014.
Need help?
Do you have a question about the etrex and is the answer not in the manual?
Questions and answers