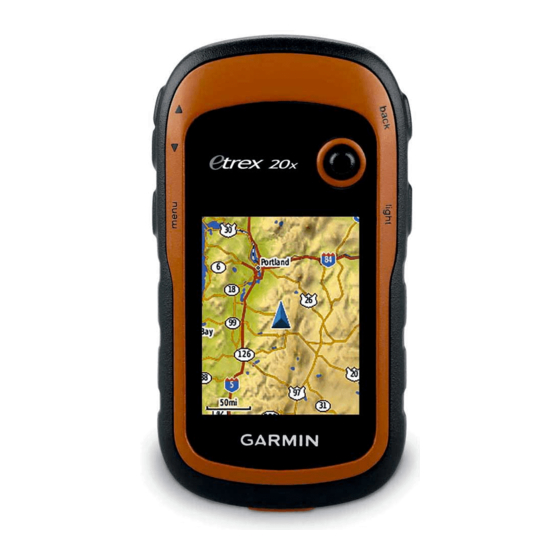
Garmin eTrex 20 Getting Started
Hide thumbs
Also See for eTrex 20:
- Manual (2 pages) ,
- Owner's manual (168 pages) ,
- Quick start manual (13 pages)
Table of Contents
Advertisement
Quick Links
Getting started with an eTrex 20
When you first switch on your eTrex you'll get the Main menu screen appearing after a short time.
From here you can move around the screen using the thumbstick (also called the joystick or toggle)
zoom out button
zoom in button
menu button
Toggling - moving the thumbstick up or down or left or right - will highlight a different submenu . Initially
the one in the top left-hand corner is highlighted – in this case Map
Clicking – pressing the thumbstick down gently – will bring up the submenu.
Pressing the menu button will bring up a list of options for the menu visible on the screen.
The zoom in/out buttons are only used to alter the image size when a map is shown
Since it is often easiest to navigate around by first returning to the main menu it is important to know that:
if at any stage you are in a submenu and wish to return to the Main menu just
press the menu button twice [occasionally you may need to press the back button
first]
thumbstick or joystick or toggle
1 of 8
29/12/2015
back button
on/off + light button
Advertisement
Table of Contents

Subscribe to Our Youtube Channel
Summary of Contents for Garmin eTrex 20
- Page 1 Getting started with an eTrex 20 29/12/2015 When you first switch on your eTrex you’ll get the Main menu screen appearing after a short time. From here you can move around the screen using the thumbstick (also called the joystick or toggle)
- Page 2 The main menu has 25 submenus of which only 6 can be seen on the screen at any one time. These submenus “wrap around” so that from Map to Adventures you can toogle down 12 times or, more simply, up once Many of these submenus are not of immediate interest to a hill walker and can be removed from the main menu –...
- Page 3 Customising the main menu - rearranging and shortening Press the menu button once to bring up the Change Item Order option. Click – by pressing the thumbstick down gently – to select this option. You can see that the submenus are in the default order of Map –...
- Page 4 This will bring you back to the previous screen but this time, by toggling up, you can move Track Manager up until it comes just after Map. Click to accept this position. Now toggle down to Trip Computer, click and select Move and toggle up to move Trip Computer up until it comes just after Track Manager.
- Page 5 Setting up your eTrex for hiking Toggle to the Setup menu [toggle up if you have customised the main menu as described above] and click. This instruction and future instructions will be shortened to Main menu > Setup The Setup submenu has itself a further 16 submenus. It is not possible to customise it.
- Page 6 Main menu > Setup > Tracks The default Track Log is Record, Show On Map. Click on this and change it to Do Not Record Only set this back to recording when you really mean to record i.e. just before you take your first step of a hike. At the end of a hike always change it back to Do Not Record Main menu >...
- Page 7 Main menu > Setup > Position Format The default is latitude/longitude given in degrees/minutes/decimals of minutes Change this to the usual Irish Grid Main menu > Setup > Heading The default heading/bearing is Directional Letters i.e. N, NE, SW etc. Change this to Numeric Degrees During a hike your present position will be shown on the map screen as a blue triangle.
- Page 8 With the Trip Computer selected press on the menu button to get the options. Click on Big Numbers then press on the menu button again and click on Change Data Fields Toggle down to Location (Selected), which will give you the Irish grid coordinates, and click Now toggle down to the second field, Moving Time, and click to change that, in the same way, to Elevation.


Need help?
Do you have a question about the eTrex 20 and is the answer not in the manual?
Questions and answers