Garmin eTrex eTrex Owner's Manual
Garmin etrex etrex: owners manual
Hide thumbs
Also See for eTrex eTrex:
- Quick start manual (2 pages) ,
- Owner's manual (32 pages) ,
- Declaration of conformity (1 page)
Table of Contents
Advertisement
Quick Links
Advertisement
Table of Contents

Related Manuals for Garmin eTrex eTrex


Summary of Contents for Garmin eTrex eTrex
- Page 1 eTrex ® personal navigator owner’s manual...
- Page 2 All rights reserved. Except as expressly provided herein, no part of this manual may be reproduced, copied, transmitted, disseminated, downloaded or stored in any storage medium, for any purpose without prior written consent of Garmin Ltd. Garmin Ltd. hereby grants permission to download a single copy of this manual...
-
Page 3: Registration
8-digit serial number, it can be found inside the battery compartment. Thanks for choosing the Garmin eTrex. If you have any questions or comments regarding the use of the eTrex you can visit our web site (www.garmin.com) or contact... -
Page 4: Table Of Contents
Tracks... 30 Setup Menu... 33 Appendices ... 42-51 Appendix A: Specifi cations... 42 Appendix B: What is GPS? ... 43 Appendix C: Satellite Reception Tips... 44 Appendix D: Time Offset Chart ... 45 Appendix E: Wiring Diagram ... 46 Appendix F: Troubleshooting ... 47 Appendix G: FAQs ... -
Page 5: Introduction
WARNING: If you choose to use the eTrex in a vehicle, it is the sole responsibility of the owner/operator of the eTrex to secure the GPS unit so that it will not cause damage or personal injury in the event of an accident. -
Page 6: Fcc Compliance Statement
Consult an authorized Garmin dealer or other quali- fi ed service technician if the problem cannot be corrected. Operation is subject to the following conditions: (1) This... -
Page 7: Features
GPS provides other data, like speed, direction of movement, time and distance to destination, and more. From these basic features, your Garmin GPS can provide one more critical benefi t; peace of mind, because, with GPS you’ll know where you are, where you’ve been and where you’re going. - Page 8 Introduction eTrex Buttons Operating the eTrex is as simple as pressing a button! The UP/DOWN Buttons: • Select options on pages and menus • Adjust display contrast on Satellite Page • Zoom in and out on Map Page • Cycle through trip data on Navigation Page The ENTER Button: •...
-
Page 9: Buttons
Internal GPS Antenna UP Button DOWN Button ENTER Button External Power Data Connector Slot for Carry Lanyard Insertion. Introduction eTrex Description PAGE Button POWER Button LCD Display (with backlight) Waterproof Case Battery Compartment... -
Page 10: Accessories
- Converts 12VDC output from the lighter to 3VDC input to the eTrex. Not interchangeable with power adapters for Garmin VHF 720, 725, and 725e, or GPS 170, 175, 190, and 195. Bicycle Mounting Kit PC Interface Cable with Auto Power Adapter... -
Page 11: Getting Started
The Getting Started Section introduces you to the basic operation of the eTrex. The Reference Section shows you how to use all of the eTrex’s remaining features. The First Step The eTrex operates on information gathered from satellites. To gather this information, take your eTrex outside and fi... -
Page 12: Satellite Page Basics
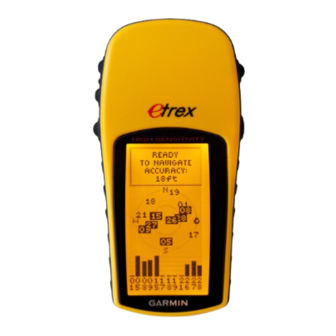
Started Getting Page Basics The “READY TO NAVIGATE” message must appear before you can begin using your eTrex to navigate. Pressing ENTER on the Advanced Skyview Page also offers the options of Orienting the Sky Ahead or Northward, Setup Display (backlighting/ contrast), and returning to Normal Skyview. -
Page 13: Map Page Basics
“trail” (track log). Waypoint names and symbols are also shown on the map. We will show you how to record your location by marking a waypoint in the “Discovering GPS Navigation” section. To help you better visualize the “real world”, the... -
Page 14: Navigation Page Basics
The eTrex is not a compass. The Compass Ring on the Pointer Page is controlled by the unit’s GPS receiver. You must be moving in order for it to track your movement. Navigation Page Basics Waypoint (Location) Name... -
Page 15: Main Menu
Menu Basics Battery Strength The Main Menu Page The Main Menu gives you access to eTrex’ s more advanced features. With the Main Menu you can create and view waypoints, create a route, save and view track logs or access the system setup features. Information on all these advanced features is included in the reference section of this manual. -
Page 16: Creating A Waypoint
This completes a basic explanation of the page features of the eTrex. Discovering the Fun of GPS Navigation Discovering how to use your eTrex is as easy as taking a quick walk around an open outdoor area. In this brief exercise, you’ll mark your current location (your home... -
Page 17: Edit Waypoints
To change the waypoint name: 1. On the ‘MARK WAYPOINT’ Page, press the UP or DOWN Button to highlight the Waypoint Name ‘001’. 2. Press ENTER. The ‘EDIT WAYPOINT NAME’ Page appears. 3. Press ENTER. Using the UP or DOWN Button, scroll through the letter selections. -
Page 18: Heading In The Right Direction
When the pointer points straight up as shown, you’re on track! Guidance by Garmin The eTrex guides you to a destination using a GOTO (GOTO means Going TO a destination in a direct line). Now let’ s use the GOTO feature and the Pointer Page to travel back to our starting location. -
Page 19: Cancelling A Goto
The destination name, distance to the destination and time to reach your destination are displayed at the top of the screen. The speed you are traveling is shown at the bottom of the screen. Once you are getting close to your destination, the eTrex will give you the message “ARRIV- ING DESTINATION”. -
Page 20: Reference
Reference Map Page Options Selecting ‘Orient Map Ahead’ from the Map Page options orients the map to the direction you are moving. When you select ‘Orient Map Northward’ the fi gure icon is replaced by a ‘direction’ triangle. The tip of the triangle tells you the general direction you are moving. -
Page 21: Navigation Page
Navigation Page Options In addition to the Navigation Page basics that were covered on page 12, the following Navigation Page options are available: • Reset Max Speed: this resets the Maximum Speed achieved during a trip. • Reset Trip: the trip time, trip distance (odometer) and average speed are reset to zeros. -
Page 22: Navigation
Reference Navigation Page Options Navigation Page Data Fields You can also change the fi elds at the bottom of the Navigation Page to display different data: Speed—like the speedometer in your car, ‘SPEED’ tells you how fast you are going regardless of whether or not you are on the right track. -
Page 23: Main Menu
NOTE: Elevation or vertical accuracy will always be somewhat less accurate than loca- tion or horizontal accuracy. This is a function of GPS measurement methods which use a mathematical model of the earth to determine elevation. Reference... -
Page 24: Mark Waypoint Page
Reference Mark Waypoint Page The ‘EDIT LOCATION’ Page displays on-screen instructions on how to edit the waypoint location. The ‘ENTER CORRECT ELEVATION’ Page allows you to change the elevation for the waypoint. To change the location (position coordinates): 1. Press the PAGE Button and switch to the ‘MENU’ Page. -
Page 25: Waypoints Page
Waypoints Page The Waypoints Page organizes all of your waypoints in alphabetical order for easy selection. It also allows you to select nine of the ‘NEAREST WAYPOINTS’, and if you want, delete all waypoints. To select a waypoint: 1. Press the PAGE Button and switch to the ‘MENU’ Page. -
Page 26: Review Waypoint Page
Reference Review Waypoint Page The ‘REVIEW WAYPOINT’ Page allows you to delete a waypoint. You can start a GOTO from the ‘REVIEW WAYPOINT’ Page. Review Waypoint Page The Review Waypoint Page allows you to change the waypoint symbol, name, elevation and location (just like on the Mark Waypoint Page). -
Page 27: Waypoint Page
Hunt & Fish Page The Hunt and Fish Page provides you with a listing of best times for hunting and fi shing for the chosen location (waypoint) and date. This page also provides the Sun and Moon Page option. To view the Hunt /Fish Page: 1. - Page 28 Reference Review Waypoint Page The ‘PROJECT WAYPOINT’ Page The ‘EDIT NUMBER’ Page Using the Project feature can create a waypoint at a specifi ed distance and bearing using a new or existing waypoint as a reference. This works best when using a map and compass to determine distance and bearing.
-
Page 29: Routes
‘Route’ and Route Page The eTrex allows you to navigate using one of three methods: • GOTO • Route • TracBack The GOTO method of navigation was briefl y discussed on page 16. The Route feature and the GOTO feature are comparable in that they both guide you to destination waypoints. - Page 30 2. Plan a ‘ROUTE’ in MapSource “Save To Device” to download the ‘ROUTE’ to the eTrex. See your Garmin dealer for more information on using MapSource (MapSource is an optional accessory, and is not included with the eTrex). In either case, you can navigate to a destination using ‘ROUTE’...
- Page 31 To insert a waypoint into an existing route: 1. From the Route page, press the UP or DOWN Button to select the entry point for the new waypoint. Stop at the waypoint on the route list that you want to follow the new waypoint or use the last open slot if you want the new point at the end of the route.
- Page 32 Reference Track Logs You need to save the track log fi rst before you can use the TracBack feature. ‘CLEAR’ the track log before starting a new trip. What is a Track Log? The eTrex draws an electronic bread crumb trail or ‘track log’...
-
Page 33: Track Logs
To save a track for navigation later: 1. Press the PAGE Button and switch to the ‘MENU’ Page. Press the UP or DOWN Button and highlight ‘TRACKS’. Press ENTER. The ‘TRACK LOG’ Page appears. 2. Press the UP or DOWN Button and highlight ‘SAVE’ and press ENTER. -
Page 34: Tracks
Reference Track Logs The ‘BEGIN’ point is the point defi ning the starting point when saving a track log. ‘END’ is the last point that was saved. Each saved track will always have a ‘BEGIN’ and ‘END’ point for navigation. The ‘BEGIN-END’... -
Page 35: Setup Menu
Setup Menu The Setup Menu allows you to customize the eTrex. From the Setup Menu you can change coordinate systems, map datums, and distance units. You can also change the time format, north reference, operating mode, display contrast, and display back light timeout. Time Page The ‘Time’... -
Page 36: Time Zone
Reference Setup Menu UTC stands for ‘Coordinated Universal Time’ and replaced Greenwich Mean Time (GMT) as the World standard for time in 1986. It is based on atomic measurements rather than the earth's rotation. The Daylight Savings time options. Time Zone The time zone can be set to any one of thirty pre-programmed zones or by entering the UTC Time Offset value in the UTC offset fi... -
Page 37: Units Page
Display Page The Display Page allows you to set the display backlight timeout (on all the time, 15 or 30 seconds, and 1 or 2 minutes) and the display contrast. To change the Light Timeout: 1. Press the PAGE Button and switch to the ‘MENU’ Page. -
Page 38: Map Datums
Every map uses a map datum. The map datum is usually listed in the title block of the map. If you are comparing GPS coordinates to a paper map or other reference, the map datum in the eTrex should match the horizontal map datum used to generate the chart or other reference. -
Page 39: Units Of Measure
To change the Map Datum: 1. Press the PAGE Button and switch to the ‘MENU’ Page. Press the UP or DOWN Button and highlight ‘SETUP’. Press ENTER. Use the UP or DOWN Buttons to select ‘UNITS’. Press ENTER. The ‘UNITS’ Page appears. - Page 40 Reference Units of Measure ‘MAGNETIC’ north is the default north reference setting. ‘Angle’ Allows you seset directional information in degrees or mils. North Reference ‘Reference’ refers to the orientation of a map’ s grid. Map makers try to align the vertical lines on a map with ‘True North’.
-
Page 41: Interface Page
Below is a description of each format: • Garmin - the proprietary format used to exchange waypoint, route, and track data with a PC. • Garmin DGPS - allows DGPS input using a Garmin beacon receiver and a standard RTCM SC-104 format and DGPS tuning. -
Page 42: System Page
(when using alkaline batteries). If ‘Garmin DGPS’ or ‘RTCM/NMEA’ format is selected, additional fi elds are provided to control a Garmin differential beacon receiver (e.g. GBR 21) directly from your eTrex. You can enter the beacon frequency and bit rate when you select ‘User’... - Page 43 If you select the ‘DEMO’ mode, a window appears at the bottom of the screen asking you to verify that you want to turn the GPS off (the unit will stop tracking satellites, not power off). To do so, press ENTER.
-
Page 44: Appendices
The temperature rating for the eTrex may exceed the usable range of some batteries. Alkaline bat teries can rupture at high temperatures. External power can only be applied using the Garmin Auto Power Adapter (P/N 010-10203-00) or PC Interface Cable with Auto Power Adapter (P/N 010- 10268-00-this cable contains a voltage regulator). -
Page 45: Appendix B What Is Gps
Meanwhile, receivers used on the ground, sea and air search the sky for the satellites. The GPS unit needs to acquire good signals from at least three satellites to determine a position on the surface of the earth. A fourth signal is required to get three-dimensional positioning which determines elevation or altitude. -
Page 46: Appendix C Satellite Reception Tips
Appendices Appendix C Reception Tips Clouds and weather do not affect the operation of the eTrex! The eTrex has a 12 parallel channel receiver for fast, accurate position fi xes, even under heavy foliage and tree canopy. Satellite Reception Tips The basic steps in getting the eTrex ‘ready to navigate’... -
Page 47: Appendix D: Time Offset Chart
The table below gives approximate UTC time offset for various longitudinal zones. If you are in daylight savings time, add one hour to the offset. º 0 º 5 º 5 º 5 º 5 º 5 º 5 º 5 º... -
Page 48: Appendix E Wiring Diagram
DGPS (Differential GPS) corrections are accepted in RTCM SC-104 version 3.0 format through the ‘Data In’ line. The Garmin GBR 21 and GBR 23 are the recom- mended beacon receivers for use with the eTrex. Other beacon receivers with the correct RTCM format may be used, but may not correctly display status or allow tuning control from the GPS unit. -
Page 49: Appendix F Troubleshooting
NOTE: The Auto Power Adapter converts 12 VDC to 3 VDC output for the eTrex. This adapter is not interchangeable with car power adapters designed for the Garmin VHF 720 and 725, GPS 170, 175, 190 and 195. Appendices Appendix F... -
Page 50: Appendix Gfaqs
Does the eTrex work anywhere in the world and in any weather? Yes. How accurate is a Garmin GPS? The eTrex is accurate to within 15 meters without the DoD-imposed Selective Availability (S/A). Using differential techniques, the eTrex can be as accu- rate as 1-5 meters. -
Page 51: Appendix H Index
Display Page 35 Edit Waypoints 15, 21-22 Elevation 20, 21 FCC Compliance Statement 4 Features 5 Frequently Asked Questions 48 Getting Started 9-17 GOTO 16, 17, 24 GPS 43 GPS Accuracy 48 Grid Formats 48 Heading 20 Hunt and Fish 25... - Page 52 Appendices Appendix H Index I/O Formats 39-40 Interface Page 39 Installing the Batteries 8 Latitude/Longitude 20 Location 21-22 Low Battery 40 Map Datum 35, 36, 37 Map Display 17-18 Map Orientation 18 Map Page 11, 18 Map Scale 11 MapSource CD 8, 38 Maps 35 Mark a Waypoint 14 Mark Waypoint Page 21-22...
- Page 53 Appendices Appendix H Index Satellite Page 9, 10 Satellite Reception 10, 42-44 Setup Page 33-41 Signal Strength Bar 10 Software Version 40 Specifi cations 42 Speed 20 Stop Navigation 18, 19 Sun and Moon 25 System Page 40-41 Time Format 33 Time Offset Chart 45 Time Zones 13, 45 Tracback Navigation 30-32...
-
Page 54: Warranty
This Garmin product is warranted to be free from defects in materials or workmanship for one year from the date of purchase. Within this period, Garmin will at its sole option, repair or replace any components that fail in normal use. Such repairs or replacement will be made at no charge to the customer for parts or labor, provided that the customer shall be respon- sible for any transportation cost. - Page 56 For the latest free software updates throughout the life of your Garmin product, visit the Garmin web site at: www.garmin.com. © 2000-2003 Garmin Ltd. or its subsidiaries Garmin International, Inc. 1200 East 151 Street, Olathe, Kansas 66062, U.S.A. Garmin (Europe) Ltd.
Need help?
Do you have a question about the eTrex eTrex and is the answer not in the manual?
Questions and answers