Advertisement
Table of Contents
- 1 Service Manual
- 2 Index
- 3 Installation
- 4 Voltage Selection
- 5 Positioning
- 6 Useful Information
- 7 Configuring
- 8 From Board Revision L6 Upward
- 9 Board Revision L 4 and L 5
- 10 Board Revision 5 Only
- 11 Installing Aktiv Modules
- 12 Installing Sneaky Kudos
- 13 Linn Kudos Sneaky Module Upgrade
- 14 Installing Knekt Sneaky Drivers/Receivers
- 15 Installing the Knekt RCU/S Control Panel
- 16 Specifications
- Download this manual
See also:
Owner's Manual
Advertisement
Table of Contents

Subscribe to Our Youtube Channel
Related Manuals for Linn MAJIK


Summary of Contents for Linn MAJIK
-
Page 1: Service Manual
LINN SERVICE MANUAL MAJIK AMPLIFIER & WAKONDA PRE-AMPLIFIER... - Page 2 Sept 95 REVISION 14: MAJIK and WAKONDA Copyright © 1995 by Linn Products Limited. All Rights Reserved. Page 5.602...
- Page 3 Installing the KUDOS SNEAKY TUNER 5.616 Installing the KNEKT SNEAKY DRIVER/RECEIVER 5.617 Installing the KNEKT RCU/S CONTROL PANEL 5.618 Specifications Majik 5.622 Wakonda 5.623 History Majik and Wakonda 5.624 Copyright © 1995 by Linn Products Limited. All Rights Reserved. Page 5.603...
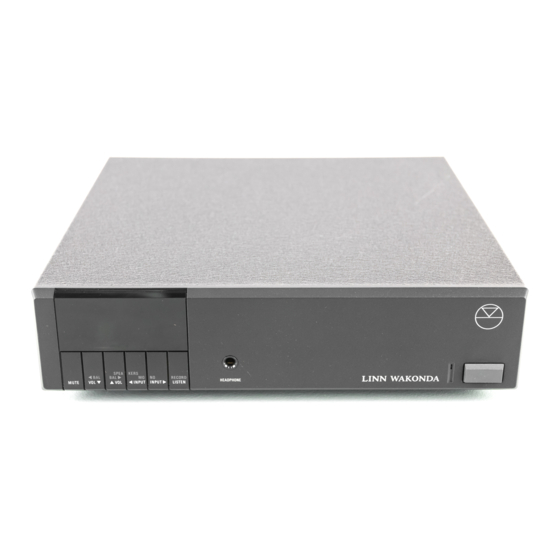
- Page 4 They accommodate six input sources, and provide outputs for two tape decks. You may record any source while listening to the same or any other source. For the purposes of this manual, the Majik and Wakonda are the same, unless otherwise stated, except when refering to the POWER- AMP...
- Page 5 LOAD IMPEDANCE The MAJIK will drive two pairs of 8 Ohm loudspeakers, or one pair of 4 Ohm loudspeakers. You can use the MAJIK to drive two pairs of 4 Ohm loudspeakers if only moderate listening levels are required as this can cause the over-current protection to trip at moderate volume levels.
- Page 6 SNEAKY KNEKT Either a Line Driver module which will expand the MAJIK / WAKONDA into the heart of a multi-room system feeding other rooms in the house or a Local Receiver module could be fitted so that the MAJIK / WAKONDA can integrate with a Linn multi-room system elsewhere in the house.
- Page 7 REVISION 14: MAJIK and WAKONDA WARNING WARNING Please note when Bi-Amping ANY Majik that each of the two methods shown will cause the Majik to suffer terminal damage Whilst the protection was improved for the Majik in Feb. 1995, NO amplifier likes to be "back driven".
- Page 8 Start volume 15 (factory setting 30). Please note: Last four pins not used. Board Revision 5 only: Fit 2 links to disable Power amplifier. (Power save mode ) Page 5.608 Copyright © 1995 by Linn Products Limited. All Rights Reserved.
- Page 9 To customise fit Shorting Links (Linn Part Number CONN 421) as shown: Display ON all the time. Start volume 15 (factory setting 30). Please note: Last two pins not used. Copyright © 1995 by Linn Products Limited. All Rights Reserved. Page 5.609...
- Page 10 Always disconnect the MAJIK/WAKONDA from everything, ESPE- CIALLY MAINS, before fitting a SNEAKY module. Remove the sleeve from the MAJIK and place the amplifier with the back panel facing you. Remove the 2 screws on the back panel and remove the SNEAKY blanking plate.
- Page 11 Fit the modules onto the tray. left right The big screening cans are fitted toward the tray. Make sure the spacers click into position. Remove Links ! Copyright © 1995 by Linn Products Limited. All Rights Reserved. Page 5.611...
- Page 12 REMOVE LINKS OR BANG!! If the MAJIK is being used as the pre-amp in the system, fit 2 dust caps over the POWER-IN sockets. Alternatively, if the MAJIK is being used exclusively as the power-amp in the system, fit 2 dust caps over the PRE-OUT sockets.
- Page 13 Always disconnect the MAJIK/WAKONDA from everything, ESPECIALLY MAINS, before fitting a SNEAKY module. On a clean bench, and with a protective pad to protect the facia, turn the MAJIK / WAKONDA upside down, remove the four screws and slide off the outer sleeve.
- Page 14 HOTO Remove the four screws and lift-off the MAJIK / WAKONDA control area mounting plate. Fit the new KUDOS control area mounting plate, which has extra holes for the additional buttons, using the existing screws. Ensure the two in-fill mouldings which are located under the mounting plate are correctly positioned.
- Page 15 MAJIK/WAKONDA using the two counter- sunk screws at the ends and the two screws underneath which were removed earlier. Re-fit the power-on LED connector to the MAJIK / WAKONDA main PCB. Plug the ribbon cable from the KUDOS con-...
- Page 16 Majik hand set (steps up and down through ZONE presets only) WHERE The Tuner input on the Majik is not affected and can be used as an TUNE auxiliary input, by selecting tuner. For further details refer to the Owners Manual.
- Page 17 Always wear an anti-static wrist strap. Refer to the Service Manual (5.8) for full details of the necessary working practices. Note: This procedure is the same for the MAJIK or the WAKONDA, so from here, the procedure will refer only to the MAJIK..
- Page 18 REVISION 14: MAJIK and WAKONDA Sept 95 INSTALLING SNEAKY KNEKT MODULE IN THE MAJIK / WAKONDA Push the extension connector into the holes on the underside of the KNEKT board. It is important to fit this connector first to the KNEKT board and not to the MAJIK / WAKONDA board, otherwise the pins may be damaged on assembly.
- Page 19 REVISION 14: MAJIK and WAKONDA INSTALLING THE KNEKT RCU/S CONTROL PANEL MAJIK: For Majik-IL after sn 2966 and Majik-IP after sn 3897. Majiks prior to these serial number will require the main board to be changed. Contact Linn Service (or your Linn Distributor) for further details.
- Page 20 Check that all the buttons are hooked through the plate properly. Secure the window in place by pressing on the four clips using the Linn tool. Page 5.620 Copyright © 1995 by Linn Products Limited. All Rights Reserved.
- Page 21 Sneaky Driver: Connect ‘MAIN’ on RCU to ‘Internal RCU Out’ on Sneaky Receiver Links: Sneaky Receiver: Remove all 4 links at P5. Sneaky Driver: No links changes required. Copyright © 1995 by Linn Products Limited. All Rights Reserved. Page 5.621...
- Page 22 Voltage gain: 28.5dB Input sensitivity: 592mV rms for 16.2V rms output (33W into 8 Ohms) Power output: 66W per channel into 4 Ohms 33W per channel into 8 Ohms Page 5.622 Copyright © 1995 by Linn Products Limited. All Rights Reserved.
- Page 23 Minimum load on line outputs: 1K Ohm total Headphone: Output impedance: < 8 Ohm Output level: 6 dB above line level input Output current limit: 60 mA Load impedance: 8 to 2000 Ohm Copyright © 1995 by Linn Products Limited. All Rights Reserved. Page 5.623...
- Page 24 RCU control panel from this revision (L11) WAKONDA-L (Line level) Introduced Nov. 1994 (All compatable with RCU control panel) WAKONDA-P (Phono) Introduced Nov. 1994 (All compatable with RCU control panel) Page 5.624 Copyright © 1995 by Linn Products Limited. All Rights Reserved.
Need help?
Do you have a question about the MAJIK and is the answer not in the manual?
Questions and answers