Table of Contents
Advertisement
Advertisement
Table of Contents

Related Manuals for Linn WAKONDA


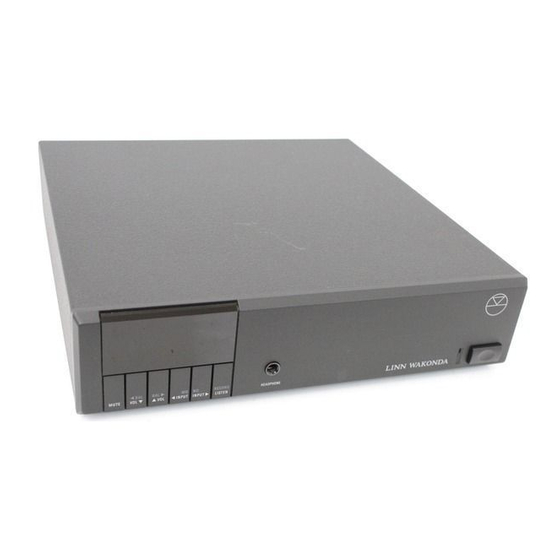
Summary of Contents for Linn WAKONDA
- Page 1 W A K O N D A O W N E R S M A N U A L...
- Page 4 MAINS PLUGS This appliance is supplied with a non-rewireable mains plug for the intended country. Replacement mains leads can be obtained from your Linn retailer. Should you need to change the plug please dispose of it carefully. A plug with bared conductors is dangerous if engaged in a live socket.
- Page 5 12. Power cord protection. Route power cords so that they are not likely to be walked on or pinched by items placed upon or against them, paying particular attention to cords at plugs, power sockets, and at the point where they exit from the appliance.
- Page 7 The addition of any Linn component will improve the sound quality of your system. We have a policy of continuously improving our products and,...
- Page 9 Expansion options include multi-room modules and a tuner which will simply plug into the internal expansion port. Like any electronic product, the WAKONDA will perform at its best when used with the highest quality source. The better the sound from your turntable, tuner or CD player, the better the sound you will hear from the other components in the system.
- Page 10 If you are in the UK and want some advice you are welcome to phone our Customer Services on: FREEPHONE 0500 888 909. If you are installing your WAKONDA yourself, proceed as follows. Unpack the WAKONDA and retain the packing for future transportation. Check the contents are as follows: WAKONDA Pre-amplifier Owner’s manual...
- Page 11 30cms between the amplifier and the cartridge is usually enough to avoid such problems. Some cassette decks may also pick up hum if they are too close to the WAKONDA. Earth Neutral...
- Page 12 The Linn remote control system is exceptionally sensitive - you should be able to put your WAKONDA almost anywhere in a room. Keep it out of direct sunlight, and don’t obscure the control window. Smoked glass cupboard doors usually present no problems.
-
Page 13: Connecting A Turntable
CONNECTING TAPE RECORDERS You can connect up to two tape decks to a WAKONDA. The TAPE1 IN sockets on the amplifier should be connected to the output of tape deck 1 (for playback) and the TAPE1 OUT socket should be connected to the line input of tape deck 1 (for recording). -
Page 14: Line Outputs
MULTI-ROOM CONNECTIONS If you have a multi-room system based on the WAKONDA amplifier, please refer to the Linn KNEKT multi-room system manual. With the multi-room option fitted, some details of the operation of the WAKONDA are different from those described in this manual. - Page 15 If you get lost in some of the advanced features while learning to use your WAKONDA, just turn the recommend you turn the WAKONDA off when it is not in use. button. A green light POWER indicator will LISTEN button again.
- Page 16 TO SELECT AN INPUT to listen to press the to step through the inputs, or hold the key down to step through several. If your WAKONDA has a phono input, these are the inputs available: CD player input Aux input Tape deck 1...
- Page 17 The and the volume will be displayed as a number from 0 to 60. Above step 4, each volume step is 1 dB. MUTE TO MUTE the WAKONDA press the and the indicator will light. MUTE TO UNMUTE...
- Page 18 MONO TO PLAY A MONO SOURCE press the pair of keys marked indicator will light. The WAKONDA will remain in mono MONO until you press the pair of keys again. MONO...
-
Page 19: Record Lock
RECORD stop remote control commands from other rooms in the house affecting your WAKONDA and potentially disrupting the recording. The RECORD light will flash softly to indicate that the record input has been locked. When you have finished recording, press this pair of keys again to enable remote control from other rooms. - Page 20 Occasionally you may find that your WAKONDA fails to respond the way you expect when you press a key. This will often be because you have pressed a key you didn’t intend to which makes your WAKONDA behave in an unfamiliar or unexpected way. You can, of course, just...
- Page 21 VOLUME mode. Or to get to LISTEN mode, press INPUT INPUT LISTEN When this indicator is lit, the WAKONDA is in LISTEN control mode, and pressing change the input that you are listening to. If you press while already in LISTEN control mode the RECORD WAKONDA will enter RECORD control mode.
-
Page 22: Useful Information
We designed your WAKONDA to last you for many years and to give you unique opportunities to extend its capabilities as your needs evolve and your resources allow. At the rear of the WAKONDA, there is an expansion slot into which one of a range of SNEAKY add-on modules may be fitted. -
Page 23: Ce Declaration Of Conformity
CE Declaration of Conformity Linn Products Ltd declare that this product is in conformance with the Low Voltage Directive 73/23/EEC and Electromagnetic Compatibility 89/336/EEC as amended by 92/31/EEC and 93/68/EEC. The conformity of the designated product with the provisions of Directive number 73/23/EEC (LVD) is proved by full compliance with the following standards:... - Page 24 W A K O N D A PACK 136/2...
Need help?
Do you have a question about the WAKONDA and is the answer not in the manual?
Questions and answers