Table of Contents
Advertisement
Advertisement
Table of Contents

Subscribe to Our Youtube Channel
Related Manuals for Kuppersbusch EKDG 6550.0 W


Summary of Contents for Kuppersbusch EKDG 6550.0 W
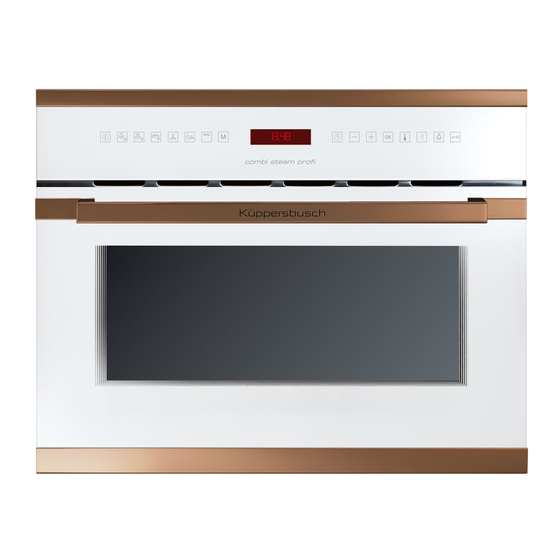
- Page 1 BEDIENUNGS- UND MONTAGEANWEISUNG EN User Manual EKDG 6550.0...
-
Page 2: Table Of Contents
Contents Safety Instructions ..........................40 Description of your oven ......................... 42 Basic settings ............................44 Basic functions ............................47 Regenerating & Sterilising ........................47 Auto Cooking functions ........................... 50 Water feeding ............................56 Emptying the water tank .......................... 56 When the oven is working........................57 Use of Acessories .......................... -
Page 3: Safety Instructions
Safety Instructions Children must be supervised to ensure that they do not play with the appliance. Use the safety locks. Warning! Do not leave the oven Warning! During use the appliance unsupervised. becomes very hot. Care should be Warning! If you see smoke or fire, taken to avoid touching heating keep the door closed in order to elements inside the oven. - Page 4 Safety Instructions The racks can bear a maximum load Avoid damaging the oven or other of 8 kg. To avoid damaging the oven, dangerous situations by following these do not exceed this load. instructions: Please cover the socket inside the Cleaning: oven as you are not using the food The appliance will remain hot for...
-
Page 5: Description Of Your Oven
Description of your oven 1. – Door window glass 7. – Shelf guides 2. – Safety catches 8. – Rack 3. – Water tank 9. – Lamp bulb 4. – Control panel 10. – Plug socket for the Food Probe 5. -
Page 6: Description Of Functions
Description of your oven Description of Functions Symbol Function Foods Cooking all sorts of vegetables, rice, cereals and meat. Steam Extracting juice from berries. Simultaneous defrosting and cooking of vegetables. Regenerating & Regenerating plate dishes and ready-made meals. Sterilising Sterilising/boiling down fruit. “Profi”... -
Page 7: Basic Settings
Basic settings Initial Settings After your steam oven is first plugged in or after a The oven will not operate until the clock, the water power failure, the clock display will flash to indicate hardness parameter and the Calibration is set. that the time shown is not correct. -
Page 8: Safety Blocking
Basic settings Water hardness Ca + Mg French deg. German deg. Type Display English deg. [°eH] (ppm) [°dF] [°dH] Soft water 0 to 150 0 to 11 0 to 15 0 to 8 Medium water 151 to 350 12 to 25 16 to 35 9 to 20 Hard water... - Page 9 Basic settings Timer The timer functions like an egg timer. It can be used at any time and independently of all other functions. To set the Timer proceed as follows: While the Timer is running the Timer light is on. The 1.
-
Page 10: Basic Functions
Basic functions Steam function Use this function to cook all sorts of vegetables, rice, cereals and meat. It is also suitable for extracting juice from berries and for simultaneous defrosting and cooking of vegetables. 1. Press the “On/Off” key to switch the oven on. 5. - Page 11 Basic Functions “Profi” Cooking Press the “On/Off” key to switch the oven on. With the “-” and “+” key define the desired Press the “Profi” Cooking key . temperature. Press the “OK if you wish to use the Press the “OK”...
- Page 12 Basic Functions Hot Air + Steam function Press the “On/Off” key to switch the oven on. With the “-“ and “+” key select the timer Press the “Hot Air + Steam” function key . function. Press the “Temperature” key . Press the “OK”...
-
Page 13: Auto Cooking Functions
Auto Cooking functions Steam function menus 1. Press the “On/Off” key to switch the oven on. If you wish to change the parameters proceed to the 2. Press the “Steam Function” key. next step. Press the “+” key to enter the “ 6. - Page 14 Auto Cooking functions Regenerating & Sterilising menus Press the “On/Off” key to switch the oven on. Press the “OK” key to validate. The oven will Press the “ ” key . start to operate. Regenerating & Sterilising Press the “+” key to enter the “ Regenerating &...
- Page 15 Auto Cooking functions Temperature Function Program Food types Duration (min.) (⁰C) PC01 Baking Buns PC02 Frozen Buns PC03 Fresh Dough Bread PC04 White Bread PC05 Braided Bread PC06 Brown Bread PC07 Whole Wheat Bread PC08 Fruit Bread PC09 Pound Cake PC10 Puff Pastry Cake...
- Page 16 Memory Functions Memory Functions (M1 – M5) This function is intended to store five separated settings that can be saved and called. Store a memory Press the “On/Off” key to switch the oven on. Press the “OK” key to validate. Press the “Memory Function”...
- Page 17 Memory Functions Delete a memory 1. Press the “On/Off” key to switch the oven on. 6. Press the “OK” key to confirm. 2. Press the “Memory Functions” key . Deleting all memories 3. Press the “-“ and “+” keys to select the stored 1.
-
Page 18: Food Probe
Food Probe The food probe measures the inner temperature of the food being cooked and ends the active function when a selected temperature is reached 1. Insert the Food Probe into the socket inside the 6. When a cooking function becomes active, for example oven’s cavity. -
Page 19: Water Feeding
Water feeding While the water is being pumped the display shows Filling the water tank “PUMP”. All functions require the water tank to be full. This message stays on until the temperature of the Fill the water tank up to the “MAX” mark with cold, fresh water reaches 75º... -
Page 20: When The Oven Is Working
When the oven is working... Interrupting a cooking cycle Cancelling a cooking cycle You can stop the cooking process at any time by pressing If you wish to cancel the cooking process, press the Stop the Stop key once. key twice. The oven incorporates a steam-reduction function that is You will then hear 3 beeps and the message “End”... -
Page 21: Use Of Acessories
Use of Acessories The perforated container is suitable for cooking fresh or The rack is used when cooking with small containers, as deep frozen vegetables, meat and poultry. In this case it for example, dessert bowls and to regenerate plate is important that the non-perforated container is dishes. - Page 22 Cooking with Steam Steam cooking - Fish (This information may vary.) Fish Quantity Temperature ºC Time min. Container Level Gilthead sea bream 800-1200 g 30-40 Perforated Trout 4 x 250 g 20-25 Perforated Salmon filet 500-1000 g 15-25 Perforated Salmon trout 1000-1200 g 25-35 Perforated...
- Page 23 Cooking with Steam Steam cooking - Meat Meat Quantity Temperature ºC Time min. Container Level Chicken leg 4-10 40-45 Perforated Chicken breast 25-35 Perforated Smoked pork loin 500g – 1000 g 40-50 Perforated Turkey escalope 20-25 Perforated Pork filet, whole 20-30 Perforated Sausages...
- Page 24 Cooking with Steam Steam cooking – Vegetables Temperature Time Vegetables Container Level ºC min. Eggplant/Aubergine 15-20 Perforated in slices Beans 35-45 Perforated Broccoli 25-30 Perforated florets with stalk Broccoli 15-20 Perforated florets without stalk Cauliflower 30-35 Perforated florets Cauliflower 45-50 Perforated whole head Peas...
- Page 25 Cooking with Steam Steam cooking - Desserts Desserts Quantity Temperature ºC Time min. Container Level Stewed apples 500-1500 g 15-25 Not perforated Stewed pears 500-1500 g 25-30 Not perforated Crème brûlée 20-25 Rack - bowl Crème caramel 25-30 Rack - bowl Yogurt 4-6 hrs.
-
Page 26: Cooking With Steam
Cooking with Steam Steam cooking - Defrost Temperature Time Vegetables / Side dish Container Level ºC min. Broccoli 15-20 Perforated florets with stalk Mixed vegetables 15-20 Perforated Spinach leaves 10-15 Not perforated portions Cauliflower 15-20 Perforated florets Peas 15-25 Perforated Curly kale 25-35 Not perforated... -
Page 27: Cooking With The Grill
Cooking with the grill For good results with the grill, use the grid iron supplied 4. If the grill is used for extended period of time it is normal to find that the elements will switch themselves with the oven. off temporarily due to the safety thermostat. - Page 28 Cooking with Hot Air Roasting and baking Time Standing Time Type Quantity (g) Power (Watt) Temperature ºC Comments (min) (min) Do not put lid on Beef stew 1000 160/170 80/90 container Do not put lid on Pork loin 500/600 180/190 35/40 container Put lid on container.
- Page 29 Cooking with Hot Air Cooking – Cakes Type Container Level Temperature Time (min) Walnut cake Spring-form type tin 170/180 30/35 Fruit tart Spring-form type tin 150/160 35/45 Fruit cakes Cake tin with central hole 170/190 30/45 Savoury tarts Spring-form type tin 160/180 50/70 Simple cake (sponge cake)
-
Page 30: Care And Maintenance
Care and maintenance front. Screw the knurled nuts 1 and 2 in a clockwise Cleaning the cooking space direction till tight. Avoid using abrasive cleaners such as scouring pads, Removing the appliance door steel wool, etc. as they can damage the surface. 1. - Page 31 Care and maintenance Descaling Suitable descaling solutions Whenever steam is produced, irrespective of the For descaling, use the descaling solution “DURGOL®”. hardness of the local water supply (i.e. the limescale This solution allows a professional and careful descaling content of the water), limescale is deposited inside the of your appliance.
-
Page 32: Descaling Procedure
Care and maintenance Descaling procedure Warning: For safety reasons, the descaling process The descaling process is silent and during this process the display shows continuously "0.5L" (without cannot be interrupted and it takes about 45 minutes. blinking). The appliance can be descaled with the appliance door 6. -
Page 33: Oven Cleaning
Oven cleaning Warning! Cleaning should be done with the oven power Oven interior switched off. Take the plug out of the socket or switch After use, remove any water on the bottom of the off the oven’s power circuit. cooking space with a soft cloth. Leave the appliance Do not use aggressive or abrasive cleaning products, door open so that the cooking space can cool down. -
Page 34: What Should I Do If The Oven Doesn't Work
What should I do if the oven doesn’t work? WARNING! Any type of repair must only be done by a specialised technician. Any repair done by a person not The appliance still makes a noise after the cooking authorised by the manufacturer is dangerous. process is finished! This is not a problem. -
Page 35: Technical Characteristics
Technical characteristics Displays Display Description Descaling Soft water. SOFT Medium water. Hard water. HARD Appliance must be descaled. Flashing – descaling starts. Feed 0.6 litre descaling solution into the water tank. 0.5L Feed 1 litre cold water into the water tank for rinsing. 1.0L Water tank Indication that water tank is missing. -
Page 36: Environmental Protection
Environmental protection Disposal of the packaging Disposal of equipment no longer used The packaging bears the Green Dot mark. According to European Directive 2002/96/EC on the Dispose of all the packaging materials such as management of waste electrical electronic cardboard, expanded polystyrene and plastic wrapping equipment (WEEE), home electrical appliances should in the appropriate bins. -
Page 37: Installation Instructions
Installation instructions Before installation During installation, make sure that the power cable does not come into contact with any moisture or objects with sharp Check that the input voltage indicated on the characteristics edges and the back of the oven. High temperatures can plate is the same as the voltage of the power outlet you are damage the cable. -
Page 38: Installation
Installation 1. Den Dampfgarer in die Nische einschieben entsprechend anpassen. 2. Die Tür der öffnen und das Gerät vier mitgelieferten Schrauben am Küchenmöbel wie im Bild dargestellt befestigen. 1. Push oven completely into the cabinet and centre it. 2. Open door and fasten the appliance to the cabinet using the four screws provided. - Page 39 Küppersbusch Hausgeräte GmbH Postfach 10 01 32, D-45801 Gelsenkirchen, Küppersbuschstr. 16, D-45883 Gelsenkirchen Telefon: (02 09) 4 01-0, Telefax: (02 09) 4 01-3 03 www.kueppersbusch.de Teka Austria GmbH Eitnergasse 13, A-1230 Wien Telefon: (01) 8 66 80-15, Telefax: (01) 8 66 80-50 www.kueppersbusch.at...
Need help?
Do you have a question about the EKDG 6550.0 W and is the answer not in the manual?
Questions and answers