8e6 Technologies R3000 Mobile Quick Start Manual
Mobile client
Hide thumbs
Also See for R3000 Mobile:
- User manual (594 pages) ,
- Quick start manual (102 pages) ,
- User manual (386 pages)

Related Manuals for 8e6 Technologies R3000 Mobile


Summary of Contents for 8e6 Technologies R3000 Mobile
-
Page 1: Quick Start Guide
Mobile Client Quick Start Guide Product: r3000 Mobile (5k02-63) uPdated: 10.01.06... - Page 2 8e6 Technologies. Every effort has been made to ensure the accuracy of this document. However, 8e6 Technologies makes no war- ranties with respect to this documentation and disclaims any implied warranties of merchantability and fitness for a particular purpose.
-
Page 3: Table Of Contents
Step 5: Test the Mobile Client Console Connection ..............19 Step 6: Set Library Updates ......................20 .....................23 onClusion ..................24 PeCifiCations R3000 Mobile 1U Units ........................ 24 Front Panel LED Indicators and Buttons .................. 26 obile lient uiCk tart uide... - Page 4 obile lient uiCk tart uide...
-
Page 5: E 6 M Obile C Lient I Ntroduction
Mobile Client software installed on an end user’s workstation, the Administrator con- sole used for configuring the R3000 Mobile server, and the Administrator console used for setting up and maintaining your account and licenses for all end users working at home or on the road. -
Page 6: About This Document
Introduction - This section is comprised of an overview of the R3000 product and how to use this document • Service Information - This section provides 8e6 Technologies contact information • Preliminary Setup Procedures - This section includes instructions on how to physi- cally set up the R3000 in your network environment •... -
Page 7: S Ervice I Nformation
The user should not attempt any maintenance or service on the unit beyond the proce- dures outlined in this document. Any initial hardware setup problem that cannot be resolved at your internal organiza- tion should be referred to an 8e6 Technologies solutions engineer or technical support representative. 8e6 Corporate Headquarters (USA) Local 714.282.6111... -
Page 8: P Reliminary S Etup P Rocedures
reliMinary etuP roCedures Unpack the Unit from the Carton Inspect the packaging container for evidence of mishandling during transit. If the packag- ing container is damaged, photograph it for reference. Carefully unpack the unit from the carton and verify that all accessories are included. Save all packing materials in the event that the unit needs to be returned to 8e6 Tech- nologies. -
Page 9: Rack Mount The Server
Rack Mount the Server Rack Mount Instructions Rack Setup Suggestions • Determine the placement of each component in the rack before you install the rails. • Install the heaviest server components on the bottom of the rack first, and then work Identify the Sections of the Rack Rails You should have received two rack rail assemblies with the 8e6 server unit. - Page 10 Install the Rack Rails Determine where you want to place the server unit in the rack. Position the fixed rack rail/sliding rail guide assemblies at the desired location in the rack, keeping the sliding rail guide facing the inside of the rack. Screw the assembly securely to the rack using the brackets provided.
- Page 11 Installing the Server into a Telco Rack If you are installing the 8e6 server unit into a Telco type rack, follow the directions given on the previous pages for rack installation. The only difference in the installation pro- cedure will be the positioning of the rack brackets to the rack. They should be spaced apart just enough to accommodate the width of the Telco rack.
-
Page 12: I Nstall The S Erver
nstall the erver Step 1: Preliminary Setup Create a “setup workstation” using a Windows-based laptop or desktop machine with a network card and Internet Explorer 5.5 (or later). The setup workstation will be used for accessing the R3000 server on the network and configuring the unit. A. - Page 13 Link the Workstation to the R3000 The procedures outlined in this sub-section require the use of the CAT-5E crossover cable. A. Plug one end of the CAT-5E crossover cable into the R3000’s LAN 2 port. NOTE: When facing the rear of the chassis, the LAN 2 port is the port on the right.
- Page 14 D. Power on the R3000 by dropping down the face plate and pressing the large button. The boot-up process may take 5 - 10 minutes. When the drive light remains off for 30 seconds, the system is booted up. Front of the chassis The Boot Up Process The boot-up process may take 5 - 10 minutes.
-
Page 15: Step 2: Network Setup
Step 2: Network Setup When the R3000 is fully booted, you can configure network settings. For this step, you will need your network administrator to provide you the host name, gateway address, and one unused IP address. Access the R3000 Administrator Console A. - Page 16 Log in to R3000 Administrator Console In the login dialog box, you need to enter the generic Username and Password: A. In the Username field, type in admin. B. In the Password field, type in user3. C. Click OK to close the login dialog box and to go to the main screen of the R3000 Administrator console: obile lient...
- Page 17 Network Click the System button at the top of the screen to go to the System section of the con- sole: In this section of the console you will: • Configure LAN settings the R3000 will use on your network •...
- Page 18 (the NetBIOS name must be capitalized). It is important to enter something identifiable, because once the product is registered, this host name is used by 8e6 Technologies to recognize your account for library updates. This name needs to be a valid DNS entry.
- Page 19 F. Click Apply. Network: NTP Servers From the control panel, click Network and choose NTP Servers from the pop-up menu: The NTP Servers window is used for specifying the Network Time Protocol (NTP) serv- ers to be used by the R3000, so that the R3000 is synchronized with computer clocks on the Internet.
- Page 20 NOTE: If the primary server fails, the secondary will be used. If the secondary server fails, the tertiary server will be used. Network: Regional Setting From the control panel, click Network and choose Regional Setting from the pop-up menu: Make the following selections in the Regional Setting window: A.
-
Page 21: Step 3: Physically Connect The R3000 To The Network
Step 3: Physically Connect the R3000 to the Network Select a Site to Install the Unit In most cases the R3000 Mobile server should be installed in the DMZ, but the appliance can be installed anywhere on the network as long as the following operational require- ments are met: •... -
Page 22: Step 4: Test The R3000 Console Connection
Did you restart the R3000 after changing the network settings? • Do you have the LAN port connected to your network hub? • If still unsuccessful, contact an 8e6 Technologies solutions engineer or technical sup- port representative. obile lient uiCk... -
Page 23: Step 5: Test The Mobile Client Console Connection
LAN. Open a browser window on a network workstation, and then go to http://test.8e6.net (an empty site for testing pornography filtering). B. The connection should be blocked, and the block page served by the R3000 Mobile appliance should display in the browser’s Address field. If you do not receive a block page, contact an 8e6 Technologies solutions engineer or technical support represen- tative. -
Page 24: Step 6: Set Library Updates
R3000 library updates. Library updates are critical for filtering as new sites are added to the 8e6 library each day. To activate updates, visit the 8e6 Technologies Web site and enter the activation code that was issued to you by e-mail (also included on the product invoice). -
Page 25: Perform A Complete Library Update
Perform a Complete Library Update Your R3000 was shipped with the latest library update for the current software release. However, as new updates continually become available, before you begin using the R3000 you must perform a complete library update to ensure you have the latest library updates. -
Page 26: Monitor The Library Update Process
Monitor the Library Update Process To verify that the library is being updated: A. From the control panel, click Updates and select Library Update Log from the menu. B. In the Library Update Log window, click View Log to display the update activity: NOTE: You will be notified in the log when the library has been completely updated by the message: “Full URL Library Update has completed.”... -
Page 27: C Onclusion
onClusion Congratulations; you have completed the R3000 quick start procedures. Now that the R3000 is filtering your network, the next step is to set up groups and create filtering pro- files for group members. To activate a default filter profile more appropriate for your operations, or to specify a more limited IP range to filter, consult Chapter 2: Group screen in the Global Administra- tor Section of the R3000 User Guide. -
Page 28: Pecifications
PeCifiCations R3000 Mobile 1U Units 1U Physical Specifications Specification Value Height 1.7” (43mm) Width 16.8” (426mm) Depth 22.6” (574mm) Front clearance 2 inches (76mm) Side clearance 1 inch (25mm) Rear clearance 3.6 inches (92mm) Weight 19.5 lbs (8.85 kg) obile... -
Page 29: Internal Product Specifications
Power Supply Safety / EMC USA - UL listed, FCC Canada - CUL listed Germany - TUV Certified Europe/CE Mark EN 60950/IEC 60950-Compliant Internal Product Specifications Specification R3000 Mobile 3.6GHz P4 CPU Memory 3GB PC4200 / DDR2-533 Dual Channel RAM Hard drive capacity 1x120GB HDD Connectivity... -
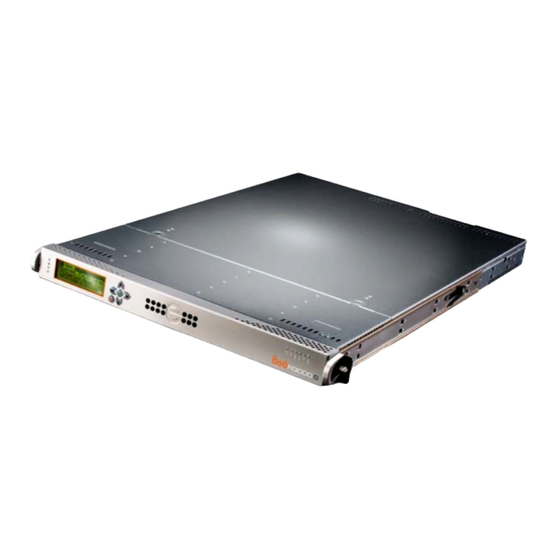
Page 30: Front Panel Led Indicators And Buttons
Front Panel LED Indicators and Buttons Diagrams and Descriptions LED indicators and buttons display on the front panel, to the right: LED indicators alert you to the status of a feature on the unit while buttons let you per- form a function on the unit. LED Indicators and Buttons LED Indicator Key Button Key... - Page 31 obile lient uiCk tart uide...
- Page 32 8e6 Corporate Headquarters (USA): 828 West Taft Avenue Orange, CA 92865-4232 • Tel: 714.282.6111 or 888.786.7999 Fax: 714.282.6116 (Sales/Technical Support) • 714.282.6117 (General Office) Satellite Offices: 8e6 Taiwan: RM B2, 13F, No. 49, Sec. 3, Minsheng E. Rd., Taipei 104, Taiwan, R.O.C. Tel: 886-2-2501-5285 •...
Need help?
Do you have a question about the R3000 Mobile and is the answer not in the manual?
Questions and answers