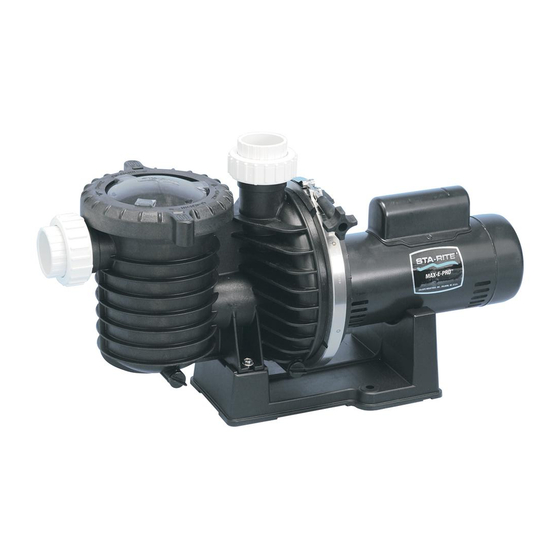
STA-RITE MAX-E-PRO Owner's Manual
Max-e-pro series centrifugal pumps with integral trap
Hide thumbs
Also See for MAX-E-PRO:
- Brochure (2 pages) ,
- Owner's manual (17 pages) ,
- Installation and user manual (15 pages)
Advertisement
Sta-Rite Pool/Spa Group
293 Wright Street, Delavan, WI 53115
International: 262-728-5551, FAX: 262-728-7550
www.starite.com
Union City, TN • Delavan, WI • Mississauga, Ont. • Murrieta, CA
© 2003, Sta-Rite Industries, Inc.
MAX-E-PRO
CENTRIFUGAL PUMPS
WITH INTEGRAL TRAP
O
W
N
E
R '
INSTALLATION, OPERATION & PARTS
Series P6E and P6RA
See Page 2 for Model Numbers
TM
S
M
A
N
Printed in U.S.A.
U
A
L
This manual should be furnished to
the end user of this pump; its use will
reduce service calls and chance of
injury and will lengthen pump life.
S691 (Rev. 10/30/03)
Advertisement
Table of Contents

Summary of Contents for STA-RITE MAX-E-PRO
- Page 1 Sta-Rite Pool/Spa Group 293 Wright Street, Delavan, WI 53115 International: 262-728-5551, FAX: 262-728-7550 www.starite.com Union City, TN • Delavan, WI • Mississauga, Ont. • Murrieta, CA S691 (Rev. 10/30/03) © 2003, Sta-Rite Industries, Inc. Printed in U.S.A.
-
Page 2: Table Of Contents
To avoid unneeded service calls, prevent possible injuries, and get the most out of your pump, READ THIS MANUAL CAREFULLY! The Sta-Rite ‘P6RA’ and ‘P6E’ Series Self-priming Centrifugal pumps: • Are designed for use with swimming pools or as centrifugal pumps. -
Page 3: Safety Instructions
• Limit test to 24 hours. After test, visually check system to be sure it is ready for operation. Remove trap lid and retighten hand tight only. NOTICE: These parameters apply to Sta-Rite equipment only. For non-Sta-Rite equipment, consult manufacturer. - Page 4 NOTICE: Port threads to filter cover are: Internal - 2" NPT or pool Clamp for direct connection to Knob pipe. External - 3-1/4" Buttress. Fits Sta-Rite Suction U11-200P Union Collar Bonding Lug Port for quick disconnect from pipe connection. pool or...
- Page 5 Piping: Use at least 2" IPS PVC (51mm) pipe. Increase size if a long run is needed. To avoid strains on the pump, support both suction and discharge pipes inde- pendently. Place these supports near the pump. To avoid a strain left by a gap at the last connection, start all piping at the pump and run pipe away from the pump.
-
Page 6: Electrical
Testing and Certification Suction outlet covers must have been tested by a nationally recognized testing laboratory and found to comply with the latest ASME/ANSI Specification for Suction Fittings For Use in Swimming Pools, Spas, Hot Tubs, and Whirlpool Bathtub Applications. Outlets Per Pump Provide at least two hydraulically balanced main drains, with covers (see Page 5), for each swimming pool pump suction line. - Page 7 Grounding/Bonding BONDING Install, ground, bond and wire motor according to local or National Electrical Code requirements. Permanently ground motor. Use green ground terminal provided under motor GREEN canopy or access plate (See Figure 3); use size and type wire required by GROUND SCREW code.
- Page 8 TABLE I - RECOMMENDED FUSING AND WIRING DATA – P6E MODELS Serv. to Motor - Dist. in Ft. (M) Motor Branch Fuse Max Load Voltage/ 0-100' 101-200' 201-300' Rating Amps* Amps Hz/Phase (0-30 M) (30-60 M) (60-90 M) P6E Models: 11.0 115/60/1 14(2)
-
Page 9: Operation
OPERA TION NEVER run pump dry. Running pump dry may damage seals, causing leakage and flooding. Fill pump with water before starting motor. Before removing trap cover: 1. STOP PUMP before proceeding. 2. CLOSE GATE VALVES in suction and discharge pipes. 3. -
Page 10: Storage/Winterizing
2. Remove trap cover handle ring (turn counterclockwise). If necessary, tap handles gently with a rubber mallet. 3. Remove strainer basket and clean. Be sure all holes in basket are clear, flush basket with water and replace in trap with large opening at pipe con- nection port (between ribs provided). -
Page 11: Pump Service
9. Prime pump according to instructions on Page 9. PUMP SERVICE Pump should only be serviced by qualified personnel. For best results, use only genuine Sta-Rite factory parts. Be sure to prime pump (Page 9) before starting. Before removing clamp or trap cover: 1. - Page 12 7. Unscrew impeller from shaft (turn counterclockwise when facing it). NOTICE: On models with impeller screw: Remove impeller screw (left hand thread - turn clockwise) and gasket before removing impeller. Inspect gasket for damage, cracks, etc. Replace if damaged. 8. Pull rotating member of seal off of impeller sleeve; clean sleeve. 9.
-
Page 13: Troubleshooting Guide
TROUBLESHOOTING GUIDE Read and understand safety and operating instructions in this manual before doing any work on pump! Only qualified personnel should electrically test pump motor! FAILURE TO PUMP; REDUCED CAPACITY OR DISCHARGE PRESSURE Suction leaks/lost prime: 1. Pump must be primed; make sure that pump volute and trap are full of water. -
Page 14: Repair Parts List
P6E, P6RA REPAIR PARTS LIST Part Part MAX-E-PRO POOL PUMP Description Qty. 1/2 through 3 HP Models Motor Chart at Right #10-32x1/2” Screw U30-692SS Lock Washer U43-22SS Bonding Lug U17-568 Water Slinger 17351-0009 Seal Plate Kit Box A (Incl. Key Nos. 6, 7) - Page 15 P6E, P6RA MAX-E-PRO POOL PUMP 1/2 through 3 HP Models See Box A See Box A 4285 1102...
-
Page 16: Warranty
Product specific warranties: of installation The foregoing warranties relate to the original consumer pur- chaser (“Purchaser”) only. Sta-Rite shall have the option to re- HRPB, DEPB, System 3, System 2 and Posi-Clear pair or replace the defective product, at its sole discre- Tanks .


Need help?
Do you have a question about the MAX-E-PRO and is the answer not in the manual?
Questions and answers