Turbo Air JUR-36 Service Manual
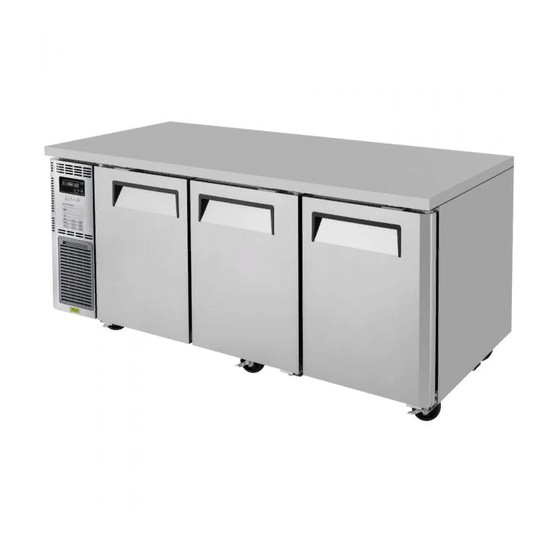
Undercounter refrigerator
Hide thumbs
Also See for JUR-36:
- Installation and operation manual (16 pages) ,
- Installation and operation manual (17 pages) ,
- Installation and operation manual (17 pages)
Table of Contents
Advertisement
Advertisement
Table of Contents

Related Manuals for Turbo Air JUR-36


Summary of Contents for Turbo Air JUR-36
- Page 1 CAUTION! PLEASE KEEP POWER SWITCH ON BEFORE OPERATING THIS EQUIPMENT Turbo Air Speed up the Pace of Innovation Undercounter Refrigerator Service Manual Please read this manual completely before attempting to install or operate this equipment! JUR-36 JUR-48 JUR-60 JUR-72 www.turboairinc.com...
-
Page 2: Table Of Contents
TABLE OF CONTENTS 1. EXPLODED VIEW 1-1. JUR-36 EXPLODED VIEW 1-2. JUR-48 EXPLODED VIEW 1-3. JUR-60 EXPLODED VIEW 1-4. JUR-72 EXPLODED VIEW 2. WIRING DIAGRAMS 3.MAIN PART 4. MAIN COMPONENTS 5. PARTS LIST 6. TEMPERATURE CONTROL INSTRUCTION 7. REPLACEMENT OF MAIN COMPONENTS 7-1. -
Page 3: Exploded View
1. EXPLODED VIEW 1-1. JUR-36 EXPLODED VIEW PART NAME MAIN PCB COVER COUNTER TOP UNIT BRACKET A) FRONT PCB EVA FAN AIR GUIDE CASKET UNIT FRONT COVER CABINET ASSY BOTTOM HINGE R UNIT BRACKET DOOR(R)_900 UNIT SIDE COVER TOP HINGE R... -
Page 4: Jur-48 Exploded View
1-2. JUR-48 EXPLODED VIEW PART NAME EVA DUCT MAIN PCB COVER DRYER EVA FAN MOTOR FRONT PCB DRAIN PAN UNIT FRONT COVER EVA ASSY CONDENSER FAN MOTOR COUNTER TOP BOTTOM HINGE L UNIT BRACKET A) EVA FAN AIR GUIDE TOP HINGE L CASKET CABINET ASSY DOOR(L)_1200... -
Page 5: Jur-60 Exploded View
1-3. JUR-60 EXPLODED VIEW PART NAME EVA DUCT MAIN PCB COVER DRYER EVA FAN MOTOR FRONT PCB DRAIN PAN UNIT FRONT COVER EVA ASSY CONDENSER FAN MOTOR COUNTER TOP BOTTOM HINGE L UNIT BRACKET A) EVA FAN AIR GUIDE TOP HINGE L CASKET CABINET ASSY DOOR(L)_1500... -
Page 6: Jur-72 Exploded View
1-4. JUR-72 EXPLODED VIEW PART NAME MAIN PCB COVER AIR GUIDE(L/R) COMPRESSOR FRONT PCB EVA DUCT DRYER UNIT FRONT COVER EVA FAN MOTOR DRAIN PAN EVA ASSY BOTTOM HINGE L CONDENSER FAN MOTOR COUNTER TOP TOP HINGE L UNIT BRACKET A) EVA FAN AIR GUIDE DOOR(L)_1800 CASKET... -
Page 7: Wiring Diagrams
2. WIRING DIAGRAMS... -
Page 8: Main Part
3.MAIN PART DISPLAY PCB DISPLAY PCB CONDENSER UNIT SUCTION PIPE(B) COMP CONDENSER FAN MOTOR CONDENSER DRAIN PIPE DRYER DRAIN PAN CONDENSER FAN MOTOR ASSY CONDENSER MOTOR FAN BLADE CONDENSER MOTOR BRACKET CONDENSER MOTOR... -
Page 9: Door Gasket
PCB BOX TRANSFORMER MAIN PCB DOOR GASKET DOOR FRAME DOOR GASKET EVAP UNIT D-SENSOR EVAP R-SENSOR EVAP DUCT EVAP FAN MOTER... -
Page 10: Main Components
EVAP DUCT FAN COVER EVAP DUCT FAN COVER(A) 4. MAIN COMPONENTS 1.COMPRESSOR MODEL PART NAME PART NO. CAPACITY TYPE OF INPUT MAKER JUR-36 HBL-27YE-1 M369700100 1/4 HP RSCR 115V 60Hz DAEWOO JUR-48 HBL-27YE-1 M369700100 1/4 HP RSCR 115V 60Hz DAEWOO... -
Page 11: Parts List
6. CAPILLARY TUBE LENGTH AND REFRIFERANT MODEL CAPILLAY LENGTH Refriferant MAKER NOTE JUR-36 OD2.4,ID1.2,L=31007.0OZ JUR-48 OD2.4,ID1.2,L=31007.0OZ JUR-60 OD2.4,ID1.2,L=31008.5OZ JUR-72 OD2.4,ID1.2,L=360012.0OZ 7.FILTER DRYER MODEL PART NO. REFRIFERANT SPEC NOTE JUR-36 BR84100101 R-134a C-052-5 JUR-48 BR84100101 R-134a C-052-5 JUR-60 BR84100101 R-134a C-052-5... - Page 12 Model Remark PART NAME PART CODE DESCRIPTION DRYER BR84100100 CONDENSER KF84900105 CONDENSER KF24900104 CONDENSER FAN MOTOR G8F6600100 EVAP FAN MOTOR P8F6600100 DISPLAY PCB JR85400101 MAIN PCB BR85400100 POWER CORD M721300201 R SENSOR K3F5102100 D SENSOR K3F5102001 TRANS K3F6000100 MAIN PCB COVER(B) KR81400100 MAIN PCB COVER(F) KR81400200...
-
Page 13: Temperature Control Instruction
6. TEMPERATURE CONTROL INSTRUCTION... -
Page 14: Replacement Of Main Components
7.REPLACEMENT OF MAIN COMPONENTS 7-1.REPLACING DOOR A.Unscrew the top hinge B.Lift the door C.Lift the door and take apart it from cabinet. D.DOOR ASSY 7-2.Cabinet Compartment A.Unscrew the cabinet Reinforce. B.Unscrew the counter top bracket(Right). C.Unscrew the counter top bracket(Left). D.Cut the counter top out of cabinet as below. - Page 15 E.Unscrew evap fan duct. G.Unplug the evaporator motor connector. H.Disassemble evap motor. I.Evap Motor J.Disassemble air guide K.Unscrew evap air guide. L . Disconnect the harness sensor.
-
Page 16: Compressor Compartment Parts
M. Pull out Sensor from the Evap. N.Unscrew evaprator. O.After unscrewing,remove evaporator. P.Evaporator 7-3.COMPRESSOR COMPARTMENT PARTS A.Disassemble the unit front cover assembly B.Disassemble the unit side cover C.Remove the mech cover D.Remove the comp base... -
Page 17: 7-4.Disassemble Refrigerator Compartment
E.Disassembly the condesing unit 7-4.DISASSEMBLE Refrigerator Compartment A.Unsolder suction pipe(B) and comp as below B.Unsolder condenser and drain pipe . C.Unscrew the compressor. D.Disassemble the condenser motor. E.Unscrew the condenser. F.Disassemble filter dryer. -
Page 18: Replacing Front Pcb
7-5 Replace Front PCB A.lift the unit front cover as illustrated below. B.Switch off the power. D.Remove the display PCB back cover by unscrewing C.Unplug the four screws located on the display PCB back cover. E.Disassemble display PCB. F.Replace display PCB with the new one. G.Screw the display PCB. -
Page 19: How To Use Display Pcb
I.Put the plug in the socket. J.Turn on the unit. 7-6 How to use Display PCB A.Push"SW1" and "SW2" button (SWI . SW2 B.Bar LED display "F1",the unit is at the mode of freezer. at the same time and wait five seconds to set mode. -
Page 20: Replace Main Pcb
-7 Replace Main PCB A.lift the unit front cover as illustrated below. B. Unscrew the main PCB cover (front). C.Unscrew the the main PCB cover(back). D.Disconnect the connectors. E.Figure of the removed connectors. F.Separate the PCB. G.Take apart the main PCB from electrical box. H.Replace the main PCB with the new one. -
Page 21: Replacing Cabinet Frame Heater(And/Or)Mullion Heater
I.Connect connectors of main PCB. J.Tighten the screws as below. K.Assemble the unit front cover. 7-8 Replacing cabinet frame heater(and/or)mullion heater A.Insert the point of“-”type screw driver into the gap B.Take apart the frame cover from the frame. between the frame and frame cover. C.Pull out the heater wire from the inlet. - Page 22 E.Assemble the frame cover with frame.Pat the frame F. Disassemble the mullion frame. cover with the soft hammer,etc. G.Uncap connectors of mullion heater. H. Take apart mullion frame cover from mullion frame. I. Replace the mullion heater with a new one.
Need help?
Do you have a question about the JUR-36 and is the answer not in the manual?
Questions and answers