Table of Contents
Advertisement
Advertisement
Table of Contents

Related Manuals for Star Micronics SM-T300I SERIES


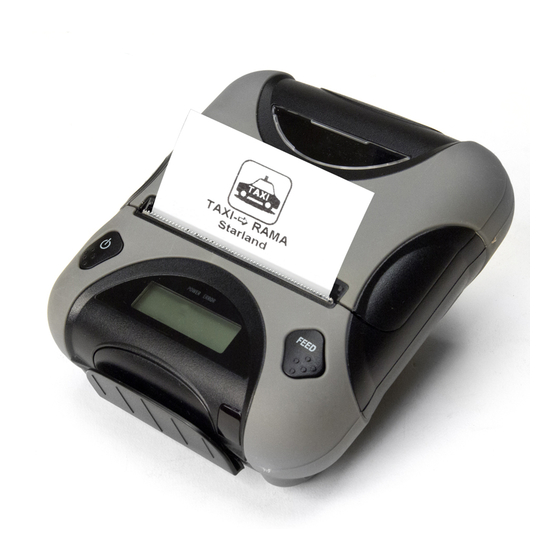
Summary of Contents for Star Micronics SM-T300I SERIES
- Page 1 Mobile Printer SM-T300I SERIES Hardware Manual...
- Page 2 [Swedish] och övriga relevanta bestämmelser som framgår av direktiv 1999/5/EG. Español: Por medio de la presente STAR MICRONICS CO.,LTD. declara que el Wireless Device cumple con los requisitos esenciales y cualesquiera [Spanish] otras disposiciones aplicables o exigibles de la Directiva 1999/5/CE. Português: STAR MICRONICS CO.,LTD. declara que este Wireless Device está conforme com os requisitos essenciais e outras disposições [Portuguese] da Directiva 1999/5/CE.
-
Page 3: Trademark Acknowledgments
[Norwegian] relevante krav i direktiv 1999/5/EF. Íslenska: Hér með lýsir STAR MICRONICS CO.,LTD. yfir Því að Wireless Device er í samræmi við grunnkröfur og aðrar kröfur, sem gerðar eru í [Icelandic] tilskipun 1999/5/EC. This is a class B product. In a domestic environment, this product may cause radio interference, in which case the user may be required to take adequate measures. - Page 4 P If you notice smoke, a strange smell, or a strange sound, turn off the power immediately, and remove the battery pack and battery charger. Then contact a Star Micronics dealer. P If any foreign material (metal scraps, water, or other fluid) enters the printer, immediately turn off the printer and remove the battery charger and/or battery pack.
-
Page 5: Using The Printer
Using the Printer P Some semiconductors can be damaged by static electricity. Be sure to turn off the printer when inserting or removing the battery pack. P Do not drop the printer or hit it against a hard object. P Do not open the printer cover while the printer is printing. P Before you open the printer cover, make sure that printing data is not being sent to the printer. -
Page 6: Printer Maintenance
Operating Environment for the Printer Before actually unpacking the printer, you should take a few minutes to think about where you plan to use it. Remember the following points when doing this. P Do not use the printer in an environment in which it will be subject to strong shaking while it is printing. -
Page 7: Table Of Contents
Table of Contents 1. Product Overview ..................1 1.1 Printer & Accessories......................2 1.2 External Appearance and Part Names ................3 2. Setup ......................4 2.1 Battery Pack ........................... 4 2.1.1 Inserting into the Printer ........................4 2.1.2 Charging the Battery ..........................5 2.2 Bluetooth .......................... -
Page 8: Product Overview
1. Product Overview This printer is perfect for mobile banking systems, retail, POS (point of sale) terminals and other forms of mobile computing. The characteristics of this printer are listed below: • Pocket size (120 ×130.5 × 58.3 mm) <Model without Card Reader> •... -
Page 9: Printer & Accessories
1.1 Printer & Accessories The printer is packaged with the following accessories. If any of these accessories is broken or missing, please contact the dealer that you bought the product. Printer Battery Pack Printer paper sample Belt Clip Serial Communication Cable Safety Instruction Sheet Battery Charger u The optional items for this printer are listed below. -
Page 10: External Appearance And Part Names
1.2 External Appearance and Part Names Platen Gear Thermal Head Platen Mechanism Feed Button Printer Cover Magnetic Stripe Reader Error Lamp Power Lamp Cover Open Switch Power Button Remove the films if you do not need them. ※ Charge Connector Belt Clip Serial Connector Don’t connect USB mini B cable here. -
Page 11: Setup
2. Setup 2.1 Battery Pack 2.1.1 Inserting into the Printer 1. Make sure that the printer has been turned off before you insert or remove the battery pack. 2. Insert the battery pack into the back of the printer as in the figure shown below, following the di- rection of the arrow. -
Page 12: Charging The Battery
2.1.2 Charging the Battery Insert the battery pack into the printer to charge it. Insert the battery charger cable into the printer’s power inlet for charging. Lamp(Red) Lamp(Green) Charging Fully charged Note: When the battery charger is connected to the printer without the battery pack, the printer turns on but cannot print. - Page 13 u Battery Pack Life • The battery can be charged approximately 500 times in the normal temperature range without losing performance. If an extreme decline in the running time of the battery is noticed, the bat- tery is reaching the end of its usable life. It is recommended to replace the old battery with a new one.
-
Page 14: Bluetooth
2. If necessary, enter the following information into the terminal that you are using. PIN: 1234 (default) Device name: Star Micronics (default) For security purposes, we recommend that you change the PIN. For details about changing the PIN, please contact with our dealer. - 7 -... -
Page 15: Auto Connection Function (Only For Ios)
2.2.2 Auto Connection Function (only for iOS When the Bluetooth connection with your iOS device is disconnected, it is required to establish a connection by tapping the printer you want to use on the Bluetooth setting screen. This Re-Connec- tion Specification is exactly based on the iOS specifications, and this specification is different from other OS such as Android. -
Page 16: Loading Paper
2.3 Loading Paper Refer to chapter 4, “Paper” (p. 19), to select roll paper that conforms to the specifications. 1. Turn on the printer. 2. Put your finger on the switch for opening the cover, and then open and raise the printer cover. Printer Cover Cover Open Switch 3. - Page 17 CAUTION When the paper is jammed, be sure to open the printer cover before removing the jammed paper. Do not under any circumstances try to pull out the jammed paper forcefully while the printer cover is closed. Doing so may damage parts of the printer. Caution Symbol This symbol is placed near the thermal head to indicate that it may be hot.
-
Page 18: Memory Switch Settings
2.4 Memory Switch Settings Change the Memory switch by following operations. (Refer to page 13 “Memory Switch Set- ting Table”). 1. Press and hold POWER for approx. 3 seconds, and printer is turned on. 2. To put the printer into Memory Switch Setting mode, press and hold both the POWER & FEED buttons for 3 seconds. After the ERROR LED flashes five (5) times, you can configure the settings. - Page 19 * Example: When you want to change the settings of the printer mode as shown below, <Before> Bluetooth / 9600 BPS / 8 DATA BIT / NO PARITY / 1 STOP BIT / DENSITY LOW / LOW QUALITY / MARK NO USE / SENSOR LOW / PWDN1min Sleep <After> Bluetooth(iOS) / 9600 BPS / 7 DDATA BIT / EVEN PARITY / 1 STOP BIT / DENSITY LOW / HIGH QUALITY / MARK NO USE / SENSOR HIGH / PWDN1min Sleep 1 Press and hold the POWER & FEED buttons for 3 seconds. After the ERROR LED flashes five times, you can configure the settings. Press the POWER button once and the connection mode will be changed to “Bluetooth Mode (iOS)”.
-
Page 20: Printer Mode
Memory Switch Setting Table Printer Mode Setting Display RS-232C UART Mode Communication Port Bluetooth Bluetooth Mode Bluetooth(iOS) * Bluetooth(iAP) 9600 bps 9600 BPS 19200 bps 19200 BPS Baud Rate 38400 bps 38400 BPS 57600 bps * 57600 BPS 115200 bps 115200 BPS 7 Data bit 7 DATA BIT... - Page 21 1) Communication mode It is possible to change the communication mode setting between Bluetooth and serial. Please see below for details to select the proper communication mode for your application. Bluetooth (iOS): The display shows [Bluetooth(iAP)]. At the Bluetooth (iOS) mode, the printer can com- municate with an iOS device over Bluetooth.
-
Page 22: Belt Clip
2.5 Belt Clip 2.5.1 Attaching to the Printer Follow the procedure below to attach the belt clip to the printer. 1. Make sure that you are attaching the belt clip in the right orientation, then screw the screw that comes with the belt clip into the designated screw hole to attach the belt clip to the printer. 2. -
Page 23: Printer Features
3. Printer Features 3.1 Control Panel Remaining battery power Mode Status ERROR Lamp POWER Lamp POWER ERROR Bluetooth Mode FEED Button POWER Button Bluetooth Connection Status Data Communication Status 3.1.1 Button 1) POWER Button : 1 Pressing and holding the POWER button for 3 seconds or more will turn the power on or off. 2 Pressing both the POWER and FEED buttons simultaneously will cause the ERROR lamp to flash 5 times and put the printer into Memory Switch Setting mode. -
Page 24: Self Test
3.2 Self Test You can use a self test to check the printer’s settings. Before you start the self test, make sure that roll paper has been properly loaded into the printer. 3.2.1 Self Test Procedure 1) Turn on the power while holding down FEED. 2) The printer will print the current printer status, including the firmware version, communica- tion mode, and print settings. -
Page 25: Instruction For Auto Power Down(Sleep) Mode
3.3 Instruction for Auto Power Down(Sleep) Mode The printer in the Power Down(Sleep) Mode will recover to the Print Ready Mode when receiv- ing commands or button operations. However, print data received while shifting from the Sleep Mode to the print Ready Mode (for approx. -
Page 26: Paper
4. Paper 4.1 Paper Specifications Type : Thermal Paper Paper width : 80 mm Paper thickness : 65±5 µm Outer diameter : Ø50 mm or less Inner diameter : Ø12 mm or more Recording side : Outside of roll 4.2 Recommended Paper Manufacturer Product Name Mitsubishi Paper Mills Limited... -
Page 27: General Specifications
5. General Specifications Item Specifications Printing method Direct line thermal printing Characters per line Maximum 64 cpl Alphanumeric characters: 9 X 24 dots, 12 X 24 dots, and 8 X 16 dots Character size Japanese characters: 24 X 24 dots Alphanumeric characters, expanded graphic characters, JIS Level-1 Kanji Set, JIS Character types Level-2 Kanji Set, and special characters Dot density 203 dpi (8 dots/mm) Printing width 72mm, 576 dots... - Page 28 n Dimensions External Dimensions : 120 mm (W) × 130.5 mm (D) × 58.3 mm (H) <Model without Card Reader> 120 mm (W) × 132.2 mm (D) × 58.3 mm (H) <Model with Card Reader> Weight : 442 g (Including Battery Pack) Body Color : Gray and Black 58.3...
-
Page 29: Declaration Of Conformity
Manufacturer’s Address 20-10 Nakayoshida, Suruga-ku, Shizuoka-shi, Shizuoka 422-8654 Japan Importer’s Name Star Micronics Europe Ltd. Importer’s Address Star House, Peregrine Business Park, Gomm Road, High Wycombe, Bucks. HP13 7DL, U.K. Thermal Printer Type of Equipment WSP-i350 Model Name Ref. R&TTE Radio Report No. ETLE121213.1451-01 Ref. - Page 30 URL: http://www.starmicronics.com/support/ Rev. 1.2...