
Related Manuals for Warmup Luxury 2 LUXY2D44


Summary of Contents for Warmup Luxury 2 LUXY2D44
- Page 1 ENERGY EFFICIENT LUXURY 2 USER MANUAL ISO 9001; 2000 QUALIT Y Copyright reserved - 1985 - 1/5/2011 Heatsolve SA (PTY) Ltd Warmup...
-
Page 2: Technical Data
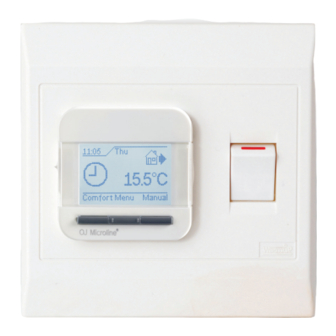
4 Richard Road, Industria North, Roodepoort, Gauteng, Tel: 011 673 5063, Fax: 011 673 4827, Toll Free: 0800 00 65 65 3 Thor Circle, Viking Place, Thornton, Cape Town, Tel: 021 531 1896, Fax: 021 532 0741 website: www.warmup.co.za, info@warmup.co.za / infocape@warmup.co.za... - Page 3 LUXURY 2 USER MANUAL LUXURY 2 4 Event Programmable Clock Thermostat ENERGY EFFICIENT DISPLAY, BUTTONS AND SYMBOLS. On/Off slide switch Mode selection Down/right selection OK selection Up/left selection Temperature 2 pole Isolator switch Current event Time Auto mode 3 4 5 Page 1...
-
Page 4: First Time Setting
FIRST TIME SETTING. EASY TO THE LUXURY 2 THERMOSTAT MAY BE USED ETHER AS A FLOOR MONITORING THERMOSTAT. AIR MONITORING THERMOSTAT. DUEL: FLOOR AND AIR MONITORING THERMOSTAT. OR A REGULATOR. THE THERMOSTAT MENU WILL NOW AUTOMATICALLY GUIDE YOU THROUGH THE PROCESS. LANGUAGE MUST BE SET: Language German... - Page 5 BUT.. IF AFTER THE ABOVE SETTINGS HAVE BEEN COMPLETED THE SCREEN INDICATES AN ERROR MESSAGE E2: ERROR MESSAGE Important IF the floor sensor has not been connected External floor sensor The thermostat needs to be programmed for monitoring the error Air (Room) temperature.
- Page 6 THE PRE-PROGRAMMED 4-EVENT SCHEDULE 17.20 THE THERMOSTAT WILL CONTROL YOUR HEATING IN ACCORDANCE WITH THE PRE-PROGRAMMED 4-EVENT 15.0 C SCHEDULE Comfort Menu Manual THE 4-EVENTS FOR ECONOMIC CONTROL.: COST EFFECTIVE When you wake up in the morning (floor will be warm). When you are away at work (floor in setback mode).
- Page 7 APPLICATION SETTINGS. SETTING THE THERMOSTAT TO FUNCTION USING FLOOR OR AIR (ROOM) OR FLOOR AND AIR OR USED AS A REGULATOR. FIRST TIME SETTING. Press the Menu button THESE SIMPLE STEPS NEED TO BE FOLLOWED: THE THERMOSTAT CAN REGULATE DIFFERENT OPTIONS Menu FLOOR - AIR (ROOM) - FLOOR AND AIR OR USED AS A REGULATOR.
-
Page 8: Event Schedule
4-EVENT SCHEDULE THIS FUNCTION ALLOWS YOU TO CHOOSE THE TYPE OF WEEKLY 4-EVENT SCHEDULE YOU REQUIRE. THESE SIMPLE STEPS NEED TO BE FOLLOWED: Press the button Press the Menu button 4-Event settings Menu Follow the Steps FOLLOW STEPS A - J: 4-Event schedule User settings Press the... - Page 9 4-EVENT SETTINGS OF YOUR OWN CHOICE THIS ALLOWS YOU TO PROGRAM YOUR OWN CHOICE OF TEMPERATURE SETTINGS AS WELL AS DIFFERENT EVENT 4-Event settings SETTINGS DURING THE DAY OR NIGHT. THE 4-EVENTS FOR ECONOMIC CONTROL.: COST EFFECTIVE (AN EVENT IS A FUNCTION) When you wake up in the morning (floor will be warm).
- Page 10 2nd EVENT SETTINGS OF YOUR OWN CHOICE When you are away at work (floor in setback mode). THE PRESET SCHEDULE CAN BE EASILY CHANGED IN THE FOLLOWING WAY: FOLLOW STEPS 1, 2, 3 : Event Evening CHOOSE THE DAILY EVENT Daytime YOU WOULD LIKE TO CHANGE (DAYTIME)
- Page 11 3rd EVENT SETTINGS OF YOUR OWN CHOICE When you return home (floor will be warm). THE PRESET SCHEDULE CAN BE EASILY CHANGED IN THE FOLLOWING WAY: FOLLOW STEPS 1, 2, 3 : Event Night CHOOSE THE DAILY EVENT Evening YOU WOULD LIKE TO CHANGE (EVENING) Daytime Press the...
- Page 12 4th EVENT SETTINGS OF YOUR OWN CHOICE When you go to bed at night (floor in setback mode). THE PRESET SCHEDULE CAN BE EASILY CHANGED IN THE FOLLOWING WAY: FOLLOW STEPS 1, 2, 3,4 : Event Back CHOOSE THE DAILY EVENT Night YOU WOULD LIKE TO CHANGE (EVENING)
- Page 13 ..ENERGY MONITOR SETTINGS Follow the Steps Energy Cost/unit Year Month 0.00 Press the button Press the button 2 days Cost/unit Energy Currency Year 0.75 Press the button Press the button to set current kWh price Month of electricity. Once selected press OK. Energy Energy Back...
- Page 14 ENERGY MONITOR SETTINGS THIS FUNCTION ONCE SET ALLOWS YOU TO VIEW ENERGY CONSUMPTION FOR THE PAST 2 DAYS, 30 DAYS OR 365 DAYS. Follow the Steps THESE SIMPLE STEPS NEED TO BE FOLLOWED: Menu Press the Menu button FOLLOW STEPS A - R: Press the button Display settings...
- Page 15 VIEW ENERGY CONSUMPTION THIS FUNCTION WILL ALLOWS YOU TO VIEW ENERGY CONSUMPTION FOR THE PAST 2 DAYS, 30 DAYS OR 365 DAYS. Press the Menu button Menu THESE SIMPLE STEPS NEED TO BE FOLLOWED: Heating cost FOLLOW STEPS A - G: FOLLOW STEPS A - R: Press the button...
- Page 16 ..VIEW ENERGY CONSUMPTION FOLLOW FINAL STEPS I - K: Heating cost Energy Energy The selected screen will Energy consumption The selected screen will Energy consumption for the last 2 days for the last month display % of kilowatt display % of kilowatt 0% = 0 KWh 0% = 0 KWh and Rand value used after...
-
Page 17: Setting The Child Lock
SETTING THE CHILD LOCK. THIS FUNCTION ALLOWS YOU TO LOCK THE THERMOSTAT SETTINGS...e.g. CHILDREN’S ROOMS, OFFICES, PUBLIC AREAS, ACCOMMODATION etc..CHILD LOCK THESE SIMPLE STEPS NEED TO BE FOLLOWED: Menu Press the Menu button FOLLOW STEPS A - G: Child lock Press the button Press the... -
Page 18: Display Settings
DISPLAY SETTINGS THIS FUNCTION ALLOWS YOU TO SELECT WHAT WILL BE SHOWN ON THE THERMOSTAT SCREEN ONCE SET . THESE SIMPLE STEPS NEED TO BE FOLLOWED: Press the button Press the Menu button 4-Event settings Menu Follow the Steps FOLLOW STEPS A - J: Display Scr . -
Page 19: Temporary Override
TEMPORARY OVERRIDE THIS FUNCTION ALLOWS YOU TO MAKE A TEMPORARY OVERRIDE OF THE 4-EVENT PROGRAM. Override Need Warmth FOLLOW STEPS A - J: 10.20 Please enter duration 1 5. 0 C COMFORT Press the button Press the Comfort Menu Manual button to increase or decrease time from 1h to 8hours. - Page 20 SET THE THERMOSTAT TO ACCEPT A DIFFERENT MAKE OF OF FLOOR PROBE OTHER THAN THE OJ MICROLINE SENSOR. 10.20 IF a different floor sensor has been installed, the thermostat needs 15.0 C to be programmed to read and relay the correct temperature readings to the new OJ Thermostat.
Need help?
Do you have a question about the Luxury 2 LUXY2D44 and is the answer not in the manual?
Questions and answers