Table of Contents
Advertisement
Available languages
Available languages
USE R M AN UAL
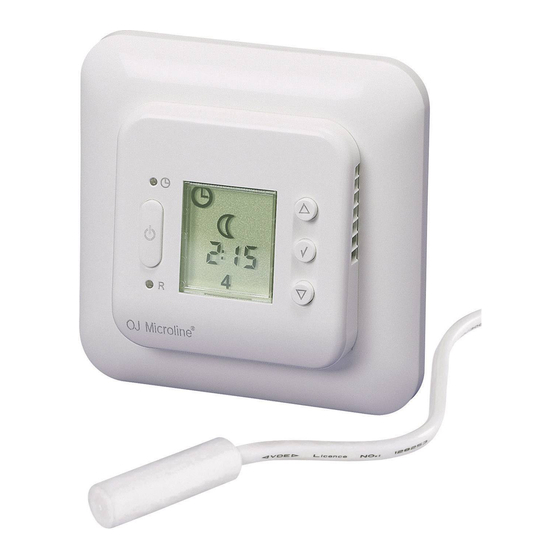
Type OCC2
Introduction
The OCC 2 thermostat is capable of switching on your heating system at pre determined times on different days of the week. It is possible to set 4 periods
called events each day with different temperatures. From factory a default schedule is programmed suitable for most installations. Unless you change these
settings the thermostat will operate to this default program.
Working with lower temperatures during times that the room is unoccupied will lower your energy costs without reducing the comfort. The thermostat has an
adaptive function that automatically changes the start time of a heating period so that the desired temperature is reached at the time that you set. After 3
days the adaptive function has learned when the heating must be switched on.
Type OCC2-1991H1 has an external temperature sensor that is normally placed in the floor construction. In this configuration the thermostat controls the
temperature of the floor and not the temperature within the room.
The thermostat has a pin button marked R, allowing you to reset the thermostat to factory settings. These are listed at the end of this manual with space for
you to record your own weekly schedule.
The display is backlit when operating the buttons. The heating element is switched off when the light is on in the display.
The heating system can be switched off on the built-in interrupter. The Microprocessor taking care of the time will still be supplied with power whereby time
and day will be maintained. When the heating is required and the thermostat is switched on, it will continue the 4-event programme based on present time
and day.
1. Getting started
Buttons
G
A
B
C
R
A:
B:
C:
Pin button
On/off
Reset to
adjust of
factory
clock
setting
E:
F:
G:
OK -
Adjustment
Display
accept
up
Setting the thermostat into operation
First time power is connected the clock and day will be flashing and must be set. If you need to
adjust the time of the thermostat at a later date, insert a pin into the hole
and day. Adjustment must be made for summer and winter time.
☞
Press the UP (
select the correct time and press OK button (
Then press the UP (
☞
select the correct day and press OK (
Type: OCC2
F
E
D
D:
Adjustment
down
) or DOWN (
) buttons to
) or DOWN (
) button to
) button.
Display symbols
H
I
J
K
H:
I:
J:
Clock
Manual
Time and
function
mode
temperature
L:
M:
N:
Heating on
%
4-event symbol
Monitoring
of switch-on
time
for setting of time
).
1-7
N
M
L
K:
Day number
Wake
Out
Night
Home
1
Advertisement
Table of Contents

Related Manuals for Warmup OCC2


Summary of Contents for Warmup OCC2
- Page 1 Type OCC2-1991H1 has an external temperature sensor that is normally placed in the floor construction. In this configuration the thermostat controls the temperature of the floor and not the temperature within the room.
- Page 2 2. Daily use of the thermostat 4-event clock mode The day has been split into 4 events describing a typical day. When the thermostat is in 4-event mode it will automatically adjust the temperature according to the required temperature to the required time. As standard the thermostat has 5 days with 4 events, and 2 days with 2 events. Programming see 3. 4-event clock mode: The clock function symbol ( ) and one of the 4-event symbols (...
- Page 3 4. Advanced settings and read-out ☞ Press both UP ( ) and DOWN ( ) buttons together for 3 seconds. INFO is displayed. ✚ Press UP( ) button until you reach the desired sub menu. Select the sub menu with the OK ( Monitoring of energy consumption ☞...
- Page 4 This limited warranty is in lieu of all other warranties, obligations or liabilities expressed or implied by the company. In no event shall Warmup plc be liable for consequential or incidental damages resulting from installation of this product.
- Page 5 Deutsch Einführung Mit dem OCC2-Thermostaten kann das Heizsystem zu vorgegebenen Zeiten an verschiedenen Wochentagen eingeschaltet werden. Bis zu 4 verschiedenen Perioden, auch Events genannt, können jeden Tag mit verschiedenen Temperaturen verwendet werden. Ab Werk enthält der Thermostat eine Standardprogrammierung, die für die meisten Heizsysteme geeignet ist. Falls diese Programmierung nicht geändert wird, wird der Thermostat mit dem Standardprogramm laufen.
- Page 6 2. Täglicher Gebrauch des Thermostaten 4 Event Uhr-Modus Der Tag ist in 4 Events aufgeteilt worden, die einen typischen Tag beschreiben. Wenn der Thermostat im 4 Event Modus läuft, wird die Temperatur automatisch an die gewünschte Temperatur zum gewünschten Zeitpunkt angepasst. Standardmäßig hat der Thermostat 5 Tage mit 4 Events und 2 Tage mit 2 Events.
- Page 7 4. Spezielle Einstellungen und Anzeigen ☞ Die Knöpfe ( ) und ( ) gemeinsam für 3 Sekunden betätigen. INFO wird angezeigt. Den Knopf ( ) drücken, bis das gewünschte ✚ Untermenü erreicht ist. Mit ( ) das Untermenü wählen. Überwachung des Energieverbrauchs ☞...
- Page 8 Für dieses Produkt besteht eine Gewährleistung für Materialfehler und Fabrikationsmängel bei normaler Nutzung von drei Jahren ab Kaufdatum bei einem Vertragshändler. Während dieses Zeitraums repariert oder ersetzt Warmup Plc jedes bei normaler Nutzung nachgewiesen defekte Produkt nach Warmup Plc's Ermessen durch ein neues oder qualitativ gleichwertiges Produkt ohne Berechnung.
- Page 9 êÛÒÒÍËÈ àÌÒÚÛ͈Ëfl ÔÓ ˝ÍÒÔÎÛ‡Ú‡ˆËË Ç‚Â‰ÂÌË íÂÏÓÒÚ‡Ú éëë2 ÒÔÓÒÓ·ÂÌ ÛÔ‡‚ÎflÚ¸ LJ¯ÂÈ Ì‡„‚‡ÚÂθÌÓÈ ÒËÒÚÂÏÓÈ, ‚Íβ˜‡fl  ‚ ÓÔ‰ÂÎÂÌÌÓ ‚ÂÏfl ‚ ‡Á΢Ì˚ ‰ÌË Ì‰ÂÎË. ëÛ˘ÂÒÚ‚ÛÂÚ ‚ÓÁÏÓÊÌÓÒÚ¸ ÛÒÚ‡ÌÓ‚ËÚ¸ 4 ÂÊËχ (ÒÓ·˚ÚËfl) ̇ ͇ʉ˚È ‰Â̸ Ò ‡Á΢ÌÓÈ ÚÂÏÔ‡ÚÛÓÈ. ᇂӉÒÍË ÛÒÚ‡ÌÓ‚ÍË (ÔÓ ÛÏÓΘ‡Ì˲) ÔÓ‰ıÓ‰flÚ ‰Îfl ·Óθ¯ËÌÒÚ‚‡ Ó·˙ÂÍÚÓ‚. ÑÓ ÚÂı ÔÓ, ÔÓ͇ Ç˚ Ì ÓÚÏÂÌËÚ ˝ÚË ÛÒÚ‡ÌÓ‚ÍË, ÚÂÏÓÒÚ‡Ú ·Û‰ÂÚ ‡·ÓÚ‡Ú¸ ÔÓ ÛÏÓΘ‡Ì˲. íÂÏÓÒÚ‡Ú...
- Page 10 2. èӂ҉̂ÌÓ ËÒÔÓθÁÓ‚‡ÌË ÚÂÏÓÒÚ‡Ú‡ ‚ 4-ı ÔÓ„‡ÏÏÌÓÏ ÂÊËÏ ÑÂ̸ ‡Á‰ÂÎÂÌ Ì‡ 4 ÒÓ·˚ÚËfl, ˜ÚÓ ı‡‡ÍÚÂÌÓ ‰Îfl ÚËÔ˘ÌÓ„Ó ‰Ìfl. äÓ„‰‡ ÚÂÏÓÒÚ‡Ú ‡·ÓÚ‡ÂÚ ‚ 4-ı ÔÓ„‡ÏÏÌÓÏ ÂÊËÏÂ, ÓÌ ‡‚ÚÓχÚ˘ÂÒÍË ÛÒڇ̇‚ÎË‚‡ÂÚ ÌÂÓ·ıÓ‰ËÏÛ˛ ÚÂÏÔ‡ÚÛÛ ‚ Á‡‰‡ÌÌÓ ‚ÂÏfl. íËÔÓ‚‡fl ÛÒÚ‡Ìӂ͇ ÚÂÏÓÒÚ‡Ú‡ ̇ÒÚÓÂ̇ ̇ 4 ÒÓ·˚ÚËfl ‚ Ú˜ÂÌË 5 ‰ÌÂÈ (‡·Ó˜Ë ‰ÌË) Ë...
- Page 11 4. ì„ÎÛ·ÎÂÌÌ˚ ÛÒÚ‡ÌÓ‚ÍË Ë Ò˜ËÚ˚‚‡ÌË ËÌÙÓχˆËË ☞ ç‡ÊÏËÚ ӉÌÓ‚ÂÏÂÌÌÓ ÍÌÓÔÍË ì‚Â΢ÂÌË ( ) Ë ìÏÂ̸¯ÂÌË ( ) ̇ 3 ÒÂÍÛ̉˚. ç‡ ‰ËÒÔΠÔÓfl‚ËÚÒfl ̇‰ÔËÒ¸ INFO. ✚ ç‡ÊËχÈÚ ÍÌÓÔÍÛ ì‚Â΢ÂÌË ( ) ‰Ó ÔÓfl‚ÎÂÌË Ê·ÂÏÓ„Ó ÏÂÌ˛. á‡ÙËÍÒËÛÈÚ ‚˚·‡ÌÌÓ ÏÂÌ˛ ÍÌÓÔÍÓÈ éä ( ). åÓÌËÚÓËÌ„...
- Page 12 Г арантируется отсутствие дефектов при правильной эксплуатации изделия в течение трех (3) лет со дня покупки у уполномоченных дилеров. В течение этого периода Warmup plc бесплатно ремонтируется или заменяется на аналогичное или новое изделие, по качеству и характеристикам соответствующее Warmup plc, если доказано, что не было нарушений правил эксплуатации.
- Page 13 Każdorazowe użycie przycisków powoduje podświetlenie wyświetlacza. Gdy wyświetlacz jest podświetlony element grzejny jest odłączony. OCC2 został wyposażony w funkcję adaptacyjną, która automatycznie zmienia czas załączenia ogrzewania w taki sposób, aby o nastawionej przez użytkownika porze, została osiągnięta zadana temperatura. Po trzech dniach funkcja adaptacyjna zostaje zapisana w pamięci regulatora. Funkcję...
- Page 14 3. Obsługa regulatora W regulatorze OCC2 dzień został podzielony na cztery zdarzenia. Fabrycznie zaprogramowany na pracę 5(4)-2(2) tzn: - Przez pięć dni (poniedziałek-piątek) pracuje w trybie cztero-zdarzeniowym, czyli: ) pobudka, ( ) wyjście, ( ) powrót, ( )noc. - Przez dwa dni (sobota, niedziela) w trybie dwu-zdarzeniowym, czyli: ( pobudka i ( ) noc.
- Page 15 5 5 . . U U s s t t a a w w i i e e n n i i a a d d o o d d a a t t k k o o w w e e Naciśnij i przytrzymaj przyciski ( ) i ( ) przez 3 sekundy.
- Page 16 Produkt ten jest objęty gwarancją, na wady materiałowe i wykonania, które ujawniły się podczas normalnego użytkowania w ciągu trzech (3) lat od daty zakupu u autoryzowanego sprzedawcy. W okresie gwarancji Warmup plc bezpłatnie naprawi lub wymieni produkt na nowy, jeżeli uległ on uszkodzeniu podczas normalnego użytkowania.
Need help?
Do you have a question about the OCC2 and is the answer not in the manual?
Questions and answers