Table of Contents
Advertisement
Advertisement
Table of Contents

Related Manuals for Honeywell HNDR series


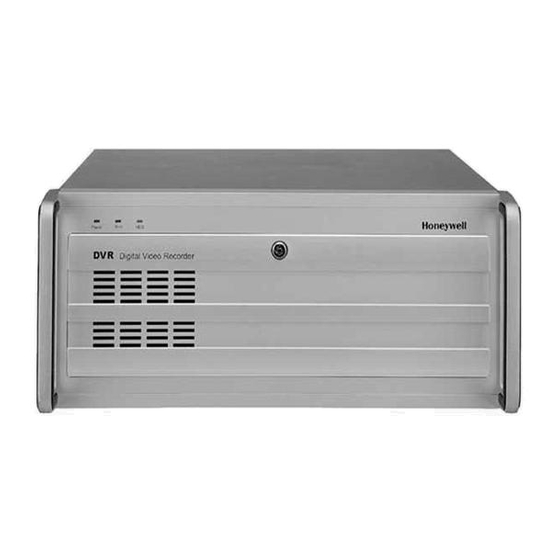
Summary of Contents for Honeywell HNDR series
-
Page 2: Safety Precautions
Safety Precautions Be Sure to Read “Safety Precautions” before Using This Product For Safety of the User and Others and To Prevent Loss or Damage of Properties. • Following signs and explanations serve as a reminder for the potential hazards and the degree of loss or damage that may result from non-observance of necessary precautions. - Page 3 Safety Precautions Warning Do Not Touch This Product with Do Not Touch Power Cord with Wet Hands or Wet it. Wet Hands. Water or other liquid could cause There is a danger of electric fire, electric shock or failure. shock. Pull Out the Power Cord Do Not Disassemble or Rebuild.
- Page 4 Precautions on Use For effective use of the product free of troubles, following precautions should be taken: • When there is a problem with the product, contact the store where you purchased the product or the agency instead of trying to disassemble it yourself. •...
- Page 5 Thank you very much for using the HNDR (Honeywell Network Digital Recorder ) from Honeywell. Developed with proven technology of Honeywell Co., Ltd., this product guarantees the quality by having passed the reliability and compatibility tests. This User Manual is prepared exclusively for HNDR Users.
- Page 6 Guidelines for Installation and Use 1. Humidity Do not install this product in a building that leaks rain and with high humidity. If water leaks into DVR, it could cause a failure or become a fire hazard. 2. Trouble Repair Do not disassemble or rebuild this product on your own to avoid electric shock.
- Page 7 Contents Check that these materials are included when you open the box. Should there be anything missing contact the dealer bought it from. OP Manual Mouse HNDR Series Keyboard Rack Mounter Power Cable...
-
Page 8: Table Of Contents
TABLE OF CONTENTS PART 1. HNDR Operation Chapter 1. About HNDR 1. HNDR Overview ………………………………………………………………………… 10 2. Features of HNDR ……………………………………………………………………… 11 3. Glance of HNDR ………………………………………………………………………… 14 Chapter 2. Monitoring 1.Main Monitoring ………………………………………………………………………… 2.Monitoring Status ………………………………………………………………………… 18 3.Monitor Controls ………………………………………………………………………… 19 4. -
Page 9: Manual Backup
Chapter 4. SETUP 1. Image Database Tool ………………………………………………………………… 29 2. System Setup ………………………………………………………………………… 31 3. Basic Setup for Camera ……………………………………………………………… 33 4. Camera Recording Schedule Setup ……………………………………………… 5. Camera Motion/Image Setup ……………………………………………………… 6. Camera Pan/Tilt Setup ……………………………………………………………… 36 7. Sensor Setup ………………………………………………………………………… 37 8. - Page 10 PART 2. HNDR-Net Operation Chapter 6. HNDR-Net 1. Connecting to HNDR-Net …………………………………………………………… 2. HNDR-Net Configuration Setting …………………………………………………… 46 3. HNDR-Net Monitoring ……………………………………………………………… 4. Local Search Mode …………………………………………………………………… 54 5. Remote Search Mode ………………………………………………………………… 56 6. HNDR-Net Setup ……………………………………………………………………… 58 PART 3. HNDR-Web Operation Chapter 7.
-
Page 11: Chapter 1. About Hndr
Chapter 1. About HNDR Chapter 1. About HNDR 1. HNDR Overview • DVR (Digital Video Recorder) refers to a product that adopts a digital recording method instead of the existing analogue tape method. DVR digitalizes all image data for storage and playback. •... -
Page 12: Features Of Hndr
2. Features of HNDR 1) Features of HNDR • 1~16 Video Inputs Up to 16 videos are available for input. • 1~16 Sensor Inputs / 1~4 Relay Outputs Up to 16 input sensors are available for connection. Relay outputs allow you to operate the HNDR connected with sirens, shutters, and doors when something moves or sensors go off. - Page 13 • Scheduled Recording Allows you to select a desired weekday and time for recording using schedules. (Recording is available for the same time zone or weekday only.) • Data Backup and Automatic Backup Allows you to backup data in different devices (DAT, CD, DVD, etc.), and by desired camera, date, and time.
- Page 14 2) Features of HNDR-Net • Multi-Net Access Support Allows you to integrate and manage multiple HNDR sites in the HNDR-Net system. • Multiple Protocols (PSTN, ISDN, ADSL, etc.) Support Allows you to access the HNDR using various communication protocols. • Real-time Monitoring of HNDR Images Allows you to access the HNDR to monitor images of the camera connected with the HNDR in real-time in the HNDR-Net system.
-
Page 15: Glance Of Hndr
Filter Power Switch Power Switch CD-ROM /Removable HDD Rack (Option) CD-ROM/R-HDD Rack CD-RW/ DVD-RW (Option) CD-RW / DVD-RW 3.5” FDD Disk Honeywell Logo Honeywell Logo Product Name ( Digital Video Recorder) Product Logo Ventilation of HNDR Ventilation Locker Locker Cover Door... - Page 16 10 11 15 16 17 12 13 14 Item Function Power Fan Power Fan Power Input Power Input Power Select Power Select switch (230/115V) Power In/Out Select Power In/Out Select Switch Camera In (1~16) Camera Input (1~16) terminal Sensor In(16)/Out(4) Sensor In(16), Out(4) terminal Extra Monitor Output Composite signal output...
-
Page 17: Chapter 2. Monitoring
Chapter 2. Monitoring Chapter 2. Monitoring 1. Main Monitoring 1 [Split Screen settings] • Select the 1, 4, 6, 9, 10, or 16 split button with the mouse to display images on the selected split screen. [Manual Switching] • Select the manual switching button with the mouse on the 1, 4, 6, 9, or 10 split screen to switch manually and display images. - Page 18 [Split Screen Settings] • Select the 1, 4, 6, 9, 10, or 16 split button with the mouse to display images on the selected split screen. [Manual Switching] • Select the manual switching button on the 1, 4, 6, 9, or 10 split screen to switch manually and display images.
-
Page 19: Monitoring Status
2. Monitoring Status [Time Status Display] Displays year/month/day and hour/minute/second of the HNDR. [Video Status Display] Shows the status of display for 1~16 cameras. • A LED lit in green indicates that images are being displayed on the screen. • A blinking green LED indicates that the camera is not connected yet after “Camera enabled” is selected on “Setup.”... -
Page 20: Monitor Controls
3. Monitor Controls [Control Button Display] • Select the “Control” button with the mouse to display a window ( ), where you can control the camera equipped with a Pan/Tilt device. • A switch button ( ) also appears that can control “Image” and “PTZ”. [Search Button] •... - Page 21 • Moving Up/Right Up/Right/Right down/Down/left down/left/left Up and Auto pan is available. • Moving Aux1 and Aux2 is available. • Controlling Camera menu is available. ( GC-655/755 on Honeywell ) [GC-655/755 Control] • Select “GC-655/755” PTZ on “Pan/Tilt Settings” of Setup to display the windows ( •...
- Page 22 [HSD-251 Control] • Select “HSD-251” PTZ on “Pan/Tilt Settings” of Setup to display the windows ( • Following are major functions of Honeywell Scan Dome Camera (HSD-251). [Preset/ Auto scan/ Tour Function] • Moving 10 Pre-positions is available. ( • Monitoring 1 Auto scan zone is available.
-
Page 23: Shell Monitoring
• Exiting of HNDR system can be pushed “Ctrl + Alt + Shift + Q “ on keyboard. • Before adding other devices , make sure the proper installation under Honeywell Call Center. 2 [Monitoring Icon] •Select the Main Monitoring icon with the mouse to display Monitoring screen. -
Page 24: Chapter 3. Search/Replay
Chapter 3. Search/Replay Chapter 3. Search/Replay 1. Single View Search/Replay [Single Screen Display] • Allows you to search images stored in single screen. It also allows you to enlarge or reduce retrieved images. • Allows you to marking the area using the right-button of mouse for enlargeable digital image(X1.5, X2.0) in single screen. - Page 25 [Hour/Minute Display for Stored Data] • Displays information on stored images in single screen by hour and minute. • Display on the top represents the minute axis, and the stored data are represented by square blocks. Selecting a red spot with the mouse will display images on the screen. Display at the bottom represents an hour axis, and the stored data are represented by square blocks.
- Page 26 [Smart Search Control] • This is a new features which can get rapid searching for each of desired conditions such as every time and every camera. [Adjust Smart Search] • Smart searching for each of desired conditions such as every date/time/camera, by limiting the searching parameter to specific “Rate of motion”...
-
Page 27: Multi View Search/Replay
2. Multi View Search/Replay [Multi Screen Display] • Allows you to search images stored in multi screen. It also allows you to select multi screen ( 4, 6, 9, 16) with the mouse. ( Allows you to shifting replay using the right-button of mouse for single screen ) [Search Date Selection Display] •... -
Page 28: Search/Replay Controls
3. Search/Replay Controls [Search Controls] • Replay Mode: Select the “SEARCH” button with the mouse to display the “SEARCH” window ( where you can search stored data. • Smart Search mode: Select the “SMART” button with the mouse to display the “SMART Search” window ( ), where you can search stored data rapidly. - Page 29 [Replay Mode] • Adjust Replay Speed : can adjust data searching speed in 1~10 stages. • Adjust Replay Direction : can adjust replay directions (forward, backward) of videos and still pictures, replay of first and last images. (Pressing the button once again will stop the operation.) [Smart Search] •...
-
Page 30: Chapter 4. Setup
Chapter 4. Setup Chapter 4. Setup 1. Image Database Tool • Pressing the DVR Setup button will generate the following window. [Image Database Tool] • Generates a file system for the HNDR. (It generates a stable file system exclusively for the HNDR to ensure data stability and prevent system overload.) [System Setup] •... - Page 31 Set the number of volumes to use in “Add Volume“ and press the ”Update" button. Check “Add Volume” in the figure and press the "Make” button to generate the HNDR file system in the selected drive. [Database Information] • Shows you the information on the hard drive, used/total space, used ratio, maximum volume, current volume, and add volume set in the HNDR file system.
-
Page 32: System Setup
2. System Setup [Site Setup] • Site Name: Site name of HNDR • Site Location: Location of HNDR [Network Setup] • Allow remote connection: Check to allow the connection to the HNDR Network from HNDR-Net. • Remote notification of events: Check to notify the occurrence of motion or sensor to HNDR-Net. (In order to notify an emergency situation to HNDR-Net, be sure to record IP address of the HNDR system in “IP Address.”) •... - Page 33 [E-mail Setup] • Allows you to use E-mil functions. • Reboot Notify: check to be notified of the starting time and IP address when the HNDR Main Program starts via email. (Email notification allows you to access HNDR-Net at any time even if IP is changed if you use dynamic IP.) •...
-
Page 34: Basic Setup For Camera
3. Basic Setup for Camera [Camera Setup] • Camera use: Check to enable the camera. ( Keep in mind that HNDR reboots the system when you don’t connect to all videos on BNC board. ) 2 [Event Notify method] • Audible warning on event : Check to select an alarm by cameral channel when an alarm occurs. When events come out by detecting motion or sensor, it goes off the beep sound. -
Page 35: Camera Recording Schedule Setup
4. Camera Recording Schedule Setup Specifying recording schedule by camera will enable saving images by day of the week and time zone. [Recording schedule] • Normal: Records all the images from the camera. • Sensor recording: Records images only when there is a sensor occurs. •... -
Page 36: Camera Motion/Image Setup
5. Camera Motion/Image Setup [Motion detection area setting] • Whole area: Select to monitor motion in all areas covered by the camera. • Partial area: Allows you to monitor motion in specific areas by pressing the “Add” button and specify specific regions. You may specify up to 20 areas, and erase them by pressing “Delete.”... -
Page 37: Camera Pan/Tilt Setup
• Speed: Specify the speed of PTZ device. (varies depending on the device.) • Parity, data bit, stop bit : Specify in accordance with the manual for PTZ device. • Following example is for only when Honeywell equipment are used ( HRX-1000, HRX-2000, HSD-251, HSDN-251, GC-655/755 ). -
Page 38: Sensor Setup
7. Sensor Setup [Sensor information] • Use: Verify whether specific sensor are used. • Location: Verify the locations of the sensors. • Type: Verify the sensor types (N.C., N.O. ). • Camera#: Verify the connected cameras. • Check time: Verify the check time settings of the sensors. •... -
Page 39: Auto Backup Setup
8. Auto Backup Setup [Scheduling] • Select a day of the week for backup on the backup schedule table with the mouse. • Make sure that the backup day of the week has changed. • Allow you to use automatic start backup timer. [Select Backup] •... -
Page 40: User Setup
9. User Setup [User setup] • To add a user, select the empty table in the user list, and to change a user select the table you want to change with the mouse. [User name] • Name: Enter the user name using 10 characters or less. •... -
Page 41: Chapter 5. Application
Chapter 5. Application Chapter 5. Application 1. Manual Backup • This program allows you to back up manually in the desired device. If you set up a backup schedule in Setup, this backup program executes backup automatically in accordance with the backup schedule. -
Page 42: Backup Viewer
2. Backup Viewer Only “Backup Viewer” can search backed up data and read data by date. [Data Explorer] • Allows you to search backed up data by date. • Select a backed up folder in the Find Folder window and press the “OK” button. [Data selection] •... -
Page 43: Data Authentication
3. Data Authentication This is a program that determines whether the images stored by the Search Program or the Backup Viewer were edited at will. (Determines whether they are genuine or false.) [Data authentication information] • If the data are found to be genuine, the following information are displayed: - Authentication Status: Shows whether the images are genuine or false. -
Page 44: Chapter 6. Hndr-Net
Chapter 6. HNDR-Net Chapter 6. HNDR-Net 1. Connecting to HNDR-Net • Honeywell-Net Program is included in the HNDR system or in the enclosed CD. HNDR => C:/Backup/HNDR-xxxx/Honeywell/HNDR-PROGRAM/HNDR-Net/Setup.exe => CD:/HNDR-xxxx/Honeywell/HNDR-PROGRAM/HNDR-Net/Setup.exe) • See Chapter 8. Appendix to find out how to install the HNDR-Net Program. -
Page 47: Hndr-Net Configuration Setting
2. HNDR-Net Configuration Setting • This window allows you to change settings for Site (single or multiple) connection, initial screen, etc. after logging in the HNDR-Net Program. If you don’t change connection settings, you may skip it. Click the “Config” button on the Monitor screen to activate the dialog (See the figure on page 41). - Page 48 [Change Login Password] • Allows you to change the password for login. • Enter the existing password, new password, and confirm password, and press the “OK” button to apply. [Add, Delete and Edit site information] • Allows you to change settings (New(Add)/Modify/Delete) for the site already logged in. •...
- Page 49 [Setup Connection Mode] • Single site connect: Establishes a single site connection to the HNDR system. Select an already established site. • Connect on login: Automatically connects to the selected site on login. • Multiple site connect: Establishes a multiple site connection to the HNDR system. Press the “OK”...
- Page 50 [Display Configuration] • Initial view screen: Set the type of split screen window to be displayed on HNDR-Net login. • Data location: Set the data location to be used when pressing the “Save” button on HNDR-Net. (Be sure to specify a data location. Otherwise, data may not be saved.) •...
-
Page 51: Hndr-Net Monitoring
3. HNDR-Net Monitoring • Run the program by clicking the “Honeywell-Net” icon on Desktop, then the following Connect On Login window will be activated. [Connect on login] • Enter the login name on “LOG IN ID” and the login password on “LOG IN P/W”, and then press... - Page 52 [Split Screen/Manual Switching/Full Screen/Minimized Screen] • Allows you to display the selected video image on 1, 4, 6, 9, 10, or 16 split screen. • Allows you to display images with Manual Switching, Full Screen, and Minimized Screen. [System Data/Time Display] •...
- Page 53 [Local Search Button] • Searches the data stored in the HNDR-Net system. [Local Search Control] • Allows you to select the site name of the HNDR system that is connected to HNDR-Net. • Select either “Saved while viewing” or “Saved while searching” on the selected site, and press the “OK”...
- Page 54 [Control Button] • Press the “COMP RATE” button to control transfer speed of images. • Press the “PTZ” button to control zoom, focus, auto scan of Pan/Tilt device. • Press the “IMAGE” button to control brightness, contrast, saturation, and hue of cameras. •...
-
Page 55: Local Search Mode
4. Local Search Mode • Allows you to search the data saved in the system on which Honeywell-Net is installed. • For site selection during local search, select “Saved while viewing” or “Saved while searching” and press the “OK” button to begin searching data. - Page 56 [Enlarge/Reduce Button] • Allows you to enlarge or reduce an image. [Search Data Display] • The saved data are displayed by camera (Number on the right), hour (Number at the bottom), and minute (Number on top). You can search the data by pressing the desired item with the mouse.
-
Page 57: Remote Search Mode
5. Remote Search Mode • Allows you to search the data saved in the HNDR system on the Honeywell-Net system. • Select the site name of the data saved in the HNDR system and press the “OK” button to begin searching. - Page 58 [Enlarge/Reduce Button] • Allows you to enlarge or reduce an image. [Search Data Display] • The saved data are displayed by camera (Number on the right), hour (Number at the bottom), and minute (Number on top). You can search the data by pressing the desired item with the mouse.
-
Page 59: Hndr-Net Setup
6. HNDR-Net Setup • Pressing the HNDR-Net Setup button will generate the following window. [System Setup] • Sets the settings for site access, network access, initial screen, log write, sound, E-mail, Auxiliary functions etc. (See the figures shown on pages 59, Chapter 4-2. “System setup” to find out how to setup the HNDR on pages 31.) [Camera Setup] •... -
Page 63: Chapter 7. Hndr-Web
Chapter 7. HNDR-Web Chapter 7. HNDR-Web 1. Connecting to HNDR-Web • The Honeywell-Web program is included either in the HNDR system or in the enclosed CD. -. Location within the HNDR system: (C:/Backup/HNDR-xxxx/Honeywell/HNDR-PROGRAM/HNDR-Web/ *.*) -. Location in the CD: ( CD:/HNDR-xxxx/Honeywell/HNDR-PROGRAM/HNDR-Web/ *.*) •... -
Page 64: Hndr-Web Monitoring
2. HNDR-Web Monitoring [Split Screen/Manual Switching/Full Screen Setting] • Displays the selected video images on the 1, 4, 6, 9, or 10 split screen. • Displays images on manual switching and full screen. [Camera Setting] • Up to 10 channels are available for each camera. Pressing the “CONNECT” button by each channel displays images of the camera, while pressing the “DISCONNECT”... -
Page 65: Hndr-Web Settings
3. HNDR-Web Settings 1 [SETUP Setting] • Initial HNDR-Web is not configured with default settings. To modify configurations, press the “SETUP” button on the lower right after logging in. Enter the information of the site to which the HNDR are connected in Site Name, IP, Camera No., and press the ‘Save &... - Page 66 [USER Settings] • The initial HNDR-Web has only the ‘admin’ account as a default user. • You can create or modify other accounts by logging in as ‘admin’ user. • To manage users, press the ‘user manager’ button on the lower right corner. To register a new user, press the ‘New User’...
-
Page 67: Connecting Other Hardware
Chapter 8. Appendix Chapter 8. Appendix 1. Connecting Other Hardware 1.1. Connecting PTZ Device COM1 RS-485 Board S- (1) Connect to RS-485 Serial communication S+ (2) Com. port of RECEIVER cable • Connect COM1 PORT ( ) on the rear of the HNDR and the D-SUB 9-Pin Port attached ( ) to the HNDR PCI Slot to the provided RS-232 cable. - Page 68 1.1. Connecting method to PTZ Device • Connect D-SUB 9-Pin Port for connecting RS-485 attached ( ) to the PCI slot on the rear of the HNDR as shown below. (The D-Sub 9-Pin Connector is provided.) COM1 RS-485 Board HNDR System S- (1) S+( 2) GC-655(485 Type)
- Page 69 1.2. Connecting External Sensor Input/Relay Output • Connecting External Sensor Input (16 Channels) ☞ Connect one of two strands of signal lines for various sensors (Infrared sensor, Heat Wire Detector, Magnetic) to a Signal ( S1 ~ S16) terminal. Connect the other line to Ground ( GND) terminal.
-
Page 70: Installing Hndr-Net
2. Installing HNDR-Net • Run setup.exe and follow the instructions ( ) to complete the installation. • When HNDR-Net Program is successfully installed, confirm the HNDR-Net folder ( ) on Desktop. -
Page 71: Installing Hndr-Web
3. Installing the HNDR-Web • Before installing the HNDR-Web server, Run Morgan.exe (Video Codec) and follow the instructions (... - Page 72 3) Copying HNDR-Web Files Copy HNDR-Web files to the appropriate directory ( C:/ ). HNDR-Web files are included in the HNDR system or in the enclosed CD. - HNDR => C:/Backup/HNDR/Honeywell/HNDR-PROGRAM/HNDR-Web/ *.* - CD => CD:/HNDR/Honeywell/HNDR-PROGRAM/HNDR-Web/*.* 4) Creating Honeywell-Web Application Execute ‘Internet Information Service,’...
- Page 74 HNDR-Web Security Setting • Since the HNDR-Web has not received the Application Certification yet, you should change the Internet security option as follows: A. Select ‘Tool->Internet Option’ on the web browser menu. B. When the ‘Internet Options’ window appear, select the ‘Security’ tab at the top of the window. C.
-
Page 75: Warranty
17F, Kukje Center Building 191, Hangangro-2ga Yongsan-gu, Seoul, 140-702, Korea Tel : 82-02-799-6202, 6121 fax : 82-02-749-6119 Http://www.Honeywell.co.kr/cctv Contents q Any defect under normal use within the warranty service period we give you free repair service according to the warranty sheet. - Page 76 82-2-799-6109...
Need help?
Do you have a question about the HNDR series and is the answer not in the manual?
Questions and answers