Table of Contents
Advertisement
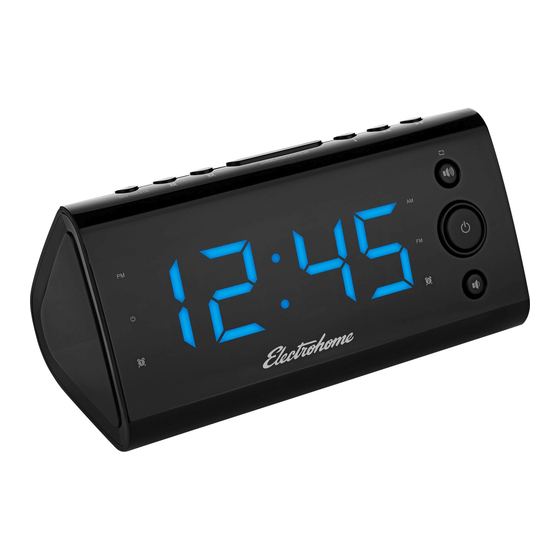
EAAC470 / EAAC470W
USER MANUAL
Thank you for your purchase of this Electrohome product. Please read this
instruction manual carefully before using product to ensure proper use.
Keep this manual in a safe place for future reference.
USB Charging Alarm Clock Radio
with Dual Alarm and Battery Backup
electrohome.com
Advertisement
Table of Contents

Related Manuals for Electrohome EAAC470


Summary of Contents for Electrohome EAAC470
- Page 1 USB Charging Alarm Clock Radio with Dual Alarm and Battery Backup Thank you for your purchase of this Electrohome product. Please read this instruction manual carefully before using product to ensure proper use. Keep this manual in a safe place for future reference.
-
Page 2: Need Help
NEED HELP? DO NOT RETURN THIS PRODUCT TO THE STORE Please contact an ELECTROHOME® customer support representative first regarding any additional information on product features, specifications or assistance with setup. Please contact us via one of the methods below: Support: www.electrohome.com/support... -
Page 3: Warnings
WARNINGS WARNING To reduce the risk of fire or electric shock, do not expose this appliance to rain or moisture. CAUTION Use of controls or adjustments or performance of procedures other than those specified may result in hazardous radiation exposure. RISK OF ELECTRIC SHOCK DO NOT OPEN CAUTION - TO REDUCE THE RISK OF ELECTRIC SHOCK, DO NOT REMOVE COVER (OR... -
Page 4: Important Safety Information
IMPORTANT SAFETY INFORMATION Clean only with a dry cloth. Do not block any ventilation openings. Install in accordance with the manufacturer’s instructions. Do not install near any heat sources such as radiators, heat registers, stoves, or other apparatus (including amplifiers) that produce heat. 10. -
Page 5: Replacement Parts
IMPORTANT SAFETY INFORMATION 26. Unwind and straighten the power cord before use. 27. Damage Requiring Service Unplug the power cord and refer servicing to qualified service professional under the following conditions: A. If liquid has been spilled on or into the product. If the product has been exposed to rain, water, or other liquids. - Page 6 IMPORTANT SAFETY INFORMATION Any changes or modifications not expressly approved by the party responsible for compliance could void the user’s authority to operate the equipment. NOTE: This equipment has been tested and found to comply with the limits for a Class B digital device, pursuant to part 15 of the FCC Rules.
-
Page 7: Table Of Contents
Cycle Display ....................18 Adjusting LED Brightness ................18 Listening to the Radio .................18 To Set / Recall the Radio Presets ..............18 USB Charging Function ................19 Troubleshooting ......................20 Care and Maintenance ....................20 Specifications ........................21 Electrohome Warranty ....................22 Notes ..........................23 - 7 -... -
Page 8: What's Included
WHAT’S INCLUDED • USB Charging Alarm Clock Radio • Instructional Manual • Quick Start Guide • 1 x 3V, CR2032 Flat Lithium battery PRODUCT INFORMATION FRONT - LED SCREEN LED dot appears to the right of PM indicating time is set to PM LED dot appears to the right of to indicate LED Time Display is set to OFF Alarm 1 - LED dot appears to the right of... - Page 9 PRODUCT INFORMATION FRONT BUTTONS When set to ON, LED screen shows TIME, YEAR, MONTH/DAY & current temperature Increases volume Turns POWER ON/OFF Decreases volume REAR PANEL A. B. USB Circuit Switch Charges USB devices - 9 -...
- Page 10 PRODUCT INFORMATION TOP BUTTONS Set Radio Presets / Nap function Toggle between AM & FM Radio band / Set ALARM 1 AM / FM Set ALARM 2 TIME ZONE/ Set TIME ZONE / SNOOZE / SLEEP / LED Brightness SNOOZE/SLEEP DIMMER Set TIME / Y-M-D / 24h-12h Clock ;...
- Page 11 PRODUCT INFORMATION BOTTOM Battery compartment for 1 x 3V, CR2032 Flat Lithium battery AC Adaptor FM Antenna Indoor Temperature Sensor - 11 -...
-
Page 12: Operating Instructions
OPERATING INSTRUCTIONS CONNECTING POWER The USB Charging Alarm Clock Radio is equipped with an "AUTO TIME SET" feature. When power is connected, the clock display will flash '2' which is TIME ZONE 2 (Eastern time) and the default TIME ZONE setting. The correct time will be displayed, unless you are in another time zone. -
Page 13: Installing The Battery
OPERATING INSTRUCTIONS INSTALLING THE BATTERY Using a small Phillips Head screwdriver, remove the screw from the battery panel on the bottom of the unit. Remove the battery compartment panel. Remove/properly dispose of depleted battery and replace with new, 3V, CR2032 Flat Lithium battery. -
Page 14: Setting The Date & Time
OPERATING INSTRUCTIONS DST/°C °F button for 3 To REACTIVATE DST/Summer Time, press and hold the seconds while the radio is OFF. 'ON' will appear in the display to show that the Automatic DST/Summer Time adjustment is reactivated. The display will return to the clock. •... -
Page 15: Setting Alarm 1 & Alarm 2
OPERATING INSTRUCTIONS SETTING ALARM 1 & ALARM 2 To set ALARM 1, press the button once to view current alarm setting then press and hold the button and alarm time will flash. The settings below will appear in the following order: AL 1 Hour >... - Page 16 OPERATING INSTRUCTIONS To set ALARM 2, press the button once to view current alarm setting then press and hold the button and alarm time will flash. The settings below will appear in the following order: AL 2 Hour > AL 2 Min > AL 2 Alarm Modes > AL 2 Radio Station > AL 2 Radio Volume DST/°C °F buttons to decrease/increase the HOUR;...
-
Page 17: Alarm Duration
OPERATING INSTRUCTIONS ALARM DURATION The BUZZER alarm or RADIO alarm will sound for 30 minutes if no key is pressed, then it will stop automatically and resume to the same alarm time on next scheduled day. To stop ALARM 1 and/or ALARM 2 when sounding, press the POWER ON/OFF button on the front of the unit. -
Page 18: Cycle Display
OPERATING INSTRUCTIONS CYCLE DISPLAY The CYCLE DISPLAY function displays the TIME, YEAR, MONTH/DAY & CURRENT TEMPERATURE on the front LED panel in sequence. Press and hold the display button on the front of the alarm clock until ‘ON’ appears on the LED panel. Please wait 10 seconds for the cycle to begin. To return to TIME display only, press and hold until ‘OFF’... -
Page 19: Usb Charging Function
OPERATING INSTRUCTIONS DST/°C °F buttons to select the desired radio station. Use the Press the SET/NAP button; 'P02' will blink in the display. DST/°C °F buttons to toggle to the desired preset Use the P01-P10' number. Press the SET/NAP button again to set the preset. Repeat steps 2 through 4 to set more presets. -
Page 20: Troubleshooting
TROUBLESHOOTING Please consult the Troubleshooting chart below before communicating with ELECTROHOME Customer Support. SYMPTOM POSSIBLE CAUSE POSSIBLE SOLUTION GENERAL Power does not come on AC cord not plugged in Insert plug firmly into AC outlet RADIO No Sound Power is not on... -
Page 21: Specifications
SPECIFICATIONS Display Size 1.2" Display Type Automatic Time Set Battery Back-up for Time PLL Digital Radio Tuner Radio Station Pre-sets Yes 10 AM / 10 FM Dual Alarm Calendar Display Indoor Temperature Reading Adjustable Brightness Off, Low, Medium, High Sleep Timer Battery Required Lithium, Included (3V CR2032) USB Charging... -
Page 22: Electrohome Warranty
ELECTROHOME product or the loss of information. -
Page 23: Notes
NOTES - 23 -...
Need help?
Do you have a question about the EAAC470 and is the answer not in the manual?
Questions and answers