Electrohome EAAC302 User Manual
1.8" jumbo alarm clock radio
Hide thumbs
Also See for EAAC302:
- User manual (44 pages) ,
- Quick start manual (2 pages) ,
- User manual (22 pages)
Table of Contents
Advertisement
Available languages
Available languages
EAAC302/EAAC302W
V1.03
USER MANUAL / MANUEL D'UTILISATION
1.8" Jumbo Alarm Clock Radio
Radio-réveil à écran large 1,8po
Thank you for your purchase of this Electrohome product. Please read this instruction
manual carefully before using product to ensure proper use. Keep this manual in a safe
place for future reference.
Merci pour votre achat de ce produit Electrohome. Se il vous plaît lire ce manuel
d'instructions attentivement avant d'utiliser le produit pour garantir une utilisation
correcte. Conservez ce manuel dans un endroit sûr pour référence ultérieure.
electrohome.com
Advertisement
Table of Contents

Related Manuals for Electrohome EAAC302


Summary of Contents for Electrohome EAAC302
- Page 1 Keep this manual in a safe place for future reference. Merci pour votre achat de ce produit Electrohome. Se il vous plaît lire ce manuel d'instructions attentivement avant d'utiliser le produit pour garantir une utilisation correcte.
- Page 2 NEED HELP? DO NOT RETURN THIS PRODUCT TO THE STORE Please contact an ELECTROHOME® customer support representative first regarding any additional information on product features, specifications or assistance with setup. Please contact us via one of the methods below: Support: www.electrohome.com/support...
-
Page 3: Warnings
WARNINGS WARNING To reduce the risk of fire or electric shock, do not expose this appliance to rain or moisture. CAUTION Use of controls or adjustments or performance of procedures other than those specified may result in hazardous radia- tion exposure. RISK OF ELECTRIC SHOCK DO NOT OPEN CAUTION - TO REDUCE THE RISK OF ELECTRIC SHOCK, DO NOT REMOVE COVER (OR BACK). -
Page 4: Important Safety Information
IMPORTANT SAFETY INFORMATION 6. Clean only with a dry cloth. 7. Do not block any ventilation openings. Install in accordance with the manufacturer’s instructions. 8. Do not install near any heat sources such as radiators, heat registers, stoves, or other apparatus (including amplifiers) that produce heat. - Page 5 IMPORTANT SAFETY INFORMATION 24. Unwind and straighten the power cord before use. 25. Damage Requiring Service Unplug the power cord and refer servicing to qualified service professional under the following conditions: A. If liquid has been spilled on or into the product. B.
- Page 6 IMPORTANT SAFETY INFORMATION Any changes or modifications not expressly approved by the party responsible for compliance could void the user’s authority to operate the equipment. NOTE: This equipment has been tested and found to comply with the limits for a Class B digital device, pursuant to part 15 of the FCC Rules.
-
Page 7: Table Of Contents
TABLE OF CONTENTS WARNINGS ......................3 IMPORTANT SAFETY INFORMATION ................ 4 WHAT’S INCLUDED ....................9 PRODUCT INFORMATION ..................9 OPERATING INSTRUCTIONS ................... 12 CONNECTING POWER ................12 BATTERY BACKUP ................12 INSTALLING THE BATTERY ..............13 DAYLIGHT SAVING TIME (DST) / SUMMER TIME ........13 SETTING THE DATE &... - Page 8 TABLE DES MATIÈRES AVERTISSEMENT ....................24 CONSIGNES DE SÉCURITÉ IMPORTANTES..............25 CE QUI EST INCLUS ....................29 INFORMATIONS DU PRODUIT ................. 29 UTILISATION......................32 CONNEXION D’ALIMENTATION............... 32 CIRCUIT SECOURS À PILES ..............32 INSTALLATION DE LA PILE ..............33 HEURE AVANCÉE (HA) / HEURE D’ÉTÉ ............. 33 RÉGLER LA DATE ET L’HEURE ..............
-
Page 9: What's Included
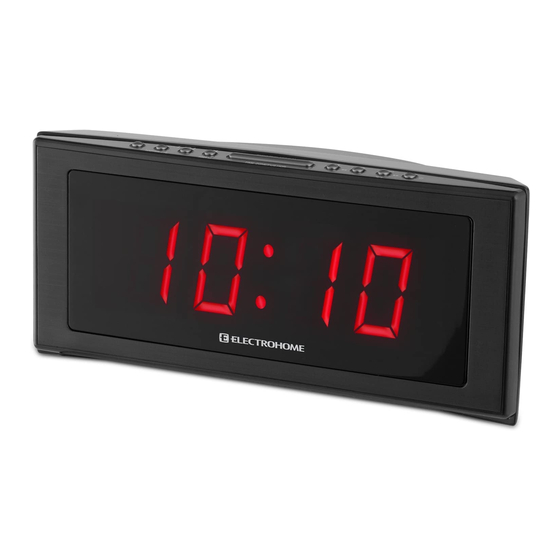
WHAT’S INCLUDED • 1.8" Jumbo Alarm Clock Radio • Instructional Manual • Quick Start Guide • 1 x 3V, CR2032 Flat Lithium battery PRODUCT INFORMATION FRONT - LED SCREEN BELL PM Indicator Light STANDBY-LED Light Alarm 1 set indicator Hour Minutes Volume AM band indicator... -
Page 10: Top Buttons
PRODUCT INFORMATION TOP BUTTONS AM/FM Tune-Scan Radio (back) Tune-Scan Radio (forward) Set / Enable / Disable Alarm 1 Set / Enable/ Disable alarm 2 Snooze / Sleep / Dimmer / Time Zone Set Time / Y-M-D / 24h-12h Clock Volume Down Volume Up Radio AM / FM / Radio ON / OFF AM/FM... - Page 11 PRODUCT INFORMATION BACK PRESETS PRESETS reset Set and skip through radio presets Daylight Savings Time / Calendar FM Antenna AC Adaptor - 11 -...
-
Page 12: Operating Instructions
OPERATING INSTRUCTIONS CONNECTING POWER The 1.8" Jumbo Alarm Clock Radio is equipped with an "AUTO TIME SET" feature. When power is connected, the clock display will flash '2' which is TIME ZONE 2 (Eastern time) and the default TIME ZONE setting. The correct time will be displayed, unless you are in another time zone. -
Page 13: Installing The Battery
OPERATING INSTRUCTIONS INSTALLING THE BATTERY Using a small Phillips Head screwdriver, loosen the screw on the battery panel on the bottom of the unit. Remove the battery compartment panel. Remove/properly dispose of depleted battery and replace with new, 3V, CR2032 Flat Lithium battery. -
Page 14: Setting The Date & Time
OPERATING INSTRUCTIONS To REACTIVATE DST/Summer Time, press and hold the DST button for 3 seconds while the radio is OFF. 'ON' will appear in the display to show that the Automatic DST / Summer Time adjustment is reactivated. The display will return to the clock. •... -
Page 15: Setting Alarm 1 & Alarm 2
OPERATING INSTRUCTIONS SETTING ALARM 1 & ALARM 2 To set ALARM 1, press and hold the button to set. The settings below will appear in the following order: AL 1 Hour > AL 1 Min > AL 1 Alarm Modes > AL 1 Wake Options > AL 1 Radio Volume Press the buttons to decrease/increase the HOUR;... -
Page 16: Alarm Duration
OPERATING INSTRUCTIONS Press the buttons to decrease/increase the HOUR; press to confirm the HOUR. The MINUTES will begin to flash. Press the buttons to decrease/increase the MINUTES; press confirm the MINUTES. ALARM MODES will begin to flash. The ALARM MODE settings are as follows: 1-5 : Monday to Friday 3 : Wednesday 1-7 : Whole week... -
Page 17: Sleep Timer
OPERATING INSTRUCTIONS SLEEP TIMER The sleep timer allows you to listen to music for a preset amount of time ranging from 90 minutes to 10 minutes. It is commonly used by people who prefer to fall asleep to music. Press the button to turn the radio ‘ON’. -
Page 18: Radio Presets
OPERATING INSTRUCTIONS RADIO PRESETS You can preset up to 20 radio stations in the memory; 10 AM and 10 FM stations. AM / FM button to turn the radio 'ON'. Press the When the radio is 'ON', press and hold the AM / FM button to toggle between AM and FM radio bands. -
Page 19: Troubleshooting
TROUBLESHOOTING If you experience a problem with this unit, check the chart below before contacting us for service. SYMPTOM POSSIBLE CAUSE POSSIBLE SOLUTION GENERAL Power does not come on AC cord not plugged in Insert plug firmly into AC outlet RADIO No Sound Power is not on... -
Page 20: Specifications
SPECIFICATIONS Display Size 1.8" Display Automatic Time Set Battery Back-up for Time / Date Battery Back-up for Alarm PLL Digital Radio Tuner Radio Station Pre-sets Yes 10 AM/ 10 FM Dual Alarm Calendar Display Adjustable Brightness Off / Low / Medium / High Sleep Timer Battery Required Included, Lithium (3V CR2032) - Page 21 ELECTROHOME® WARRANTY Thank you for choosing Electrohome. We guarantee your investment in our products is a solid one! Extensive thought, research, planning and design goes into every product we make. High quality components combined with precision manufacturing allows us to maintain the highest possible production standards. All items are guaranteed against defects in materials and craftsmanship.
- Page 22 NOTES NOTES...
- Page 23 NE RETOURNEZ PAS CE PRODUIT AU MAGASIN! Veuillez contacter d’abord un représentant du soutien à la clientèle ELECTROHOME® pour toute information supplémentaire sur les caractéristiques du produit, les spécifications ou pour de l’aide avec l’installation. Veuillez nous contacter par l’une des méthodes ci-dessous: Soutien: www.electrohome.com/support...
-
Page 24: Avertissement
AVERTISSEMENT AVERTISSEMENT Pour réduire le risque d’incendie ou de choc électrique, n’ e xposez pas cet apareil à la pluie ni à l’humidité. MISE EN GARDE Le réglage ou l’utilisation de commandes ou d’ajustements qui ne sont pas spécifiés dans ceguide peuvent vous exposer à... -
Page 25: Consignes De Sécurité Importantes
CONSIGNES DE SÉCURITÉ IMPORTANTES 6. N’utilisez qu’un linge doux et sec pour le nettoyage. 7. Ne bloquez aucun des orifices de ventilation. Installez l’appareil conformément aux directives du fabricant. 8. N’installez pas l’appareil à proximité d’une source de chaleur telle que radiateur, bouche à... - Page 26 CONSIGNES DE SÉCURITÉ IMPORTANTES 19. AVERTISSEMENT: Pour réduire le risque d’incendie ou d’ é lectrocution, ne pas exposer cet appareil à la pluie ou à l’humidité. 20. Distances minimales de 5 cm autour de l’appareil pour une ventilation suffisante. 21. L’aération ne doit pas être bloquée en obturant les ouvertures d’aération ou en plaçant sur ou à...
- Page 27 CONSIGNES DE SÉCURITÉ IMPORTANTES 29. Les précautions d'emploi sont inscrites au dos de l'appareil. 30. Les marquages sont inscrits sous l'appareil. Déclaration de la FCC sur la réglementation Cet appareil est conforme à la partie 15 des règlements de la FCC. Son fonctionnement est soumis aux deux conditions suivantes: (1) cet équipement ne doit pas causer d’interférences nuisibles et (2) cet équipement doit accepter toute interférence reçue, y compris les interférences...
- Page 28 CONSIGNES DE SÉCURITÉ IMPORTANTES Cet appareil numérique de classe[B] est conforme à la norme ICES -003 du Canada. Cette marque indique que ce produit ne doit pas être jeté avec les autres déchets ménagers en Amérique du Nord. Pour prévenir les dommages possibles à...
-
Page 29: Ce Qui Est Inclus
CE QUI EST INCLUS • Radio-réveil à écran large 1,8po • Manuel d’instruction • Guide de démarrage rapide • 1 x Pile à plat au lithium 3V, CR2032 INFORMATIONS DU PRODUIT AVANT - ÉCRAN DEL BELL PM Voyant STANDBY-LED Indicateur d'alarme 1 jeu Heure Minutes Volume... - Page 30 INFORMATIONS DU PRODUIT BOUTONS - DESSUS SNOOZE/SLEEP/DIMMER AM/FM Syntoniser-Balayer stations de RADIO (ARRIÈRE) Syntoniser-Balayer stations de RADIO (AVANT) Régler ALARME 1 / activer / désactiver l'alarme Régler ALARME 2 / activer / désactiver l'alarme MINUTERIE SOMMEIL / SOMNOLENCE / GRADATEUR / RÉGLER FUSEAU SNOOZE/SLEEP/DIMMER HORAIRE Régler l’HEURE / A-M-J / Horloge 24h-12ha...
- Page 31 INFORMATIONS DU PRODUIT ARRIÈRE PRESETS PRESETS Radio présélectionnées l'HA / Calendrier Antenne FM Adaptateur CA - 31 -...
-
Page 32: Utilisation
UTILISATION CONNEXION D’ALIMENTATION Le radio-réveil à écran large 1,8po est équippé avec la fonction "SYNCHRONISATION AUTOMATIQUE DE L’HEURE". Lorsque l’appareil est alimenté, l’affichage de l’horloge clignote « 2 » qui représente le TIME ZONE 2 (heure de l’ e st). C’ e st le paramètre de fuseau horaire par défaut, donc l’heure exacte s’affiche, sauf si vous demeurez dans un autre fuseau horaire. -
Page 33: Installation De La Pile
UTILISATION INSTALLATION DE LA PILE À l’aide d’un petit tournevis à tête cruciforme, desserrer la vis dans le panneau du compartiment à pile sous l’appareil. Enlevez le panneau du compartiment à pile. Retirez/jetez la pile en respectant les consignes de sécurité et remplacez par une nouvelle pile à... -
Page 34: Régler La Date Et L'heure
UTILISATION Pour RÉACTIVER l'HA / l’heure d’ é té, appuyez et maintenir appuyé le bouton DST pour trois secondes lorsque la radio est éteinte. «ON» apparaîtra à l’affichage pour indiquer que le réglage automatique de l'HA/ l’heure d’ é té est réactivée. L’affichage retournera à l’heure courante. l'HA / l’heure d’... -
Page 35: Régler Alarme 1 Et Alarme 2
UTILISATION RÉGLER ALARME 1 ET ALARME 2 Pour régler ALARME 1, les paramètres appuyez et maintenez pour mettre en ci- dessous seront affichés dans l’ o rdre suivant: AL 1 Heure > AL 1 Minute > AL 1 Modes alarme > AL 1 Sélection sonnerie/radio > AL 1 volume de la radio Appuyez les boutons pour diminuer/augmenter l’HEURE;... -
Page 36: Durée De L' Alarme
UTILISATION Appuyez les boutons pour diminuer/augmenter l’HEURE; appuyez le bouton pour confirmer l’HEURE. Les MINUTES clignotent. Appuyez les boutons pour diminuer/augmenter les MINUTES; appuyez le bouton pour confirmer les MINUTES. Les MODES ALARMES clignotent. Les réglages pour MODE ALARME sont les suivants: 1-5 : lundi au vendredi 3 : mercredi 1-7 : sur semaine... -
Page 37: Minuterie Sommeil
UTILISATION Appuyez le bouton POUR mettre la radio 'SUR' . Appuyez le bouton SNOOZE/SLEEP/DIMMER pour faire défiler les temps préréglés; 90min > 60min > 30min > 15min > OFF (ARRÊT) Pour annuler la fonction SOMNO, appuyez le bouton SNOOZE/SLEEP/DIMMER jusqu’à ce que vous voyez OFF à l’affichage ou appuyez le bouton MINUTERIE SOMMEIL Lorsque l’alarme sonne, appuyez le bouton SNOOZE/SLEEP/DIMMER pour arrêter l’alarme pendant 9 minutes. -
Page 38: Régler / Rappel De Stations Radio
UTILISATION RÉGLER / RAPPEL DE STATIONS RADIO Vous pouvez prérégler jusqu'à 20 stations de radio dans la mémoire ; 10 stations AM et 10 stations FM. Appuyez le bouton sur le dessus de l’appareil pour alimenter la radio. AM / FM pour faire défiler Lorsque la radio est alimentée, appuyez le bouton les bandes AM et FM. -
Page 39: Dépannage
DÉPANNAGE PROBLÈME CAUSE POSSIBLE SOLUTION POSSIBLE HORLOGE Heure incorrecte L’horloge n’est pas réglée Réglez l’horloge Piles sont insérées Vérifiez les piles incorrectement, pas insérées ou épuisées PROBLÈME CAUSE POSSIBLE SOLUTION POSSIBLE GÉNÉRAL L’appareil ne s’allume pas Cordon d’alimentation n’est Insérez fermement la fiche dans la prise de courant branché... -
Page 40: Soins Et Entretien
DÉPANNAGE PROBLÈME CAUSE POSSIBLE SOLUTION POSSIBLE HORLOGE L’alarme ne se déclenche pas L’alarme n’est pas réglée Appuyez le bouton pour régler ALARME 1 ; Appuyez le bouton pour régler ALARME 2 L’horloge n’est pas réglée Réglez l’horloge L’heure de l’alarme n’est pas réglée Réglez l’alarme Pas d'affichage Gradateur est réglé... -
Page 41: Spécifications
SPÉCIFICATIONS Largeur de l’affichage 1,8po Affichage Synchronisation automatique de l’heure Circuit secours à pile/date Batterie de secours pour alarme Syntonisateur numérique PLL Stations radio préréglées Oui 10 AM/ 10 FM Alarme double Affichage calendrier Luminosité réglable Arrêt (veille) / Bas / Moyen / Haut Minuterie somnolence Pile requise Incluse, au lithium (3V CR2032) - Page 42 Si votre produit acheté démontre un défaut du fabricant pendant la période de garantie et qu’il ne fonctionne pas correctement, Electrohome réparera votre produit et paiera toutes les pièces, les frais de main-d’ o euvre et les frais de retour à la réception du produit Electrohome et sa preuve d’achat.
- Page 43 NOTES NOTES...
Need help?
Do you have a question about the EAAC302 and is the answer not in the manual?
Questions and answers