Advertisement
Table of Contents
- 1 Before You Begin
- 2 Installation of the Major Components
- 3 Control Module
- 4 Wiring the 6 Pin Main Power Harness
- 5 Testing Your Installation
- 6 Hood Pin Safety Shut down
- 7 Mechanical Neutral Safety Switch Considerations
- 8 Key in Sensor Circuits
- 9 Completing the Installation
- 10 Programming Bank 1 (Transmitters)
- 11 Programming Bank 2 (Alarm Features)
- 12 Programming Bank 3 (Remote Start )
- 13 Tach Rate Programming
- Download this manual
See also:
Owner's Manual
Table Of Contents:
Before You Begin
Wire Harnesses Quick View
Mounting Of The Major Components
Pin Power Harness Wiring
14 Pin Accessory Input/Output Harness Wiring
4 Pin GND, Alarm Bypass Output & Parking Light Harness
Door Lock Harness Wiring
Telematic Port Information
6 Pin Antenna Harness
Diesel Engine Setting Information
DBI Port Information
Engine Monitoring Selections, (Voltage Tach, DBI, Hybrid,)
Tach Programming
Diagnostics Access & Information
Testing Your Installation Hood Pin Safety
Manual Override Safety Testing and Operation
Neutral Safety Switch Testing
Completing Your Installation
Programming Transmitters
Programming Alarm Feature Bank 2
Programming Remote Start Feature Bank 3
Tach Programming
Circuit Wiring Layout
PATENTED: www.voxxintl.com/company/patents
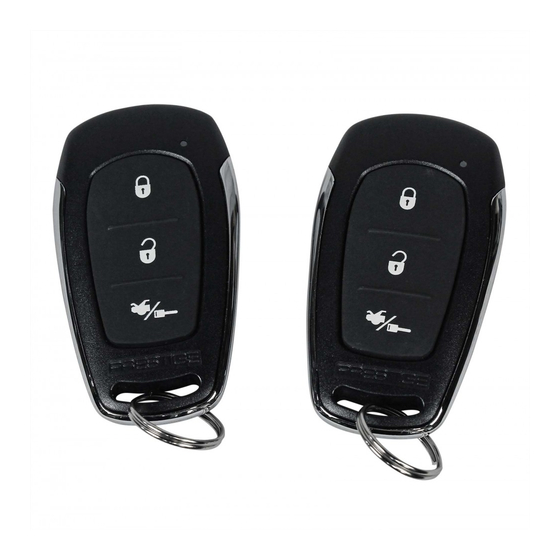
Model APS-57E
Installation Manual
Keyless Entry and
Remote Start System
1
Page 2
Page 3 - 4
Page 5
Page 6 - 7
Page 7 - 9
Page 11
Page 12 - 13
Page 13
Page 13
Page 14
Page 14
Page 14
Page 14 & 21
Page 15
Page 15
Page 15 - 16
Page 16 - 18
Page 18
Page 18
Page 19 & 20
Page 21 & 22
Page 14 & 21
Page 24
128-9312
1 of 24
Advertisement
Table of Contents

Related Manuals for Prestige APS-57E


Summary of Contents for Prestige APS-57E
- Page 1 Model APS-57E Installation Manual Keyless Entry and Remote Start System Table Of Contents: Before You Begin Page 2 Wire Harnesses Quick View Page 3 - 4 Mounting Of The Major Components Page 5 Pin Power Harness Wiring Page 6 - 7...
-
Page 2: Before You Begin
Before You Begin PROFESSIONAL INSTALLATION IS STRONGLY RECOMMENDED Roll down window to avoid locking the keys in the vehicle during installation. Avoid mounting components or routing wires near hot surfaces or near moving parts like the steering wheel as it may prevent proper operation of the vehicle. - Page 3 14 Pin Main Wiring Harness #1124305 1 Green/Orange Tachometer input 2 Green/Yellow Glow Plug Input 3 DK. Blue Channel 3 Trunk Release Output (-) 4 Brown/Black (+) Inhibit /Shutdown To Brake Switch 5 Brown (+) Inhibit / Shutdown To Brake Switch 6 Gray (-) Inhibit Neutral Start Switch 7 NA...
- Page 4 6 Pin Power / Start Harness #1123742 1 Blue Ignition 1 (+) 2 Red/White Battery 1 - 12V (+) 3 Green Ignition 2 (+) 4 Purple Accessory (+) 5 Red Battery 2 - 12V (+) 6 Yellow Starter Output 4 Pin 2nd Main Harness #1124294 1 Black Chassis Ground 2 White/Red...
-
Page 5: Installation Of The Major Components
This Remote Start is to be used in vehicles with AUTOMATIC TRANSMISSIONS only! Although this sys- tem is a sophisticated device with many advanced features, IT MUST NOT be installed into a vehicle with a manually operated transmission. Doing so may result in serious personal injury and property damage! INSTALLATION OF THE MAJOR COMPONENTS: CONTROL MODULE: PART # 1365407... -
Page 6: Wiring The 6 Pin Main Power Harness
IMPORTANT! DO NOT PLUG THE SIX PIN MAIN POWER HARNESS OR THE MULTI PIN INPUT / OUTPUT HARNESS INTO THE CONTROL MODULE UNTIL ALL CONNECTIONS TO THE VEHICLE HAVE BEEN MADE. AFTER SELECTING YOUR TARGET WIRES AS DEFINED BELOW, DISCONNECT THE NEGATIVE BATTERY CABLE FROM THE VEHICLE BATTERY PRIOR TO MAKING ANY CONNECTIONS. - Page 7 In both mechanical and electrical neutral start switch configurations, the connection of the Yellow Wire will be made to the low current start solenoid wire of the ignition switch harness. This wire will have +12 Volts when the ignition switch is turned to the start (crank) position only. This wire will have 0 Volts in all other ignition switch positions.
- Page 8 3 Dark Blue Wire: (-) 300mA Pulsed Channel 3 Output (Trunk) The Dark Blue Wire supplies a 300mA ground pulsed output whenever channel three of the receiver is accessed. Pressing the pre-programmed transmitter button for three seconds will access channel three. This is a low current output and must be connected to a relay to supply power to the trunk release or the circuit you wish to control.
- Page 9 9 Black w/ Red Trace Wire: Pulsed Ground Output After Shutdown The Black w/ Red Trace wire will provide a 1 second 300 mA pulsed ground output 2 seconds after the remote starts GWR wire shuts down. This output will occur regardless of whether the circuit times out or is manually terminated.
- Page 10 A. Sensor By Pass: If there is a Non Plug-in Sensor used with the alarm system and it is not shunted during the Remote Start activation period, then vibration or noise from the running vehicle can cause the alarm to trigger. In this case, connect the Light Blue Wire to terminal # 86 of a external relay.
- Page 11 4 Pin Additional Harness: Parking Light Flasher I/O Alarm Bypass O/P & Ground P/N #1124294 1 Black Wire: Chassis Ground Connect the Black Wire to a known vehicle ground source or to a solid clean metal part of the chassis. Be certain to remove any paint or grease and secure this wire with a self tapping screw and ring terminal.
- Page 12 2 Pin Door Lock/Unlock Harness: (White Connector) 300mA Part # 1122242 1 Red Wire: (-) Lock The Red Wire provides a (-) Negative Pulse when the transmitter is used to lock the doors. 2 Green Wire: (-) Unlock The Green Wire provides a (-) Negative Pulse when the transmitter is used to unlock the doors. 3 Wire Ground Switched Door Lock Circuits: In this application, the Red Wire of the door lock harness provides a ground pulse during the arming sequence, or pulsed ground lock output.
- Page 13 3 Wire Positive Switched Door Lock/Unlock Wiring Detail Unlock Lock Factory Lock Relay From Vehicle Chassis Ground When Using DLVI To Red Lock Wire Green Of Control Module Factory Unlock Relay Blue To Green Unlock Wire Of Control Module Cut and Splice Per the Install Guide Instruction Factory Lock Relay...
- Page 14 DIESEL ENGINE SETTINGS: NOTE: When selecting Diesel operation, (Bank 3 Feature #12), over gasoline, the only change is to the ignition circuits. When Diesel is selected, the ignition circuits will power up 10, 15, or 20 seconds before the start circuit. The intent of this feature is to allow the glow plug warming required by some diesel engines.
-
Page 15: Testing Your Installation
DIAGNOSTICS: Enter Bank 3 and turn on selectable feature # 10 as described on the front pages of this manual. NOTE: Diagnostic mode is a temporary mode. Once you have accessed the diagnostic mode, the unit will pause for two seconds then begin to flash the last stored shut down code. This code will be displayed three times in succession, then the unit will automatically exit the diagnostic on mode. -
Page 16: Mechanical Neutral Safety Switch Considerations
To Exit Remote Start Override Mode: 1. With the system disarmed, Press and Hold the PBLED on. 2. Turn the ignition switch on, off, on, off, on, off. 3. The LED turns off indicating that the R/S unit is fully functional one again. DO NOT RELEASE THIS VEHICLE TO THE CONSUMER UNTIL YOU CONFIRM THE OPERATION OF THE MANUAL SHUT DOWN / ENABLE FEATURE. -
Page 17: Key In Sensor Circuits
KEY IN SENSOR CIRCUITS: If the vehicle you are working on does not have or you cannot locate the ECM reference wire, there are two alternatives available. Although not preferred, the vehicle Key In Sensor may be reconfigured to allow a margin of safety and will prevent the vehicle with a Mechanical Neutral Start Switch from starting in gear. -
Page 18: Completing The Installation
NOTE: A second 4002 series diode may be required to maintain the integrity of the hood open, shut down circuit. If this is the case, it must be installed as shown in the diagram on the previous page. The anode (Non Striped) side must be connected to the Gray/Black wire of the Remote Start Unit. The cathode (Striped) side must be connected to the hood pin switch. -
Page 19: Programming Bank 1 (Transmitters)
The transmitters are pre-programmed from the factory, If you find you need to program new or additional transmitters follow the instructions below. PROGRAMMING BANK 1 (TRANSMITTERS): 1. Turn the ignition key to the on position. 2. Press and release the valet/programming switch 3 times (Siren Chirps Once). 3. - Page 20 128-9312 20 of 24...
-
Page 21: Programming Bank 3 (Remote Start )
PROGRAMMING BANK 3 (REMOTE START ): You can enter Bank 3 from Bank 2 by turning the ignition key off then on after you've made the changes you wanted in Bank 2, (Siren Chirps 3 times), You can also go right to Bank 3 by: 1. - Page 22 128-9312 22 of 24...
- Page 23 NOTES: 128-9312 23 of 24...
- Page 24 Connect Data Module Wire Side View Of Connector Selectable DBI or ADS Protocol 1 Blue (Ign 1) 2 Red/White (+ 12VDC Relays Ign 1 & Ign 2) 3 Green (Ign 2) 4 Purple (Accessory) 5 Red (+ 12VDC Relays ACC & Start) 6 Yellow (Starter) APS57E White (Parking Light Relay Output)
Need help?
Do you have a question about the APS-57E and is the answer not in the manual?
Questions and answers