Table of Contents
Advertisement
Quick Links
The selectable features can be set manually as explained below, or with the RF feature programmer.
To set features using the RF programmer, follow the instructions packaged with the programmer.
Factory default settings are indicated by bold text.
Note : The method of manual override can either be selected to operate from the valet switch or operate as custom code.
Be certain to place a check mark indicating the method used in the box located on the last page of the owner's manual.
NOTE: Keyless Entry Models with no horn output will Flash the Parking Lights instead of chirp where chirp is indicated.
Also, No data will be indicated if a feature is not available for a particular model. The unit will enter the feature but no selection will be available.
RF Programmable Feature Bank 1 Is For Transmitter Programming See Transmitter Programming Guide.
RF Programmable Features Bank 2 Is Alarm Selectable Features:
Feature Selection
1 Chirp
1st DoorL/UL
1 Sec.
2nd Accy Lock
Not Available
3rd Accy. UL
Not Available
4th Headlights
Not Available
5th Passive Locks
Not Available
6th Pass/Act Arm
Not Available
7th Siren/Horn
Not Available
8th Horn Chirp
Not Available
9th O/R Method
Not Available
10th 2 Step U/L
Not Available
11th Chp Del Tx
Not Available
12th Voltage/Hd Wire
Not Available
13th Trigger Circuits
Not Available
14th Lock/Unlock Poll
Not Available
15th Aux Ch 5 Sel
Not Available
16th Aux Ch 6 Sel
Not Available
17th Aux Ch 7 Sel
Not Available
18th Trigger Delay
Not Available
When using the RF programmer, enter the program mode as follows:
Turn the ignition on
Press and release valet switch 3 times
turn ignition off then on
Press and hold valet switch for 5 seconds
Siren and or lights chirp/flash 2 times indicating access to RF feature program mode.
2 Chirps
3 Chirps
4 Chirps
3.5 Sec.
1 Sec L, Dbl. U/L
Dbl L, 1 Sec UL
Get other manuals https://www.bkmanuals.com
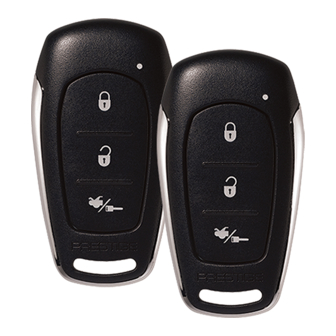
Model APS-57
Installation Manual
5 Chirps
6 Chirps
Dbl L, Dbl UL
1 S l/350mS ul
Advertisement
Table of Contents

Subscribe to Our Youtube Channel
Related Manuals for Prestige APS-57


Summary of Contents for Prestige APS-57
- Page 1 Model APS-57 Installation Manual The selectable features can be set manually as explained below, or with the RF feature programmer. To set features using the RF programmer, follow the instructions packaged with the programmer. Factory default settings are indicated by bold text.
- Page 2 To program these selectable features; Action System Response Turn ignition on No response Press and release the valet switch 3 times 1 Chirp - LED 1 flash Within 3 seconds, turn ignition Off Then On Short chirp, then long chirp This Action Accesses Feature Bank 2 Alarm Selectable Features First Press and release the valet switch 1 time...
- Page 3 To exit program mode, turn ignition off, or press and release valet switch. RF Programmable Features Bank 3 Is Remote Start Selectable Features: Feature Selection 1 Chirp 2 Chirps 3 Chirps 4 Chirps 5 Chirps 6 Chirps 1st Defrost Output Not Available 2nd RF Start Chirp Not Available...
- Page 4 Action System Response Turn ignition on No response Press and release the valet switch 3 times 1 Chirp - LED 1 flash Within 3 seconds, turn ignition Off, On, Off, On Short chirp, then 2 long chirps This Action Accesses Feature Bank 3 Remote Start Selectable Features First Press the valet switch one time 1 chirp = defrost output pulsed...
-
Page 5: Installation Of The Major Components
This Remote Start/Keyless Entry System is designed for use with Automatic Transmission Vehicles Only! The unit provides wait to start input for glow plug pre-heat which will be used for all diesel applications. If this wire is not connected, then the unit will remain in the Gasoline mode setting, which will crank the car when the RF signal is received with no delay. -
Page 6: Wiring The 6 Pin Main Power Harness
THE RECEIVER/ANTENNA ASSEMBLY: The Superheterodyne Receiver Antenna Assembly provided with this unit allows routing from below the dashboard for maximum operating range. Choose a location above the belt line (dashboard) of the vehicle for best reception. Special considerations must be made for windshield glass as some newer vehicles utilize a metallic shielded window glass that will inhibit or restrict RF reception. - Page 7 NOTE: This wire must be connected to the vehicle side of the starter cut relay (when used). For the electrical neutral switch configuration, this connection must be made between the starter inhibit relay, (when used) and the neutral safety switch as shown in the following diagram. Failure to connect this wire to the ignition switch side of the neutral safety switch can result in personal injury and property damage.
- Page 8 VIOLET WIRE: Accessory Output Connect this wire to the Accessory wire from the ignition switch. This wire will show + 12 volts when the ignition switch is turned to the "ACCESSORY" or "ON" and "RUN" positions and will show 0 volts when the key is turned to the "OFF"...
- Page 9 Brake Switch Positive Shutdown Detail YELLOW w/ BLACK Tracer Wire: + 12 Volt Alarm By - Pass Output NOTE: You must disconnect the ignition input of the alarm from any other wire that it is presently connected to in the vehicle. This wire provides a + 12 Volt output when the ignition key is turned to the “ON”...
- Page 10 A. Shock Sensor By Pass: If there is Shock Sensor used with an alarm system and it is not shunted during the Remote Start activation period, then vibration from the running vehicle can cause the alarm to trigger. In this case, connect the Light Blue Wire to terminal #86 of a external relay.
-
Page 11: Wiring The 4 Pin Auxiliary Output Harness
Tachometer Input Wiring Detail Green/Yellow Wire: Diesel Wait To Start Input The Green/Yellow wire of the 2 pin connector will connect to a diesel vehicles glow plug wire. When the unit receives a start command, this wire must go to + 12 then to ground to allow the crank sequence to begin. When ignition #1 is activated by the remote start unit, the glow plug circuit gets energized, (+ 12 volts), when the glow plug circuit of the vehicle drops the + 12 volts, which effectively grounds the wait to start input, then 500mS later the starter will engage. - Page 12 vehicle door lock / unlock circuits. The output of these wires has a maximum switching capability of 300mA. Many vehicles today have factory door lock relays which can be connected directly to these outputs, however always confirm that the factory relays in your particular vehicle do not exceed the rated 300mA output of the units door lock/unlock circuit.
- Page 13 2 Pin Blue Connector : Programming Switch Route the gray and black wires in the 2 pin connector from the previously installed programming switch to the control module and plug it into the mating blue connector on the side of the module. 2 Pin White Auxiliary Output Connector : Low Current Trunk Release Output (1Blue Wire Loaded) This wire pulses to ground via an independent RF channel from the keychain transmitter.
-
Page 14: Testing Your Installation
achieve optimum performance the coil signals must be evenly distributed. This is accomplished by first mapping out the firing order of the engine in groups of as indicated below. Draw a circle around any of the columns. The Green/Black wires should be connected to the negative (-) terminal of the respective cylinder number which appears in any of the circles. - Page 15 The intent of the neutral start switch is to prevent the vehicle from starting while the gear selector is in any position other than Park, or Neutral. When installing a Remote Start Device, it is imperative that the Yellow Starter wire be connected to the ignition switch side of the Neutral Start Switch.
-
Page 16: Key In Sensor Circuits
KEY IN SENSOR CIRCUITS: If the vehicle you are working on does not have or you cannot locate the ECM reference wire, there are two alternatives available. Although not preferred, the vehicle Key In Sensor may be reconfigured to allow a margin of safety and will prevent the vehicle with a Mechanical Neutral Start Switch from starting in gear. - Page 17 NOTE: A second 4002 series diode may be required to maintain the integrity of the hood open, shut down circuit. If this is the case, it must be installed as shown in the diagram above. The anode (Non Striped) side must be connected to the Gray/Black wire of the Remote Start Unit.
-
Page 18: Completing The Installation
COMPLETING THE INSTALLATION: After you have confirmed the operation of the Audiovox Remote Start unit and tested all the safety features of the system: 1. If you have not done so already, place the red rubber handle cover over the handle of the control switch for ease of identification. - Page 19 © 2006 Audiovox Electronics Corp., Hauppauge, NY 11788 128-7767 128-7767 19 of 19 Get other manuals https://www.bkmanuals.com...
Need help?
Do you have a question about the APS-57 and is the answer not in the manual?
Questions and answers