Table of Contents
Advertisement
Quick Links
Advertisement
Table of Contents

Related Manuals for Elation DESIGN PROMO 360


Summary of Contents for Elation DESIGN PROMO 360
- Page 1 DESIGN PROMO 360 USER MANUAL...
-
Page 2: Safety Instructions
For your own safety, please read this user manual carefully before installing the device. Keep this device away from rain and moisture ! Unplug mains lead before opening the housing. Every person involved with the installation, operation and maintenance of this device has to: -be qualified -follow carefully the instructions of this manual INTRODUCTION:... -
Page 3: General Guidelines
If the device has been exposed to temperature changes due to environmental changes, do not switch it on immediately. The arising condensation could damage the device. Leave the device switched off until it has reached room temperature. If the external flexible cable or cord of this luminaire is damaged, it shall be exclusively replaced by the manufacturer or his service agent or a similar qualified person in order to avoid a hazard. -
Page 4: Installation Instructions
operation. Please use the original packaging if the device is to be transported. For safety reasons, please be aware that all modifications on the device are forbidden. If this device will be operated in any way different to the one described in this manual, the product may suffer damages and the guarantee becomes void. -
Page 5: Dmx-512 Control Connection
device’s weight. Connect the fixture to the mains with the power plug. Installation method via clamp Please refer to the picture below: (1)Omega-holders (2) Clamp (3) Safety-rope (4)Quick-lock fastener Screw one clamp each via a M12 screw and nut onto the Omega holders. Insert the quick-lock fasteners of the first Omega holder into the respective holes on the bottom of the device. - Page 6 For installations where the DMX cable has to run a long distance or is in an electrically noisy environment, such as in a discotheque, it is recommended to use a DMX terminator. This helps in preventing corruption of the digital control signal by electrical noise. The DMX terminator is simply an XLR plug with a 120 Ω...
- Page 7 Note: The modes of DMX 512 data and lamp are shown via the display: DMX OK NO DMX DMX OK NO DMX Lamp off Lamp off Lamp on Lamp on 1. After switching on, the device will automatically detect whether DMX 512 data is received or not. If the data is received, the the display will show "A.001"...
-
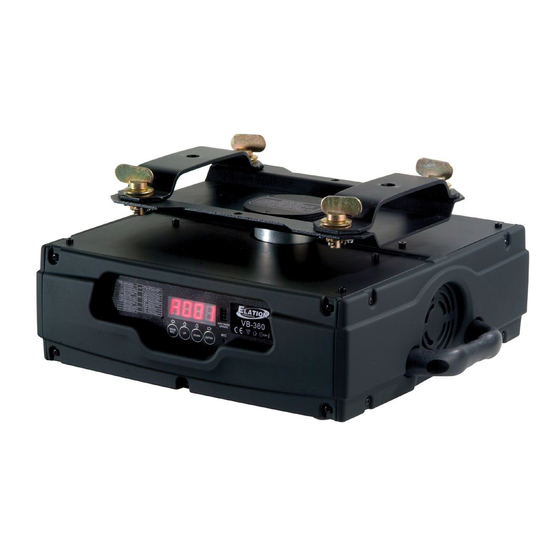
Page 8: Control Board
Control Board The Control Board offers several features: you can simply set the starting address, switch on and off the lamp, run the pre-programmed program or make a reset. The main menu is accessed by pressing the Mode/esc-button until the display starts flashing. Browse through the menu by pressing the Up-button or Down-button. -
Page 9: Main Functions
Main functions - Main menu 0 1. Press [MODE/ESC] to enter the main menu "MODE" (display flashing) 2. Press [ENTER] and select "ADDR", “RUN” or "DISP" by pressing [UP] or [DOWN] button. 3. Press [ENTER] for selecting the desired sub menu. - DMX address setting, Slave setting - DMX address setting With this function, you can adjust the desired DMX-address via the Control Board. - Page 10 1. Select "AUTO" or "SOUN" by pressing [UP] or [DOWN] button. 2. Press [ENTER] for selecting the desired extension menu. 4. Select "ALON" or "MAST" by pressing [UP] or [DOWN] button. 5. Press [ENTER] to confirm or Press [MODE/ESC] to return to the main menu. - Display the DMX-value, Reverse display, Shut off LED display - Display the DMX 512 value of each channel With this function you can display the DMX 512 value of each channel.
- Page 11 - Main menu 1 1. Press [MODE/ESC] to enter the main menu (display flashing). 2. Press [UP] or [DOWN] button. to select “SET”. - Pan Reverse With this function you can reverse the Pan-movement. 1. Select “RPAN” by pressing [UP] or [DOWN] button. 2.
- Page 12 1. Select “AUTO” by pressing [UP] or [DOWN] button. 2. Press [ENTER], the display shows “ON” or “OFF”. 3. Press [UP] to select “ON” if you wish to enable this function or “OFF” if you don’t. 4. Press [ENTER] to confirm or Press [MODE/ESC] to return to the main menu. -Sound Run by no DMX With this function you can sound run the device by no DMX.
- Page 13 - Clear fixture time With this function you can clear the running time of the device. 1. Select “CLMT” by pressing [UP] or [DOWN] button. 2. Press [ENTER], the display shows “ON” or “OFF”. 3. Press [UP] to select “ON” if you wish to enable this function or press [DOWN] button to “OFF” if you don’t. 4.
-
Page 14: Instructions On Use
12. Adjust the desired time by pressing [UP] or [DOWN] button. 13. Press [ENTER] to save the settings for the scene you are editing, the display will change to the next scene automatically. 14. Repeat step 3-14 to edit and other scenes, you can edit and save a maximum of 48 scenes. 15. -
Page 15: Error Codes
ERROR CODES: When power is applied, the unit will automatically enter “reset/test” mode. This mode brings all the internal motors to a home position. If there is an internal problem with one or more of the motors an error code will flash in the display in the form of “XXer”... -
Page 16: Technical Specifications
TECHNICAL SPECIFICATIONS Power supply: ¡ õ 98VAC,50Hz;¡ õ 120VAC, 50Hz;¡ õ 208VAC, 50Hz;¡ õ 220VAC,50Hz;¡ õ 230VAC,50Hz;¡ õ 240VAC, 50Hz; ¡ õ 98VAC,60Hz;¡ õ 120VAC,60Hz; ¡ õ 208VAC, 50Hz;¡ õ 220VAC,60Hz;¡ õ 230VAC,60Hz;¡ õ 240VAC,60Hz; Power consumption: max. Motors: 1 micro motors PCB model: MH 250-PT-05D PCB fuse: F1=4L F2=5L(2PCS) Packing dimensions: 45x31x49cm...
Need help?
Do you have a question about the DESIGN PROMO 360 and is the answer not in the manual?
Questions and answers