
Subscribe to Our Youtube Channel
Related Manuals for Bosch Maxx WTL 6500


Summary of Contents for Bosch Maxx WTL 6500
- Page 1 Maxx WTL 6500 en Instruction Manual and Installation Instructions Internet: http://www. bosch-hausgeraete.de...
-
Page 2: Table Of Contents
Table of Contents Operating Your new dryer ......Instructions Notes on disposal ......Disposing of packaging . - Page 3 End of the programme ..... . Anti crease function ..... Switching off .
-
Page 4: Your New Dryer
Your new dryer With the purchase of your new dryer, you have cho sen a modern, high quality domestic appliance. A distinctive feature of your dryer is its low energy con sumption. Every dryer which leaves our factory is carefully chek ked to ensure that it functions correctly and is in per fect condition. -
Page 5: Notes On Disposal
Notes on disposal Danger of suffocation Disposing of There is a danger of suffocation from the cardboard packaging box and plastic film. Do not allow children to play with the packaging. All the packaging materials are environmentally friendly and recyclable. Please dispose of the packaging in an environmentally responsible manner. -
Page 6: Safety Information
Safety information Using your dryer - Only for domestic use. correctly - Only for drying fabrics washed in water. - Do not leave children unsupervised near the dryer. Risk of explosion/fire Solvent danger. Do not use the dryer if: - the laundry has been treated with a solvent or has been colour treated (e.g. -
Page 7: Drying Your Laundry
Drying your laundry - Do not leave children unsupervised near the dryer. - Keep pets away from the dryer. - Remove all objects from pockets, especially ligh ters risk of explosion. End of programme - Switch off the dryer when the programme has en ded. -
Page 8: Notes On Environmental Protection/Economical Drying
Notes on environmental protection/economical drying Environmentally- - Spin the laundry thoroughly before drying. Spin the laundry thoroughly in the washing machi friendly and econo ne before drying. The higher the spin speed, the mical drying shorter the drying time and the lower the energy consumption. -
Page 9: Description Of The Dryer
Description of the dryer The dryer works on the principle of condensation. The Operation and condensation produced during the drying cycle is col special features lected in a container. The container should be emp tied after each drying cycle. Simple to use The water container does not have a lock on it. -
Page 10: Summary Of Instructions
Before drying Summary of 1. Open the door. instructions 2. Place the laundry in the drum. 3. Close the door. 4. Select a programme using the programme selec tor (see the table of programmes from page 16 onwards). 5. Set additional functions if required (see page 18). 6. -
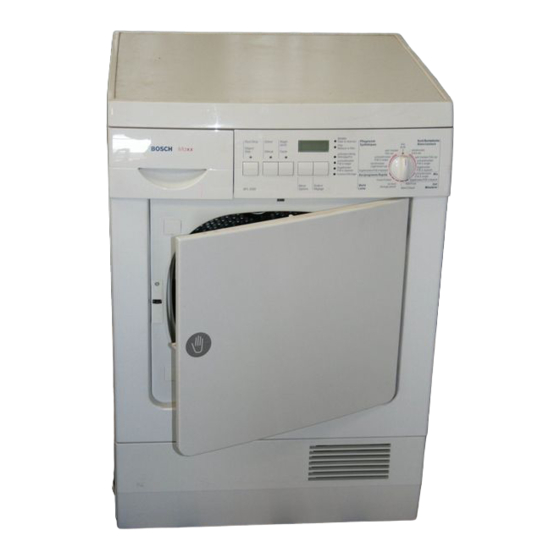
Page 11: Appliance Design
Appliance design Water container Maintenance flap for Door with filter Button for opening the condenser unit maintenance flap... -
Page 12: Control Panel
Control panel Indicator panel Programme selector Displays the selected settings or settings For switching the dryer on to be changed and the remaining time Indicator lamps and off and selecting the Indicator lamps (LEDs) for buttons which programme. Can be turned have been pressed (LEDs) for emptying the water con in both directions... -
Page 13: Laundry Information
Laundry information Check the following fabric symbols: Fabric symbols E = drying at normal temperature. D = drying at a lower temperature: Press the Low Heat button too or select J (super delicate drying). F = do not tumble dry. Do not tumble dry the following fabrics: - Airtight fabrics (e.g. -
Page 14: Preparing To Use Your Dryer
Preparing to use your dryer Please read through this instruction manual carefully before using the dryer for the first time. 1. Open the door. 2. Place the laundry into the empty drum. i Ensure that the drum contains only laundry. 3. -
Page 15: Selecting A Programme
Selecting a programme Your dryer has various programmes and additional Selection functions for the best drying results. Our drying cycles are designed to protect your laundry and minimise energy consumption. As a result of the residual heat after drying, your laundry will feel dam per than it actually is. -
Page 16: Standard Programmes
Standard programmes Suitable for cottons, coloureds and linens. Standard programmes for Press the Low Heat button or select J Super delicate cottons+linens drying for heat sensitive fabrics. For laundry: Bed linen, table linen and towels which needs to be pressed Iron dry (min 2 kg) Bed linen, table linen, towels, T shirts,... -
Page 17: Timed Programmes
Timed programmes for delicate fabrics made of acry Timed programmes lic or for subsequent drying or airing. Fabrics which have already been pre dried and are slightly damp, warm individual laundry items such as bath towels, bath robes, dishcloths and (can be set in 10 minute quilted fabrics made of acrylic. -
Page 18: Additional Functions
Additional functions Press this button when drying heat sensitive fabrics Low Heat button (e.g. acrylic). Observe the fabric D care instructions. The temperature is reduced and the drying time in creased. i Once the programme has started, the dryer re members"... -
Page 19: Programmable Functions
Additional functions can be set by pressing the Menu Programmable and Change buttons. All the additional functions functions which have been set are indicated in the display by the appropriate symbols. i A sticker which explains the symbols is supplied with the dryer. - Page 20 The programme can be set to start up to 19 hours Time delay later (the first 2 hours is set in 30 minute increments, thereafter the time is set in 1 hour increments). (For notes on settings, see page 19). 1.
- Page 21 You can lock the dryer settings to prevent the func Child safety tions you have set from being inadvertently changed. lock (For notes on settings, see page 19). When the child safety lock is selected: - It is not possible to make any changes while a pro gramme is running.
- Page 22 The dryer has been designed to be as energy efficient Fine adjustment of the as possible. level of dryness The level of dryness of the cupboard dry", very dry" and extra dry" programmes can be individually in creased. We would particularly recommend this if you live in a hard water area or a cold climate.
-
Page 23: End Of The Programme
End of the programme When the anti crease/End" indicator lamp lights Anti crease up:0. function 1. Open the door. 2. Remove the laundry. The dryer is equipped with an automatic anti crease function (anti crease/End). It is effective if the laundry is not removed from the drum immediately. -
Page 24: Woollens Basket
Woollens basket The woollens basket allows you to dry washable wool lens and trainers. The woollens basket does not turn with the drum. This means that woollens or trainers can be dried. Wet woollens should not be moved wherever possi ble, otherwise they tend to felt. - Page 25 Notes The laundry must be spun. 1. Place the items loosely in/about the basket insert, do not squash them in or fold them (see following pages for examples). 2. Place the basket insert inside the woollens basket. The laundry must not be touching the drum, it could become caught and be damaged.
- Page 26 Example: Woollen pullover/cardigan/top 1. Insert the bottom of the pullover into the basket insert. 2. Lay the top part on top of the basket insert. 3. Loosely place the sleeves in the top section of the basket. 4. Place the basket insert and the pullover in the bas ket.
- Page 27 Example: Suit trousers/dress/skirt 1. Insert the bottoms of the trouser legs into the bas ket insert. 2. Guide the top part of the trousers through the top of the basket insert. 3. Lay the top part of the trousers on top of the bas ket insert.
- Page 28 Example: Trainers i The basket insert is not used when drying shoes. i Pull the tongues out as far as possible on trainers. Loosen shoelaces, or remove them if possible. Remove insoles and/or heel cups. i To protect the dryer and subsequent loads of laun dry, only dry shoes which have been cleaned.
-
Page 29: Cleaning And Care
Cleaning and care Risk of explosion Cleaning the dryer There is a risk of explosion from the solvents. Never use solvents for cleaning. The dryer may be damaged if it is not cleaned properly. Do not spray the dryer with a water jet. Do not use scouring powder or general purpose cleaners. -
Page 30: Cleaning The Fluff Filter
Bobbling (fluff) occurs as clothes etc. are used. These Cleaning the fluff bobbles come off during the drying cycle and collect filter in the fluff filter. The filter must be cleaned after each drying cycle. A clogged filter results in longer drying times and higher energy consumption. -
Page 31: Empty The Water Container
Do not drink this water. Empty the water Condensation accumulates during drying. This con container densation is collected in a container. The container should be emptied after each drying cycle.0. If a large amount of washing which has not been thoroughly spun is dried at the same time (more than 5 kg at less than 1200 rpm), it may be necessary to remove some of the washing mid-cycle. -
Page 32: Cleaning The Condenser Unit
The condenser unit should be cleaned three or four Cleaning the times a year, or more often if the dryer is used very condenser unit frequently. 1. Residual water may leak out so place an absor bent towel underneath the maintenance flap. 2. -
Page 33: Changing The Bulb For The Interior Light
You will need a special tool and a new bulb. The Changing the bulb se are both available from specialist suppliers. for the interior light - Torx screwdriver, size T20. - 15 watt bulb for E14 oven. Danger of death Danger of death from electrical voltage. -
Page 34: What To Do If
What to do if ... Danger, electrical current. Repairs must only be carried out by the after sales service or an authorised expert. If you cannot rectify a fault yourself, or a repair is necessary: q Turn the programme selector to Off. q Remove the plug from the socket. - Page 35 What to do if ... Cause Solution The filter is blocked. Rinse the filter with warm water, dry The Filter" indicator it thoroughly (see page 30). lamp is on even though th filt i f the filter is free of fluff. f fl ff The condenser unit is clogged.
- Page 36 What to do if ... Cause Solution The drum lighting is not The bulb is faulty. Change the bulb (see page 33). working. The condenser unit is clogged. Clean the condenser unit The contents did not dry (see page 32). or the drying time was too long.
-
Page 37: After Sales Service
After sales service Before calling the after sales service, check to see if you can rectify the fault yourself (see page 34 onwards). If you contact the after sales service, even within the warranty period, you will be liable for labour costs. Please inform the after sales service of the product number (E Nr.) and the production number (FD) of the appliance. -
Page 38: Technical Data
Technical data Size Measurement Height 86 cm (adjustable) Width 60 cm Depth 57 cm Weight approximately 45 kg Nominal capacity 5 kg Water container volume 3.2 l A.C. voltage, connected load, fuse See identification plate Consumption rates Spin speed in rpm Drying time Energy consumption (residual moisture) -
Page 39: Installation, Connection And Transportation
Installation, connection and transportation Risk of injury. Safety information The dryer is very heavy. Do not attempt to lift it on your own. Do not lift the dryer by any of the protruding parts (e.g. the door) they may break off. Risk of tripping. -
Page 40: Electrical Connection
Caution: Electrical The dryer must be connected correctly to an A.C. connection contactor socket. The mains voltage must comply with the voltage infor mation given on the identification plate (on the rear of the unit). The connected load and the necessary fusing are shown on the identification plate. -
Page 41: Accessories And Special Equipment
Accessories and special equipment Accessories can be fitted to modify the dryer for your needs. Please order accessories from a specialist supplier or from the after sales service. This kit is used to drain the condensed water using a Connecting kit for hose. -
Page 42: Washer Dryer Stack Connection Set
The dryer can be stacked on top of a Bosch washing Washer dryer stack machine of the same dimensions to save space. connection set Risk of injury. For reasons of safety, the appliances must be stacked Order no.: WTZ 1190 by an expert. -
Page 43: Reversing The Door Catch
The door catch can be reversed if necessary. Reversing the door The door is hinged on the right at the factory. catch You will need: - Torx screwdrivers, sizes T10 and T20. - Medium sized slotted screwdriver. These are available from specialist suppliers. Carefully tighten all screws by hand. - Page 44 Converting the dryer: 1. Remove both door fastening point covers: Lever them off carefully with a slotted screwdriver. 2. Undo both of the screws which are underneath and screw them in on the opposite side. 3. Replace both covers. 4. Undo the screw in the door lock cover. Remove the cover.
- Page 45 Converting and replacing the door. 1. Carefully lever off the locking catch cover. 2. Unscrew the locking catch. 3. Screw on the locking catch in the opposite posi tion. 4. Replace the locking catch cover. 5. Carefully lever off the hinge fastening point cover. 6.
- Page 46 7. Screw on the door hinges in the opposite position. 8. Replace both covers. 9. Place the hinge bracket on the front, holding the door firmly. 10.Screw the door first onto the top hinge, and then onto the bottom one. 11.Open and close the door carefully several times before using the dryer.
-
Page 47: Converting The Installed Load
The dryer has been designed for 10 or 16 amperes. Converting the If the dryer fuse (factory setting) does not correspond installed load to the socket fuse (household fuse), have the following steps carried out by an expert: 1. Connect the dryer to the mains electricity, see page 40. - Page 48 WTL6500 0504 en ROBERT BOSCH HAUSGERÄTE GMBH 9000 013 270...
Need help?
Do you have a question about the Maxx WTL 6500 and is the answer not in the manual?
Questions and answers