Jura IMPRESSA Z5 Instructions For Use Manual
Jura coffeemaker instructions for use
Hide thumbs
Also See for IMPRESSA Z5:
- Quick reference manual (10 pages) ,
- Manual (112 pages) ,
- Manual (112 pages)
Table of Contents
Advertisement
Quick Links
Advertisement
Table of Contents

Related Manuals for Jura IMPRESSA Z5


Summary of Contents for Jura IMPRESSA Z5
- Page 1 IMPRESSA Z5 Instructions for use 9/05...
- Page 2 JURA Elektroapparate AG, CH-4626 Niederbuchsiten, = Note = Important = Tip Internet http://www.jura.com...
- Page 3 Fig. 1 Fig. 6 Fig. 11 Fig. 13: Correct assembly of the cappuccino nozzle Make sure there is always a small gap between the rear cappuccino nozzle and the connection piece. This will guarantee perfect operation of the cap- puccino nozzle. Fig.
-
Page 5: Description Of The Machine
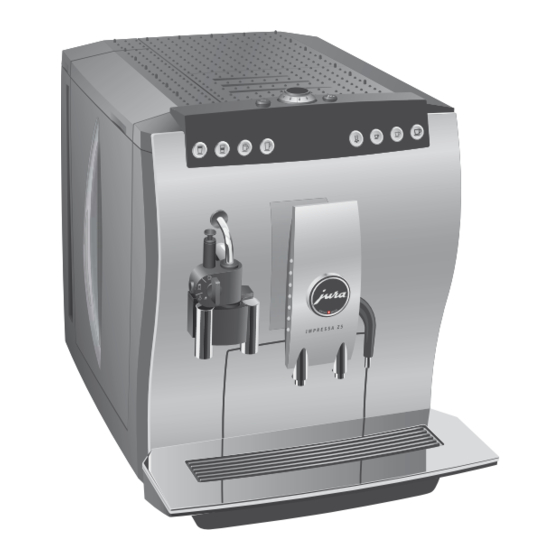
Description of the machine 1. Drip tray 2. a) Drip grate b) Cup platform 3. Coffee grounds tray and container 4. a) One Touch Cappuccino nozzle* long spout b) One Touch Cappuccino nozzle* short spout 5. Water tank with handle and level indicator 6. -
Page 6: Table Of Contents
Contents 1. Safety information ...page 7 Warning...page 7 Precautions...page 7 2. Preparing the IMPRESSA Z5 ...page 7 Check supply voltage...page 7 Check electrical fuse ...page 8 Fill water tank ...page 8 Fill coffee beans ...page 8 Adjusting the grinding gear ...page 8 Vacuum milk container...page 8... -
Page 7: Safety Information
2. Preparing the IMPRESSA Z5 2.1 Check supply voltage The IMPRESSA Z5 is preset in the factory to the correct mains voltage. Check if your local mains supply voltage complies with the information given on the type plate on the underside of the... -
Page 8: Check Electrical Fuse
2.2 Check electrical fuse The IMPRESSA Z5 is designed for an electric current of 10 amperes. Check if the electrical fuse has sufficient capacity. 2.3 Fill water tank Only use fresh, cold water. Never fill in milk, mineral water or other liquids. -
Page 9: Stainless Steel Vacuum Milk Container (16B)
Too little milk in the container may cause the milk to squirt out of the nozzle. 2.7 Power switch Actuate the power switch (15) on your IMPRESSA Z5 be- fore using the machine for the first time. We recommend that you switch off your IMPRESSA Z5 with the power switch (15) if you intend not to use the machine for longer periods of time (e.g.during holidays) -
Page 10: Cup Illumination
CONFIRMED PRESS MAINTENANCE Maintenance key (C) lights up. Place a cup each under the height-adjustable coffee spout (12) and the cappuccino nozzle (4) and press the maintenance key (C). SYSTEM FILLS The system now fills up automatically. While it is doing so, the maintenance key flashes. -
Page 11: Using The Claris Plus Filter Cartridge
COFFEE READY Press the Rotary Switch (B) until you hear an acoustic signal. FILTER Turn the Rotary Switch (B) until the following message is dis- played: HARDNESS 16°dH Now press the Rotary Switch (B) to start programming. HARDNESS 16°dH Now turn the Rotary Switch until the correct water hardness is set. -
Page 12: Changing The Filter
Place a sufficiently large receptacle (min. 0.5 litres) under the cappuccino nozzle (4). We recommend attaching the short spout (4b). Press the maintenance key (C) to start rinsing the filter. FILTER RINS Filter rinsing stops automatically. UNIT IS HEATING COFFEE READY You have now activated the filter. -
Page 13: Rinsing The Machine
6. Rinsing the machine If the coffee machine is switched off and has cooled down, you will be prompted to start a rinsing cycle when switching the machine back on. The machine automatically performs a rinsing cycle when you switch it off. PRESS MAINTENANCE Place a cup under the height-adjustable coffee spout (11). -
Page 14: Cappuccino
COFFEE READY To stop the brewing process prematurely, press any of the product keys. You can pre-select the strength of your coffee when the ma- chine is ready to brew ( do so, turn the Rotary Switch (B) until the display indicates the desired coffee strength and then press the coffee key of your choice (key F for special coffee). -
Page 15: Cappuccino Cleaning Cycle
CAPPU RINSE Place a sufficiently large receptacle (ca. 0.5 litres) under the cap- puccino nozzle (4). Turn the selector switch (1, Fig. 9) to the steam range (c, Fig. 9). Press the maintenance key (C) to start the cappuccino rinsing cycle. -
Page 16: Cleaning The Cappuccino Nozzle
MACHINE IS CLEANING COFFEE READY 9.4 Cleaning the cappuccino nozzle Despite the cappuccino cleaning cycle, you should regularly disassemble the cappuccino nozzle and rinse it under running water. Remove the cappuccino nozzle from the IMPRESSA and take it apart as shown in Fig. 11. Thoroughly rinse all the parts of the nozzle under running water. -
Page 17: Brewing Coffee Using Pre-Ground Coffee Powder
You can change the amount of water set while the machine is dispensing hot water. To do so, turn the Rotary Switch (B) until the display indicates the required amount (ML). The amount of water can be selected in increments of 5 ML. The amounts given in ML are approximate values and may vary from the effective quantity. -
Page 18: Settings
Switch the IMPRESSA off with the ON / OFF switch GOODBYE The coffee spout is rinsing. RINSE LEFT SPOUT PRESS BUTTON Press the maintenance key (C) to continue rinsing. GOODBYE When switching the machine off, there may be a hissing sound. -
Page 19: Milk Setting
When the machine has dispensed as much milk as you wanted, briefly press the key once more. CONFIRMED The amount of milk to be dispensed is now programmed. ENOUGH ? PRESS BUTTON When you have made as much coffee as you wanted, briefly press the key once more. -
Page 20: Programming
15. Programming The IMPRESSA leaves the factory with a number of default settings that allow you to make coffee without having to pro- gram the machine first. You can, however, adjust various parameters to make the coffee suit your personal taste. The following parameters can be programmed: Filter Water hardness... -
Page 21: Programming The Coffe Strength
COFFEE READY Press the Rotary Switch (B) until you hear an acoustic signal. FILTER NO or YES Turn the Rotary Switch (B) until the following message is dis- played: TEMPERATURE Press the Rotary Switch (B) to start programming. TEMPERATURE COFFEE READY Then press a product key of your choice. -
Page 22: Cappuccino Programming
AROMA Now turn the Rotary Switch (B) until the following message is displayed: EXIT Now press the Rotary Switch (B) to leave the programming mode. COFFEE READY 15.6 Cappuccino programming You can also make the cappuccino settings in the program- ming mode or as described in Chapter 14.2 “Cappuccino set- ting”. -
Page 23: Save Energy
Press the Rotary Switch (B) until you hear an acoustic signal. FILTER NO or YES Turn the Rotary Switch (B) until the following message is dis- played: MILK 20 SEC (example) Now press the Rotary Switch (B) to start programming. MILK 20 SEC (example) Now turn the Rotary Switch (B) until the required amount of... -
Page 24: Setting The Time
Now press the Rotary Switch (B) to leave the programming mode. COFFEE READY Save energy: No Selecting this level puts the IMPRESSA in constant stand-by mode. This setting allows you to make coffee or frothed milk without having to wait for the machine to heat up. This setting is useful if you make a lot of coffee and milk products and want your machine to be in stand-by all the time. -
Page 25: Programming The Automatic Switch-On Time
TIME 13:50 Now turn the Rotary Switch (B) until the following message is displayed: EXIT Now press the Rotary Switch (B) to leave the programming mode. COFFEE READY 15.10 Programming the automatic switch-on time COFFEE READY Press the Rotary Switch (B) until you hear an acoustic signal. FILTER NO or YES Turn the Rotary Switch (B) until the following message is dis-... -
Page 26: Information
OFF AFTER 5 HRS Now press the Rotary Switch (B) to start programming. OFF AFTER 5 HRS Turn the Rotary Switch (B) to set the switch-off time. OFF AFTER 4 HRS (example) Confirm the automatic switch-off time by pressing the Rotary Switch (B). -
Page 27: Renaming
COFFEE READY 15.13 Renaming This function allows you to rename the different products as well as change the welcome and end text. COFFEE READY Press the Rotary Switch (B) until you hear an acoustic signal. FILTER NO or YES Turn the Rotary Switch (B) until the following message is dis- played: RENAME Now press the Rotary Switch (B) to start programming. -
Page 28: Programming The Language
15.14 Programming the language COFFEE READY Press the Rotary Switch (B) until you hear an acoustic signal. FILTER NO or YES Turn the Rotary Switch (B) until the following message is dis- played: LANGUAGE ENGLISH Now press the Rotary Switch (B) to start programming. LANGUAGE ENGLISH Turn the Rotary Switch (B) to set the language. -
Page 29: Maintenance
Now turn the Rotary Switch (B) until the following message is displayed: EXIT Now press the Rotary Switch (B) to leave the programming mode. COFFEE READY Changing the time format COFFEE READY Press the Rotary Switch (B) until you hear an acoustic signal. FILTER NO or YES Turn the Rotary Switch (B) until the following message is dis-... -
Page 30: Emptying The Coffee Gronds
The machine will still make hot water and frothed milk, however. Empty the coffee grounds container (3). On the IMPRESSA Z5 Chrome we recommend that the cup platform (2b) is removed first followed by the drip tray and the coffee grounds tray with bin. -
Page 31: Filling The Bean Tank
Insert the drip tray (3). COFFEE READY 16.6 Filling the bean tank COFFEE READY FILL BEANS If this information is displayed, the machine will no longer make coffee. The machine will still make hot water and frothed milk, however. Refill beans as described in Chapter 2.4. -
Page 32: Information About Decalcify
Lime scale builds up in the IMPRESSA as a result of normal use. The degree of calcification depends on the hardness of the water you use. The IMPRESSA Z5 recognizes when you should run a de- calcifying cycle. The machine will still make coffee, hot water and frothed milk. -
Page 33: Decalcifying
TRAY / GROUNDS EMPTY Empty the drip tray (1) and the coffee grounds tray with the con- tainer (3). TRAY MISSING Place the empty, clean drip tray (1) and the coffee grounds tray with the container (3) back into the IMPRESSA. PRESS BUTTON Place a sufficiently large receptacle (ca. - Page 34 (3). TRAY MISSING Place the empty, clean drip tray (1) and the coffee grounds tray with the container (3) back into the IMPRESSA Z5. SOLVENT IN TANK PRESS BUTTON Remove the water tank from the machine. Empty out any remaining water.
-
Page 35: Disposal
You will hear an acoustic signal. TRAY / GROUNDS EMPTY Empty the drip tray (1) and the coffee grounds tray with the container (3). TRAY MISSING Place the empty, clean drip tray (1) and the coffee grounds tray with the container (3) back into the IMPRESSA. COFFEE READY You can also trigger a decalcifying cycle manually from the maintenance menu at any point in time (see Chapter 15.3). -
Page 36: Problems
21. Problems Problem Very loud noise coming from the grinding gear Frothing spout squirts Too little froth when frothing milk Coffee only drips from the coffee spout Message: Display constantly indicates ‘Empty tray’ ‘Fill beans’ not displayed despite empty bean tank Cause Foreign body in grinding gear Milk hose not properly attached... -
Page 37: Legal Information
1 liter Length of cable: approx. 1.1 m Weight: 13.3 kg /13.8 kg (IMPRESSA Z5 Chrome) Size (WxHxD): 31 x 37 x 43.5 cm The machine complies with the following EU directives: 73/23/EWG dated 19/02/1973 "Low Voltage Directive" including Modification Directive 93/336/EWG 89/336/EWG dated 03/05/1989 "EMC Directive"...
Need help?
Do you have a question about the IMPRESSA Z5 and is the answer not in the manual?
Questions and answers
Couldn’t push the tray back into the Jura Impressa z5
The tray may not go back into the Jura Impressa Z5 because it is not properly aligned or inserted correctly. The machine requires the drip tray and coffee grounds tray to be placed correctly for it to function. Additionally, the coffee grounds tray must be outside the machine for at least 10 seconds before reinserting. If the tray is missing or not installed properly, the machine will not make coffee, hot water, or frothed milk.
This answer is automatically generated