
Related Manuals for Yeti 575 '08-'09


Summary of Contents for Yeti 575 '08-'09
- Page 1 5 7 5 O W N E R S M A N U A L ‘ 0 8 - ’ 0 9 Yeti CYCles 600 Corporate Circle, Unit D Golden, CO P//303.278.6909 // 888.576.9384 www.yeticycles.com...
-
Page 2: Table Of Contents
Table of Contents Brand Overview Frame Features Geometry Maintenance Schedule Bike Setup Overview ū Shock Setup FOX RP23 ū Shock Setup FOX DHX Air ū Quick Start Guide ū Cable Routing Assembly Overview ū Assembly ū Disassembly Tips Exploded Views Part List Warranty... -
Page 3: General Information
Overview welCOme tO the tribe Congratulations on your purchase of a new Yeti bicycle and welcome to the Yeti Tribe. We are confident your new bicycle will exceed your expectations for value, performance and ride quality. Each frameset and component has been custom specified and designed to enhance your riding experience. -
Page 4: Frame Features
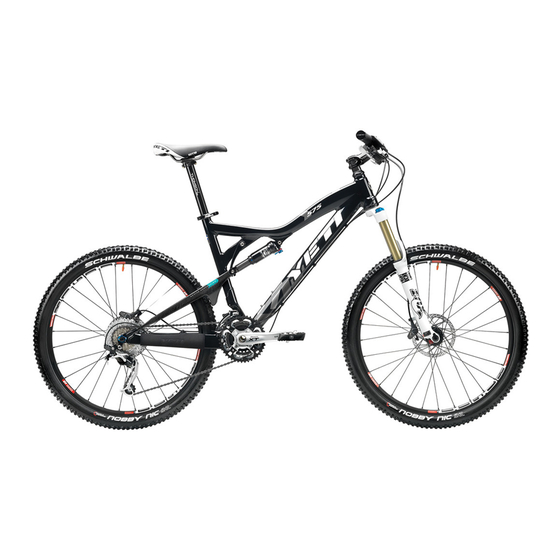
Frame Features Pure tubinG Yeti pure tubing is custom butted and tapered 7005 aluminum. This makes the frame lightweight and strong without the use of gussets. Unique shape provides added strength at the head tube junctions. bOttOm braCket 73mm shell, for use with a 113mm spindle. CarbOn rear trianGle Full carbon rear triangle with a bridge between the seatstays. -
Page 5: Geometry
Geometry Ge Ome tr Y 5 7 5 140 mm fOrk (riDe heiGht 511mm) 15.8 17.5 18.5 20.5 21.5 21.8 22.8 23.8 24.8 25.6 68.5 68.5 68.5 68.5 68.5 16.9 16.9 16.9 16.9 16.9 45.9 13.25 13.25 13.25 13.25 13.25 28.5 5.25 160 mm fOrk (riDe heiGht 545mm) -
Page 6: Maintenance Schedule
maintenanCe? Not sure how to work on your own bike? Contact your authorized Yeti dealer or visit www.parktool.com and check out the repair help section. This section contains detailed instruction on many of the service items listed in the maintenance schedule. Maintenance maintenanCe tOrque... -
Page 7: Bike Setup Overview
Bike Setup tOOls neeDeD Shock pump Tape measure 4mm allen key time 15-20 minutes Yeti tiPs Inspect your shock for any visible damage. If oil is leaking or you notice any damage to the surfaces or seals, please contact the Fox Racing Shox service center for repair at 800.FOX.SHOX. - Page 8 Setup-Fox DHX Air Setup-Fox RP23 air Pressure The main air spring controls the sag of the shock. setuP Overview The DHX 5.0 employs both speed sensitive rebound damping and positive sensitive For the 575 to ride properly it is important to setup the shock with the compression damping.
-
Page 9: Quick Start Guide
Setup-Fox DHX Air Quick Start Guide saG Once you have set your baseline air pressure you need to quiCk start GuiDe rP23 575 measure the sag. To measure the sag slide the travel indicator air sPrinG settinGs (O-Ring) up against the shock body. With a friend supporting the bike, sit Rider Weight (lbs) on the saddle (do not bounce) and allow your body weight to compress the shock. - Page 10 hOusinG enD CaPs Yeti recommends using metal end caps to maintain the integrity of the housing. The metal caps do not allow the cable to pull through as do the plastic versions. Do not mix up the shift and brake housing because it will result in a loss in performance.
-
Page 11: Assembly
It is also important to prep all bolt threads. The instructions denote whether to use a blue Loctite compound or grease. Warning: Service on Yeti bicycles requires special knowledge and tools. Yeti Cycles recommends that all service and repairs be performed by an authorized Yeti dealer. assemblY... - Page 12 threaD PreP Yeti recommends prepping all bolt threads at once on your work bench with Loctite or grease. This will ensure that all bolts are used in assembly. The medium strength (blue) Loctite formula along with proper torque is ideal to keep the bolts snug. Assembly DOGbOne anD shOCk mOuntinG assemblY Install two M4x10mm DOGbOne anD shOCk mOuntinG assemblY Align the shock and...
-
Page 13: Disassembly Tips
Assembly Cont. Disassembly Tips mOuntinG rear trianGle Prep an M6x1x12mm male Ti bolt with rear trianGle DisassemblY locktite and install into the 57.5 mm Ti stud. Place the 57.5 Ti stud Loosen the pinch bolts at the top of and Ti male bolt assembly over the male portion of the Fox guide pin. Use the seatstays. -
Page 14: Exploded Views
rebuilD kits The individual components of each Yeti bike are not sold separately. All Yeti parts are sold in rebuild kits listed below. Each and every part can be obtained by purchas- ing one of the rebuild kits. Cross reference the part number you desire from the parts lists. -
Page 15: Parts List
Parts List PART NUMBER DESCRIPTION QTy. 200020133 575 ‘08-’10 BEARING REBUILD kIT 300020032 BEARING 398 RS MAX DBL ROW 19MM X 8MM X 11MM 300020001 BEARING 6903 MAX 200020134 575 ‘08-’10 MASTER REBUILD kIT 300030191 STUD TI FEMALE 8 X 57.5MM 300030190 BOLT TI FEMALE 8 X 40.5MM M6X1 300030186... -
Page 16: Warranty
(applies to 303, 4X, DJ) Yeti Cycles will repair or replace, at its option, any frame it determines to be defective materials and / or Yeti Cycles is not responsible for any damages to you or others arising from riding, transporting or other workmanship.
Need help?
Do you have a question about the 575 '08-'09 and is the answer not in the manual?
Questions and answers