Table of Contents
Advertisement
« Instant Transmission+» is the up and coming state-of-the-art new wireless
transmission technology, exclusively designed and developed by LA
CROSSE TECHNOLOGY.
"IT +" offers you an immediate update of all your outdoor data measured
from the transmitters: follow your climatic variations in real-time!
INTRODUCTION:
Congratulations on purchasing this state-of-the-art weather station as an example of
innovative design and quality piece of engineering. Providing radio controlled time, date,
calendar, Moon phase, indoor and outdoor temperature, indoor and outdoor relative
humidity, and air pressure history information. This unit will never keep you guessing on
current and future weather conditions. Operation of this product is simple and
straightforward. By reading this operating manual, the user will receive a better
understanding of the Weather Station together with the optimum benefit of all its features.
FEATURES:
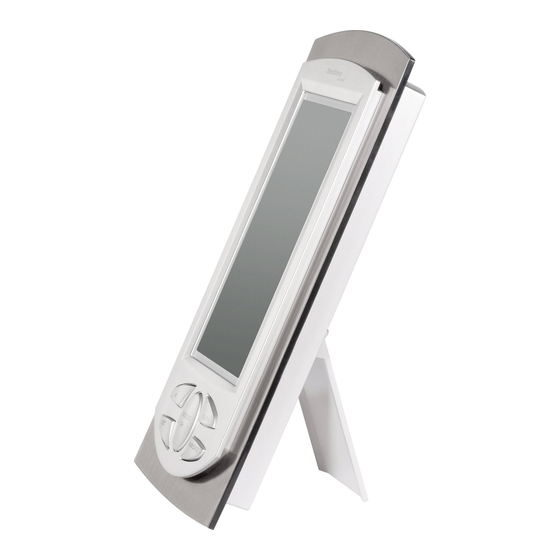
The Weather Station
LCD Display
Function keys
DCF Radio controlled time with manual setting option
•
Time reception ON/OFF (user selectable)
•
12/24 hour time display
•
Time zone option ±12 hours
•
WEATHER STATION
Instruction Manual
18
Hanging hole
Battery
compartment
Stand
Advertisement
Table of Contents

Related Manuals for Technoline WS 9032


Summary of Contents for Technoline WS 9032
-
Page 1: Weather Station
WEATHER STATION Instruction Manual « Instant Transmission+» is the up and coming state-of-the-art new wireless transmission technology, exclusively designed and developed by LA CROSSE TECHNOLOGY. “IT +” offers you an immediate update of all your outdoor data measured from the transmitters: follow your climatic variations in real-time! INTRODUCTION: Congratulations on purchasing this state-of-the-art weather station as an example of innovative design and quality piece of engineering. -
Page 2: To Install And Replace Batteries In The Weather Station
Weekday and day calendar display (year and month only in setting mode) • Alarm setting with snooze function • Display 12 Moon phases throughout the year • Weather forecasting with weather tendency indicator • Indoor comfort indicator • Temperature display in ºC/ºF •... -
Page 3: Battery Change
Note: In the event of changing batteries in any of the units, all units need to be reset by following the setting up procedures. This is due to a random security code assigned by the transmitter at start-up. This code must be received and stored by the Weather Station in the first 3 minutes of power being supplied to the transmitter. -
Page 4: Function Keys
DCF reception is done twice daily at 02:00 and 03:00 am. If the reception is not successful at 03:00 am, then the next reception takes place the next hour and so on until 06:00am, or until the reception is successful. If the reception is not successful at 06:00 am, then the next attempt will take place the next day at 02:00 am. - Page 5 Stop the alarm during alarm ringing • Stop snooze mode • Back-light on • OUT/+ key Press shortly to toggle between MAX/MIN and current outdoor temperature/humidity • data Increase, change, toggle all values in manual set mode • Press to set the alarm minute (inside alarm setting mode) •...
-
Page 6: Lcd Screen
LCD SCREEN The LCD screen is split into 4 sections displaying the information for time/calendar/alarm/moon phase, indoor data, weather forecast and outdoor data. Time reception icon Time (for DCF time) Moon phase icon Calendar or alarm time Low battery Comfort indicator icon indicator Indoor temperature Indoor relative... -
Page 7: Time Zone Setting
The LCD contrast can be set within 8 levels, from LCD 0 to LCD7 (Default setting is LCD 4): Press and hold the SET key until the digit starts flashing. Use the OUT/+ key to view all levels of contrast. Select the desired LCD contrast. -
Page 8: Calendar Setting
The hour digit will start flashing. Use the OUT/+ key to set the hour. Press again the SET key to set the minutes. The minute digits start flashing. Use the OUT/+ key to set the minutes. Confirm with the SET key and enter the Calendar setting. Note: The unit will still try and receive the signal despite it being manually set. -
Page 9: To Exit The Manual Setting Mode
Use the OUT/+ key to toggle between “hPa” or “inHg” unit Confirm with the SET key and enter the Relative air pressure value setting. Note: Units of weather icon sensitivity and air pressure history are not affected. They are always expressed in hPa. RELATIVE AIR PRESSURE VALUE SETTING The default relative pressure value is 1013 hPa (29.92 inHg). -
Page 10: Moon Phases Symbol
The alarm time can be set when pressing the ALM/DATE key. Press and hold the ALM/DATE key to enter the alarm set mode. The alarm digits flash. Use the IN key to set the alarm hour. Use the OUT/+ key to set the alarm minute. Confirm with SNOOZE/CH key and exit the Alarm setting. - Page 11 TOGGLING AND RESETTING THE INDOOR READINGS: Press the IN key to toggle between the indoor current, MAX/MIN temperature and humidity data. The time and dates of the recorded data will also be displayed in the time and calendar sections (for temperature data only). Once to show the MAX indoor temperature and humidity data with the recorded time and date.
-
Page 12: Weather Tendency Indicator
WEATHER TENDENCY INDICATOR Working together with the weather icons is the weather tendency indicators (located on the left and right sides of the weather icons). When the indicator points upwards, it means that the air-pressure is increasing and the weather is expected to improve, but when indicator points downwards, the air-pressure is dropping and the weather is expected to become worse. -
Page 13: Low Battery Indicator
Once to show the MAX outdoor temperature and humidity data with the recorded time and date. Twice to show the MIN outdoor temperature and humidity data with the recorded time and date. Three times to return to the current displayed values. Once the MIN or MAX data is displayed, press and hold the SET key for 3 seconds to reset the respective MIN or MAX record to current temperature and humidity data, and current time, date display. -
Page 14: Care And Maintenance
To wall mount: Fix a screw (not supplied) into the desired wall, leaving the head extended out by about 5mm. Place the weather station onto the screw, using the hanging hole on the backside. Gently pull the weather station down to lock the screw into place. -
Page 15: Specifications
SPECIFICATIONS: Temperature measuring range: Indoor : -9.9ºC to +59.9ºC with 0.1°C resolution 14.2ºF to 139.8ºF with 0.2ºF resolution (“OF.L” displayed if outside this range) Outdoor : -39.9ºC to +59.9ºC with 0.1°C resolution -39.8ºF to +139.8ºF with 0.2ºF resolution (“OF.L” displayed if outside this range) Indoor humidity range : 1% to 99% with 1% resolution (Display “- -“...
Need help?
Do you have a question about the WS 9032 and is the answer not in the manual?
Questions and answers