Table of Contents
Advertisement
Quick Links
Jøtul GI 425 DV
Camden Classic
Direct Vent Gas
Fireplace Insert
Installation
and
Operation
Instructions
IF THE INFORMATION IN THESE INSTRUC-
TIONS ARE NOT FOLLOWED EXACTLY, A FIRE
OR EXPLOSION MAY RESULT CAUSING PROP-
ERTY DAMAGE, PERSONAL INJURY OR LOSS
OF LIFE.
FOR YOUR SAFETY:
DO NOT STORE OR USE GASOLINE OR OTHER
FLAMMABLE VAPORS AND LIQUIDS IN THE
VICINITY OF THIS OR ANY OTHER APPLIANCE.
INSTALLATION:
INSTALLATION AND SERVICE MUST BE PER-
FORMED BY A QUALIFIED INSTALLER, SER-
VICE AGENCY OR LICENSED GAS SUPPLIER.
WHAT TO DO IF YOU SMELL GAS:
• DO NOT TRY TO LIGHT ANY APPLIANCE.
• DO NOT TOUCH ANY ELECTRICAL
SWITCHES.
• DO NOT USE THE PHONE IN YOUR
BUILDING. IMMEDIATELY CALL YOUR GAS
SUPPLIER FROM A NEIGHBOR'S PHONE.
• FOLLOW YOUR GAS SUPPLIER'S
INSTRUCTIONS.
• IF YOU CANNOT REACH YOUR GAS
SUPPLIER, CALL THE FIRE DEPARTMENT.
AVERTISSEMENT:
ASSUREZ-VOUS DE BIEN SUIVRE LES IN-
STRUCTIONS DANS CETTE NOTICE POUR
REDUIRE AU MINIMUM LE RISQUE D'INCENDIE
OU POUR EVITER TOUT DOMMAGE MATERIEL,
TOUTE BLESSURE OU MORTALIT'E.
NE PAS ENTREPOSER NI UTILISER D'ESSENCE
NI OU LIQUIDES INFLAMMABLES DANS LE
VOISINAGE DE CET APPAREIL OU DE TOUT
AUTRE APPAREIL.
L'INSTALLATION LE SERVICE DOIVENT
ETRE EXECUTES PAR UN INSTALLATEUR
QUALIFIE, AGENCE DE SERVICE OU LE
FOURNISSEUR DE GAZ.
QUE FAIRE SI VOUS SENTEZ UNE ODEUR DE
GAZ.
• NE PAS TENTER D'ALLUMER L'APPAREIL
• NE TOUCHEZ A AUCUM NTERRUPTEUR.
• NE PAS VOUS SERVIR DES TELEPHONES
SE
TROUVANT DANS LE BATIMENT OU
VOUS VOUS TROUVEZ.
• APPELEZ IMMEDIATEMENT VOTRE
FOURNISSEUR DE GAZ CHEZ UN VOISIN.
SUIVEZ LES INSTRUCTIONS DU FOURNISSEUR.
• SI VOUS NE POUVEZ REJOINDRE LE
FOURNISSEUR DE GAZ, APPELEZ LE SER-
VICE DES INCENDIES.
WARNING:
Advertisement
Table of Contents

Subscribe to Our Youtube Channel
Related Manuals for Jøtul GI 425 DV Camden Classic


Summary of Contents for Jøtul GI 425 DV Camden Classic
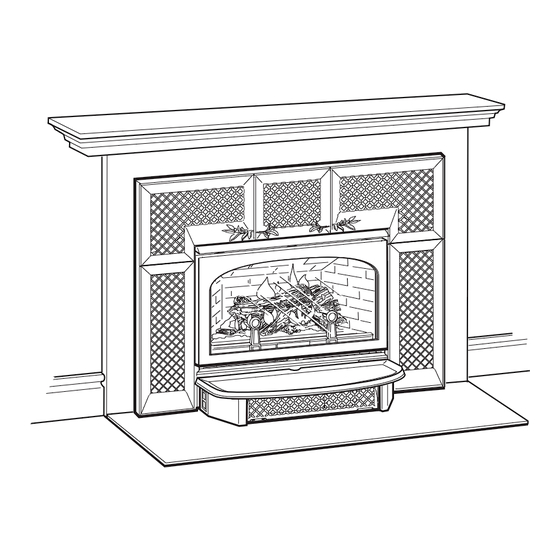
- Page 1 Jøtul GI 425 DV Camden Classic Direct Vent Gas Fireplace Insert Installation Operation Instructions WARNING: IF THE INFORMATION IN THESE INSTRUC- TIONS ARE NOT FOLLOWED EXACTLY, A FIRE OR EXPLOSION MAY RESULT CAUSING PROP- ERTY DAMAGE, PERSONAL INJURY OR LOSS OF LIFE.
- Page 2 Jøtul fireplace will provide you with many years of safe, dependable and satisfying service. The GI 425 DV Camden Classic is a direct vented gas heater designed and approved for installation into an existing masonry fireplace. Please take a...
-
Page 3: Table Of Contents
Table of Contents Specifications ... 4 Installation & Service Tools ... 4 General Information ... 5 Safety Information... 6 Installation Fireplace Requirements ... 4 Clearances ... 8 Hearth Protection ... 9 Vent Requirements ... 10 Masonry Fireplace ... 11 Prefabricated Fire ... 12 Fireplace Assembly Gas Connection ... -
Page 4: Installation Fireplace Requirements
Intertek Testing Services of Middleton, Wisconsin. In addition, the Jøtul GI 425 DV gas fireplace insert has been tested and listed as a direct vent gas fireplace heater and listed to ANSI Z21.88-1998 (NFPA 54) and CSA 2.33-M98 for Canada. -
Page 5: General Information
General Information IMPORTANT: SAVE THESE INSTRUCTIONS. THIS HEATER MUST BE INSTALLED AND MAINTAINED BY A QUALIFIED SERVICE AGENCY. DO NOT ATTEMPT TO ALTER OR MODIFY THE CONSTRUCTION OF THIS APPLIANCE OR ITS COMPONENTS. ANY MODIFICATION OR ALTERATION WILL VOID THE WARRANTY, CERTIFICATION AND LISTING OF THIS APPLIANCE. -
Page 6: Safety Information
Safety Information Due to the high operating temperatures this appliance should be located out of traffic and away from furniture, draperies, etc. Maintain proper clearance to combustible mantels and fireplace trim. Children and adults should be alerted to the hazards of high surface temperatures and should stay away to avoid burns or clothing ignition. -
Page 7: Fireplace Requirements
Exhaust Outlet Figure 1. GI 425 DV dimensions. Minimum Fireplace Requirements The GI425 DV CAMDEN gas insert has been specifically designed to be installed into a solid fuel burning factory built fireplace OR a code approved solid fuel burning masonry fireplace with a tile flue liner. An acceptable fireplace cavity must have the minimum dimensions specified below. -
Page 8: Clearance Requirements
Covering the Fireplace Opening Two cast iron surround styles are available for the GI 425 Camden fireplace insert. Standard Classic Surround The GI425 Camden includes Surround Panels that will overlap a maximum fireplace opening 39” Wide x 29 1/2” High. The actual standard surround dimensions are 40”... -
Page 9: Hearth Requirements
Mantel and Trim Clearance Figure 6. Minimum Mantel Clearances. Measure clearances from the top and sides of the fireplace cabinet before installation of the cast iron surround panels. Hearth Requirements The Jøtul GI425 Camden does not require special hearth protection. Combustible flooring materials may be present directly in front of the fireplace insert. -
Page 10: Masonry Fireplace Installation
Vent Guidelines • All vent components must be installed in accor- dance with the listing terms and manufacturer’s instructions. • Vent Height: Measured from the top of the insert to the top of the termination cap. Minimum: no less than 10' Maximum: no greater than 35'. -
Page 11: Masonry Fireplace
Venting through a Masonry Fireplace 1. Measure height of the chimney to fireplace opening. Determine if both the intake and exhaust will be extended to the top of the chim- ney. 2. Use tin snips to cut the appropriate lengths of flex for both the intake and exhaust. -
Page 12: Prefabricated Fire
Prefabricated Fireplace Installation A factory-built prefabricated fireplace will require a few modifications before installation of the Jøtul GI425 Camden fireplace insert. Modification Steps: 1. Remove any fuel grate or other components attached attached to the firebox. On most models the firegrate is attached to the unit with brackets which should be cut or pried off. - Page 13 Listed Direct Vent Termination Cap 1 2 3 4 1 2 3 4 1 2 3 4 1 2 3 4 1 2 3 4 1 2 3 4 1 2 3 4 1 2 3 4 1 2 3 4 1 2 3 4 1 2 3 4 1 2 3 4...
-
Page 14: Connecting The Gas Supply
Connecting the Gas Supply Gas Supply Requirements ALL INSTALLATIONS MUST COMPLY WITH LOCAL CODE OR IN THE ABSENCE OF LOCAL CODE, MUST COMPLY WITH THE MOST RECENT EDITION OF THE NATIONAL FUEL GAS CODE ANSI Z223.1/NFPA 54 OR CAN-B149. NOTE: INSTALL THE OPTIONAL BLOWER BEFORE PLUMBING THE GAS LINE TO THE VALVE. -
Page 15: High Altitude Adjustment
The appliance must be isolated from the gas supply line by closing its individual manual gas shutoff valve (gas cock) during any pressure testing of the gas supply piping system that is equal to or exceeds pressures of 1/2 psig (3.5 kPa). Inlet Pressure Natural Gas: 5.0 WC (1.24 kPa) Propane:... -
Page 16: Fuel Conversion
Fuel Conversion The GI425 Fireplace is designed to for use with either Natural gas or Propane. It is shipped from the factory configured to use Natural gas. A conversion kit is included for conversion to Propane use if desired. Check the identification label on the Control Valve to confirm that the correct fuel is used. - Page 17 Tighten new orifice into the base of the pilot assembly. • Replace Pilot Hood by pushing it into the base. 5. Replace the Burner Tube:. Slip the end of the tube into the Air Shutter and SLIDE TUBE TO THE RIGHT TO COMPLETELY COVER THE Pull Frame Spring Air Shutter Latch to release.
-
Page 18: Wall Thermostat
Wall Thermostat Installation Use Jøtul Thermostat #129706 or a 750 millivolt DC two-wire circuit thermostat to automatically control your fireplace operation. The thermostat should be placed in the same room as the heater, typically 5’ off the floor. Avoid drafty areas or any area that may affect the accuracy of the thermostat. -
Page 19: Antique Brick Kit
Brick Panel Assembly CAUTION: THESE PANELS ARE EXTREMELY FRAGILE! SUPPORT EACH PIECE WITH BOTH HANDS AND HANDLE TENDERLY. Install the optional Brick Panel Kit 155311 before placing the Logset. Place the panels in position in the order as numbered in Fig. 17. No fasteners or tools are required. -
Page 20: Logset Assembly
Logset Assembly This is the heart of your Jøtul GI 425 Camden fireplace. Much time and effort has been devoted to attaining a lively, realistic flame picture while simultaneously achieving efficient fuel combus- tion and effective heat output under a variety of installation conditions. -
Page 21: Surround Assembly
Plumb Adjustment Shim (2) Right Figure 24. Assemble the Surround Panels. Surround Assembly 1. Layout the parts. Place the castings face down on a protective surface such as carpeting, blankets or a sheet of cardboard. 2. Attach the Breastplates together using two M6 x 10 hex head flange bolts. -
Page 22: System Check
System Check 1. PURGING THE GAS LINE: When lighting the appliance for the first time it will take a few moments to clear the gas line of air. Once this purge is complete, the appliance will operate as described in the lighting instructions located on the fireplace’s rating plate and back cover of this manual. -
Page 23: Air Shutter Adjustment
Figure 26. Proper flame pattern. Air Shutter Adjustment 1. Open the Lower Grill panel and locate the Air Shutter adjustment stem extending down from the firebox floor. See fig. 27. 2. Loosen the wingnut and pull the stem to the forward to open the air inlet and allow more air into the burner. -
Page 24: Operation
Operation 1. Your GI425 gas fireplace can be operated manu- ally using the On/Off/T-stat rocker switch or it can be automatically controlled using an optional wall-mounted thermostat and/or remote control device. A separate switch is provided for the optional forced air blower kit. Familiarize yourself with the location and func- tion of the controls. -
Page 25: Burner Controls
Burner Control Manual Thermostatic STAT Remote Control Blower Conrol Blower Function Speed Control Figure 30a. GI425 Controls - Burner Control and Blower Switch. Blower Function The blower is controlled by a heat-activated switch (snapstat) that will ONLY function if the blower control switch is in either the HI or LOW setting. -
Page 26: Maintenance
Maintenance Your Jøtul GI425 Camden gas fireplace and its venting system should be inspected before use and at least annually by a qualified service technician. IMPORTANT: ALWAYS TURN OFF THE GAS SUPPLY TO THE FIREPLACE AND UNPLUG THE FORCED AIR BLOWER BEFORE ANY SER- VICE WORK IS PERFORMED ON THE FIRE- PLACE. - Page 27 Glass Panel or Gasket Replacement 1. Wrap the new gasketing material evenly around the edge of the glass, peeling back the protective strip to expose the adhesive as you go. Press the adhesive side down onto the glass surface. Do not stretch the gasket.
-
Page 28: Illustrated Part Breakdown
Jøtul GI 425 DV Camden Classic lllustrated Parts Breakdown... -
Page 29: Replacement Parts List
Jøtul GI 425 DV Camden Parts List Description Control Door - Matte Black Control Door - Blue Black Control Door - Jøtul Iron Ashlip - Matte Black Ashlip - Blue Black Ashlip - Jøtul Iron Fettle - Blue Black Surround Leg, Right - Matte Black Surround Leg, Right - Blue Black Surround Leg, Right - Jøtul Iron... -
Page 30: Service Log
RETAIN THIS MANUAL FOR REFERENCE AND MAKE IT AVAILABLE TO ANYONE USING OR SERVIC- ING THE FIREPLACE. MODEL NAME: Jøtul GI425 DV Camden Gas Fireplace Insert SERIAL NUMBER:__________________________ DATE OF PURCHASE:_______________________ AUTHORIZED DEALER:_____________________ NAME OF INSTALLER:______________________ TYPE OF FUEL:_____________________________ WAS FIREPLACE CON- VERTED?__________________ NOTES: SERVICE LOG:... -
Page 31: Lighting Instructions
FOR YOUR SAFETY, READ BEFORE LIGHTING. IF YOU DO NOT FOLLOW THESE INSTRUCTIONS EXACTLY, A FIRE OR EXPLOSION MAY RESULT CAUSING PROPERTY DAMAGE, PERSONAL INJURY, OR LOSS OF LIFE. A. This appliance has a pilot which must be lit by hand. When lighting the pilot, follow these instructions exactly. - Page 32 This appliance must be installed in conformance with local and national building regulations. Before beginning the installation, it is important that the these instructions be carefully read and understood. Jøtul maintains a policy of continual product development. Consequently, products may differ in specification, color or type of accessories from those illustrated or described in various publications.
Need help?
Do you have a question about the GI 425 DV Camden Classic and is the answer not in the manual?
Questions and answers