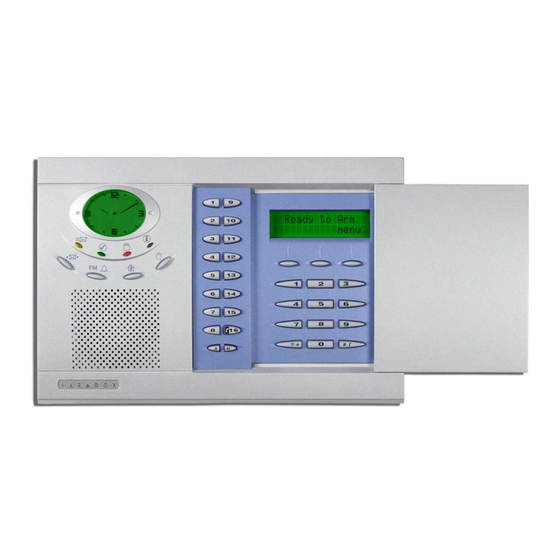
Paradox Magellan MG-6060 Reference And Installation Manual
All-in-one wireless security system v1.0
Hide thumbs
Also See for Magellan MG-6060:
- User manual (40 pages) ,
- Reference and installation manual (52 pages)

Related Manuals for Paradox Magellan MG-6060


Summary of Contents for Paradox Magellan MG-6060
- Page 1 All-In-One Wireless Security System V1.0 Model #: MG-6060 Reference and Installation Manual...
-
Page 3: Table Of Contents
Table of Contents Introduction........... 3 No Movement Auto-Arming........20 Auto-Arming Options..........20 About Magellan and this Manual......3 One-Touch Arming..........21 Conventions ............3 Exit Delay .............. 21 Specifications............3 Bell Squawk on Arm/Disarm with Remote Control 21 No Exit Delay when Arming with Remote Control. 21 Quick Setup........... - Page 4 Panel Answer Options ........... 33 Panel Identifier............33 PC Password ............33 PC Telephone Number .......... 33 Call Back Feature ..........33 Appendix 1: Ademco Contact ID Report Code List ............... 34 Index ............37 Reference & Installation Manual...
-
Page 5: Introduction
Introduction About Magellan and this Manual Specifications Magellan is designed for fast and easy installation. Simply Power input: AC*: Vac, 1A/9VA transformer or remove it from the box, mount the console and wireless 16.5Vac, 20VA transformer transmitters, apply power and Magellan is ready to protect your home. -
Page 6: Quick Setup
Quick Setup Follow these steps to quickly set up Magellan with the required For more in-depth programming of the console’s settings for a basic security installation. communication features, see Reporting and Dialer Settings on page 24. 1.Getting Started 4.Adding and Programming Zones 1. -
Page 7: Time And Date
When you are done the next menu option will appear. Press Deleting Zones NEXT ] until you see the “Passwords” menu or press the [8] key to immediately access the “Passwords” menu. 1. From the “Zone Profile” menu, press [ OK ]. 6.Passwords 1. -
Page 8: Installation
Installation Figure 2: Connecting the Backup Battery (cont’d) AC Power Slide in the battery pack horizontally, tilt the battery pack downward and then tuck it in Magellan’s battery compartment. Magellan requires a 9Vac (1A/9VA) or 16.5Vac (20VA) transformer (not included) to supply power to the console. Connect the transformer to the terminals as shown in Figure 1 on page 6. -
Page 9: Programmable Outputs
For UL compliant installations, the Magellan console must Programmable Outputs (PGMs) be able to seize the telephone line and place a call in an emergency situation. It must be able to do this even if other Magellan comes equipped with two 50mA solid-state PGM equipment (telephones, answering machines, computer outputs. -
Page 10: Hardwire Zone Connections
Figure 7: Connecting to WInLoad Hardwire Zone Connections Back view of the Magellan console. Magellan comes with two on-board hardwire zones. You can connect hardwire detection devices such as door contacts to Magellan’s zone terminals. Connect the detection devices as shown in Figure 6 on page 8. -
Page 11: X10 Transmitter Connection
X10 Transmitter Connection Location and Mounting Magellan supports the X10 communication protocol. X10 is a communication protocol for remote control of electrical devices Location such as lamps and appliances. Communication is accomplished The locations of Magellan and its wireless transmitters affect the through standard household electrical wiring using X10 overall performance of the wireless system. -
Page 12: Connecting The Radio Antenna
Figure 12: Mounting Magellan onto the Wall Plate rubber stops prevent the console from sliding when Magellan is being used. To do so: 1. Place the console back plate flush against the wall plate. 2. Slide the Magellan’s open slots labeled D (see Figure 13 on page 10) onto the wall plate’s tabs labeled B (see Figure 12 on page 10). -
Page 13: Programming Methods
Programming Methods Feature Select Programming Method WinLoad Installer Upload/Download After entering certain sections, eight options will be displayed Software where each option from [1] to [8] represents a specific feature or option. To manipulate the options: Program the Magellan console remotely or on-site using the WinLoad Installer Upload/Download Software for Windows®. -
Page 14: User Codes
User Codes A person must be assigned to a user code in order to have Maintenance Code access to Magellan. A user code defines the extent of a user’s Section [182]; Default = 111111 access to the system and consists of a code # (PIN) and user options. -
Page 15: Zone Programming
Zone Programming Magellan supports up to 16 wireless zones where each zone can Zone Definitions be configured with a different zone definition and option. Each zone can also have a voice label recorded for it. Magellan’s Sections [001] to [016] represent zones 1 through 16 zones can be programmed using section programming or respectively, where the first three digits in each of these sections through the Installer menu. -
Page 16: Follow/Stay Zones
Follow/Stay Zones Figure 18: Delayed Fire Zone Sections [001] to [016]: Zones 1 to 16, 3-digit # = 004 Follow/Stay zones function as follows: • All zones defined as Follow/Stay zones become Follow zones (refer to Follow Zones on page 13) when the Magellan system is Regular armed. -
Page 17: Zone Options
24Hr. Gas Zones When a user uses the Bypass Programming feature, only zones with the Bypass option enabled can be programmed as Sections [001] to [016]: Zones 1 to 16, 3-digit # = 012 bypassed. When a 24Hr. Gas zone opens, whether it is armed or disarmed, the console will immediately generate an alarm. -
Page 18: Zones 15 And 16 Become Hardwire Zones
Intellizone Delay Timer follows the Entry Delay 2 Timer of its assigned partition. To Section [065]: 010 to 255 seconds; Default = 48 seconds program the Entry Delay Timers, refer to Entry Delay 1 and Entry Delay 2 on page 13. Enter the desired 3-digit value into section [065] to program the Intellizone Delay Timer. -
Page 19: Wireless Programming
Wireless Programming The Magellan system supports up to 16 wireless zones and two 3. Enter the 6-digit [ ] of the MG-DCT1. SERIAL NUMBER wireless doorbells. These wireless zones are monitored using transmitters such as wireless detectors and door contacts. The Wireless Doorbell Tones Magellan console only supports the Paradox Magellan series of Section [096]: Options [1] to [4]... -
Page 20: Assigning Remote Controls
The signal strength is displayed using two terms: Table 4: Remote Control Button Programming • “Good”: This is an average reading and is acceptable. Section User Data (refer to Table 20 on page 19) • “Weak”: This is the weakest reading. The transmitter should be moved to another location. - Page 21 Figure 20: Remote Control Button Options Hexa Hexa Description Description Value Value Button disabled † Panic 1 Regular arming † Panic 2 Stay arming † Panic 3 Instant arming PGM Activation (Event Group #07 - Refer to the Magellan Programming Guide) Force arming PGM Activation (Event Group #08 - Refer to the Magellan Programming Guide) Future use...
-
Page 22: Arming And Disarming
Arming and Disarming Auto-arm Timer Regular Arming Switches to Stay Arming Section [085] Section [092]: Option [4] Program the time (use the 24-hour clock i.e. 6:30PM = 18:30) Option [4] OFF = Switch to Stay arming disabled (default) that you wish the console to attempt to arm the system and/or Option [4] ON = Switch to Stay arming enabled send the Late to Close report code. -
Page 23: One-Touch Arming
One-Touch Arming Follow Zone Switches to Entry Delay 2 Section [092]: Options [7] and [8] Section [093]: Option [7] Option [7] OFF = One-touch Regular/Force arming disabled Option [7] OFF = Follow zone triggers an alarm (default) Option [7] ON = One-touch Regular/Force arming enabled Option [7] ON = Follow zone follows Entry delay 2 when (default) opened... -
Page 24: Alarm Options
Alarm Options Bell Cut-off Timer Tamper Recognition Options Section [063]: 001 to 255 minutes; 000 = Disabled; Default = 4 Section [094]: Options [3] and [4] minutes This feature determines how the Magellan console will react to a After an audible alarm, the siren will stop upon disarming of the zone tamper. -
Page 25: Panic Alarms
presence and functionality. If a device has not sent a signal Options [4] to [6] represent the alarm types of panic alarms 1 to 3 within the specified time period, Magellan can generate a respectively. trouble, an alarm and/or transmit a report code to the central Silent Alarm: The Magellan console will emit a confirmation beep monitoring station as defined by the Wireless Transmitter and transmit the appropriate Panic report code (if programmed in... -
Page 26: Reporting And Dialer Settings
Reporting and Dialer Settings Disarming Report Codes Report Codes Sections [126] to [129] A report code is a 1- or 2-digit hexadecimal value consisting of A report code can be programmed for each of the 16 User digits from 1 to F. Each section from [120] to [156] represents a Codes. -
Page 27: Console Telephone Numbers
• Auxiliary Panic: Panic keys [4] and [6] (page 23) or the • Wireless Low Battery: The battery voltage of an Omnia appropriate button(s) on a remote control (page 18) have wireless transmitter (motion detector or contact switch) has been pressed. dropped below recommended limits. -
Page 28: Console Account Number
section [114]. If the message is less than 32 digits, press the Table 8: Special Keys for Telephone Numbers left [ ACTION ] key (ok) to save the message. Keys to press Action or Value Voice Message Telephone Numbers The Magellan console will use the Voice Message telephone numbers (which are programmed in the Installer menu. -
Page 29: Reporting Formats
[0] key followed by the 3-digit account number. Also, when using Please refer to Appendix 1: Ademco Contact ID Report 3-digit account numbers, you must use 1-digit report codes. Code List on page 34 for a complete list of the format’s pre-defined industry standard messages and report codes. -
Page 30: Delay Between Dialing Attempts
communication. When the console switches to another CSTN, it Delay Between Dialing Attempts returns to tone/DTMF dialing and will once again switch to pulse Section [076]: 001 to 255 seconds; 000 = disabled; Default = 20 dialing on the fifth attempt. seconds This delay determines the amount of time the Magellan console will wait between each dialing attempt. -
Page 31: Auto-Test Report
Auto-Test Report Section [071]: 001 to 255 days; 000 = Disabled; Default = Disabled Section [084]: Time (HH:MM) The Magellan console will transmit the Test Report report code programmed into section [153] after the number of days programmed into section [071] has elapsed at the time programmed into section [084]. -
Page 32: Programmable Outputs
Programmable Outputs A PGM is a programmable output that toggles to its opposite PGM Delay state (i.e. a normally open PGM will close) when a specific event Section [068] = PGM1, Section [069] = PGM2 has occurred in the system. For example, a PGM can be used to 001 to 255 seconds;... -
Page 33: System Settings
System Settings Software Reset Daylight Savings Time Section [201] Section [096]: Option [5] Option [5] OFF = Daylight savings time disabled (default) Performing a software reset will reset all programmed sections Option [5] ON = Daylight savings time enabled back to the factory defaults. To perform a software reset: With section [096] option [5] ON, Magellan adjusts the system’s Access the installer programming mode (page 11). - Page 34 Trouble Description AC Failure Power failure detected. The system is running on the backup battery pack. Supervision Trouble Zone(s) displayed have not sent a check-in signal within the programmed interval (page 22). Console Tamper The Magellan console was tampered with. Zone Tamper Zones displayed were tampered with.
-
Page 35: Winload Software Settings
WinLoad Software Settings Panel Answer Options PC Telephone Number Section [118] The following two options define how Magellan answers an incoming call from a computer using the WinLoad Installer Magellan will dial the number programmed in section [118] when Upload/Download Software. trying to initiate communication with a computer using WinLoad. -
Page 36: Appendix 1: Ademco Contact Id Report Code List
Appendix 1: Ademco Contact ID Report Code List CID# Reporting Code Programming CID# Reporting Code Programming Value Value Water leakage Medical Alarms - 100 Foil break Medical alarm Day trouble Pendant transmitter Low bottled gas level Fail to report in High temperature Fire Alarms - 110 Low temperature... - Page 37 CID# Reporting Code Programming CID# Reporting Code Programming Value Value Local printer paper out Quick arm Local printer failure Keyswitch open/close Expansion module DC loss Remote Access - 410 Expansion module low battery Call back request made Expansion module reset Success - download access Expansion module tamper Unsuccessful access...
- Page 38 CID# Reporting Code Programming Value Reversing relay disabled Notification appliance chk. #3 disabled Notification appliance chk. #4 disabled Modules - 530 Module added Module removed Communication Disables - 550 and 560 Dialer disabled Radio transmitter disabled Bypasses - 570 Zone bypass Fire bypass 24Hr.
-
Page 39: Index
Index Numerics 118 ................33 119 ................26 001 to 016 .............. 13 – 120 to 123 ..............24 021 to 036 ..............17 124 ................20 041 to 056 ..............18 125 ................24 058 ................17 126 to 129 ..............24 059 ................17 130 ................ - Page 40 Answering machine override .........33 Console tamper supervision ..........31 Arming options Console telephone numbers .........25 ............20 Auto-arm options Contact ID ..............27 ..21 Bell Squawk on Arm/Disarm with Remote Control Cut-off, Bell ..............22 .........21 Closing Delinquency Timer ..............21 Exit delay ..........21 Exit Delay Termination Date entry, single digit ...........11 ......21 Follow Zone switches to Entry Delay 2...
- Page 41 Entry Delay 1 ..............13 Options, zone .............. 15 Entry Delay 2 ..............13 Alarm types ..........15 Auto-zone Shutdown EOL zones ..............16 ............15 Bypass option Event .... 16 Delay before Alarm Report Code Transmission ............30 PGM activation ............. 16 Force Zones ............30 PGM deactivation ..............
- Page 42 ............24 Special disarming System master code lock ..........12 ............25 System trouble System master code reset ..........12 ..........25 System trouble restore System settings .................29 Test ..........31 AC power failure warning ...............24 Zone alarm ........31 Console audible trouble warning ............24 Zone alarm restore ........31 Console tamper supervision .............25...
- Page 43 Zone tamper restore report codes ........ 25 Zone, hardwire ..............8 Viewing ................17 Viewing transmitter signal strength .......17 Voice message repetitions ..........26 Voice message telephone numbers ......26 Wall plate .................9 WinLoad ................11 WinLoad settings ............33 Call back feature ..........33 Panel answer options ............33 Panel identifier .............33...
- Page 44 Reference & Installation Manual...
- Page 45 WARRANTY that temporary disconnection of service may be required; however, where prior notice is not practicable, the telephone company may Paradox Security Systems Ltd. (“Seller”) warrants its products to be free temporarily discontinue service if action is deemed reasonable in from defects in materials and workmanship under normal use for a circumstances.
- Page 48 780 Industriel Blvd., Saint-Eustache (Quebec) J7R 5V3 CANADA Tel.: (450) 491-7444 Fax: (450) 491-7313 www.paradox.ca Printed in Canada - 09/2004 MAGELLAN-EI01...
Need help?
Do you have a question about the Magellan MG-6060 and is the answer not in the manual?
Questions and answers