Table of Contents
Advertisement
Advertisement
Table of Contents

Related Manuals for John Lewis JLDWW 905


Summary of Contents for John Lewis JLDWW 905
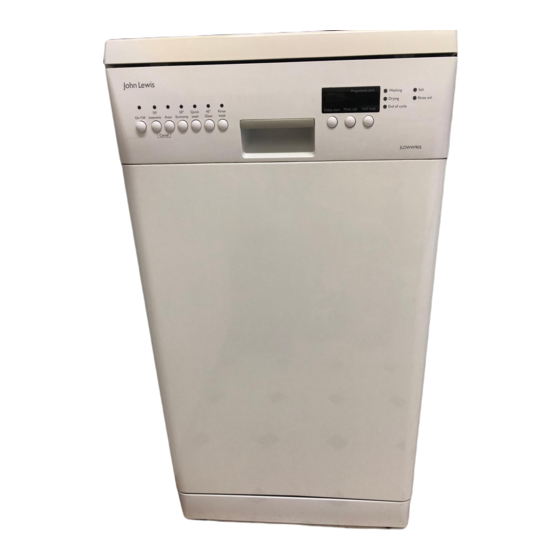
- Page 1 JLDWW 905 compact dishwasher Instruction manual...
-
Page 2: Important Safety Information
These warnings have been provided in the interest of your safety.You MUST read them carefully before installing or using the appliance. If you are unsure of the meanings of these warnings contact the John Lewis branch from which you purchased the appliance Installation This appliance is heavy. -
Page 3: Maintenance And Cleaning
Ensure that the door of the dishwasher is always closed when it is not being loaded or unloaded. In this way you will avoid anybody tripping over the open door and hurting themselves. Do not sit or stand on the open door. -
Page 4: Table Of Contents
Service Ecological hints Environmental information Contents Description of the Appliance The Control Panel When the Dishwasher is first installed The water softener Dishwasher salt and replenishment Rinse aid and replenishment Using the dishwasher Loading cutlery and dishes The lower basket... -
Page 5: Description Of The Appliance
Description of the Appliance 1. Upper basket stop 2. Water hardness dial 3. Salt container 4. Detergent dispenser 5. Control panel 6. Rating plate 7. Rinse aid dispenser 8. Filters 9. Lower spray arm 10. Upper spray arm 11. Upper basket 12. -
Page 6: Installation
Height with worktop Height without worktop Max depth Max depth with open door Information on the electrical connection is given on the rating plate on the inner edge of the dishwasher’s door. Minimum Maximum 45 cm 85 cm 82 cm 61 cm 118.5 cm... -
Page 7: Unpacking
The water inlet hose must not be kinked, crushed, or entangled when it is being connected up. The dishwasher features fill and drain hoses which can be turned either to the left or the right to suit the installation by means of the locknut. -
Page 8: Fitting Under A Counter
Be sure that once the appliance has been installed, it is easily accessible for the service engineer in the event that a repair is required. If the dishwasher is later used as a free-standing appliance, the original worktop must be re-mounted. The plinth on free-standing appliances is not adjustable. -
Page 9: Electrical Connection
Before switching on, make sure the electricity supply voltage is the same as that indicated on the appliance’s rating plate.The rating plate is located on the side of the dishwasher’s door. The plug moulded onto the lead incorporates a 13amp BSI362 fuse. -
Page 10: The Control Panel
- the end of the programme (a zero will appear in the digital display), - the countdown of the delay start, - fault codes concerning malfunction of the dishwasher. 6. Programme time indicator light Illuminates with a back light when a washing programme has been set and remains illuminated until the appliance is switched off. -
Page 11: Multi Tab Button
4. To change the setting, press function button 2 again, the digital display indicates the new setting. 5. To memorise the operation, switch off the dishwasher by pressing the On/Off button. 11. Half load button This option is useful and economical when only a small load needs washing reducing the consumption of water and energy. -
Page 12: When The Dishwasher Is First Installed
"Different kinds of detergents". The water softener The dishwasher is equipped with a water softener designed to remove minerals and salts from the water supply, which would have a detrimental or adverse effect on the operation of the appliance. -
Page 13: Dishwasher Salt And Replenishment
6 is selected. if the current level is 10, by pressing function button 1 once, level 1 is selected. 5. To memorise the operation, switch off the dishwasher by pressing the On/Off button. Filling with dishwasher salt Only use salt specifically designed for use in dishwashers. -
Page 14: Adjusting The Dose
Only use branded rinse aid for dishwashers, available also from your local John Lewis store. Never fill the rinse aid dispenser with any other substances (e.g. dishwasher cleaning agent, liquid detergent).This would damage the appliance. -
Page 15: Using The Dishwasher
- Only wash stoneware in the dishwasher if it is specifically marked as being dishwasher-safe by the manufacturer. - Glazed patterns may fade if machine washed frequently - Silver and aluminium parts have a tendency to discolour during washing. -
Page 16: The Lower Basket
Open the door and slide out the baskets to load the dishes. The lower basket The lower basket is designed to take saucepans, lids, plates, salad bowls, cutlery etc. Serving dishes and large lids should be arranged around the edge of the basket, ensuring that the spray arms can turn freely. -
Page 17: The Upper Basket
The upper basket The upper basket is designed for plates (dessert plates, saucers, dinner plates of up to 24 cm in diameter), salad bowls, cups and glasses. Arrange items on and underneath the cup racks so that water can reach all surfaces. -
Page 18: Use Of Detergent
Use of detergent Only use detergents specifically designed for use in dishwashers. Please observe the manufacturer’s dosing and storage recommendations as stated on the detergent packaging. Using no more than the correct amount of detergent contributes to reducing pollution. Fill with detergent 1. -
Page 19: Different Kinds Of Detergent
Different kinds of detergent Concentrated detergent Modern detergents for dishwashers are almost exclusively low- alkaline concentrated detergents with natural enzymes in tablet form. Using 50°C washing programmes in conjunction with these concentrated detergents reduces pollution and is good for your dishes, as these washing programmes are specially matched to the dirt-dissolving properties of the enzymes in concentrated detergents. -
Page 20: Washing Programmes
Rinse completed later in the hold day or when the dishwasher is full). (1) "Auto" washing programme During the "Auto" washing programme the amount of soil on the dishes is determined by how cloudy the water is. If the appliance is partially loaded and the dishes lightly soiled, the "prewash", "main wash", and "rinse"... -
Page 21: Starting A Washing Programme
Open the door carefully. Interrupt a washing programme in progress a) Open the dishwasher door; the programme will stop. Close the door; the programme will start from the point at which it was interrupted. b) Press the On/Off button, in this case all the indicator lights turn off. -
Page 22: End Of The Washing Programme
Switch off the dishwasher by pressing the On/Off button. Open the dishwasher’s door, leave it ajar and wait a few minutes before removing the dishes; in this way they will be cooler and the drying will be improved. -
Page 23: Maintenance And Cleaning
1. Open the door, remove the lower basket. 2. The dishwasher filter system comprises a coarse filter (A), a microfilter (B) and a flat filter (C). Unlock the filter system using the handle on the microfilter, and remove. -
Page 24: Something Not Working
Something Not Working If the dishwasher is not working correctly, please carry out the following checks, before contacting your local Service Force agent. Important! If you call out an engineer to a fault listed below, or to repair a fault caused by incorrect use or installation, a charge will be made even if the appliance is under guarantee. -
Page 25: Repairs - After Sales Service
S.N. : ..........Your dishwasher is covered by a 3 year parts and labour guarantee (see separate details given at point of sale). - Page 28 John Lewis Partnership 171 Victoria Street London SW1E 5NN www.johnlewis.com 152951 89/0 03/06...
Need help?
Do you have a question about the JLDWW 905 and is the answer not in the manual?
Questions and answers