Table of Contents
Advertisement
Advertisement
Table of Contents

Related Manuals for John Lewis JLDWS1229


Summary of Contents for John Lewis JLDWS1229
- Page 1 Dishwasher JLDWW1223 JLDWS1229 User Manual...
-
Page 2: Table Of Contents
Contents Loading cutlery and dishes Safety information Using the detergent General Safety Setting and starting a programme Children and vulnerable people safety Hints and tips Safety instructions General Installation Using salt, rinse aid and detergent Electrical connection What to do if you want to stop using multi- Water connection tablets Loading the baskets... -
Page 3: Safety Information
Safety information Before the installation and use of the appliance, carefully read the supplied instructions. The manufacturer is not responsible if an incorrect installation and use causes injuries and damages. Always keep the instructions with the appliance for future reference. General Safety This appliance is intended to be used in household and similar •... -
Page 4: Children And Vulnerable People Safety
The appliance is to be connected to the water mains using the new • supplied hose-sets. Old hose sets must not be reused. Children and vulnerable people safety This appliance can be used by children aged from 8 years and above •... -
Page 5: Safety Instructions
Safety instructions Installation Water connection • Remove all the packaging. • Make sure not to cause damage to the water • Do not install or use a damaged appliance. hoses. • Do not install or use the appliance where the •... -
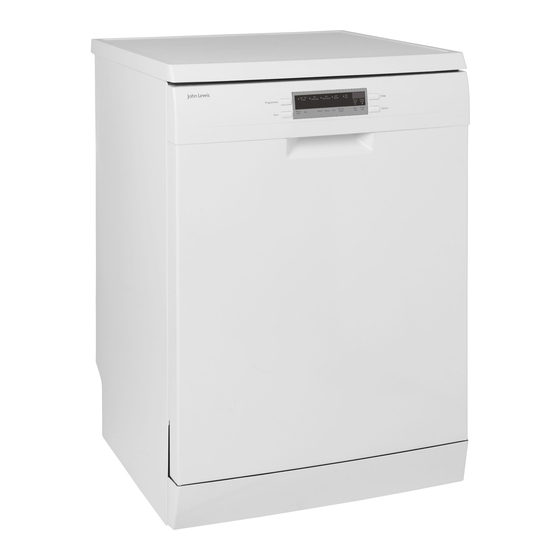
Page 6: Product Description
Product description 1. Worktop 2. Top spray arm 3. Upper spray arm 4. Lower spray arm 5. Filters 6. Rating plate 7. Salt container 8. Air vent 9. Rinse aid dispenser 10. Detergent dispenser 11. Upper basket 12. Cutlery drawer Dishwasher User Manual... -
Page 7: Control Panel
Control panel 1. On/off button 6. Option button 2. Programmes button 7. Indicators 3. Programme indicators 8. Start button 4. Display 5. Delay button Indicators Indicator Description Wash Washing phase. It comes on when the washing phase operates. Rinse Rinsing phase. It comes on when the rinsing phase operates. Drying phase. - Page 8 Indicator Description Sanitize Sanitize indicator. Dishwasher User Manual...
-
Page 9: Programmes
Programmes Programme Degree of soil Programme phases Options Type of load • Normal soil • Prewash • Sanitize 50° Eco • Crockery and cutlery • Wash 50 °C • Time save • Rinses • Multi tab • Dry • All •... -
Page 10: Consumption Values
Consumption values Water Energy Duration Programme (kWh) (min) 50° Eco 1.082 45°-70° Auto 7 - 14 0.6 - 1.4 40 - 150 70° Intensive 12.5 - 14.5 1.4 - 1.6 154 - 164 45° Glass 12 - 14 0.7 - 0.9 75 - 85 60°... -
Page 11: Settings
Settings When you activate the appliance, usually it is in Programme selection mode programme selection mode. However, if this and user mode does not happen, you can set the programme selection mode in the following way: When the appliance is in programme selection Press and hold simultaneously Delay and Option mode it is possible to set a programme and to until the appliance is in programme selection mode. -
Page 12: The Rinse Aid Dispenser
German degrees French degrees mmol/l Clarke de- Water softener level (°dH) (°fH) grees 15 - 18 26 - 32 2.6 - 3.2 18 - 22 11 - 14 19 - 25 1.9 - 2.5 13 - 17 4 - 10 7 - 18 0.7 - 1.8 5 - 12... - Page 13 The use of the option Multi tab with the rinse aid dispenser deactivated may not give satisfying drying results. When the rinse aid dispenser is deactivated, the rinse aid indicator is always off when the option Multi tab is activated. How to deactivate the rinse aid dispenser The appliance must be in programme selection mode.
-
Page 14: Options
Options Options Time save This option increases the pressure and the Desired options must be activated temperature of the water. The washing and the every time before you start a drying phases are shorter. programme. It is not possible to activate or deactivate options while The total programme duration decreases by a programme is running. -
Page 15: Before First Use
Before first use 1. Make sure that the current level of the water softener agrees with the hardness of the water supply. If not, adjust the level of the water softener. 2. Fill the salt container. 3. Fill the rinse aid dispenser. 4. -
Page 16: How To Fill The Rinse Aid Dispenser
How to fill the rinse aid dispenser Caution! Only use rinse aid specifically designed for dishwashers. 1. Open the lid (C). 2. Fill the dispenser (B) until the rinse aid reaches the marking ''MAX''. 3. Remove the spilled rinse aid with an absorbent cloth to prevent too much foam. -
Page 17: Daily Use
Daily use 1. Open the water tap. 2. Press the on/off button to activate the appliance. Make sure that the appliance is in programme selection mode. • If the salt indicator is on, fill the salt container. • If the rinse aid indicator is on, fill the rinse aid dispenser. - Page 18 The cutlery drawer Warning! Knives with long blades are a potential hazard. Take care when loading or unloading sharp items such as knives. The upper basket Arrange items on and underneath the cup racks so that water can reach all surfaces. Dishwasher User Manual...
- Page 19 Adjusting the height of the upper basket Caution! Never lift or lower the basket on one side only. To load large plates move the upper basket to the higher position Moving the upper basket to the higher position 1. Pull out the basket until it stops. 2.
-
Page 20: Using The Detergent
Caution! Only use detergent specifically designed for dishwashers. 1. Press the release button (A) to open the lid (C). 2. Put the detergent, in powder or tablets, in the compartment (B). 3. If the programme has a prewash phase, put a small quantity of detergent on the inner part of the appliance door. -
Page 21: Cancelling The Programme
Starting a programme with delay start If you open the door before the activation of Auto Off, the appliance is automatically 1. Set a programme. deactivated. 2. Press Delay again and again until the display 2. Close the water tap. shows the delay time you want to set (from 1 to 24 hours). -
Page 22: Hints And Tips
Hints and tips aid and salt separately for optimal cleaning and General drying results. • If you use multi-tablets you can select the Multi The following hints will ensure optimal cleaning tab option (if available). This option increases and drying results in daily use and also help to the cleaning and drying results with the use of protect the environment. -
Page 23: Before Starting A Programme
• Make soft the remaining burned food on the items. • Put hollow items (cups, glasses and pans) with the opening down. • Make sure that glasses do not touch other glasses. • Put cutlery and small items in the cutlery drawer. -
Page 24: Care And Cleaning
Care and cleaning Warning! Before maintenance, deactivate the appliance and disconnect the mains plug from the main socket. Dirty filters and clogged spay arms decrease the washing results. Make a check regularly and, if necessary, clean them. Cleaning the filters The filter system is made of 3 parts. -
Page 25: Cleaning The Spray Arms
Caution! An incorrect position of the filters can cause bad washing results and damage to the appliance. Cleaning the spray arms Do not remove the spray arms. If the holes in the spray arms are clogged, remove remaining parts of soil with a thin pointed object. External cleaning •... -
Page 26: Troubleshooting
Troubleshooting If the appliance does not start or it stops during With some problems, the display shows operation. Before you contact an Authorised an alarm code. Service Centre, check if you can solve the problem by yourself with the help of the information in the table. -
Page 27: The Washing And Drying Results Are Not Satisfactory
The washing and drying results are not satisfactory Problem Possible solution There are whitish streaks or bluish • The release quantity of rinse aid is too much. Adjust the rinse aid layers on glasses and dishes. selector to a lower position. •... -
Page 28: Technical Information
Technical information Dimensions Width / height / depth (mm) 596 / 850 / 610 Voltage (V) 220 - 240 Electrical connection Frequency (Hz) Water supply pressure Min. / max. bar (MPa) 0.5 (0.05) / 8 (0.8) Water supply max 60 °C Cold water or hot water Capacity Place settings... -
Page 29: Installation
A plastic top cover can be purchased, 820 mm contact your local John Lewis branch. Be sure that once the appliance has been installed, it is easily accessible 600 mm for the service engineer in the event that a repair is required. -
Page 30: Levelling Of The Appliance
If the appliance is later used as a freestanding appliance, the original worktop must be reassembled. Levelling of the appliance Good levelling is essential for correct closure and sealing of the appliance door. When the appliance is correctly levelled, the door will not catch on either side of the cabinet. -
Page 31: Water Connection
Water connection Water inlet connection • This appliance may be fed with either hot (maximum 60 °C) or cold water. Nevertheless we advise you use a cold water supply. A hot water supply is not always efficient with heavily max. 850 mm soiled crockery as it shortens the washing programmes a lot. - Page 32 When connecting the drain hose to an under sink trap spigot, the entire plastic membrane (A) must be removed. Failure to remove all the membrane will result in food particles building up over time eventually blocking the appliance drain hose spigot. Dishwasher User Manual...
-
Page 33: Repairs - After Sales Service
John Lewis, Oxford Street 020 7629 7711 information contained within this instruction Peter Jones, Sloane Square 020 7730 3434 manual, the next step is to contact John Lewis technical support on: John Lewis, Brent Cross 020 8202 6535 0844 871 7771... - Page 34 John Lewis electrical appliances are also available in Waitrose Food and Home John Lewis, Stratford (Opening 2011) Canary Wharf 020 7719 0300 John Lewis at home, Swindon 01793 733180 Cheltenham 01242 241425 John Lewis, Trafford 0161 491 4040 Rushden 01933 355099...
-
Page 35: Environmental Concerns
ENVIRONMENTAL CONCERNS Recycle the materials with the symbol . Put the packaging in applicable containers to recycle it. Help protect the environment and human health and to recycle waste of electrical and electronic appliances. Do not dispose appliances marked with the symbol with the household waste. - Page 36 117899661-A-212014 ( Subject to change without notice. )
Need help?
Do you have a question about the JLDWS1229 and is the answer not in the manual?
Questions and answers