Table of Contents
Advertisement
Advertisement
Table of Contents

Related Manuals for John Lewis JLDWS1328


Summary of Contents for John Lewis JLDWS1328
- Page 1 Dishwasher JLDWS1328 User Manual...
-
Page 2: Table Of Contents
Contents Using the detergent Safety information Setting and starting a programme Children and vulnerable people safety Hints and tips General Safety General Safety instructions Using salt, rinse aid and detergent Installation What to do if you want to stop using multi- Electrical connection tablets Water connection... -
Page 3: Safety Information
Safety information Before the installation and use of the appliance, carefully read the supplied instructions. The manufacturer is not responsible for any injuries or damages that are the result of incorrect installation or usage. Always keep the instructions in a safe and accessible location for future reference. - Page 4 Obey the maximum number of 13 place settings. • If the supply cord is damaged, it must be replaced by the • manufacturer, its Authorised Service Centre or similarly qualified persons in order to avoid a hazard. Put the cutlery in the cutlery basket with the sharp ends pointing •...
-
Page 5: Safety Instructions
Safety instructions • UK and Ireland only. This appliance is fitted with Installation a 13 A mains plug. If it is necessary to change the mains plug fuse, use only a 13 A ASTA (BS Warning! Only a qualified 1362) fuse. person must install this appliance. -
Page 6: Disposal
• When you contact the Authorised Service Centre, ensure that you have the following information that is available on the rating plate. Model : PNC : Serial Number : Disposal Warning! Risk of injury or suffocation. • Disconnect the appliance from the mains supply. -
Page 7: Product Description
Product description 1. Worktop 7. Air vent 2. Upper spray arm 8. Rinse aid dispenser 3. Lower spray arm 9. Detergent dispenser 4. Filters 10. Upper basket 5. Rating plate 6. Salt container Dishwasher User Manual... -
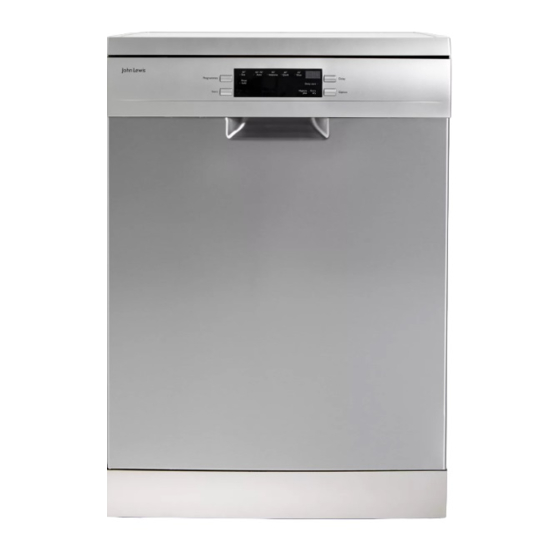
Page 8: Control Panel
Control panel 1. On/off button 6. Option button 2. Programmes button 7. Indicators 3. Programme indicators 8. Start button 4. Display 5. Delay button Indicators Indicator Description Wash Washing phase. It comes on when the washing phase operates. Drying phase. It comes on when the drying phase operates. Extra dry Extra dry indicator. - Page 9 Indicator Description Hygiene plus Hygiene plus indicator. Dishwasher User Manual...
-
Page 10: Programmes
Programmes Programme Degree of soil Programme phases Options Type of load • Normal soil • Pre-wash • Hygiene plus • Crockery and cutlery • Wash 50 °C • Extra dry • Rinses • Dry • All • Pre-wash • Hygiene plus Auto •... -
Page 11: Information For Test Institutes
Water Energy Duration Programme (kWh) (min) Auto 7 - 12 0.7 - 1.5 45 - 160 Intensive 13-15 1.4 - 1.6 140 - 160 Quick Glass 13 - 14 0.9 - 1.1 70 - 85 Rinse hold 1) The pressure and the temperature of the water, the variations of the mains supply, the options and the quantity of dishes can change the values. -
Page 12: Settings
Settings How to enter user mode Programme selection mode Make sure the appliance is in programme and user mode selection mode. When the appliance is in programme selection To enter the user mode, press and hold mode it is possible to set a programme and to simultaneously Delay and Option until the indicators Eco, Auto and Intensive start flashing and enter the user mode. -
Page 13: The Rinse Aid Empty Notification
German degrees French degrees mmol/l Clarke de- Water softener level (°dH) (°fH) grees 23 - 28 40 - 50 4.0 - 5.0 28 - 35 19 - 22 33 - 39 3.3 - 3.9 23 - 27 15 - 18 26 - 32 2.6 - 3.2 18 - 22... - Page 14 During the drying phase, the door opens automatically and remains ajar. Caution! Do not try to close the appliance door within 2 minutes after automatic opening. This can cause damage to the appliance. AirDry is automatically activated with all programmes excluding Rinse hold. To improve the drying performance refer to the Extra dry option or activate AirDry.
-
Page 15: Options
Options Options Hygiene plus This option provides better hygiene results by Desired options must be activated keeping the temperature at 70 °C for at least 10 every time before you start a minutes during the last rinsing phase. programme. It is not possible to activate or How to activate Hygiene plus deactivate options while a Press Option until the indicator Hygiene plus turns... -
Page 16: Before First Use
Before first use 1. Make sure that the current level of the water softener agrees with the hardness of the water supply. If not, adjust the level of the water softener. 2. Fill the salt container. 3. Fill the rinse aid dispenser. 4. -
Page 17: Filling With Rinse Aid
Filling with rinse aid Caution! Use branded rinse aid for dishwashers only. Never fill the rinse aid dispenser with any other substances (e.g. dishwasher cleaning agent, liquid detergent). This would damage the appliance. Rinse aid ensures thorough rinsing, and spot and streak free drying. Rinse aid is automatically added during the last rinse. -
Page 18: Daily Use
Daily use 1. Open the water tap. 2. Press the on/off button to activate the appliance. Make sure that the appliance is in programme selection mode. • If the salt indicator is on, fill the salt container. • If the rinse aid indicator is on, fill the rinse aid dispenser. - Page 19 The cutlery basket Warning! Knives with long blades, stored in an upright position, are a potential hazard. Long and/or sharp items of cutlery such as carving knives must be positioned horizontally in the upper basket. Take care when loading or unloading sharp items such as knives.
- Page 20 Caution! Ensure that the spray arms can rotate freely before you close the appliance door. Adjusting the height of the upper basket Caution! Never lift or lower the basket on one side only. To load very large plates move the upper basket to the higher position.
-
Page 21: Using The Detergent
24 cm 27 cm Moving back the upper basket to the lower position 1. Pull out the basket until it stops. 2. Carefully lift both sides upwards and then allow the mechanism to drop back down slowly, keeping hold of it. 20 cm Using the detergent 31 cm... -
Page 22: Setting And Starting A Programme
Setting and starting a consumption and the programme duration. After closing the door, the appliance continues programme from the point of interruption. If the door is opened for more than The Auto Off function 30 seconds during the drying This function decreases energy consumption by phase, the running programme deactivating automatically the appliance when it ends. -
Page 23: Hints And Tips
Hints and tips • Detergent tablets do not fully dissolve with General short programmes. To prevent detergent residues on the tableware, we recommend that The following hints will ensure optimal cleaning you use the tablets with long programmes. and drying results in daily use and also help to •... -
Page 24: Before Starting A Programme
• Make sure that glasses do not touch other glasses. • Put small items in the cutlery basket. • Put light items in the upper basket. Make sure that the items do not move. • Make sure that the spray arm can move freely before you start a programme. -
Page 25: Care And Cleaning
Care and cleaning Warning! Before maintenance, deactivate the appliance and disconnect the mains plug from the main socket. Dirty filters and clogged spray arms decrease the washing results. Make 2. Remove the filter (C) out of filter (B). a check regularly and, if necessary, 3. -
Page 26: Cleaning The Spray Arms
Internal cleaning • Carefully clean the appliance, including the rubber gasket of the door, with a soft damp cloth. • If you regularly use short duration programmes, these can leave deposits of grease and limescale inside the appliance. To prevent this, we recommend to run long duration programmes at least 2 times per month. -
Page 27: Troubleshooting
Troubleshooting If the appliance does not start or it stops during With some problems, the display shows operation. Before you contact an Authorised an alarm code. Service Centre, check if you can solve the The majority of problems that can occur problem by yourself with the help of the can be solved without the need to information in the table. -
Page 28: The Washing And Drying Results Are Not Satisfactory
Problem and alarm code Possible cause and solution The appliance stops and starts • It is normal. It provides optimal cleaning results and energy savings. more times during operation. The programme lasts too long. • If the delayed start option is set, cancel the delay setting or wait for the end of the countdown. - Page 29 The washing and drying results are not satisfactory Poor drying results. • Tableware has been left for too long inside the closed appliance. • There is no rinse aid or the dosage of rinse aid is not enough. Set the rinse aid dispenser to a higher level. •...
- Page 30 The washing and drying results are not satisfactory Dull, discoloured or chipped table- • Make sure that only dishwasher-safe items are washed in the appli- ware. ance. • Load and unload the basket carefully. Refer to "Loading cutlery and dishes". •...
-
Page 31: Technical Information
Technical information Dimensions Width / height / depth (mm) 600 / 850 / 625 Voltage (V) 220 - 240 Electrical connection Frequency (Hz) Water supply pressure Min. / max. bar (MPa) 0.5 (0.05) / 8 (0.8) Water supply max 60 °C Cold water or hot water Capacity Place settings... -
Page 32: Installation
Installation Warning! 570-600 mm • It is dangerous to alter the specifications or attempt to modify the appliance in any way. • This appliance is heavy. Care 820 mm should be taken when moving it. • Care must be taken to ensure that the appliance does not stand on the electrical supply cable. -
Page 33: Levelling Of The Appliance
A plastic top cover can be purchased, contact your local John Lewis branch. Levelling of the appliance Good levelling is essential for correct closure and sealing of the appliance door. When the appliance is correctly levelled, the door will not catch on either side of the cabinet. -
Page 34: Water Connection
Water connection Water inlet connection • This appliance may be fed with either hot (maximum 60 °C) or cold water. Nevertheless we advise you use a cold water supply. A hot water supply is not always efficient with heavily max. 850 mm soiled crockery as it shortens the washing programmes a lot. - Page 35 When connecting the drain hose to an under sink trap spigot, the entire plastic membrane (A) must be removed. Failure to remove all the membrane will result in food particles building up over time eventually blocking the appliance drain hose spigot. Dishwasher User Manual...
-
Page 36: Electrical Connection
Electrical connection • If necessary, have the domestic wiring system Warning! The manufacturer socket replaced. In case that the electrical cable accepts no liability for failure has to be replaced, contact your local repair to observe the following agent. safety precautions. •... -
Page 37: Repairs - After Sales Service
John Lewis, Liverpool 0151 709 7070 them here: John Lewis, Milton Keynes 01908 679 171 • Mod........John Lewis, Newcastle upon Tyne 0191 232 5000 • P.N.C........John Lewis, Norwich 01603 660 021 • S.N......... John Lewis, Nottingham 0115 941 8282... - Page 38 John Lewis, Stratford 020 8532 3500 John Lewis, Croydon 020 8662 4730 John Lewis, The Trafford Centre 0161 491 4040 John Lewis, Horsham 01403 214 740 John Lewis, Watford 01923 244 266 John Lewis, Ipswich 01473 275 850 John Lewis, Welwyn 01707 323 456...
- Page 39 ENVIRONMENTAL CONCERNS marked with the symbol with the household Recycle the materials with the symbol . Put waste. Return the product to your local the packaging in applicable containers to recycle recycling facility or contact your municipal office. it. Help protect the environment and human health and to recycle waste of electrical and electronic appliances.
- Page 40 156915672-A-202017 ( Subject to change without notice. )
Need help?
Do you have a question about the JLDWS1328 and is the answer not in the manual?
Questions and answers
What is no54