Sign In
Upload
Download
Table of Contents
Contents
Add to my manuals
Delete from my manuals
Share
URL of this page:
HTML Link:
Bookmark this page
Add
Manual will be automatically added to "My Manuals"
Print this page
×
Bookmark added
×
Added to my manuals
Manuals
Brands
Sabre Manuals
Lawn Mower
1842GV
Operator's manual
Sabre 1842GV Operator's Manual
Yard tractors
Hide thumbs
1
2
3
4
5
6
7
8
9
10
11
12
13
14
15
16
17
18
19
20
21
22
23
24
25
26
27
28
29
30
31
32
33
34
35
36
37
38
39
40
41
42
43
44
45
46
47
48
49
50
51
52
53
54
55
56
57
58
59
60
61
62
63
64
65
66
67
68
69
70
71
72
73
74
75
76
77
78
79
80
81
82
83
84
85
86
87
88
89
90
91
92
93
94
95
96
97
98
99
100
Table Of Contents
101
page
of
101
Go
/
101
Contents
Table of Contents
Troubleshooting
Bookmarks
Table of Contents
Vehicle Serial Number
Briggs & Stratton Engine Information
Table of Contents
Assembly
1842GV and 1842HV Only - Box of Parts
1848GV and 1848HV Only - Box of Parts
Remove Packaging
1848GV and 1848HV Only - Remove Mower Deck from Side of Crate
Install Steering Wheel
Remove Tractor from Crate
Connect and Check Battery
1848GV and 1848HV Only - Assemble and Install Mower Deck
Install Rear Gage Wheels
Install Mower Deck
Install Mower Discharge Chute
Break-In Electric PTO Clutch
Check Machine Safety System
Checking Tire Pressure
Safety-Alert Symbol
Machine Safety Labels
Safety Signs
Certification Label
Console Controls
Foot and Panel Controls
Operate Safely
Park Safely
Operating the Machine
Rotating Blades Are Dangerous - Protect Children and Prevent Accidents
Wear Appropriate Clothing
Stay Clear of Rotating Drivelines
Transport Safely
Adjusting Seat
Using Headlights
Unlocking Park Brake
Locking Park Brake
Using the Park Brake
Starting Engine
Warming and Idling Engine
Stopping Engine
Using and Stopping Gear Transmission
To Travel Forward
To Travel in Reverse
Using and Stopping Automatic Transmission
For Emergency Stopping
Using Reverse Implement Option
Pushing Machine
Daily Operating Checklist
Testing Safety Systems
Avoid Using Ground Engaging Equipment
Using Front Weights
Using Rear Wheel Weights
Installing the Chains
Using Tire Chains
Preparing Tractor for Installing Chains on Tires
Transporting
Operate Mower Safely
Check Ground Conditions
Avoid Injury from Contacting Blades
Operating the Mower
Using Lift Lever to Raise and Lower Mower
Adjusting Cutting Height
Adjusting Mower Gage Wheels
Adjusting Mower Level (Side-To-Side)
Adjusting Mower Level (Front-To-Rear)
Engaging Mower
Disengaging Mower
Dismounting to Inspect or Unplug Mower or Optional Bagger
Parts for Tractor and Mower Deck
Replacement Parts
Practice Safe Maintenance
Service Machine Safely
Handling Waste Product and Chemicals
Servicing Your Machine
Service Interval Chart
Engine Warranty Maintenance Statement
Adjusting Carburetor
Service Engine
Avoid Fumes
Engine Oil
Checking Engine Oil
Changing Engine Oil
Changing Engine Oil Filter
Checking and Cleaning Air Cleaner Elements
Checking Spark Plugs
Replacing Fuel Filter
Adding Automatic Transmission Fluid
Check Automatic Transmission Fluid Level
Transmission Oil
Service Transmission
Grease
Service Mower
Lubricating Mower Spindles
42-Inch Mower Deck
48-Inch Mower Deck
Replacing Mower (Secondary) Belt
Installing Mower Blades
Servicing Mower Blades
Removing Mower Blades
Sharpening Blades
Balancing Blades
Checking the Battery
Removing and Installing the Battery
Service Electrical
Clean Battery and Terminals
Charging the Battery
Using Booster Battery
Replacing Fuse
Replacing Headlight Bulb
Replacing Battery Discharge Indicator Light Bulb
Service Miscellaneous
Fuel
Using Clean Fuels
Oxygenated or Reformulated Fuels
Fuel Blends
Octane Rating
Using Fresh Fuel and Stabilizers
Filling Fuel Tank
Fuel Tank Capacity
Lubricating Front Wheel Spindles, Wheel Bearings and Front Axle Pivot
Care for Plastic and Painted Surfaces
Plastic Surfaces
Correct Cleaning Care
Avoid Damage
Painted Metal Surfaces
Minor Scratches (Surface Scratch)
Removing Mower
Installing Mower
Using Troubleshooting Chart
Storing Safely
Preparing Machine for Storage
Storing Machine
Preparing Engine for Storage
Running Engine Dry of Fuel
Preparing Engine
Removing Machine from Storage
Specifications
Warranty
Index
Service Literature
Advertisement
Quick Links
1
Operating the Machine
2
Replacement Parts
Download this manual
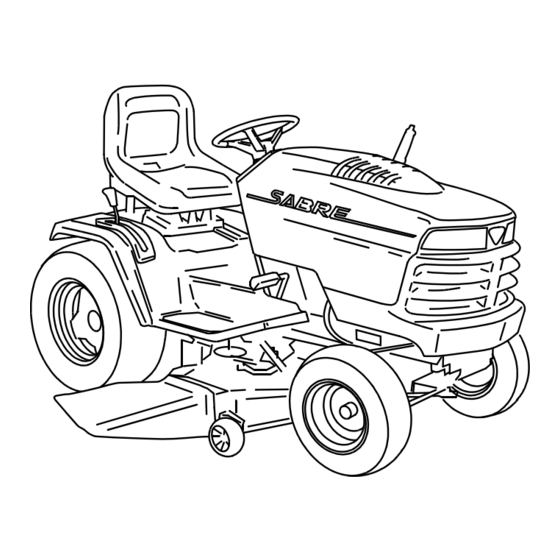
Sabre Yard Tractors
J8
1842GV and 1842HV
1848GV and 1848HV
Serial No. (020,001-)
OPERATOR'S MANUAL
John Deere
Worldwide Commercial And
Consumer Equipment Division
OMM138147 J8
North American Version
Litho in U.S.A.
English
Table of
Contents
Previous
Page
Next
Page
1
2
3
4
5
Advertisement
Table of Contents
Need help?
Do you have a question about the 1842GV and is the answer not in the manual?
Ask a question
Questions and answers
Related Manuals for Sabre 1842GV
Lawn Mower Sabre 1338 Gear Technical Manual
Sabre lawn tractor 38–inch and 46–inch (96 cm and 117 cm) (191 pages)
Lawn Mower Sabre 1338 Gear Operator's Manual
Lawn tractor (93 pages)
Lawn Mower Sabre 1842HV Operator's Manual
Yard tractors (101 pages)
Lawn Mower Sabre 1340GR Operator's Manual
(324 pages)
Lawn Mower Sabre 1336HR Operator's Manual
(233 pages)
Lawn Mower Sabre RG1128 Operator's Manual
(269 pages)
Lawn Mower Sabre M10 Technical Manual
21–inch walk-behind mowers (9 pages)
This manual is also suitable for:
1842hv
1848hv
1848gv
Table of Contents
Save PDF
Print
Rename the bookmark
Delete bookmark?
Delete from my manuals?
Login
Sign In
OR
Sign in with Facebook
Sign in with Google
Upload manual
Upload from disk
Upload from URL


Need help?
Do you have a question about the 1842GV and is the answer not in the manual?
Questions and answers